• Hi all and welcome to TheWoodHaven2 brought into the 21st Century, kicking and screaming! We all have Alasdair to thank for the vast bulk of the heavy lifting to get us here, no more so than me because he's taken away a huge burden of responsibility from my shoulders and brought us to this new shiny home, with all your previous content (hopefully) still intact! Please peruse and feed back. There is still plenty to do, like changing the colour scheme, adding the banner graphic, tweaking the odd setting here and there so I have added a new thread in the 'Technical Issues, Bugs and Feature Requests' forum for you to add any issues you find, any missing settings or just anything you'd like to see added/removed from the feature set that Xenforo offers. We will get to everything over the coming weeks so please be patient, but add anything at all to the thread I mention above and we promise to get to them over the next few days/weeks/months. In the meantime, please enjoy!

Fantasy Tool Box - the smoother

derekcohen

New Shoots
Joined
Jul 22, 2014
Messages
222
Reaction score
195
Location
Perth, Australia
It's a dozen years since I last made a Krenov smoother, which is the subject of this post. I decided on a Krenov style as it offered more control over the important weight factor. It is possible to choose the components to suit, and keeping weight down is critical with travel in mind.

The dimensions are as per a real Krenov plane I have (made for me by the late Jim) - 225mm (9") long x 50mm (2") wide x 50mm (2") high. The wood is from a small Apple log I was given 5 or so years ago, with Jarrah used for the sole, wedge and wedge bar. The bed is 45 degrees.

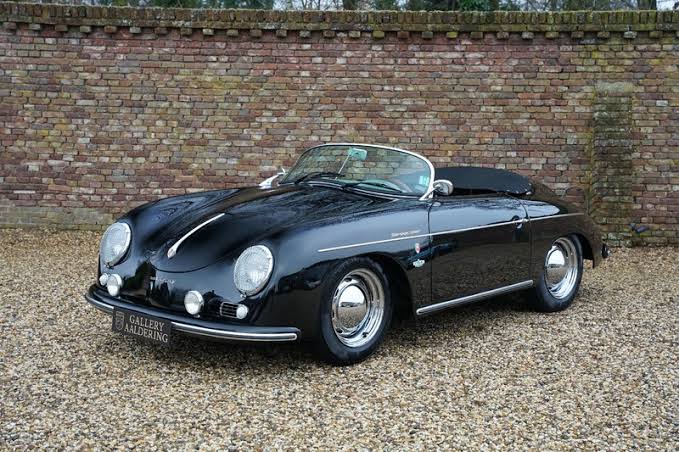
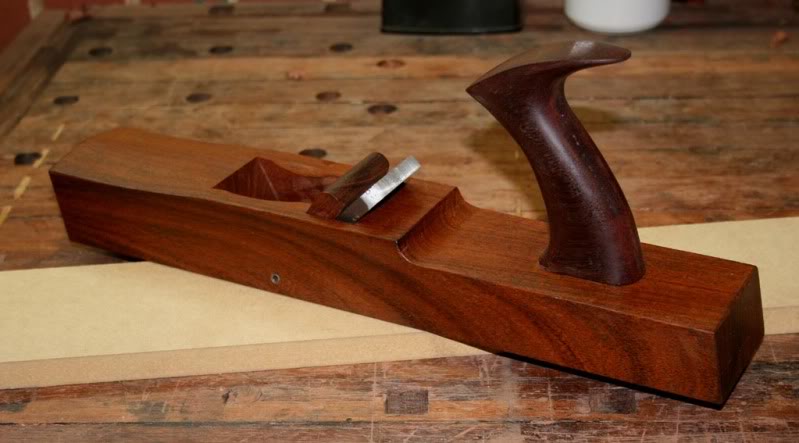
The shape is a little different, partly inspired by a French design, which looked more comfortable as I like to hold woodies with a hand over the top. I do this with HNT Gordon woodies, and they are a little uncomfortable here at 67mm in width. There was also a recent video on YouTube which was the final decider. The French plane ...


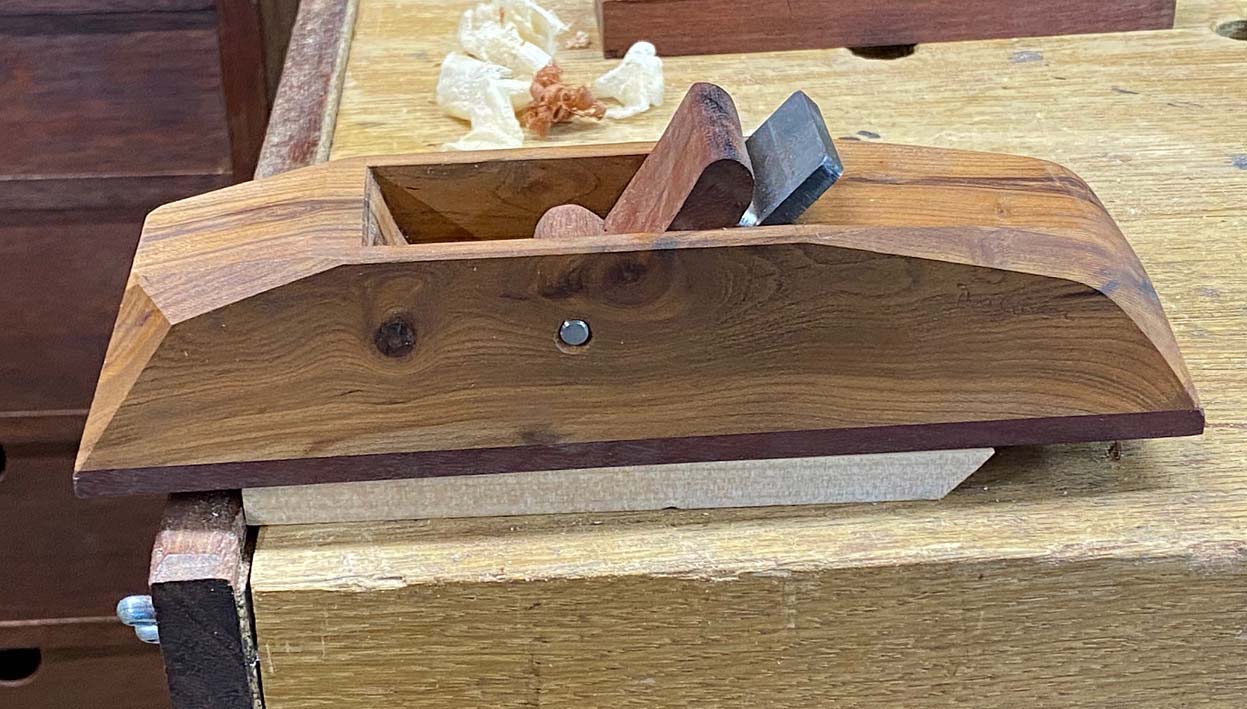
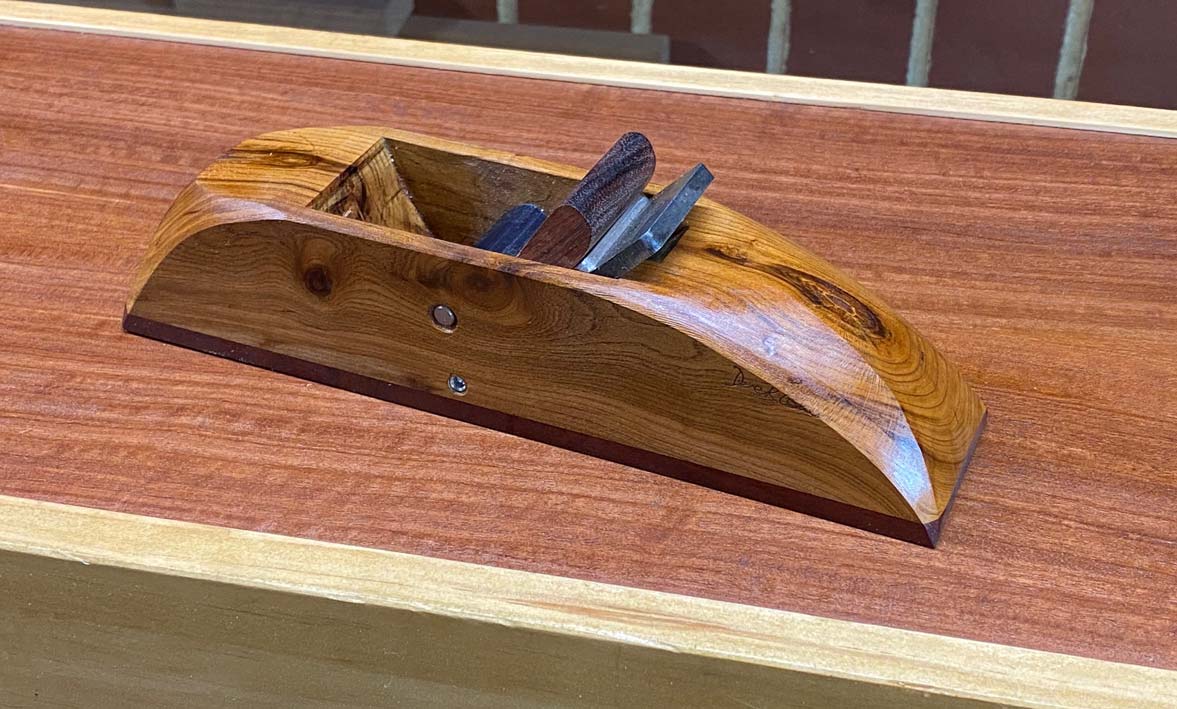
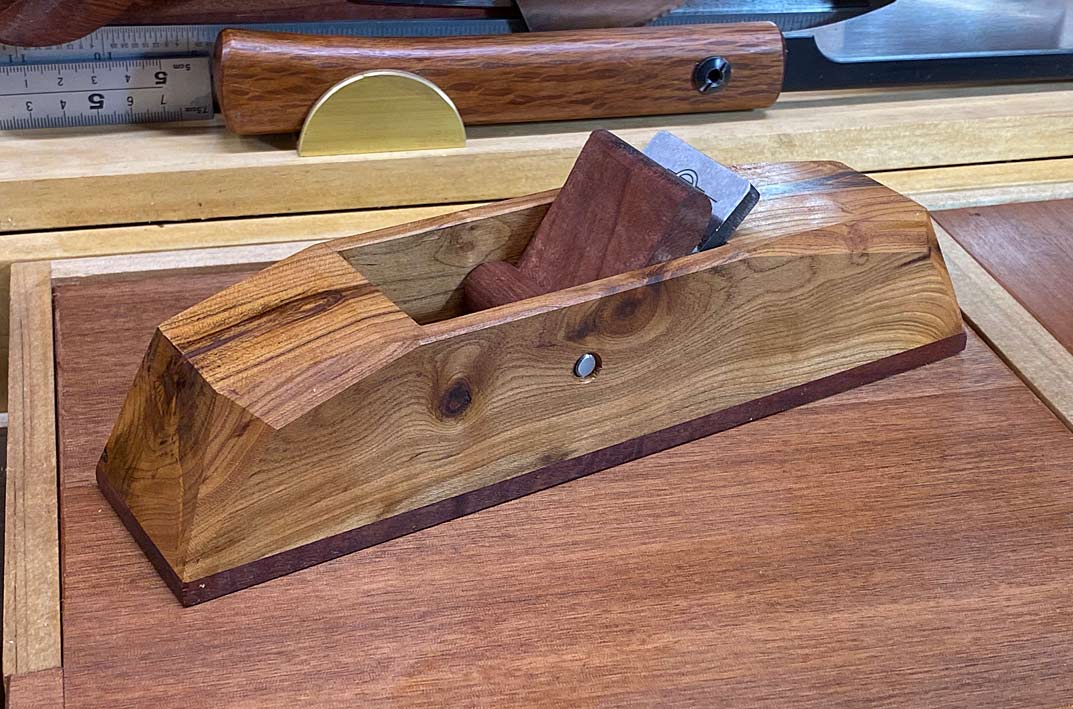
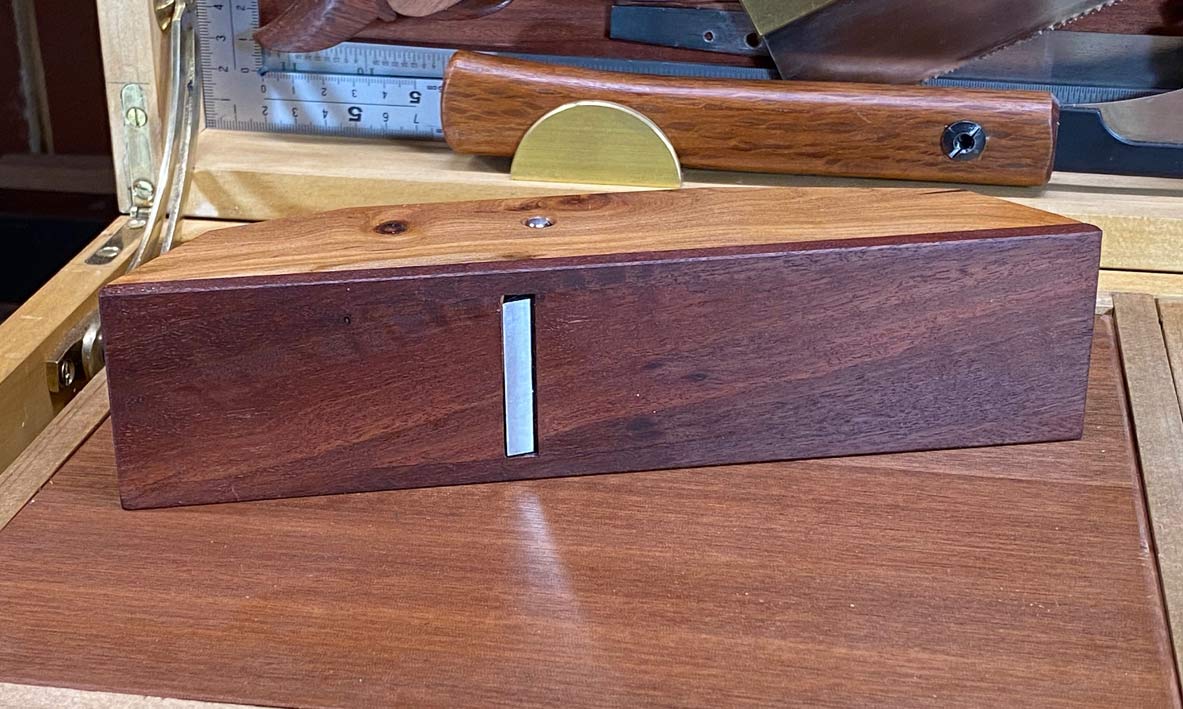
This is the end result ...


Here are the parts ...


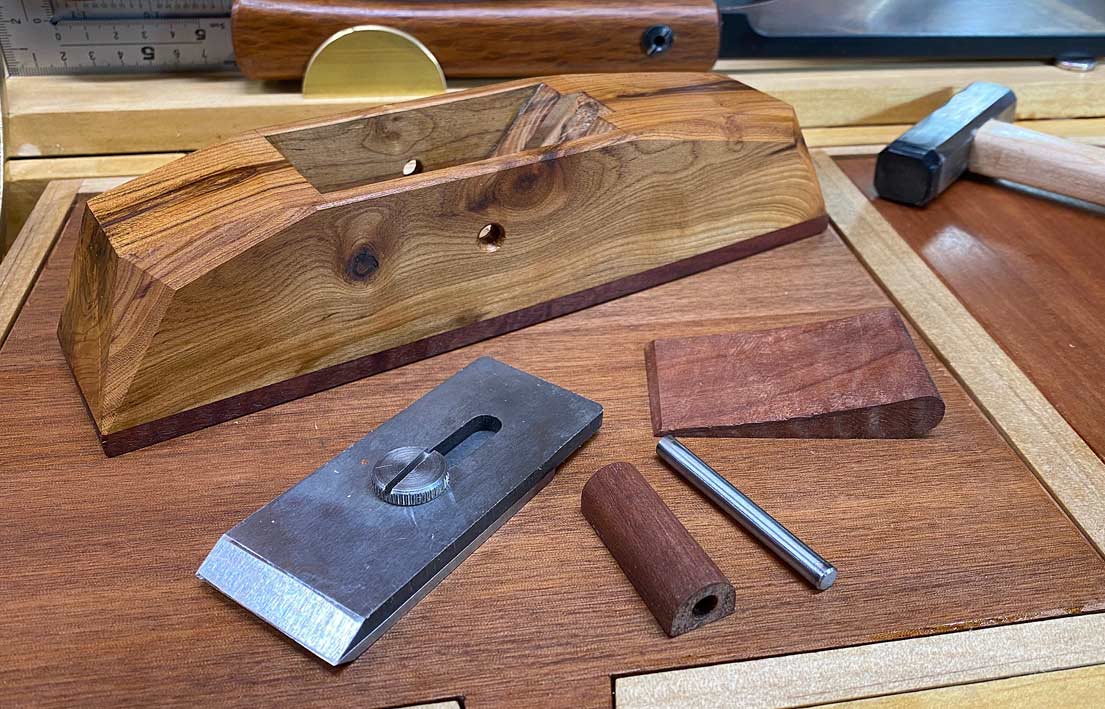
Note the wedge bar is in two parts, a Jarrah cross piece and a steel rod. The reason for this is to be able to remove and replace (if needed) the wedge bar. The wedge is a direct copy of Jim's wedge and, in tradition, a Hock O1 blade set is used. The blade is 1 1/2" wide, again as per Jim's smoother.

A few more photos, all highlighting the wonderful chunk of Apple ...


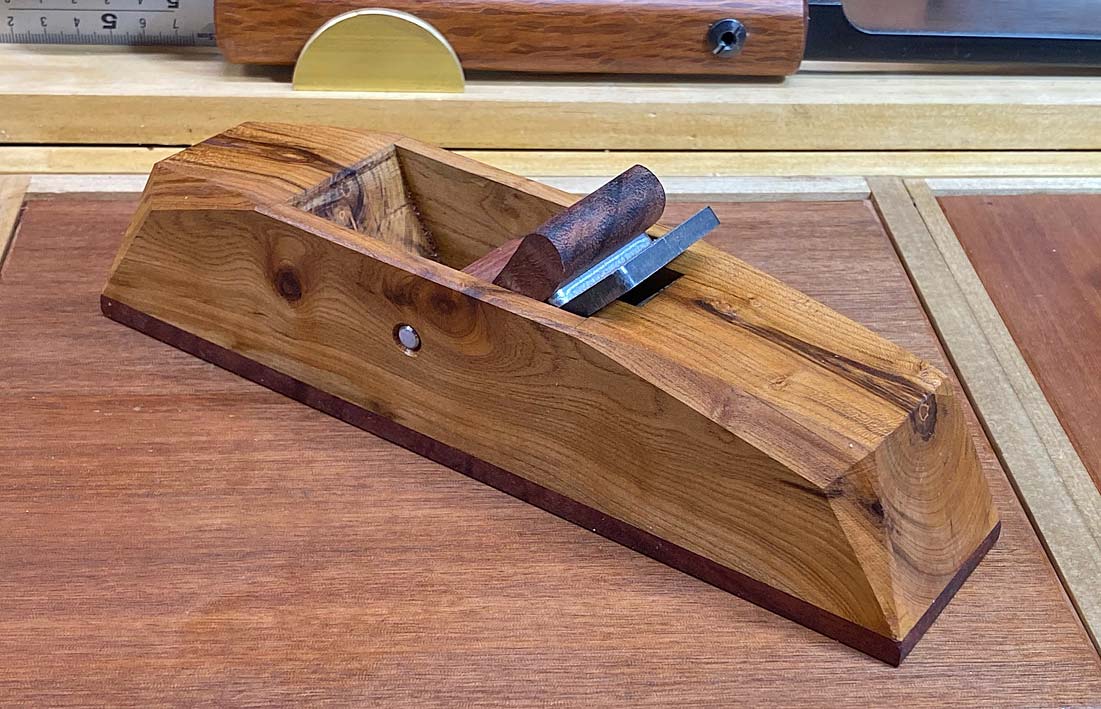
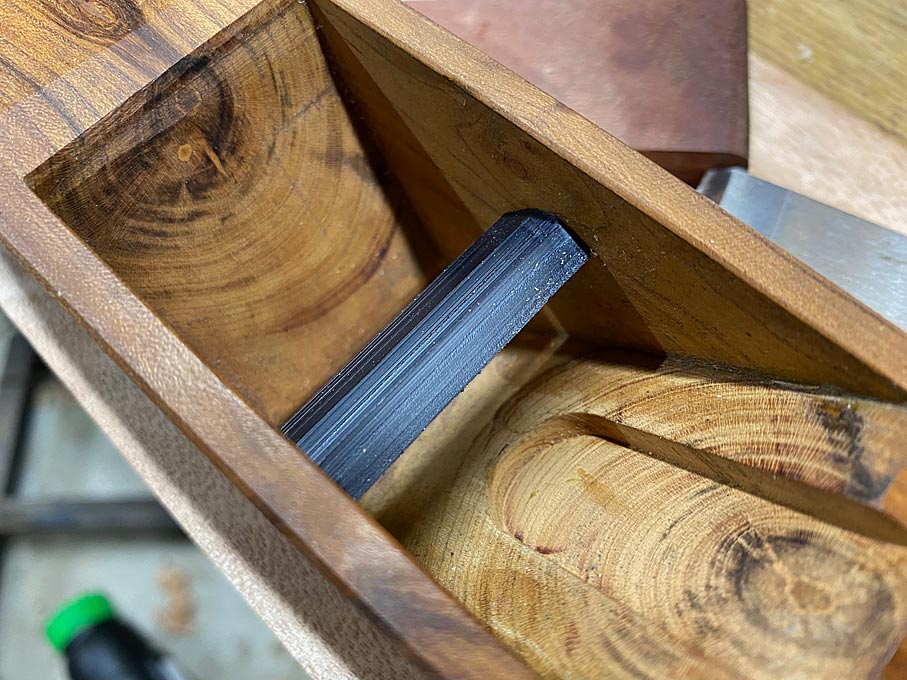
The mouth looks tighter here than it is. Allowance is made for a closed chipbreaker ...


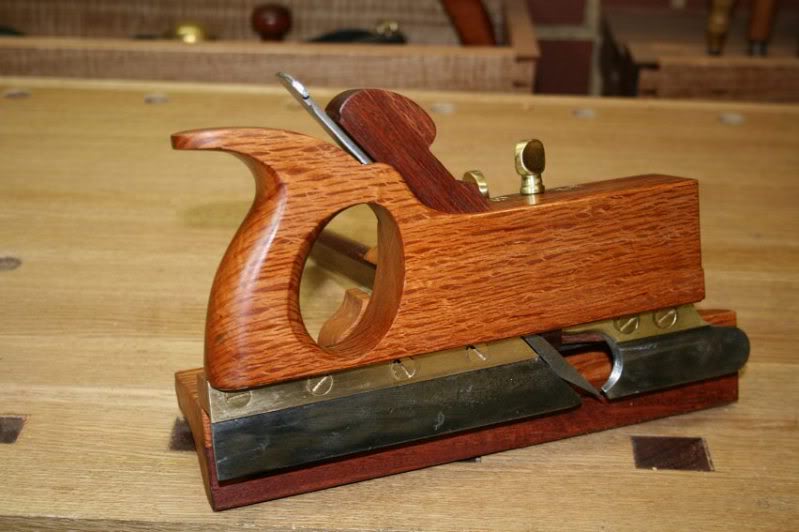
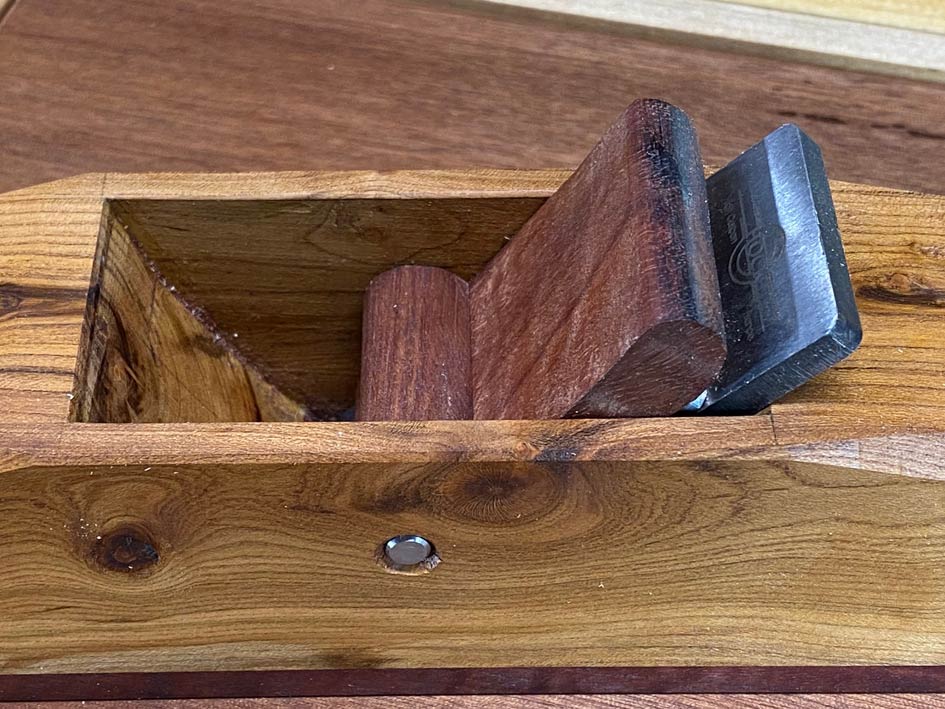
A close up of the wedge bar. Note also that the escapement is hollowed ...
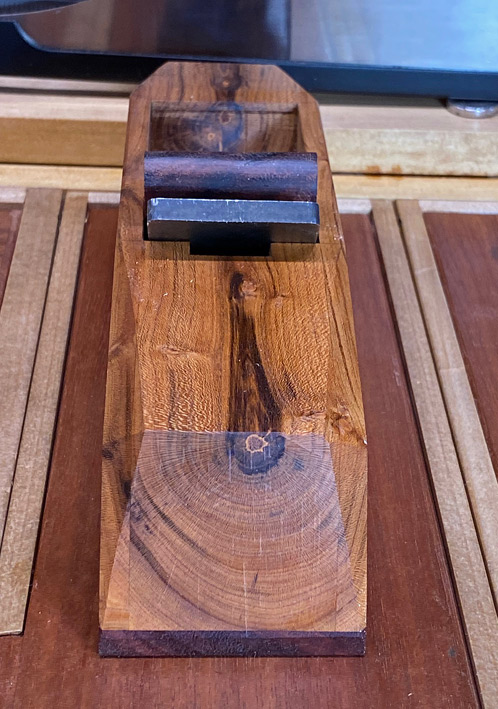


Front and rear ...


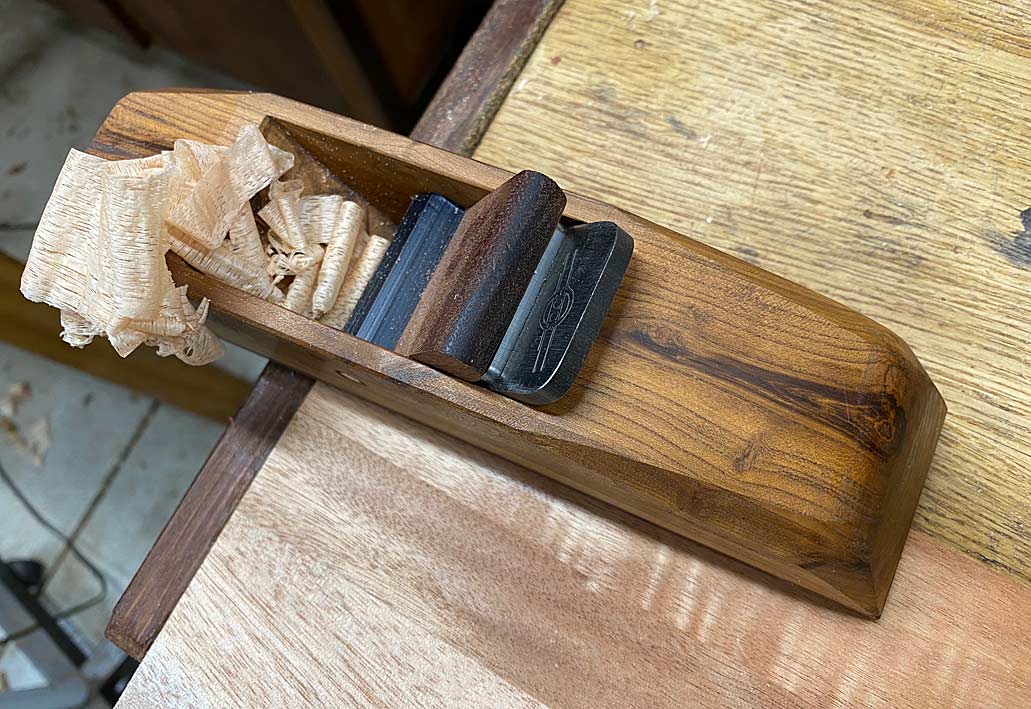
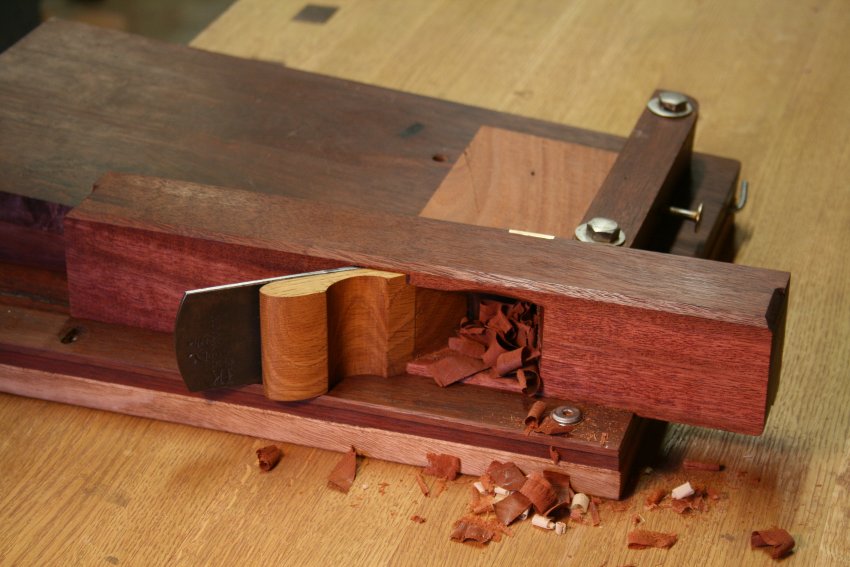
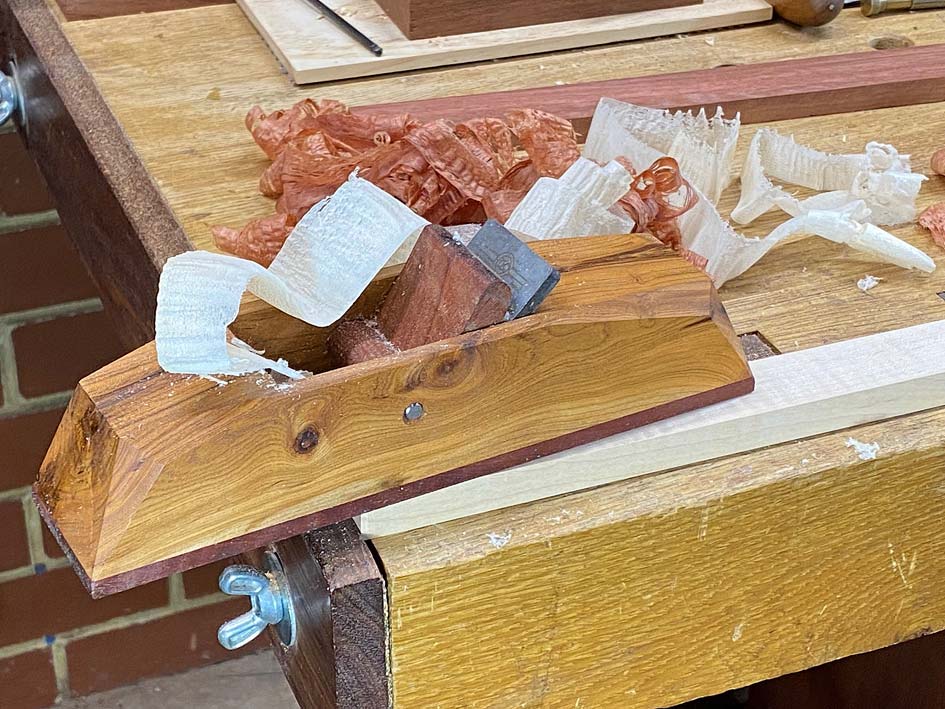
These are the first shavings from the plane. First Jarrah ...


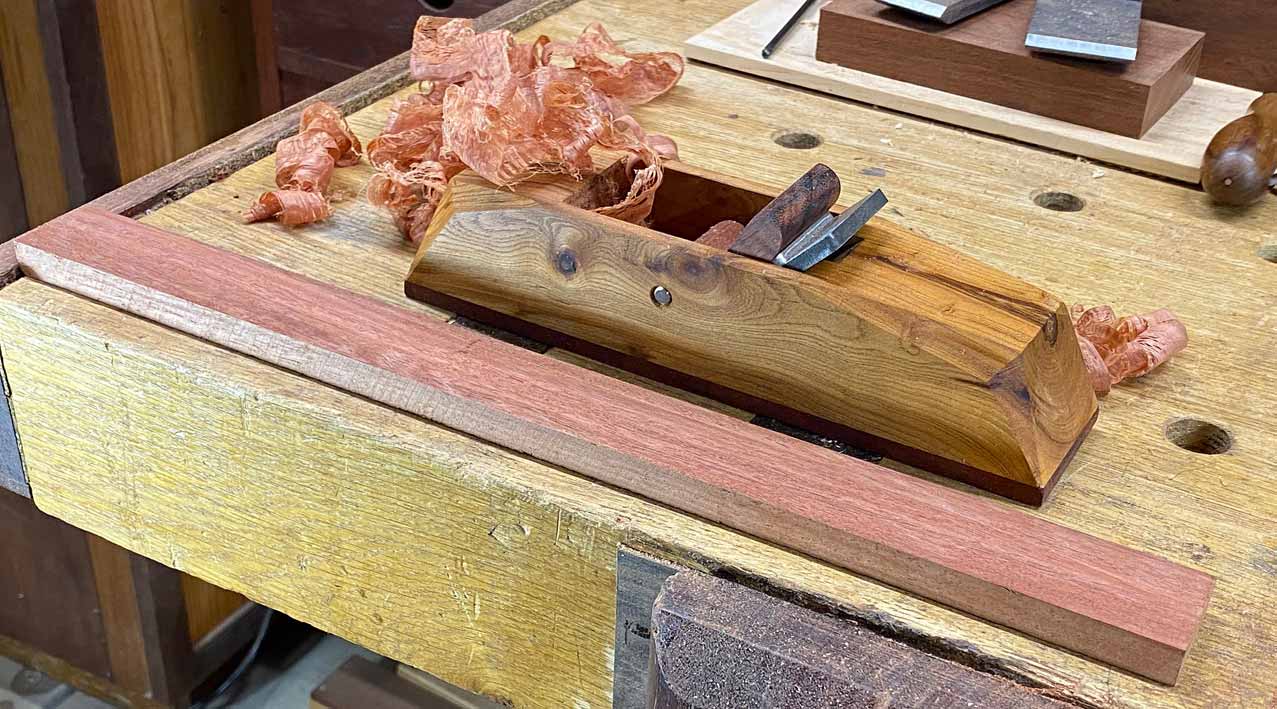
.. and then Hard Maple ...


More in a second post.

Regards from Perth

Derek
 
To me this looks hard to grip. Usually I like your tools Derek but not so much the bulk and angularity of this one; it lacks elegance. Sorry. I wonder if there is much difference between a smoother and a sharp scraper, which takes up almost no space and is very easy to maintain. I am in a mood which says what we make is more important than the tools we use to make it. Apologies again.
 
To me this looks hard to grip. Usually I like your tools Derek but not so much the bulk and angularity of this one; it lacks elegance. Sorry. I wonder if there is much difference between a smoother and a sharp scraper, which takes up almost no space and is very easy to maintain. I am in a mood which says what we make is more important than the tools we use to make it. Apologies again.
Agreed. I too have a genuine, autographed JK smoother and one of the features of his planes is that they are bandsawn (roughly in my case) to fit the shape of the users hands. This plane's contours are harsh and angular; I think if I were to use it for any length of time I'd feel an urgent need to take a coarse rasp to it and make it more 'user friendly'. Sorry Derek, but we've seen you do better - Rob
 
Last edited:
You guys may be right - the shape is likely to be refined as it gets use. There are a few sharp corners which need to be rounded. However the plane body is orientated for an overhand grip. Here the top is tapered, and this makes it easier to grasp (unlike the HNT Gordon smoother, which is designed to be used with a cross bar). The plane made by Jim Krenov, the design of which is much copied (and by myself as well), is pushed with the palm of the hand, hence the focus on the rounded rear. What I find is that there are two componenets which can work together or be opposites: control vs comfort. The overhand grip offers more control.

Regards from Perth

Derek
 
I had a couple of hours in the workshop today and the first task was to re-shape the rear of the plane. The angles may look stylish, but these cut into the palm. This is the result ...


I shall re-shape the front to match ...


Very comfortable now.

Then the mouth was given a brass wear plate ...


All this said and done, the plane became a BIG pain in the watsit. It simply would not work reliably and repeatedly. One moment it would take fine shavings - the stuff of dreams - and the next it either would not cut at all or take too deep a shaving. And - no - it was not the wood moving. The pith, knot and Apple is hard and glassy. The problem was that the plane would not hold its setting.

At first I thought the wedge was the problem. Tapped it down firmly - interestingly, every time I did this, the blade would back out rather than lock down. What was needed was to wack the wedge down and then tap the blade into position. After a while, it would stop cutting as the projection was lost. Sounded like the wedge was not holding, so wacked it again ... this was like Ground Hog Day. One wedge pin broke and so I made a second .... thank goodness for the removable steel pin! After the second wedge pin cracked, I made a third in UHMW. That is a thing of beauty!


Eventually it dawned on me that the problem was the Hock blade-chipbreaker combination. The damn chipbreaker was not remaining in place but sliding backwards. It did not help cranking on the chipbreaker screw, it still slid back and the blade slid forward, creating too much projection.

To test this theory, I used a second combination, this one from Jim Krenov's plane, which I new was absolutely fine. The result was fine shavings once again ...


So dear friends, how do you explain this and, more importantly, what can be done to prevent the chipbreaker moving?

Regards from Perth

Derek
 
I'm not a plane expert. But two ideas spring to mind. 1) a cut to size piece of wet and dry paper inserted, or 2) a piece of thin silicone sheet. Degrease all surfaces. It may be that everything is just too smooth.
 
Does the cap iron screw have a shoulder on it between the thread and the head? Could it be bottoming out on the shoulder before it has a tight grip on ther iron?
 
They look like good ideas.

Another trick to stop bits of steel sliding is to rub some violinist's rosin on the surfaces.
 
A short update:

I swapped the chipbreaker screw for another. 5 minutes of planing and all was well - the chipbreaker tightened down without moving back, and the shavings held their shape in both Jarrah and Hard Maple. This is a good sign. So far.

It is amazing if this is all the fix needed!

Regards from Perth

Derek
 
Reflection and lessons learned ....

This smoother has effectively been built three times ... well, re-built twice. The first re-build was to fix a slipping blade, which was traced to the chipbreaker screw having a high spot under the head. I had been entertaining thoughts of throwing the plane in a bin and starting again. Amazing what fault-finding will turn up! During the course of this re-build, the mouth was opened a smidgeon too much, and brass wear plate added to close it down. Lastly, I discovered UHMW makes a fantastic (!) wedge pin. Better than hardwood, two of which cracked when I wacked them down at the time the blade was slipping.

Then the second re-build - today - aimed at making the plane comfortable to hold. I learned my lesson with sharp corners. They look interesting but that is all. The plane underwent radical surgery. Now I really love it - its looks and comfort. It works sooo well! Gossamer streamers.

The inspiration for the shaping was my favourite car, a Porsche 356 Speedster ...


Let me know if you can see this.


Oh yes, I added set screws to position the blade. The bed is about 1/32" too wide and made it different to reliably centre the blade. All good now.


Hopefully that is the end of this particular build!

Regards from Perth

Derek
 
Wether the plane works or not it’s certainly a beautiful looking thing.
 
Much better Derek; glad to hear the plane has been fixed, despite it's teething problems - Rob

Edit: motor's not too shabby either:cool:
 
I find It beautiful,and am quite a fan of neat, crispy lines, although ergonomics could suffer.

I think this is obtained from a single piece, isn't it? No glue-ups.
If that's the case, I'd be interested in knowing how one gets the bed precise and flat...
 
Michelle, that is a laminated - "Krenov" - construction. I have made quite a number of solid body planes. A big reason for using Krenov as the model is that the cabinet I shall be building was designed by Jim Krenov.

Jack plane ...


Strike block plane (for shooting) ...'


Plough (bridle plough) ...


To make these with an accurate bed, it is necessary to use a guide when paring. i.e. an accurate ramp.

Crisp lines (on the smoother) do not translate to uncomfortable edges. It all depends on the plane (angle) in which they lie. This smoother is very comfortable.

Regards from Perth

Derek
 
Thanks Derek,
probably way above my paygrade right now, but in future the idea of being able to build woodies entices me - I think besides the pleasure, it would open up a few possibilities, when coupled with the ability to 'create' blades, too.

BTW drop one ell from my name please... Michelle sounds really too French (and it's female) to me 🤣
 
Back
Top