-
Hi all and welcome to TheWoodHaven2 brought into the 21st Century, kicking and screaming! We all have Alasdair to thank for the vast bulk of the heavy lifting to get us here, no more so than me because he's taken away a huge burden of responsibility from my shoulders and brought us to this new shiny home, with all your previous content (hopefully) still intact! Please peruse and feed back. There is still plenty to do, like changing the colour scheme, adding the banner graphic, tweaking the odd setting here and there so I have added a new thread in the 'Technical Issues, Bugs and Feature Requests' forum for you to add any issues you find, any missing settings or just anything you'd like to see added/removed from the feature set that Xenforo offers. We will get to everything over the coming weeks so please be patient, but add anything at all to the thread I mention above and we promise to get to them over the next few days/weeks/months. In the meantime, please enjoy!
You are using an out of date browser. It may not display this or other websites correctly.
You should upgrade or use an alternative browser.
You should upgrade or use an alternative browser.
Best way to clean this. Lantern. Hopes dashed
- Thread starter AndyP
- Start date
Thanks for looking Derek.
Afraid not the 275/276 lantern is still being made today and is considerably larger than the 175/176 that I have.
The 175/176 glass is widely available from dodgy looking ebay sellers in Thailand. Fingers crossed for the one I have found in Sweden. Too late for Friday but I can make it workable with the broken/repaired glass
I haven’t written to Feurhand in Germany for help but I am not hopeful
Slight change of plan overnight. We have now decided to go with a citric acid bath this morning, 50g per litre of warm water.
 .
.
The washers under the cap and wick mechanism will need to be replaced if I am to use paraffin. Chances of finding the right size in 3 days

.The washers under the cap and wick mechanism will need to be replaced if I am to use paraffin. Chances of finding the right size in 3 days
Well that jar of washers I’ve had in the drawer for 40 years has come up trumps. Can’t believe my luck. There is only two of that size as well. One for the filler cap, the other for the wick holder.
Glass repaired two. Looks messy but for a few hours it will not matter.

Glass repaired two. Looks messy but for a few hours it will not matter.
SamQ aka Ah! Q!
Old Oak
Nice one Andy. Well done. To use a cliché: " Don't sweat the small stuff"
The overall impression is what will matter. An obviously old, but apparently lit, lamp will conjure up memories. That it is a bit age-worn will only enhance the recall and small defects will be taken as part of that history.
I hope your day and ceremony go well.
Sam
The overall impression is what will matter. An obviously old, but apparently lit, lamp will conjure up memories. That it is a bit age-worn will only enhance the recall and small defects will be taken as part of that history.
I hope your day and ceremony go well.
Sam
Thank you Sam
Mike
Sapling
Oh no, it isn't!(Well, it is still panto season...)
(sorry, I couldn't resist)
Don't you just love auto-korrekt.....will order for future prosperity.
")
Andy, does any neighbour have a battery charger ? Will speed things up no end.
We’ve had so many changes of direction on this Roger. It will come out of the acid bath as soon as I have my finished my tea. Will then take another look as to how far to go.
I can borrow a battery charger (would love to find the metal boxed one I moved here with but have not seen since).
I can borrow a battery charger (would love to find the metal boxed one I moved here with but have not seen since).
After a rinse, brush up and wax this is how the lantern now looks.
Chestnut Microcrystalline wax was used as what little Briwax I have was rock ‘ard. All that have seen it so are very happy.
I’ve some more led tea light candles coming tomorrow and will also get, some lamp oil this afternoon as a plan B.
The washers I found above were actually too thick.
Will rubber O rings be OK to use with lamp oil?
Last edited:
AJB Temple
Sequoia
- Joined
- Apr 15, 2019
- Messages
- 7,721
- Reaction score
- 1,200
Good result.
No chance of getting a real flame. Hole in tank just under where the wick holder sits. With just a little fuel and if the lantern was kept upright it would be ok. But can’t take the risk of a fuel leakage on to clothing of an errant unwanted ignition.
Is there any chance of using a liquid tank sealer?
In order to get any sort of visible light from the led tea lights I have had to use two. One stuffed up top above the glass and one stuck to the wick holder.
Can’t say I am happy with result.

Is there any chance of using a liquid tank sealer?
In order to get any sort of visible light from the led tea lights I have had to use two. One stuffed up top above the glass and one stuck to the wick holder.
Can’t say I am happy with result.
SamQ aka Ah! Q!
Old Oak
AndyP, I think you did "just great". There's his lantern, it is 'lit'. The point is, if I have construed your situation correctly, to reconstruct an image, revive a memory?
You have managed to bring the actual item - that is so central to the memory - back into, at worst, facsimile condition, to evoke the memory.
No one could expect, in our modern age, anyone to have the wherewithal (and spare parts) to make this beautiful old thing function again exactly as it was in wartime. You came close, and in so doing, will make it do what it did all those years ago.
Thanks Sam. I know you’re right.
I will put some fuel in it again and light it at some time in the future
I will put some fuel in it again and light it at some time in the future
Think you are looking at it the way we do when we have made something out of wood. We know the faults and think it could be better - everyone else thinks it is amazing!
Well done.
Well done.
AJB Temple
Sequoia
- Joined
- Apr 15, 2019
- Messages
- 7,721
- Reaction score
- 1,200
Very good try. On the day (tomorrow?) people will not be focussed on the light. Be cool. Hope the funeral goes well and that your family are OK.
Lurker
Old Oak
It looks fine, no one knows the target you set for yourself, and time was against you.
I’m sure everyone will agree that it is a lovely sentiment.
Hope all goes smoothly.
I’m sure everyone will agree that it is a lovely sentiment.
Hope all goes smoothly.
That looks great Andy, you've done a top job. All the best for today.
toolsntat
Nordic Pine
You have done good to get it this far Andy and I am sure the lamp and attached sentiments will be wholly appreciated.
Looking forward, personally I would drain any liquid left in the tank, thoroughly wipe out the inside and rinse with a cleaning agent.
Following that and with the right equipment you may be able to solder over any impervious areas on the bottom, joints and sides.
Cheers
Andy
Looking forward, personally I would drain any liquid left in the tank, thoroughly wipe out the inside and rinse with a cleaning agent.
Following that and with the right equipment you may be able to solder over any impervious areas on the bottom, joints and sides.
Cheers
Andy
No hope of that sadly Andy as access to the hole is totally inaccessible. I’ll take a photo when I next get my hands on it. A liquid tank sealant, if I can be convinced it wont do more harm than good, is the only possible solution.
I had some fun asking people for a match to light it then as soon as they struck the match I’d press the remote to turn the led on. For the younger ones I got them to blow or rub the “lanterne magique” before switching it on or off.
I was humbled by how much joy it bought to people.
I had some fun asking people for a match to light it then as soon as they struck the match I’d press the remote to turn the led on. For the younger ones I got them to blow or rub the “lanterne magique” before switching it on or off.
I was humbled by how much joy it bought to people.
toolsntat
Nordic Pine
Glad to see that the mission was a success Andy.
Regarding repairing the hole, don't dismiss doing it externally with the solder method, I have many oilcans in my collection with just this type of repair that worked years ago for the owners.
The big advantage with this lamp is that I believe (I may be wrong...) there are no soldered joints to melt whilst getting it hot enough.
I suppose consideration should be given to the sides of the tank as well but a bottom repair should be doable even if the hole is large by tinning up a flat tin can top/bottom and using that.
Cheers, Andy
Thanks Andy.
There is zero chance of being able to solder the hole. I cannot even see it.
There is a little hollow (not best description, sorry) which is effectively the top of the tank just under where the wick holder sits. Fuel is collecting in there. I know that it is not a problem with the seal under the wick holder as with that piece removed I can carefully swirl the lantern around until I can see fuel appearing in that hollow area
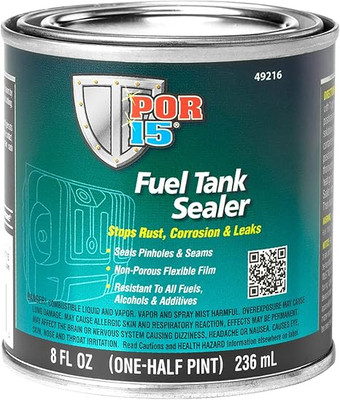
The only hope I have is with liquid tank sealant (https://fr.jbtools.com/por-15-fuel-tank-sealer-8oz-one-half-pint-49216/?gQT=1) either poured into that hollow or into the tank, or perhaps both.
The lantern went back to the MIL's house last night so it will be a while before I can get my hands on it again.

There is zero chance of being able to solder the hole. I cannot even see it.
There is a little hollow (not best description, sorry) which is effectively the top of the tank just under where the wick holder sits. Fuel is collecting in there. I know that it is not a problem with the seal under the wick holder as with that piece removed I can carefully swirl the lantern around until I can see fuel appearing in that hollow area
The only hope I have is with liquid tank sealant (https://fr.jbtools.com/por-15-fuel-tank-sealer-8oz-one-half-pint-49216/?gQT=1) either poured into that hollow or into the tank, or perhaps both.
The lantern went back to the MIL's house last night so it will be a while before I can get my hands on it again.
fiveeyes
Sapling
well done, Andy.
I fear I am not getting across quite how inaccessible the area where the leak is.
Here is another image I found on the web
The wick holder is sealed along the ring indicated by the red arrow. The leak is somewhere in the area indicated by the green arrow. There is no way that I can manipulate a soldering iron into that recess even if I could see the hole.

Here is another image I found on the web
The wick holder is sealed along the ring indicated by the red arrow. The leak is somewhere in the area indicated by the green arrow. There is no way that I can manipulate a soldering iron into that recess even if I could see the hole.
AJB Temple
Sequoia
- Joined
- Apr 15, 2019
- Messages
- 7,721
- Reaction score
- 1,200
Surely the suggestion Andy is that once you locate the hole, probably a pin hole, you apply the solder from outside using solder flux wire. You don't have to use an iron - a small pinpoint gas torch (cheap) will easily get heat to the area. Anyway, good luck with the eventual repair.
toolsntat
Nordic Pine
How very intriguing.Surely the suggestion Andy is that once you locate the hole, probably a pin hole, you apply the solder from outside using solder flux wire. You don't have to use an iron - a small pinpoint gas torch (cheap) will easily get heat to the area. Anyway, good luck with the eventual repair.
I think I now see what Andy is saying that there is a vessel within the outer skin which holds the fuel?
I'd love to see the cross section, anyone up for a bit of dissection on a less sentimental example?
")
Cheers
Andy
Maybe this image will help explain. The hole at 6 o’clock is the filler hole.
The wick enters the fuel reservoir through the hole in the middle. It is the area around that hole, which is actually the top of the fuel reservoir, that leaks fuel.

The wick enters the fuel reservoir through the hole in the middle. It is the area around that hole, which is actually the top of the fuel reservoir, that leaks fuel.
toolsntat
Nordic Pine
Sorry to keep picking at this Andy but might this just be a baffle to stop the fuel sloshing around under the burner assembly?Maybe this image will help explain. The hole at 6 o’clock is the filler hole.
The wick enters the fuel reservoir through the hole in the middle. It is the area around that hole, which is actually the top of the fuel reservoir, that leaks fuel.
View attachment 31320
When you said it leaked did it appear on the exterior of the lamp?
As you can probably tell, I ain't got one of these lamps, mind you I can't remember what the ones I have got look like inside....
Cheers, Andy
No problem Andy and thanks for you patience. Fuel is getting into that “baffle” area and then seeping out under the wick holder. The seal for the wick holder is on the inner ring , the red arrow above and the black arrow below. As you can imagine this only happens if the lantern is swung of around and the fuel in the tanked sloshed about. Not a problem if it is placed on a flat surfaced but if carried it will eventually leak.

Bit confused here.
Is this a reasonable cross-section of the area ?

And the leak is in Area A ? If so then think how they made that lamp? I'm wondering if there are some seams in the construction.
But final anlysis...how much fuel actually gets in there ?
R
Is this a reasonable cross-section of the area ?
And the leak is in Area A ? If so then think how they made that lamp? I'm wondering if there are some seams in the construction.
But final anlysis...how much fuel actually gets in there ?
R
Spot on Roger and a much better drawing than my feeble attempts.
How much fuel collects there? Enough for it to cause a problem, if as I said, the lantern is moved around.
How much fuel collects there? Enough for it to cause a problem, if as I said, the lantern is moved around.
Dr.Al
Old Oak
Can you see the hole?Spot on Roger and a much better drawing than my feeble attempts.
How much fuel collects there? Enough for it to cause a problem, if as I said, the lantern is moved around.
If so, I'm wondering if it might be possible to apply a bit of plumber's flux around the hole with a cotton bud, then snip off a small length of solder (e.g. with some side cutters) and drop it on top of the hole with some tweezers. Once you'd done that, you could heat the whole area gently with a blow torch until the solder melts. Pretty imprecise, but the flux would make the solder flow over the hole and it might work.
If you can't see the hole or get tweezers / cotton bud near it, then that's a non-starter of course.
This is a better drawing. If you're getting a lot of fuel there then that hole can't be a pinhole IMO. I think it must be a 'fracture' in one of those seams as I can't see how it can be made without being made from a kit of parts, as it were.

I will have to have a look with an endoscope .
Any thought on using the type of tank sealant I linked to above would work?
 fr.jbtools.com
Any thought on using the type of tank sealant I linked to above would work?
Produit d'étanchéité pour réservoir de carburant POR-15 - 8 oz - une demi-pinte (49216)
Achetez le produit d'étanchéité pour réservoir de carburant POR-15 (49216) à un prix bas tous les jours et une livraison rapide ! JB Tools
fr.jbtools.com
Pete Maddex
Old Oak
I think the two part epoxy putty would be best it you can get it in there.
Pete
Pete
this sort of stuff Pete?
 www.jbweld.co.uk
OriginalEpAdh | JB-Weld
www.jbweld.co.uk
Pete Maddex
Old Oak
I was thinkig of this stuffthis sort of stuff Pete?
OriginalEpAdh | JB-Weld
J-B Weld Putty Sticks | JB-Weld
www.jbweld.co.uk
Pete