• Hi all and welcome to TheWoodHaven2 brought into the 21st Century, kicking and screaming! We all have Alasdair to thank for the vast bulk of the heavy lifting to get us here, no more so than me because he's taken away a huge burden of responsibility from my shoulders and brought us to this new shiny home, with all your previous content (hopefully) still intact! Please peruse and feed back. There is still plenty to do, like changing the colour scheme, adding the banner graphic, tweaking the odd setting here and there so I have added a new thread in the 'Technical Issues, Bugs and Feature Requests' forum for you to add any issues you find, any missing settings or just anything you'd like to see added/removed from the feature set that Xenforo offers. We will get to everything over the coming weeks so please be patient, but add anything at all to the thread I mention above and we promise to get to them over the next few days/weeks/months. In the meantime, please enjoy!

Shelf Unit

Dr.Al

Old Oak
Joined
Dec 31, 2020
Messages
2,134
Reaction score
119
Location
Dursley, Gloucestershire
Name
Al
This is one of three projects I'm going to be writing up in parallel (the other two are described here and here). They'll each be running at very different paces, with two at the design stage while one is being made, but I thought I'd start posting updates on them all at the same time. I don't have space to work on multiple projects at the same time, but that doesn't stop me thinking and planning!

This project is the furthest on of the three projects: I've got a design and I've got the wood so I just need to get on with making it.

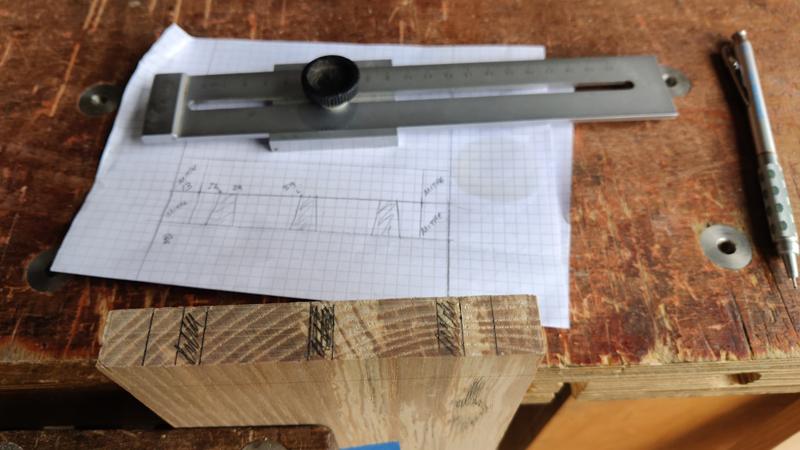
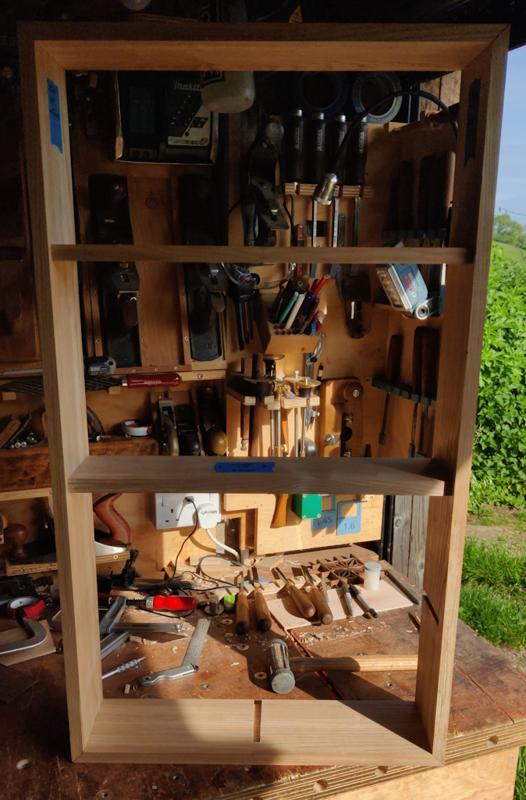
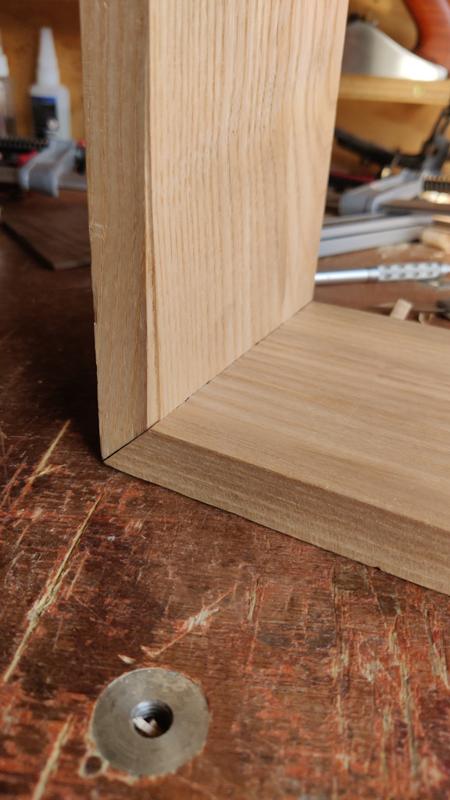
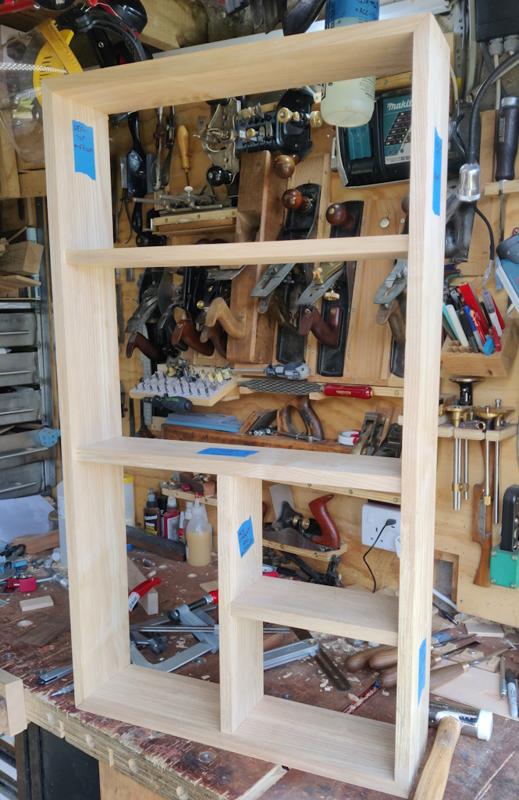
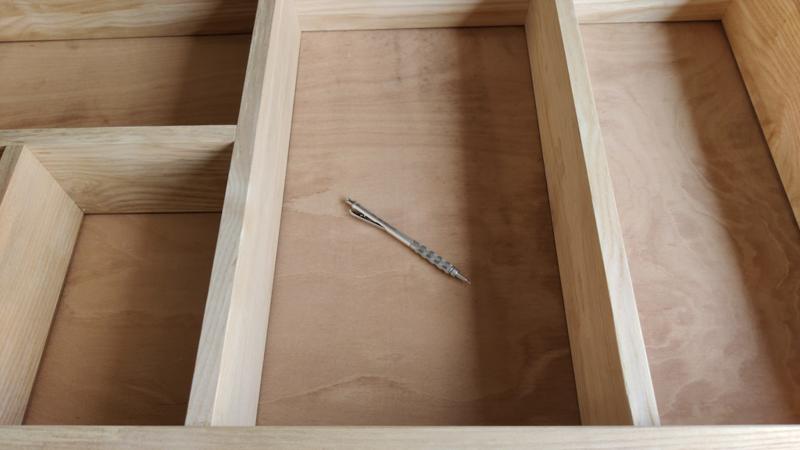
The aim of this project is to make a simple shelf-unit for my other half. It'll be wall-mounted and look something like this:

shelfunit_model_800.jpg


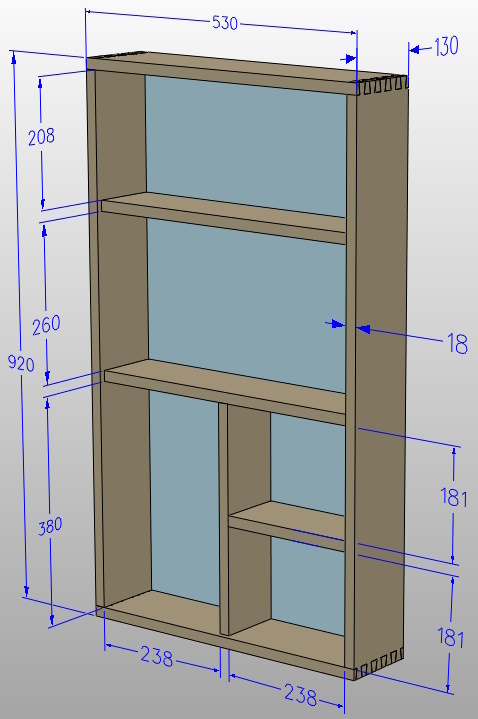
Dimensions are subject to change (especially the board thickness) once I've finished preparing the planks.

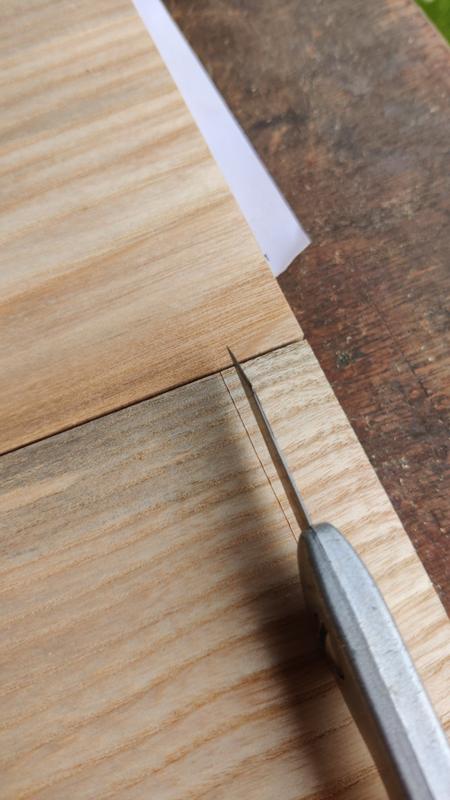
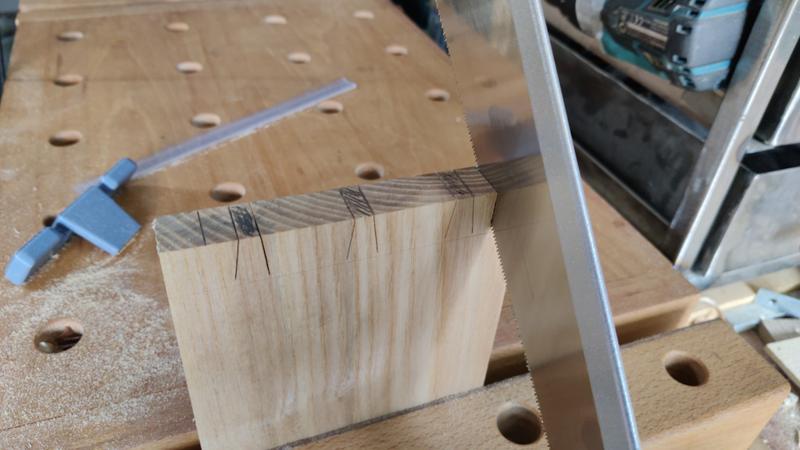
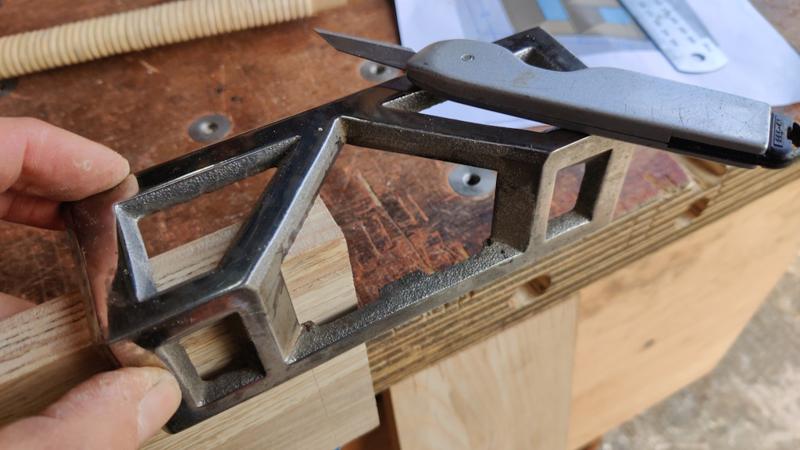
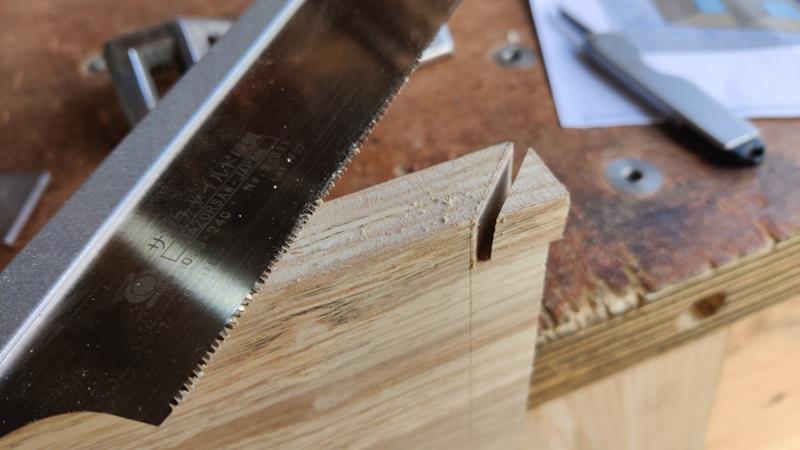
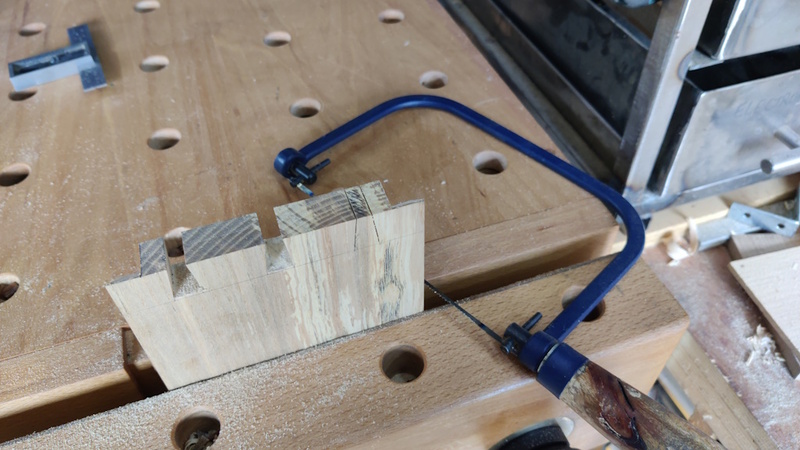
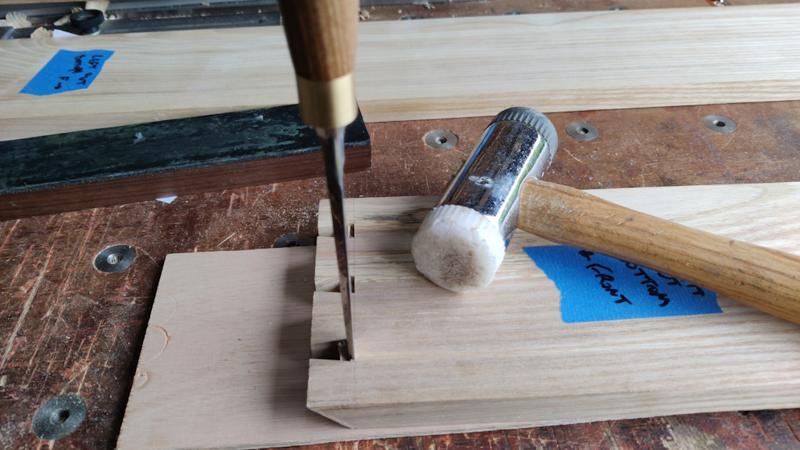
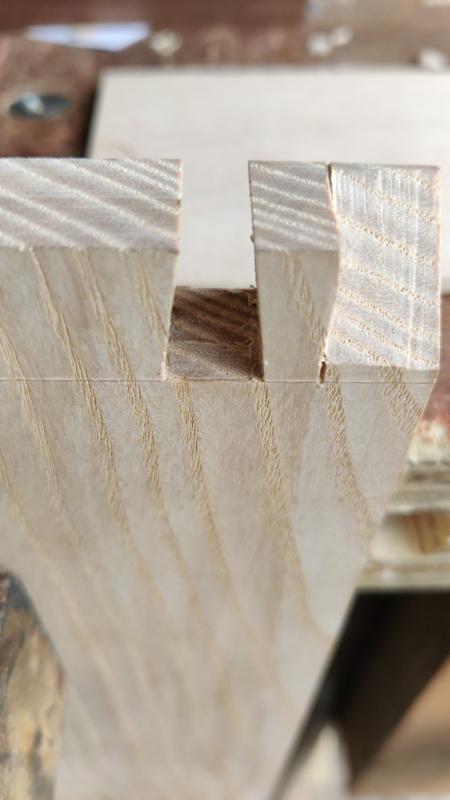
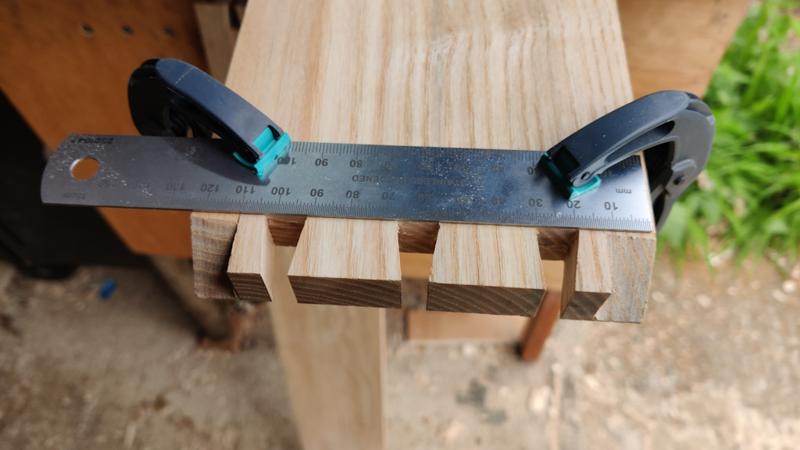
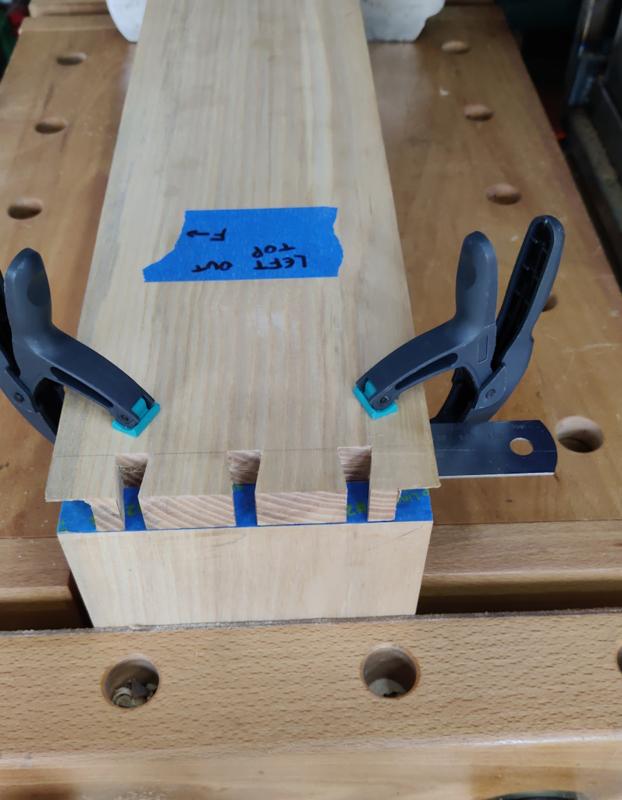
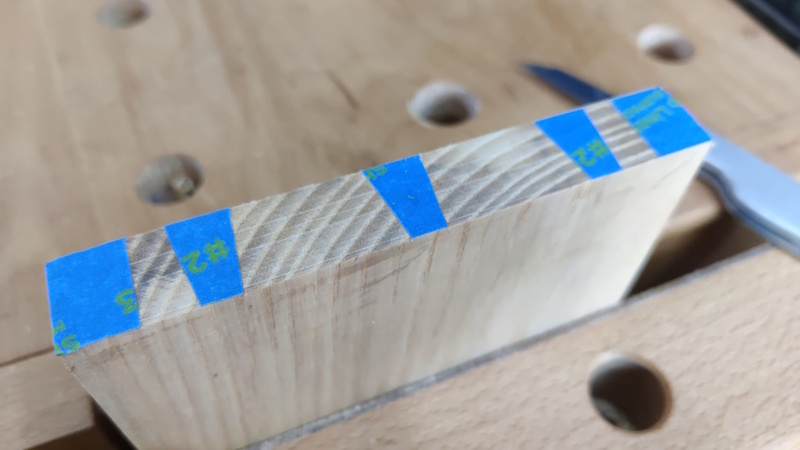
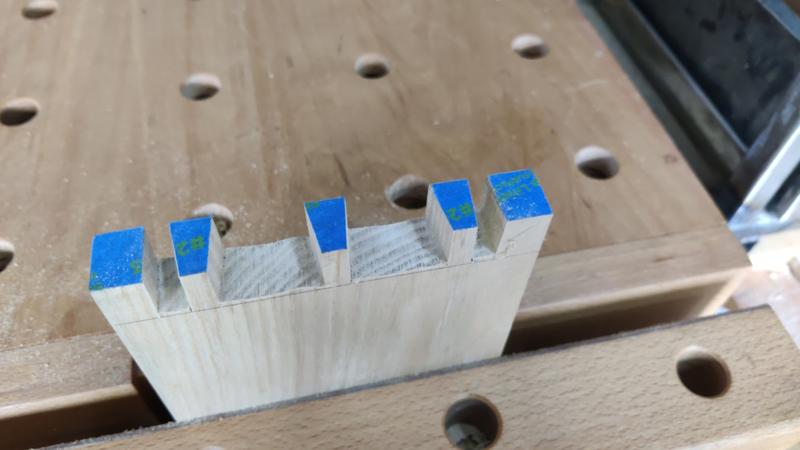
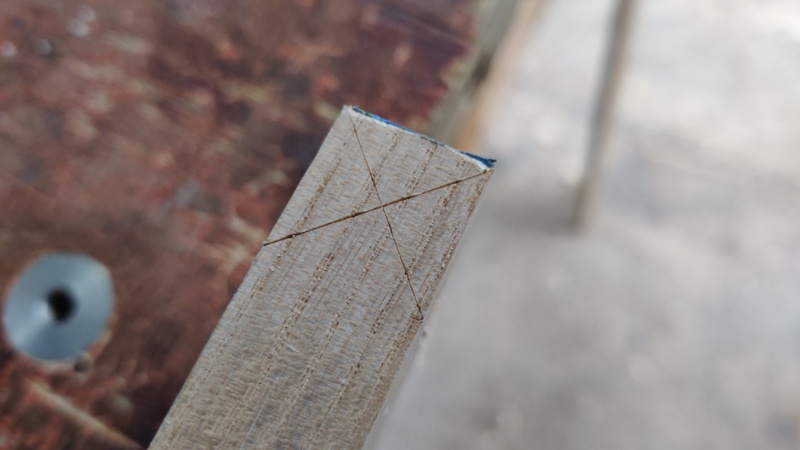
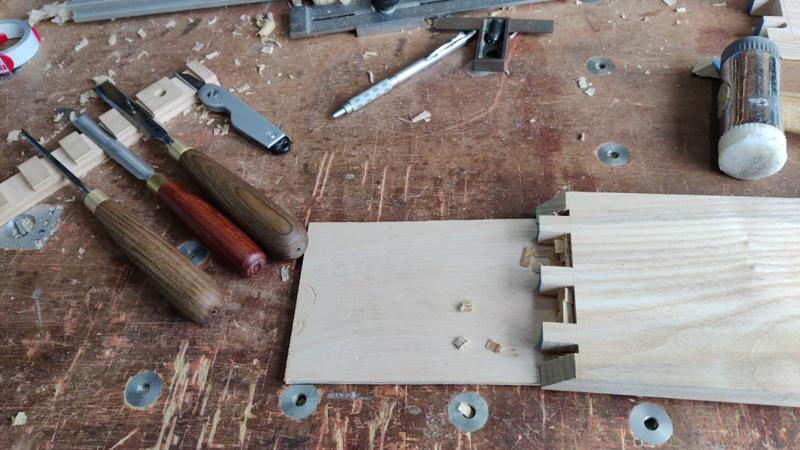
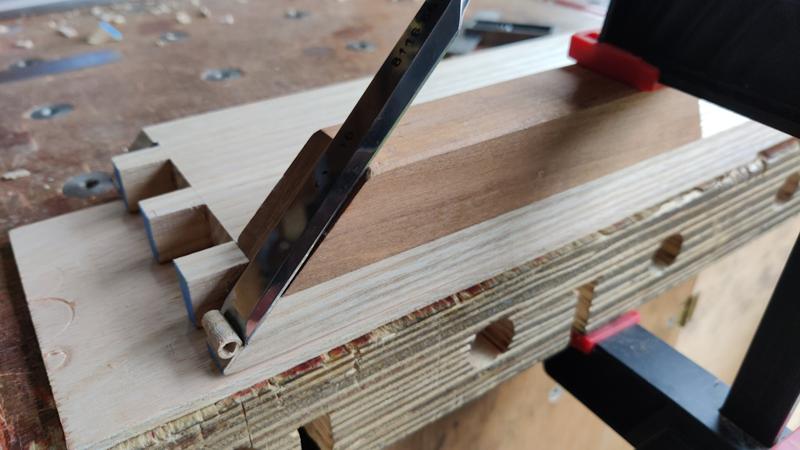
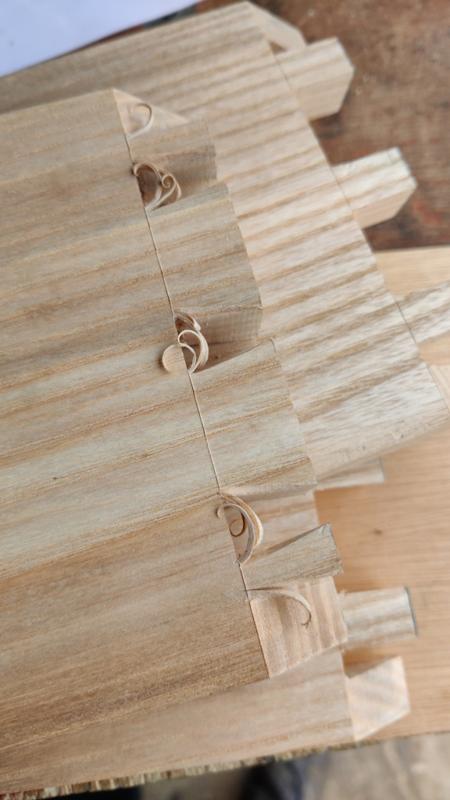
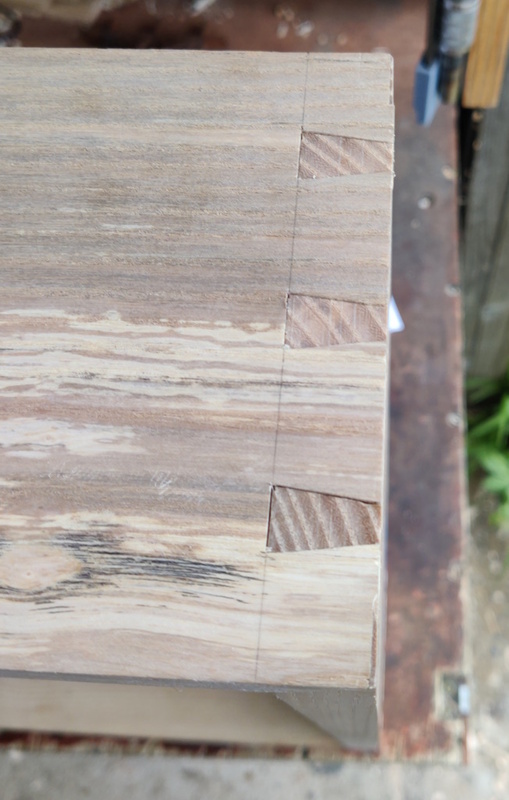
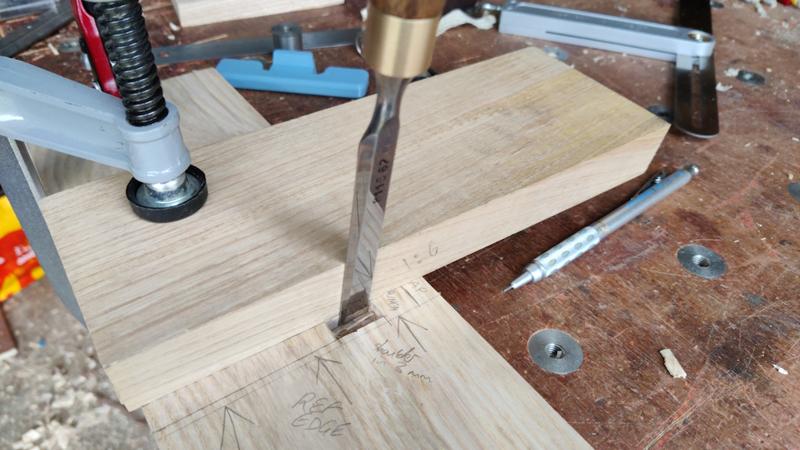
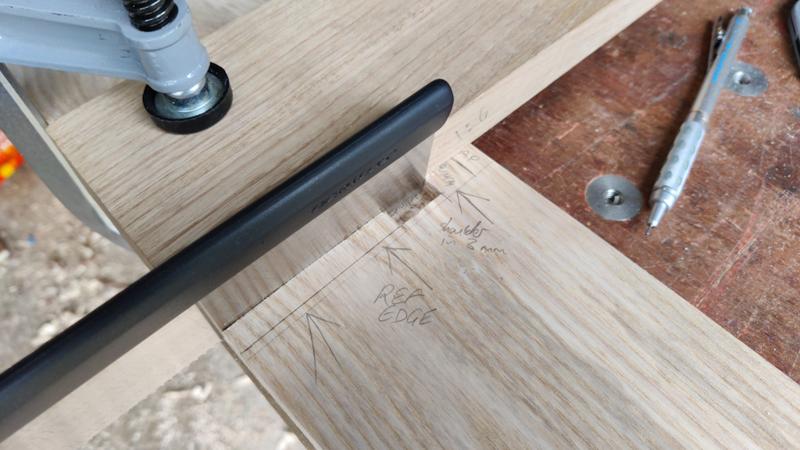
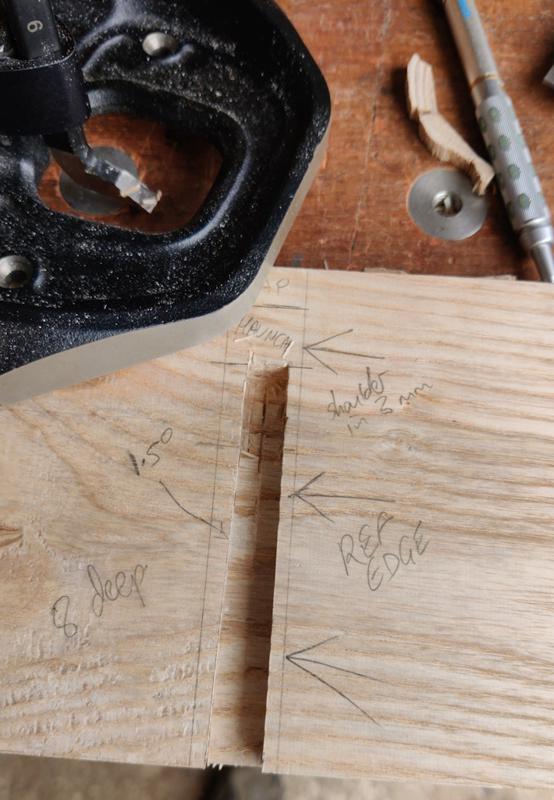
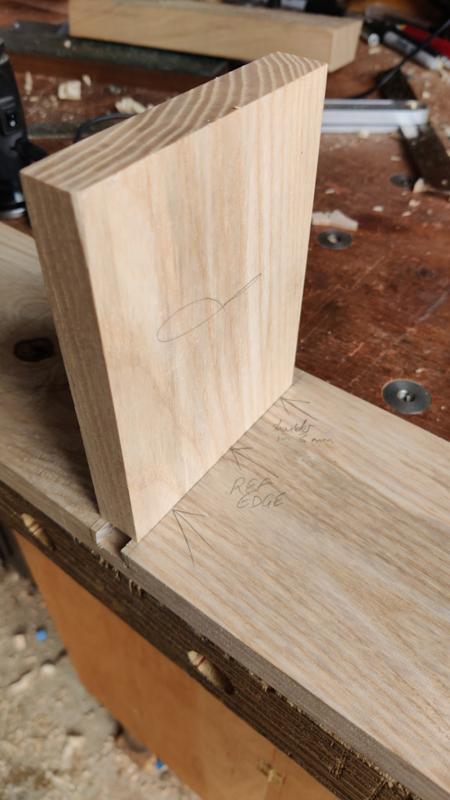
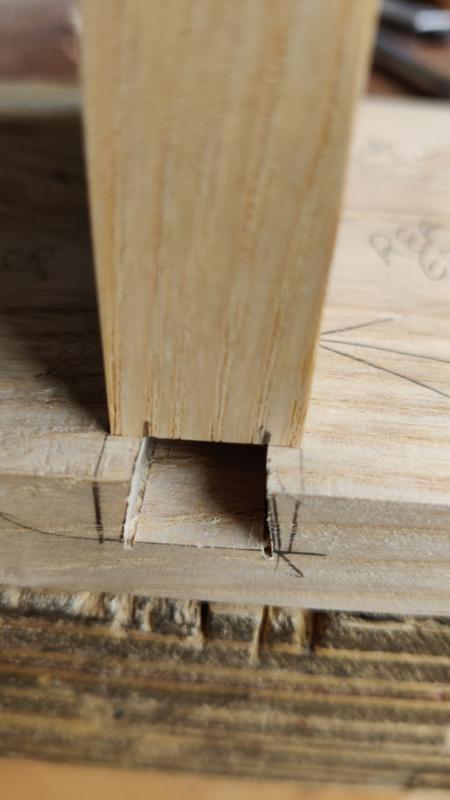
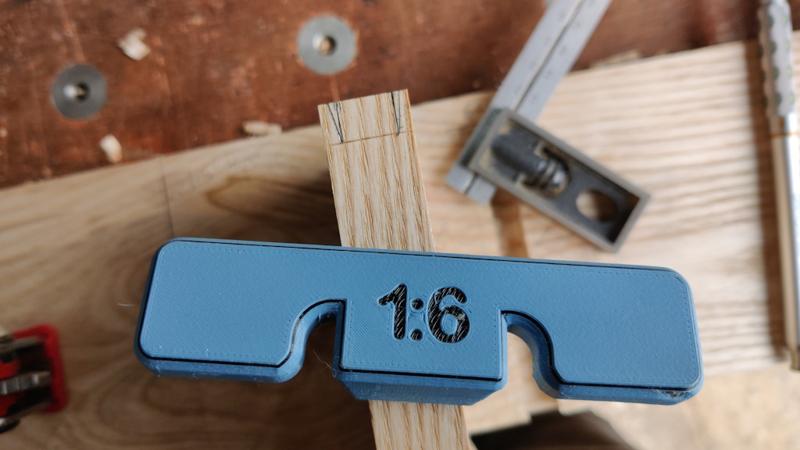
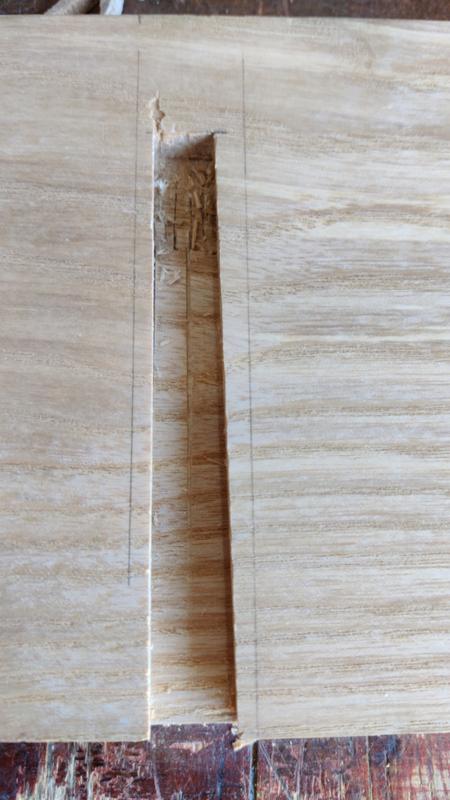
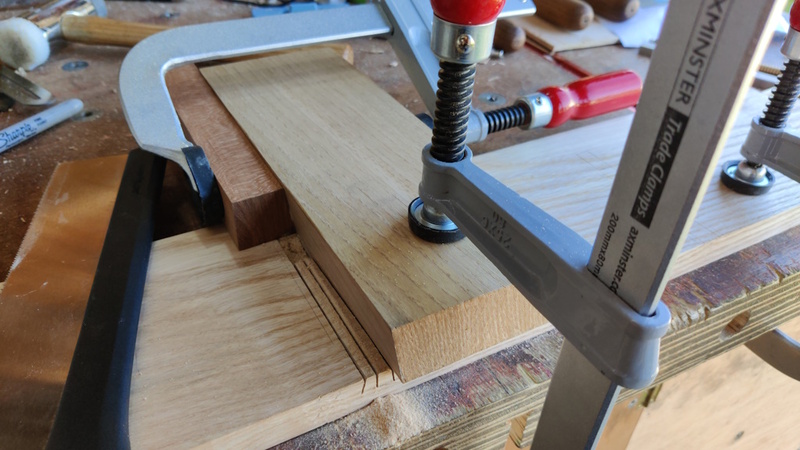
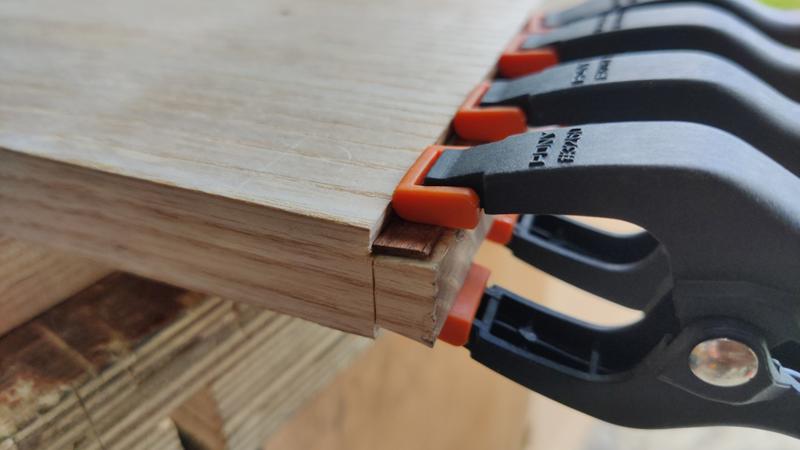
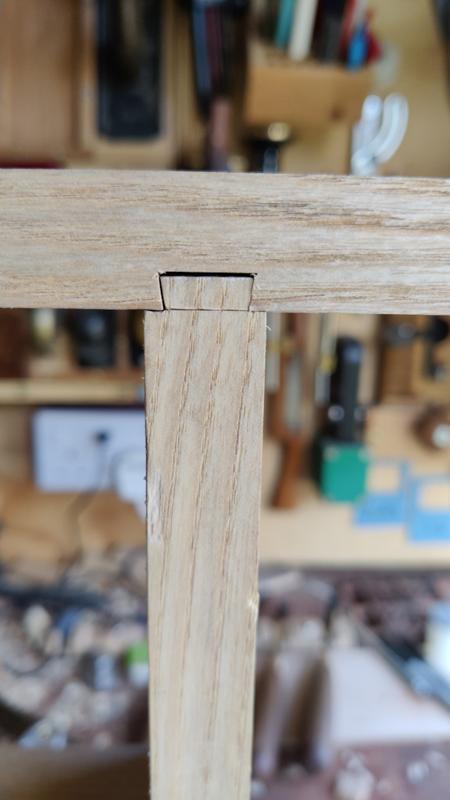
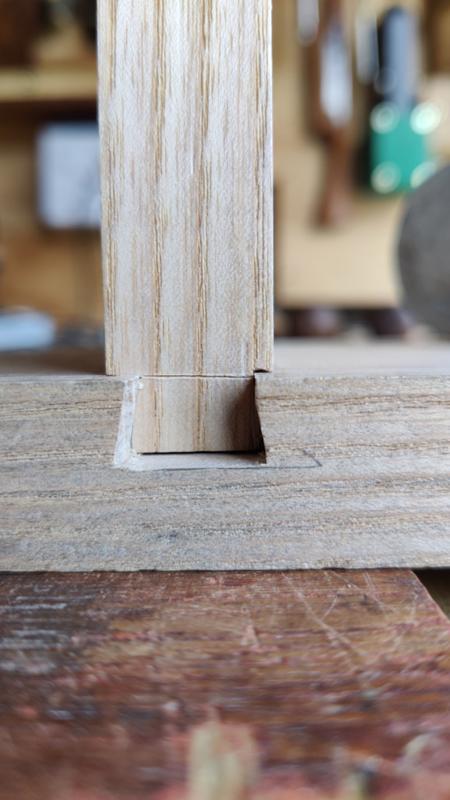
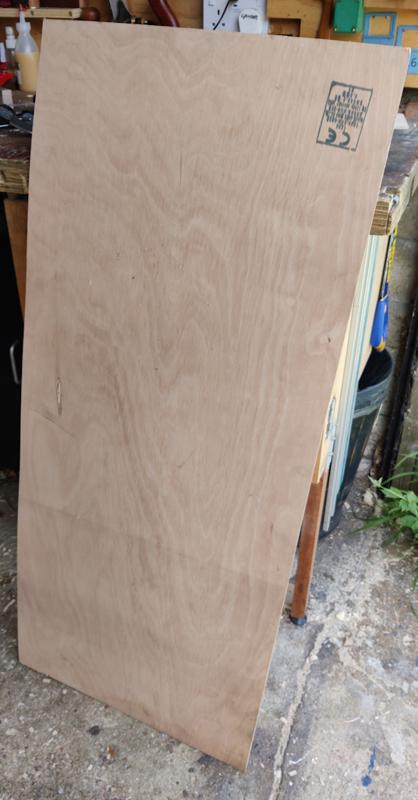
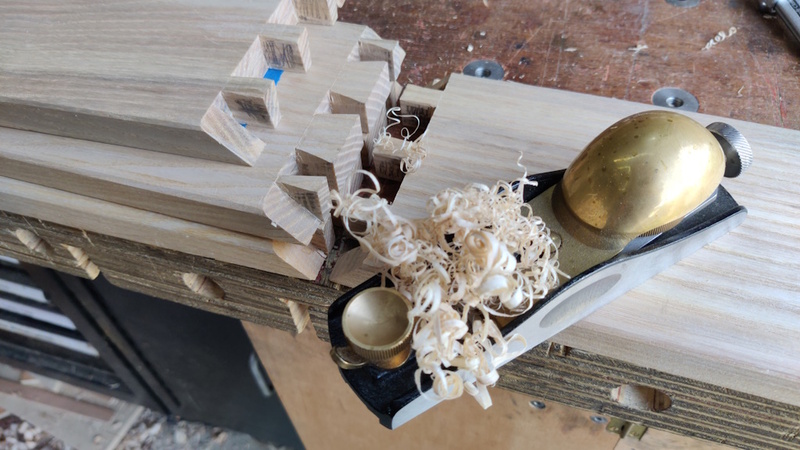
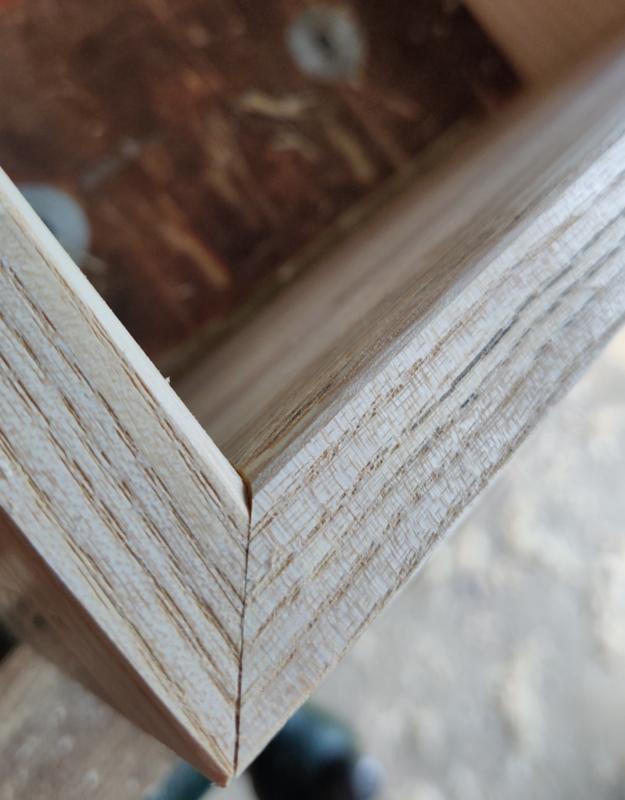
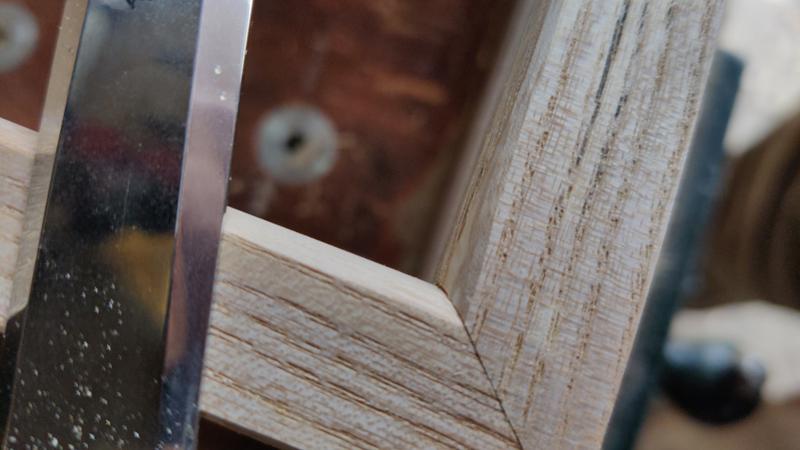
The corner joints will be through dovetails as shown in the image. The plan is to use tapered dovetail housing joints for all the other joints. There will be a painted plywood back that will get screwed into a rebate in the back of the unit. Screwing the back on will allow it to be easily removed, which will allow it to be painted in different colours if desired.

It'll be made out of ash. The ash has been machined roughly to size and then left for a few months "in stick" on top of one of the bookshelves in the room in which it will eventually be fitted (I had to negotiate displacement of a rather large number of pairs of Dr Martens boots that normally live up there to make space for the wood to be stored).

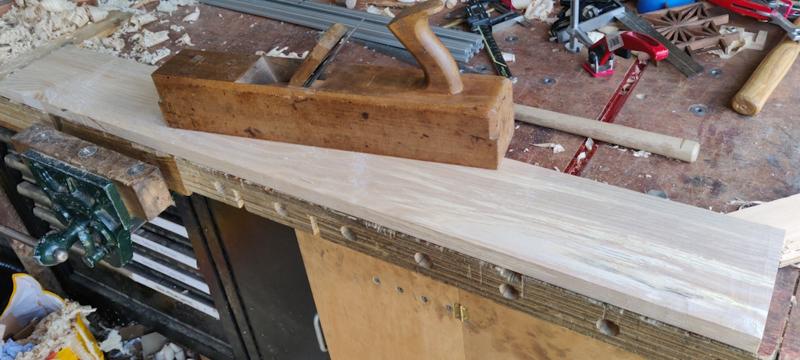
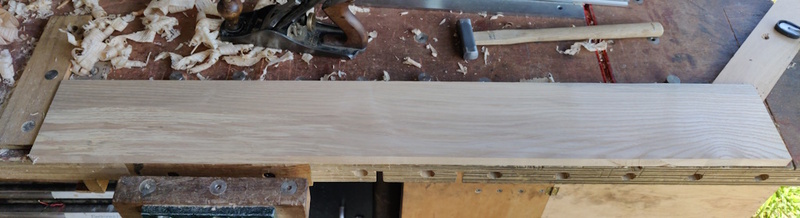
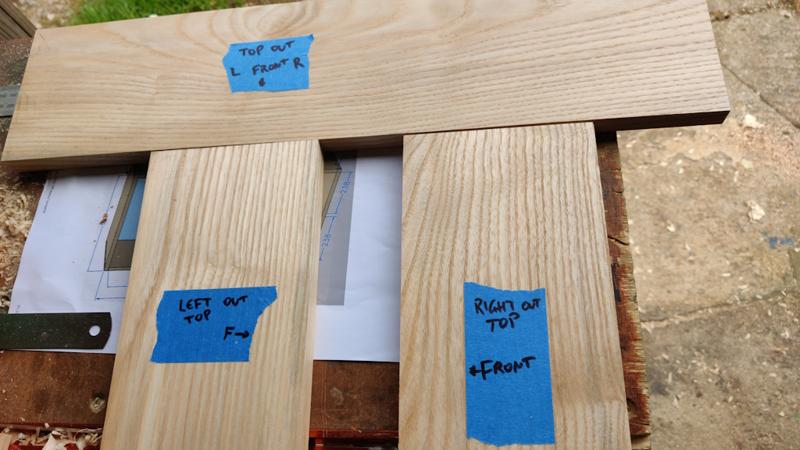
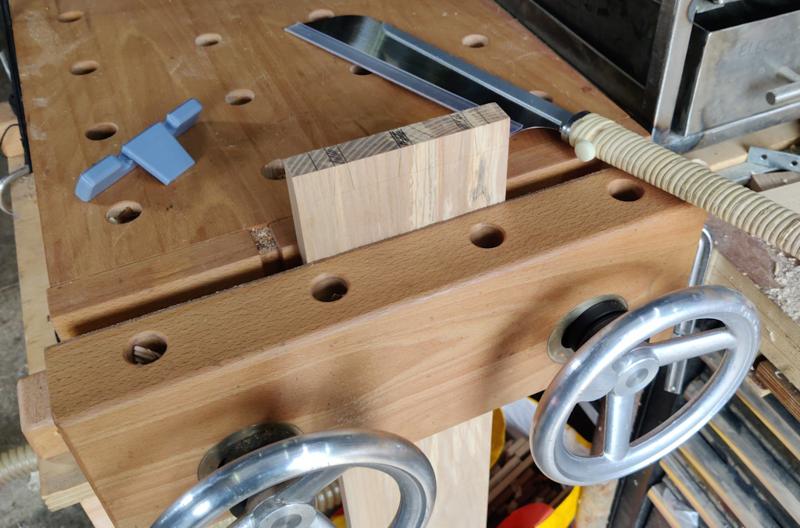
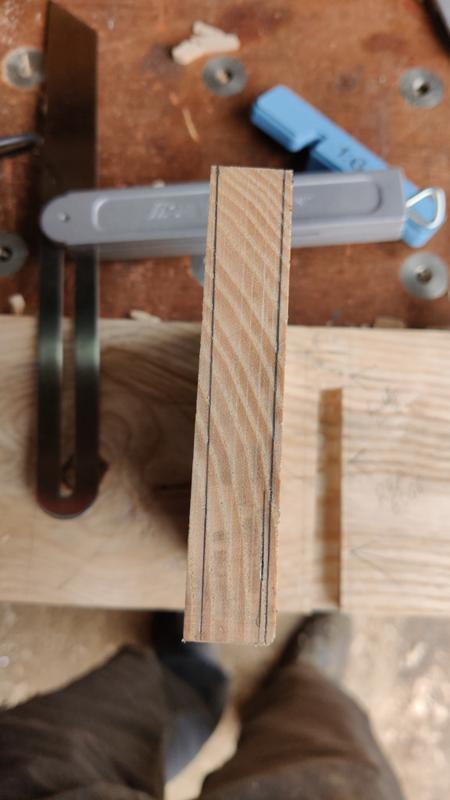
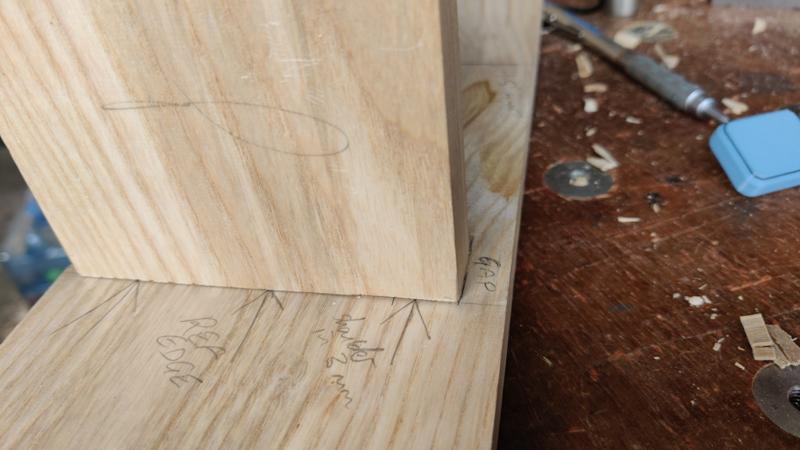
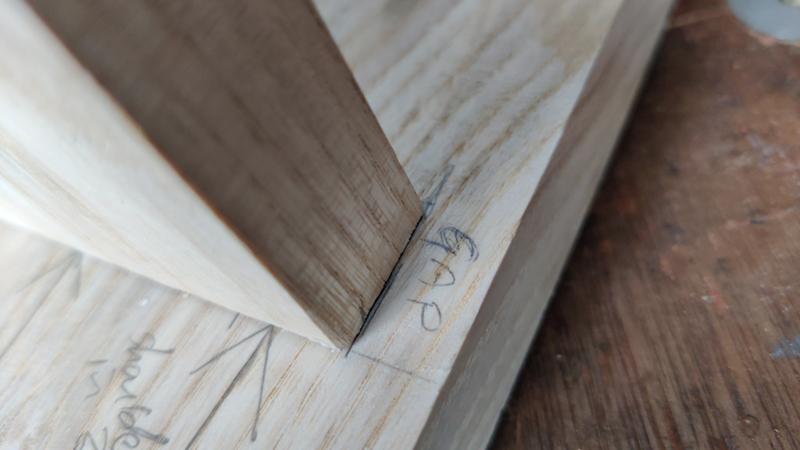
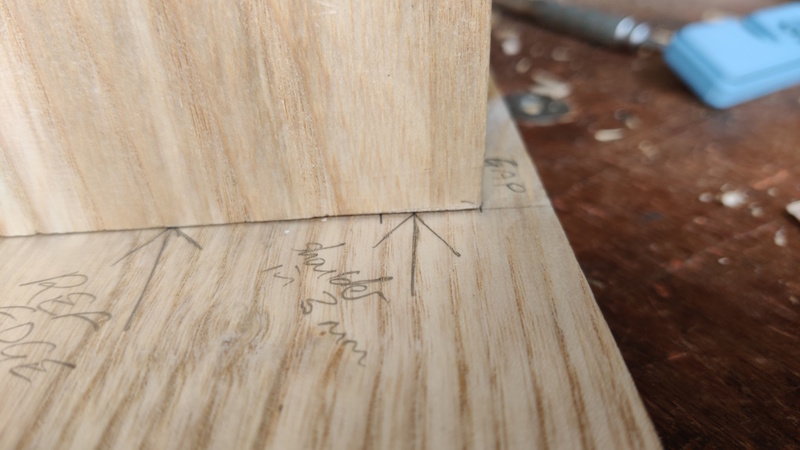
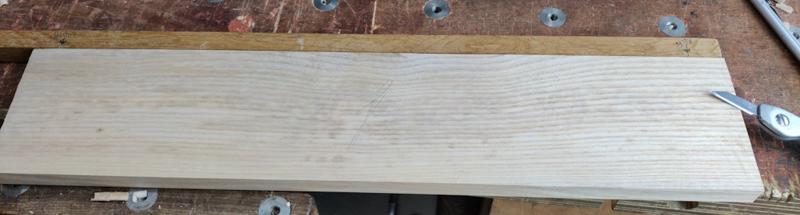
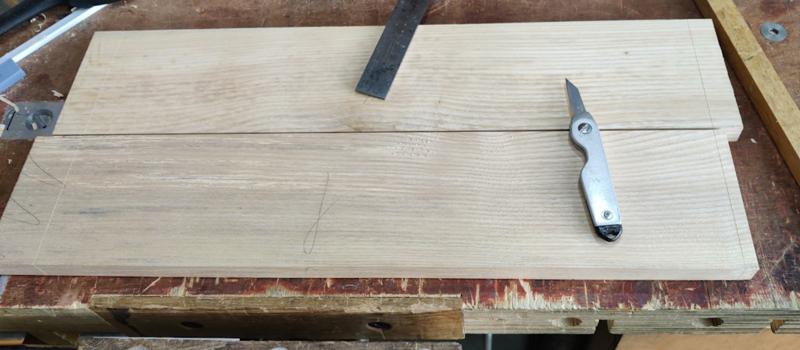
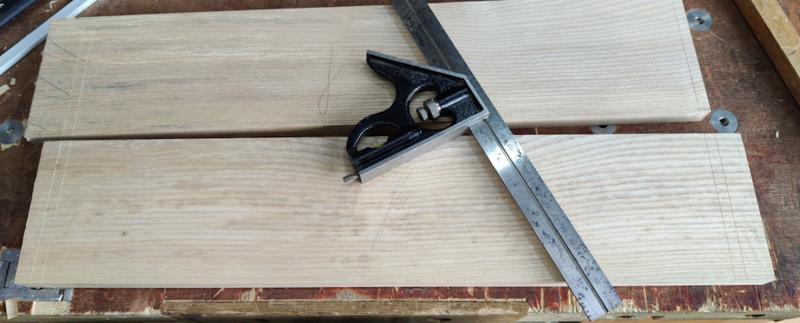
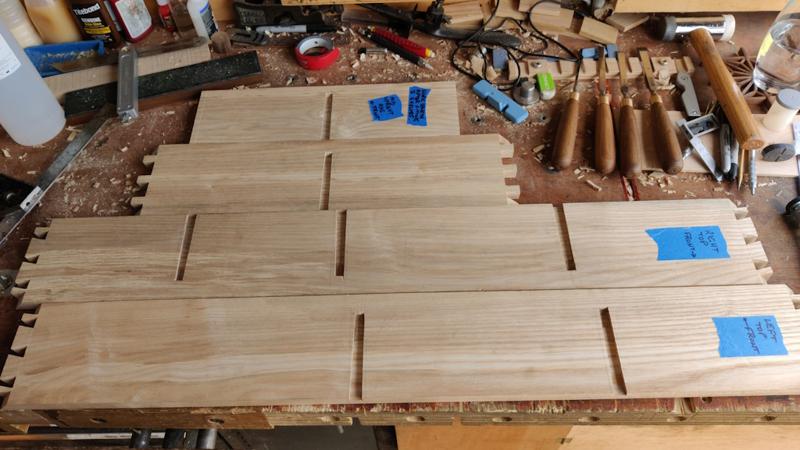
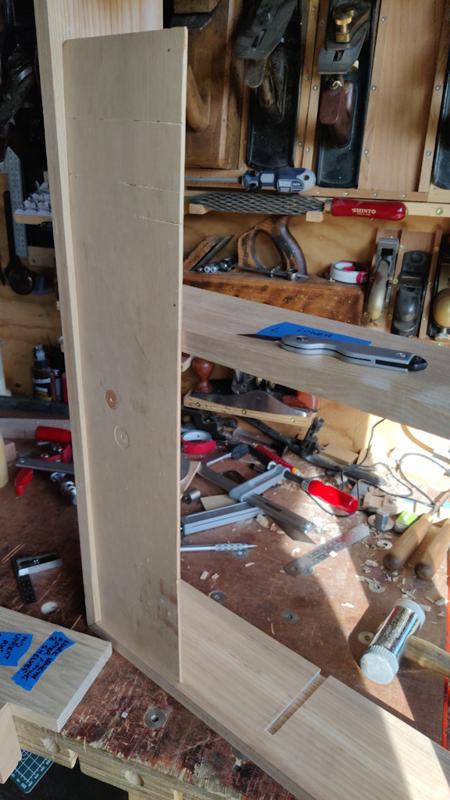
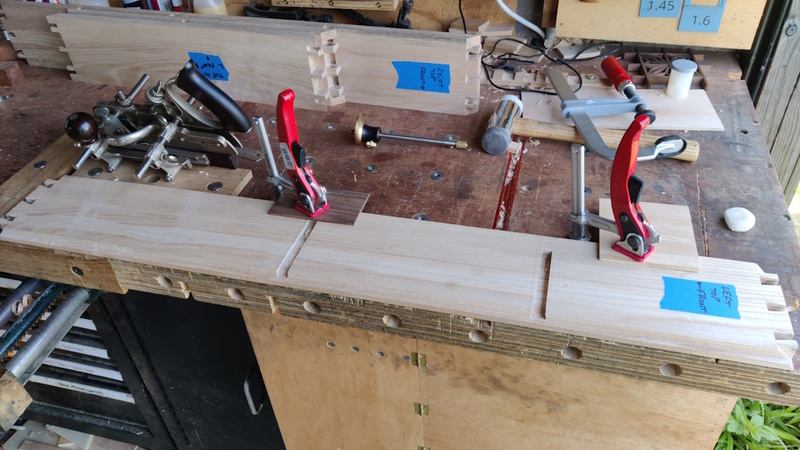
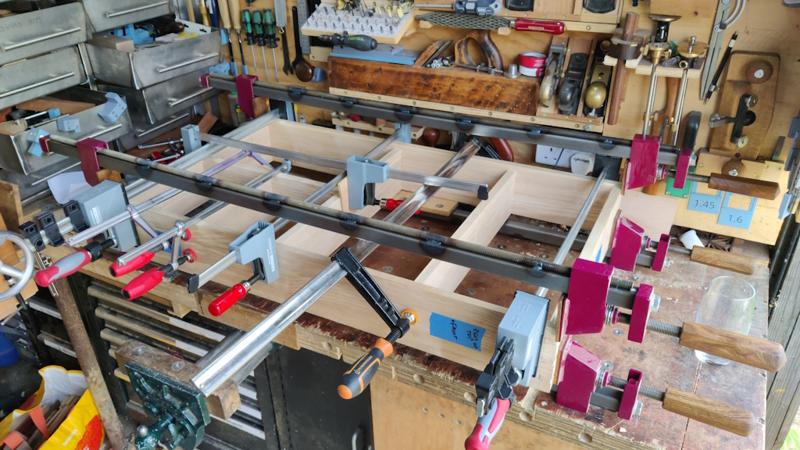
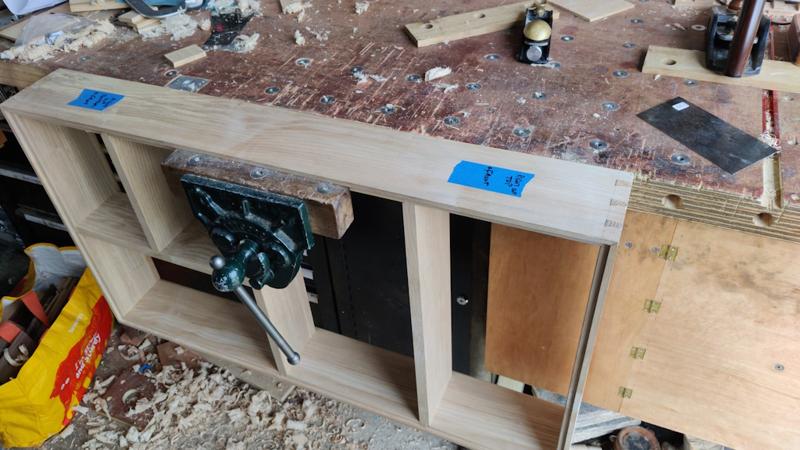
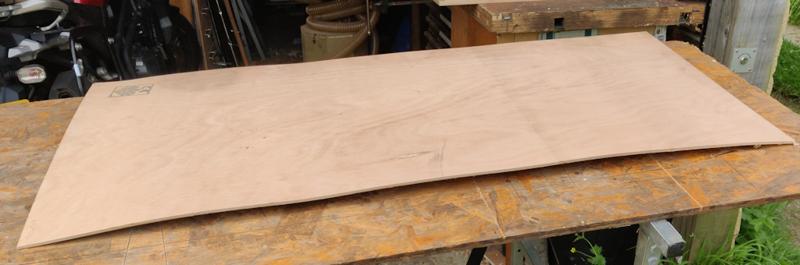
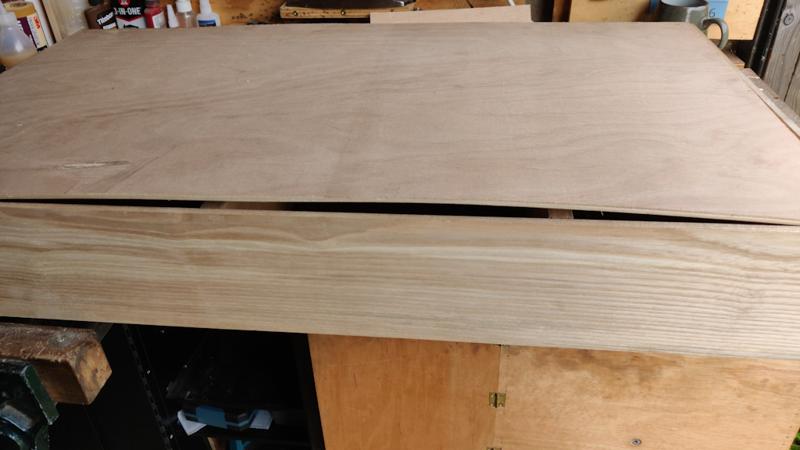
Having taken the boards down from the top of the bookcase, I set them out on the workbench to see what I had to deal with:

planks_after_resting_800.jpg


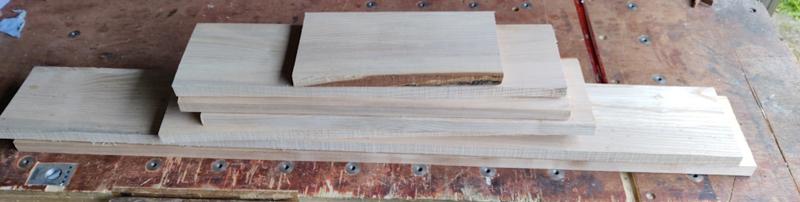
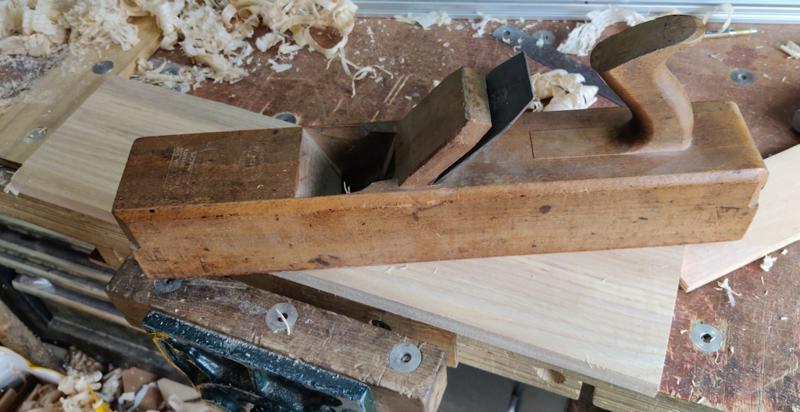
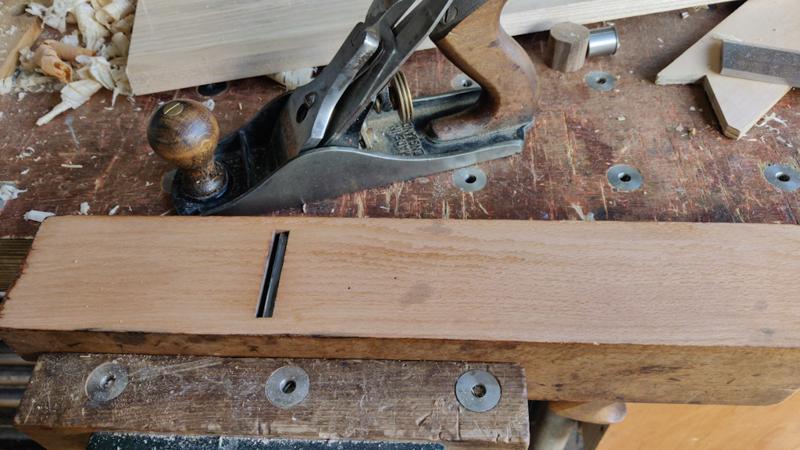
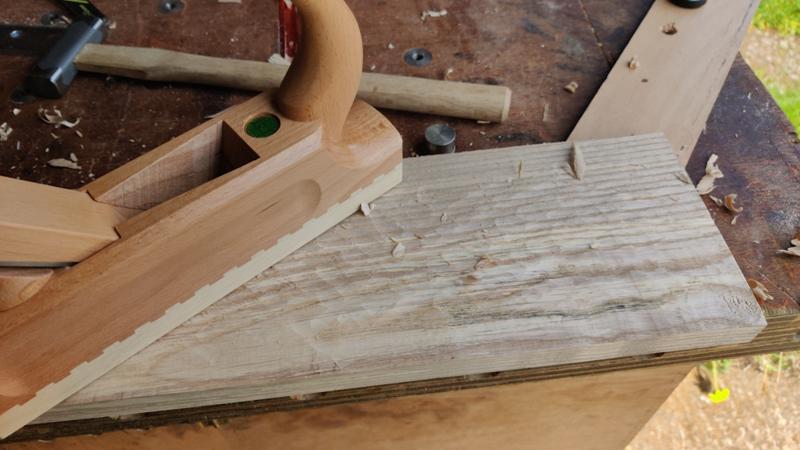
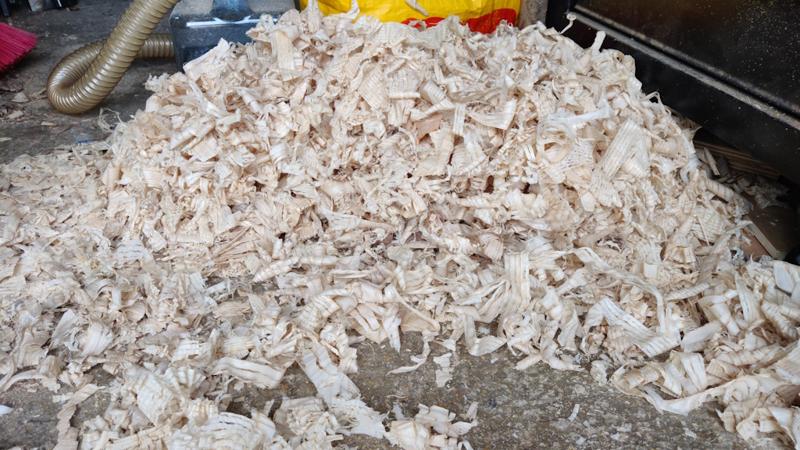
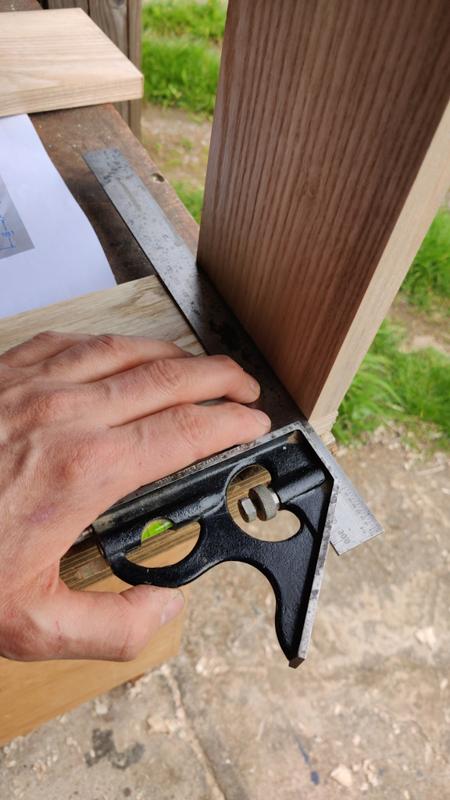
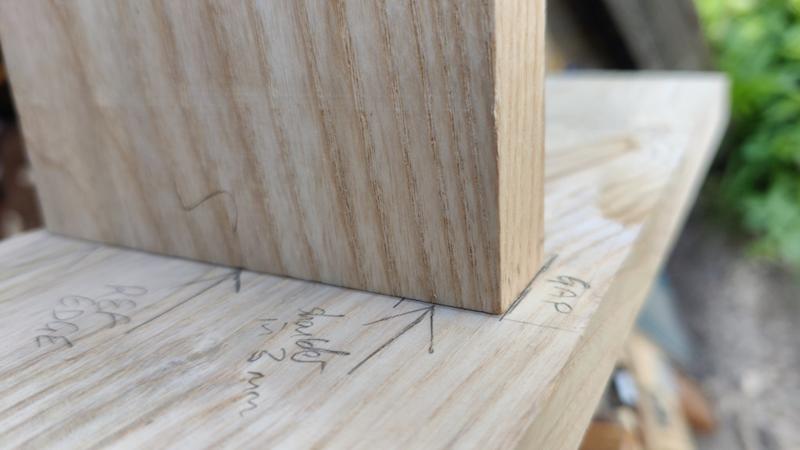
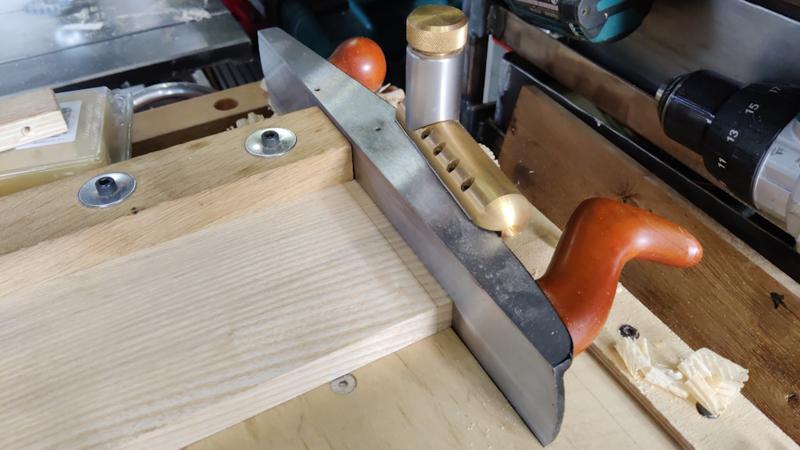
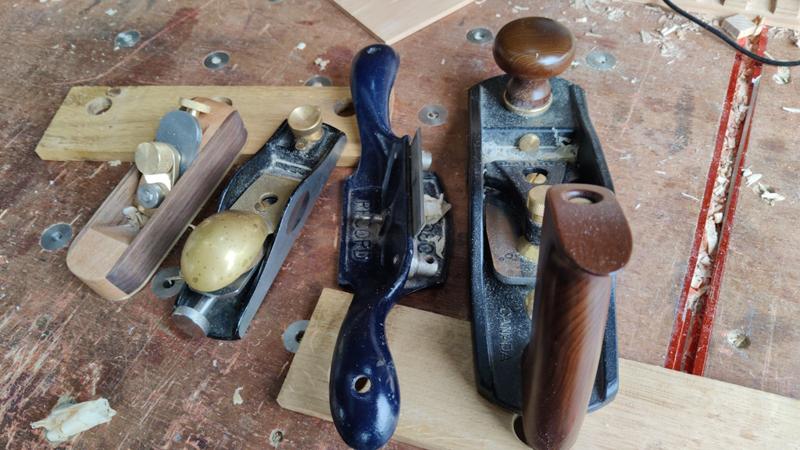
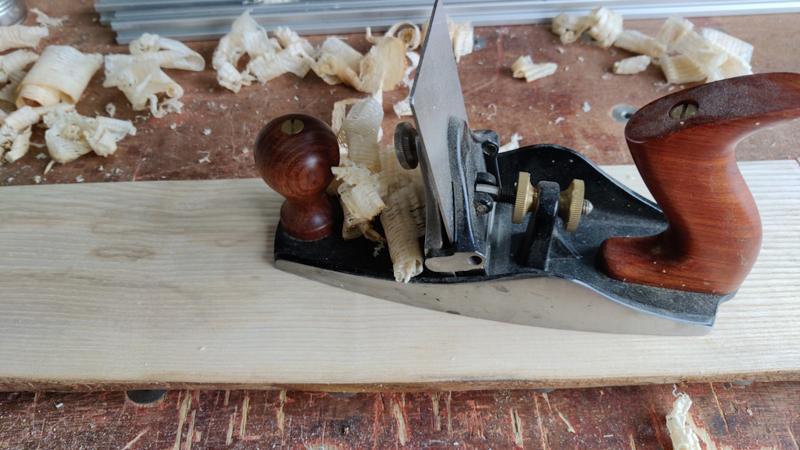
There's quite a bit of bow in them (mainly across the width), so I think they'll need a fair amount of work with the planes to get them flat. I've started working on them this afternoon, mostly with the Axminster #5:

planing_board_with_number_5_800.jpg


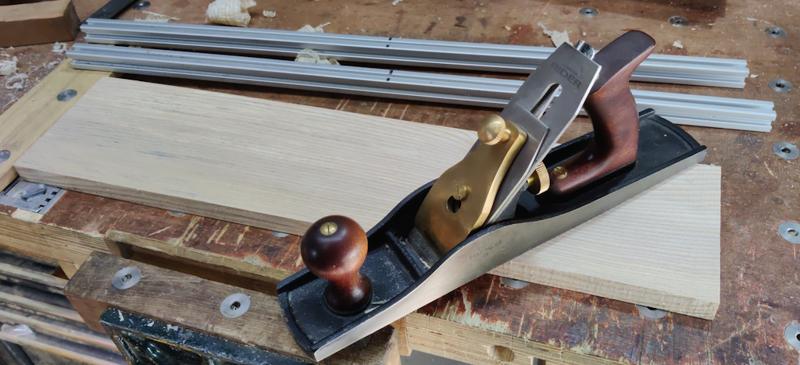
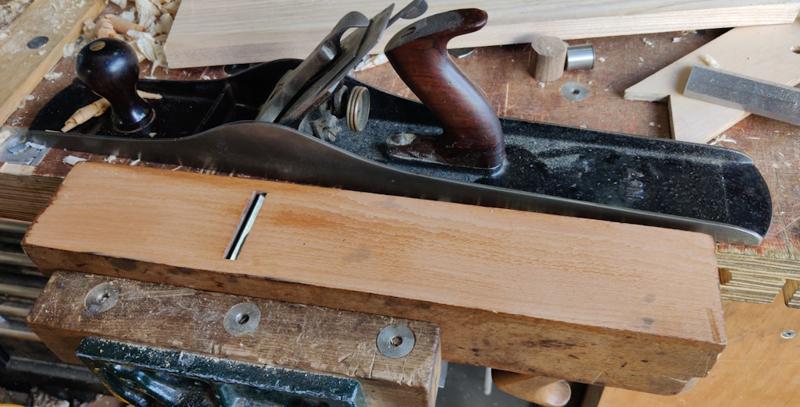
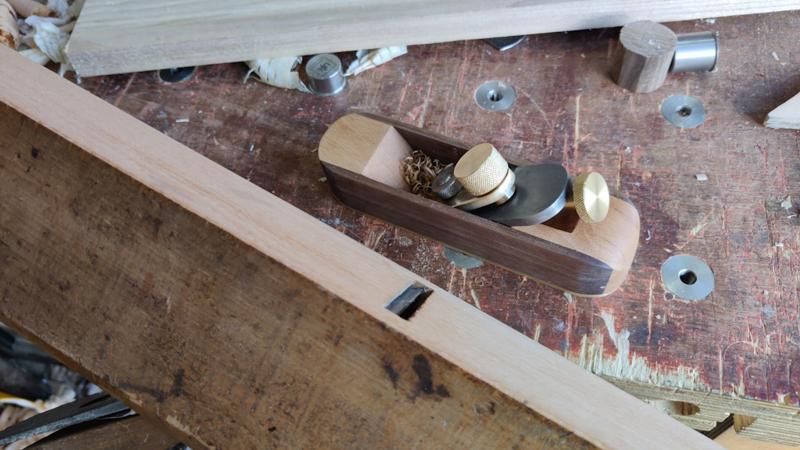
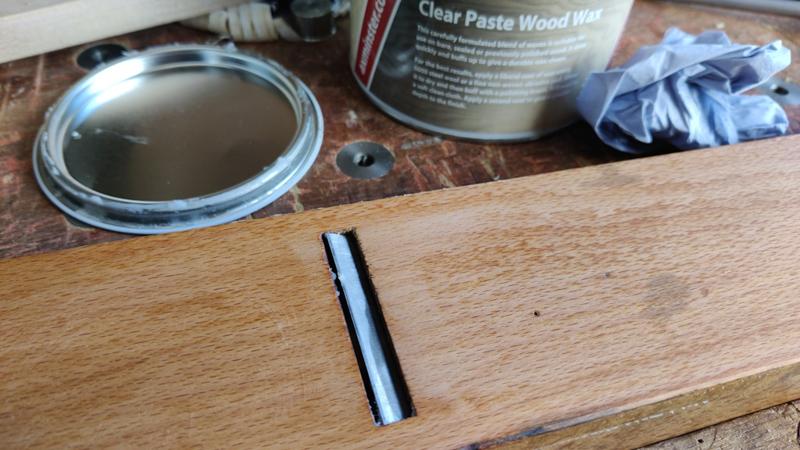
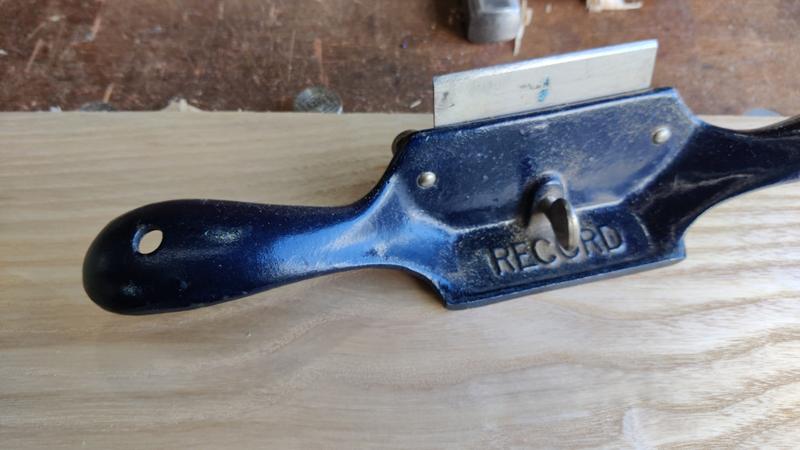
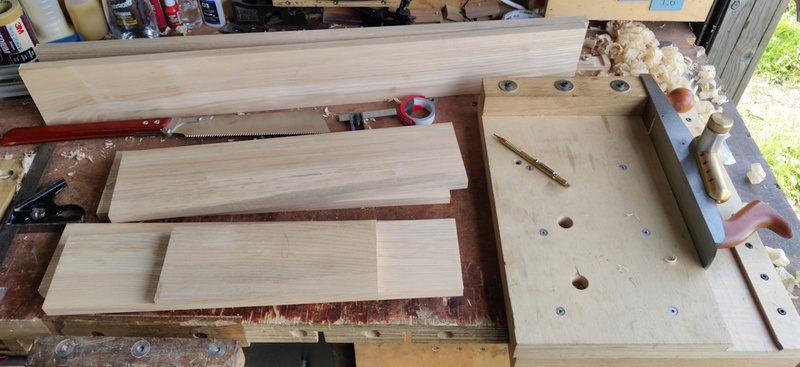
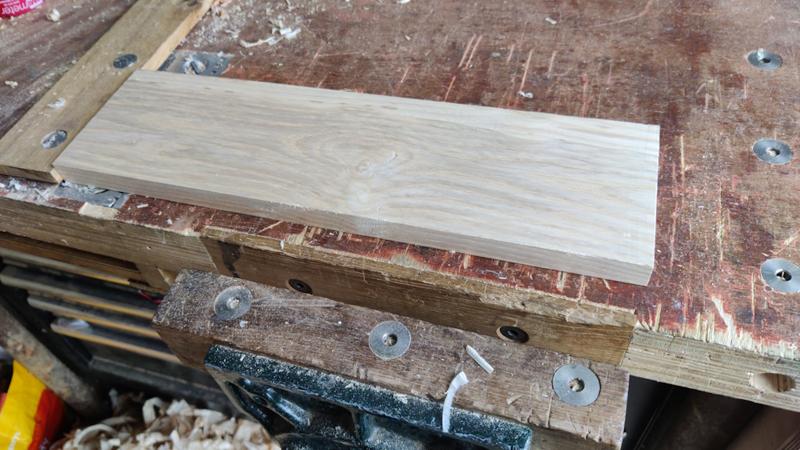
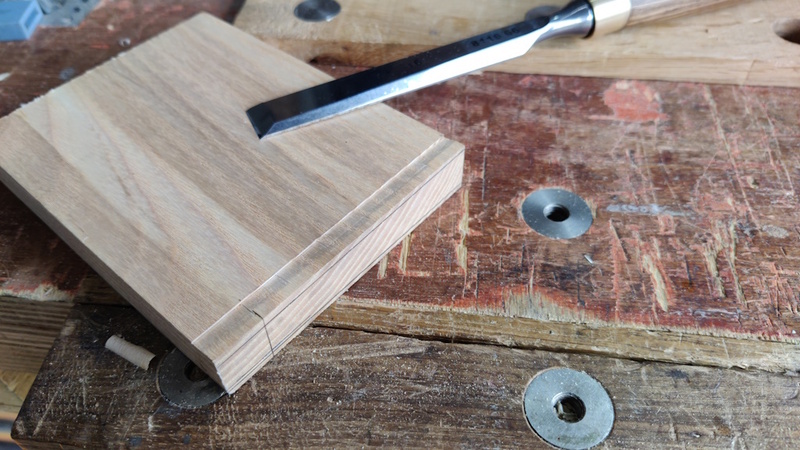
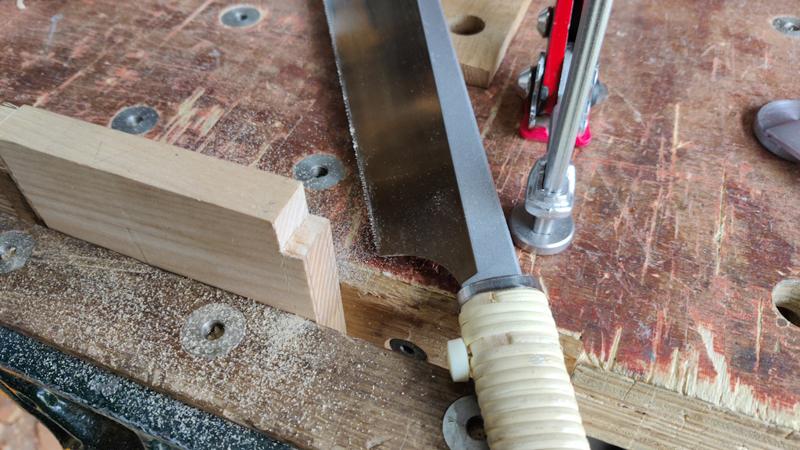
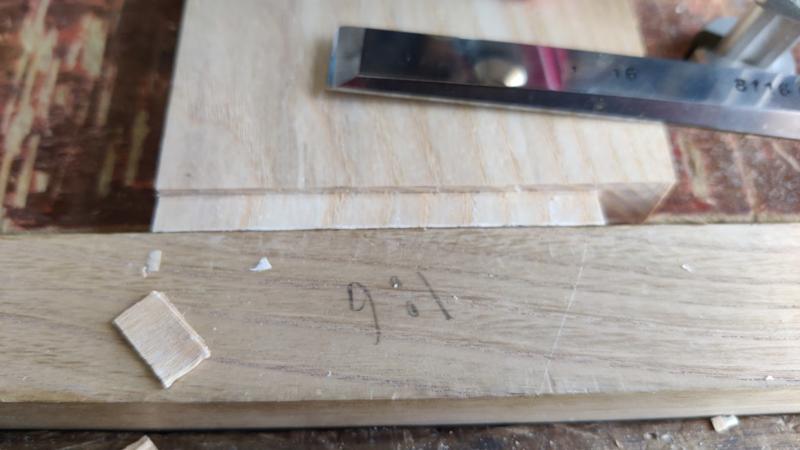
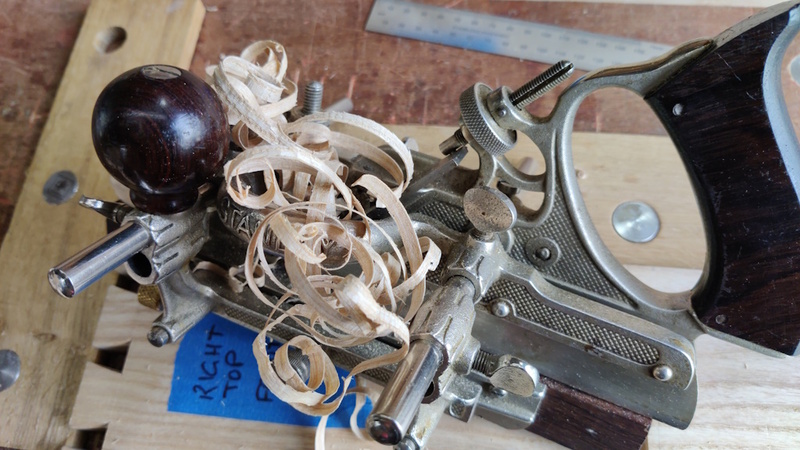
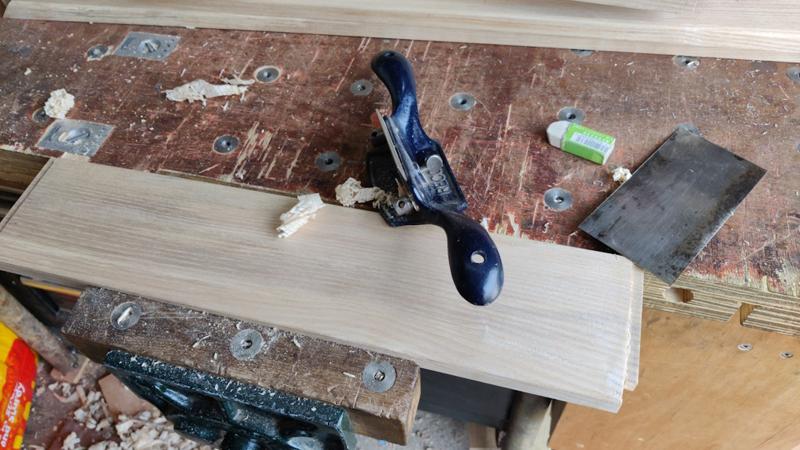
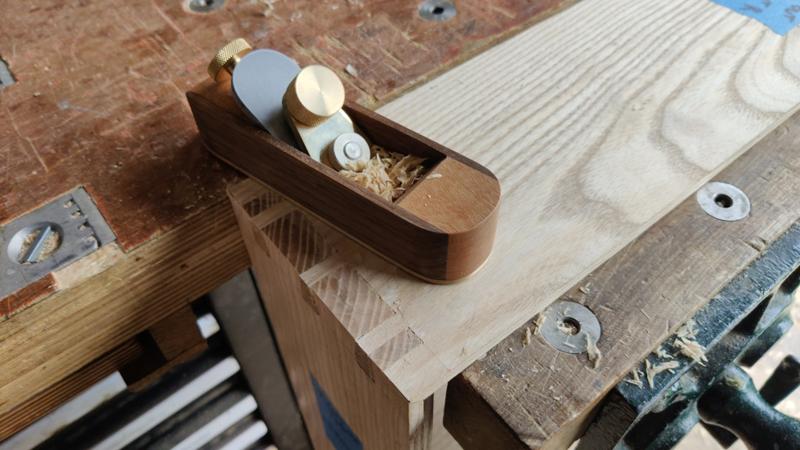
The grain of the first couple I've been working on has been quite variable in direction and I was getting a lot of tear-out. One was sorted with a bevel-up smoothing plane with a steep 50° bevel (and hence 62° cutting angle), the other one of the two I've planed so far was refusing to play ball even with that, so I resorted to the scraper plane, which did a lovely job (but gets a bit tiring after a while):

scraping_board_800.jpg


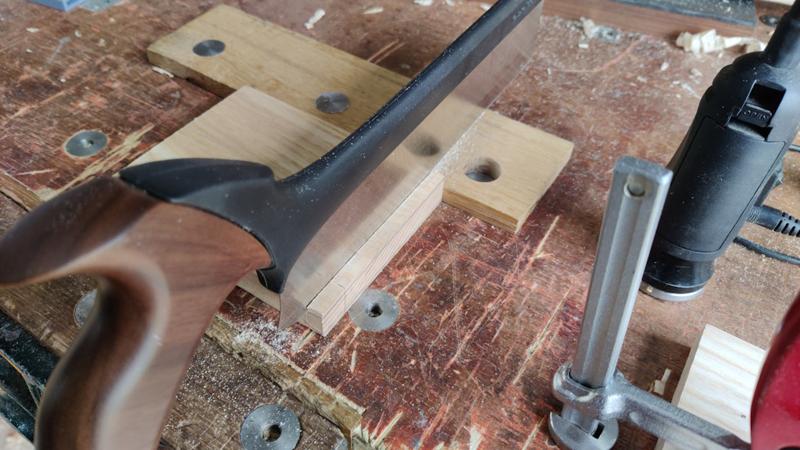
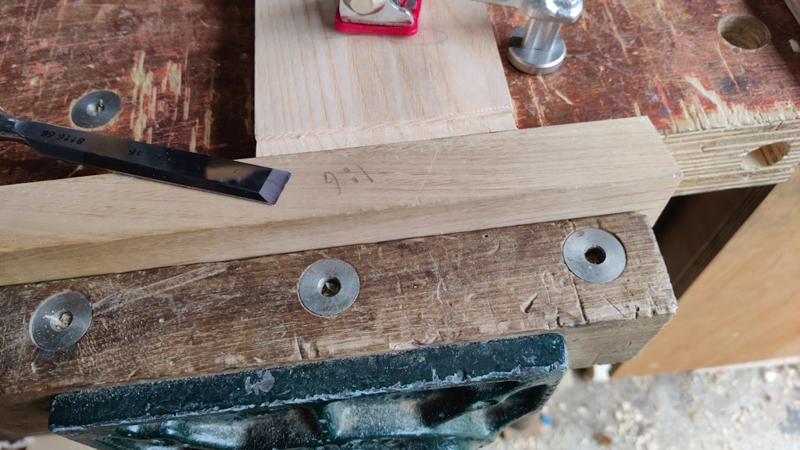
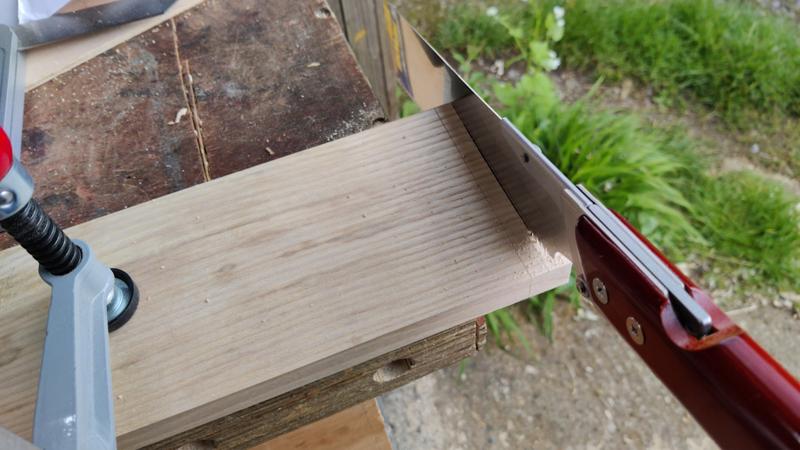
A couple of the boards had quite a bit of bark down one side. I decided to have a bit of fun and use a hatchet to hack it off:

playing_with_hatchet_800.jpg


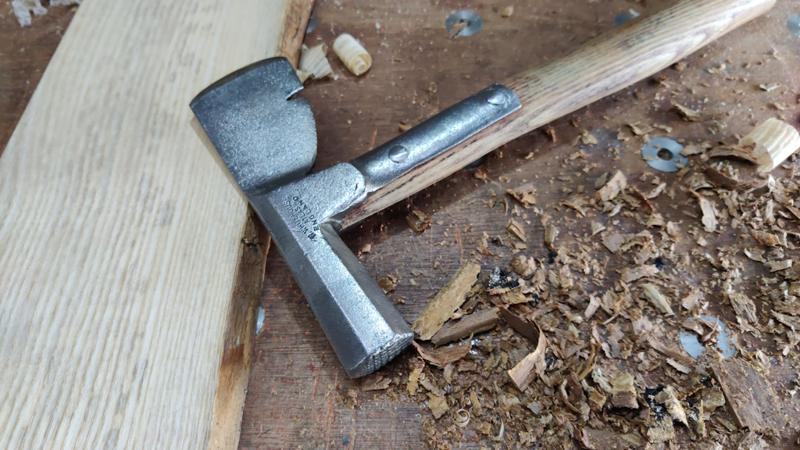
I think that hatchet is designed for use for roofing and I'm sure this sort of thing would be easier with a single bevel hatchet, but it was quite fun anyway!

The weather's looking quite promising for tomorrow, which is nice as I think I'll have the garage door wide open as I've got a lot of planing to do.
 
Last edited:
It's going to be a lovely job, but I hesitate to ask what were DMs doing on top of bookshelf.
 
Can you only manage 3 projects at once? :eek::)
I can only really work on one at a time (although occasionally I've done a small metalwork project & a small woodwork one in parallel). I can **think** about loads in parallel though!

I've no doubt there will be some other smaller projects I work on in the gaps between these three (e.g. boxes when I'm in France) & there's another big-ish project I have in mind that may join these three in due course, but that's a (surprise) present & I need to be careful not to give the surprise away.
 
Excellent, Al. You are being busy...

Do you have a planing back-stop on your bench? I ask, because flattening those boards would be so much easier if you scrubbed them at 45 degrees.........but that will push the board away from you unless you have a stop.
 
Excellent, Al. You are being busy...

Do you have a planing back-stop on your bench? I ask, because flattening those boards would be so much easier if you scrubbed them at 45 degrees.........but that will push the board away from you unless you have a stop.
Yes, I have a grid of holes (MFT style) so can put stops wherever I want.

The bow isn't that bad (not obvious when you look at the board, just obvious when you put a ruler across). It's definitely a work-out but it's going okay so far (at least on the boards without too much grain direction changes). If I get another awkward one, I'll definitely take your advice & scrub diagonally.
 
Interesting project and I expect the negotiations over the DM's were entertaining:ROFLMAO:. If the ash is anything like the stuff I used a few years ago (purchased from Yandles) it was really, really hard going to cut shovetails, especially using a chisel to remove waste on the sockets. The stuff I bought was kilned, but air dried is much kinder on an edged tool - Rob
 
Interesting project and I expect the negotiations over the DM's were entertaining:ROFLMAO:.

It helped that the shelf unit is for her so she had a vested interest in allowing me to put the wood in there :)

If the ash is anything like the stuff I used a few years ago (purchased from Yandles) it was really, really hard going to cut shovetails, especially using a chisel to remove waste on the sockets. The stuff I bought was kilned, but air dried is much kinder on an edged tool - Rob
When I did the "minimal tool challenge" thing I used a lump of ash from the same source (Wentwood Timber) and it seemed to be quite easy to chisel the dovetails so hopefully it'll be okay. It'll be air dried (all Wentwood Timber stuff is), so I guess that fits with your observation about kilned vs air dried.
 
Nice design, and an enjoyable project. I made something a bit similar, from ash, back in 2011, for books rather than boots. Here it is, newly installed in the only available space, behind our bed:

IMG_4475.JPG

I had the outside uprights extending down to stand on the floor, so it was lap dovetails at the top corners, sliding dovetails on the bottom shelf, plain housing joints for the intermediate uprights and then metal studs for the loose shelves. It was surprisingly difficult to fit together, with glue drying while I frantically planed, chiselled and malleted, as seen by the amount of extra tools and shavings in this photo:

IMG_4471.JPG

Some of that extra adjustment could have been down to inaccuracy, but I think some of it was because the glue makes the joint parts swell a little bit, so they don't slide together easily.

Actually, thinking more about your design, I expect you are already planning to make the outside box first, then slide in dividers from the back, one at a time, with no time pressure at all! Now I know what I should have done back then. :)
 
Thanks Andy. Yes: I'm planning on building it much more gradually than it sounds like you did!

I should clarify: it's not for storing boots (or anything especially heavy I think) - the boots will stay on the top of the existing bookshelves. The big "pocket" in the bottom left is for a tin jug full of paintbrushes and I think most of the rest will get odd leatherworking bits and bobs stored on it.
 
I've been carrying on preparing the boards since the last post. I settled into a rhythm of using the wooden jack plane first to get it close to flat and twist free (the wooden plane is nice and light compared to a #5 so it's a bit easier to hog off material):

wooden_plane_short_plank_800.jpg


I then used the Axminster #5 to smooth it a bit more and finally the Stanley #4 to get a nice surface finish. The wooden jack plane's handle was rocking very slightly as I was planing (it's done that ever since I got it). The movement is less than a millimetre, but I decided yesterday it was finally time to do something about it. The handle was quite difficult to remove as it was very firmly wedged in, despite the small amount of movement, but with a fair amount of mallet-assisted persuasion, I was able to get it out. I used Titebond Liquid Hide Glue - I'd forgotten how much more smelly it is than the Fish (Scale?) Glue I usually use, but the smell isn't unpleasant.

gluing_wooden_plane_handle_800.jpg


I thought I'd taken a photo of it with the clamp on, but apparently not, so you'll just have to imagine it with a little scrap of wood over the handle base and a clamp holding it down to the bench!

In case it's of interest to anyone, here is the marking on the wooden plane (which I find quite hard to read):

wooden_plane_stamp_800.jpg


With the handle glued back on, I thought I'd true up the base (it was much lower in the middle than at the front or back). This is something I've never done before (never had the bottle!) but I feel a lot more confident planing than I did when I first got this plane. I started by fitting the blade, well retracted below the sole, and using a #7 to clean up front and back until a straight edge showed it to be flat:

wooden_plane_sole_number_7_800.jpg


I already had a #4 set for a very light cut so I thought I'd give it a silky-smooth surface while I was at it and did one pass over the whole surface:

wooden_plane_sole_number_4_800.jpg


My new home-made block plane chamfered the corners...

wooden_plane_sole_chamfering_800.jpg


... and I put a bit of paste wax on the bottom as I'm guessing it's a reasonable thing to do?

wooden_plane_sole_paste_wax_800.jpg


With that done, it was time to battle the longer planks (for which I need the garage door wide open). I started with a wooden scrub plane at 45°, although I foolishly didn't check the setting. Last time I'd used it I'd obviously been taking a lot of material off and it was set for a very deep cut.

scrubbing_long_plank_800.jpg


That deep cut produced a lot of tear-out on top of the scrubbing marks, so it took a while with the newly-refurbished wooden jack plane to get the surface back looking smooth:

wooden_plane_long_plank_800.jpg


After the wooden jack plane, I did the same as before, using the #5 and then the #4:

smoothed_long_plank_800.jpg


There were a couple of very small areas with some particularly stubborn tear-out (the grain on this ash changes directions several times along the length). Rather than keep attacking the whole surface, I decided to just focus on those small areas with a cabinet scraper (which has a much smaller sole than the scraper plane):

cabinet_scraper_800.jpg


I've only done one of the long planks so far (after which I needed a breather!), but I'll get on with the second one shortly and then that's all the boards thicknessed and flat so I can start sorting out the edges and cutting them to length.
 
You'll be amazed at how quickly the sole of a woody goes out of kilter, but you've gone about trueing it up correctly. Eventually, the mouth will get too big and you'll need to drop in an insert to make it smaller:

IMG_2764.jpeg

I've used a bit of Ash on mine, but better to use beech. This old woody of mine probably needs trueing again, but it does get used quite regularly - Rob
 
That's the way to do it! Nothing beats experience at the bench.

The mark on your plane is Thomas Bloor Ltd, of Leicester. BPM traces them in directories from 1895 through to 1967, which is not much help in dating your plane, or really in saying who made it for them, but it's a nice florid sort of mark.
 
You'll be amazed at how quickly the sole of a woody goes out of kilter, but you've gone about trueing it up correctly. Eventually, the mouth will get too big and you'll need to drop in an insert to make it smaller:

View attachment 26371

I've used a bit of Ash on mine, but better to use beech. This old woody of mine probably needs trueing again, but it does get used quite regularly - Rob

I've got a couple of other wooden bench planes & they've both had that treatment in the past.

To be honest, I was surprised this one never has and that the mouth opening is still very tight (with the blade set for a medium cut, it's a shade under a millimetre of opening). I guess that means it has had a fairly easy life (at least up to the time I acquired it!)

That's the way to do it! Nothing beats experience at the bench.

The mark on your plane is Thomas Bloor Ltd, of Leicester. BPM traces them in directories from 1895 through to 1967, which is not much help in dating your plane, or really in saying who made it for them, but it's a nice florid sort of mark.

Thanks Andy: you're a fountain of knowledge as ever!
 
After having received a couple of comments on here about the DMs, I thought one or two people might be interested in a photo now they've been returned to their home above the bookcase:

1714824836125.png

11 pairs in total (for now - she tends to get them second hand and has a saved search on ebay, so who knows when the next pair will arrive!). Looking at the photo, it looks like there's a big crack in the paint-work, but that's actually a string of fairy lights that she has going all the way round the top of the wall.

These are the two for which Carolyn made her own shoelaces:

1714824916008.png
 
The afternoon was spent planing & sawing. I decided to shoot the outside pieces to length: they don't really need to be square-ended and the same length as they'll get sorted out post-dovetailing, but it means I can reference off the end if I decide I need to and it's very quick and easy to do. The inner pieces will probably also get shot to length, but I'll do that later.

With all that done, I laid the boards out for inspection:

all_planks_done_almost_800.jpg


One of the long side pieces has a bit of a notch in it, but with careful planning that should get removed when I cut the rebate for the back:

plank_with_blemish_800.jpg


It was at this point that I realised that there weren't enough boards! The design went through a few iterations around the time that I was preparing the boards and putting them in storage on top of the wardrobe, so that might be the reason (or it might be that I just couldn't count). Anyway, the upright near the bottom was missing, but I had some leftover ash in the garage, so I chopped a bit off that and planed it down:

another_plank_done_800.jpg


Like a lot of the other boards, it's got some hard (knotty?) bits and the grain changes direction half-way along, but I've cut it in such a way that the dovetail housing (aka sliding dovetail) joint won't be over the knot. This ash has been quite hard work to plane compared to the sweet chestnut I used to make the tool chest and there were a few times I was dreaming of a surface planer! The heat today hasn't helped and I'm definitely ready for a flop and a glass of Brittany Cider now!

First job tomorrow will be to sweep up the mess...

time_to_tidy_up_800.jpg


... and then I'll start marking up the dovetails. I'm umm-ing and ah-ing over whether to do mitred dovetails on the corners. They're a bit more work, but would make ploughing the rebate on the back easier. I don't need to decide until tomorrow anyway!
 
Great stuff Al.....and yes, ill-behaved ash can be a pain to plane, whereas chestnut can be a delight. In my youth I've grabbed a belt sander to tackle ash because it was beyond my planing-skill levels at the time. Even now with a handful of well tuned planes, some pieces can be a test.
 
Great stuff Al.....and yes, ill-behaved ash can be a pain to plane, whereas chestnut can be a delight. In my youth I've grabbed a belt sander to tackle ash because it was beyond my planing-skill levels at the time. Even now with a handful of well tuned planes, some pieces can be a test.
Thanks Mike: I'm glad it's not just me!
 
Today has been all about dovetails. I started by arranging the outside pieces and deciding which face was going to be the inside, the outside and which edge the front and back. I then marked them up in my preferred way: with a big piece of masking tape and some very explicit pen marks:

dt_01_oriented_pieces_800.jpg


These will continue to be used after cutting the dovetails: I'll refer to them when fitting the shelves as well, hence why it's handy to have the front of the unit marked on them to minimise (but definitely not eliminate) the chance of future stupidity.

dt_02_oriented_pieces_close_up_800.jpg


To mark the depth of the tails, I used a square against the face edge and offered up a mating board. I then flipped the mating board over and checked that it would definitely sit fractionally sub-flush with the end grain in either orientation:

dt_03_marking_board_width_800.jpg


Checking both ends of the board means that, rather than marking the two tail boards independently, I can transfer the base-line marks across from one board to the other and ensure that the inside dimension of each tail board is the same (which helps make sure the unit ends up with 90° corners):

dt_04_transferring_marks_800.jpg


I then drew around the board on a bit of paper and sketched out a plan for the tail sizes, which then got marked onto the end of each board:

dt_05_marking_tails_800.jpg


I've done that a few ways in the past, sometimes using dividers, sometimes just doing it entirely by eye. However, when I'm doing mitred dovetails I prefer to be a bit more cautious and draw it out and be confident that it's going to look okay.

This is the first time I've done mitred dovetails with the mitre in the tail (rather than in the pin), so that's another reason for drawing it out and spending more time thinking rather than cutting.

With the marks done, I could saw out the tails, with the outside face of the board facing out so I can clearly see the line I'm aiming for on the most side that will (arguably) be most visible when it's assembled:

dt_06_sawing_tails_800.jpg


I then flipped it round and lifted it up a bit higher to do the angled saw cut for the edge of the mitred section:

dt_07_sawing_mitres_800.jpg


Before sawing off the mitred corner, I used an old mitre marking tool to make a knife line at 45° on the edge of the board:

dt_08_marking_mitre_sides_800.jpg


The corner then got sawn off, leaving plenty of material to make up for my lack of faith in my sawing skills!

dt_09_rough_sawing_mitres_800.jpg


The pin sockets then got chopped out, with the outside face of the board facing me for the same reason as before. I did some of these with a coping saw and some with a fretsaw, just for a bit of variety!

dt_10_coping_saw_800.jpg


I used a 10 mm chisel for all the pin sockets:

dt_11_chiselling_800.jpg


The ash was much more nicely behaved in chiselling than it was when planing, leaving a nice smooth surface in the pocket...

dt_12_well_behaved_ash_800.jpg


Continued in the next post....
 
To transfer the lines from the tail board to the pin board, I used my usual ruler trick: clamping a 1 mm thick steel rule to the tail board using a couple of spring clamps. The rule sits right on the knife line:

dt_13_ruler_trick_800.jpg


After putting some masking tape on the end of pin board, the tail board can be slid up to the pin board: the rule sits against the inside face of the pin board and should provide perfect alignment with minimal effort:

dt_14_ruler_trick_marking_800.jpg


Once the cut lines had been transferred across, I peeled away the masking tape in the waste areas...

dt_15_removed_tape_800.jpg


... and then sawed out the waste:

dt_16_sawed_pins_800.jpg


When marking and sawing the mitres, I very, very nearly made a big mistake, but thankfully stopped myself after a light knife cut rather than after a heavy saw cut::

dt_17_nearly_oops_800.jpg


I'm lucky that I did that on the edge that's going to be on the back of the shelf, so even the knife line won't be visible.

With that done, it was time for more chiselling, this time using a 12 mm chisel to get very close to the line and then a 16 mm chisel for the final cuts. I figured that there was a lot more material to remove here (as the tail sockets are a lot wider than the pin sockets on the other board), so if I saved the wider chisel for just the final cuts, it would stay sharper and leave a better final finish.

dt_18_more_chiselling_800.jpg


The bits by the mitres were cut with a 5 mm chisel.

To sort out the mitres, I clamped on a bit of cherry that I'd previously planed to have a 45° angle on the end. A chisel could then be used to pare the end. In an ideal world, I'd probably be better to do this in several goes, doing test fits in between until I get a perfect fit. Laziness won, however, and I just pared to the knife line.

dt_19_chiselling_mitres_800.jpg


I also pared a little relief on the inside corners of the tails, to make them go in a bit easier and to give space for any glue that gets pushed down in to the corners:

dt_20_paring_relief_800.jpg


It was then time for a trial assembly:

dt_21_trial_assembly_800.jpg


That didn't go as easily as I would have liked: the joints are very tight. I always find it quite hard to work out where I need to pare material away to achieve a better fit (and not end up with big gaps). I've seen some youtube videos where they try putting things together and it leaves clear "burnish" marks on the bits where it's rubbing, but either my eyesight isn't good enough or those burnish marks don't seem to appear for me.

Anyway, after a few bits of back and forth, the joints went home, albeit with more mallet-based persuasion than is probably ideal. They'll probably need a bit more tweaking later to ease things up and make sure there's room for a bit of glue. Perhaps by the time I get to that stage I'll work out a way to determine where I need to adjust things.

The joints look okay to me, although there's the odd small gap on one or two of the mitres (serves me right for not creeping up on a perfect fit). They're small enough that I don't think it'll be especially obvious once the units assembled and on the wall.

Here's a couple of photos of one of the joints dry-fitted (chosen purely on the basis of it being the first one I looked at, so I'm not claiming it to be the best or the worst of the bunch!)

dt_22_joint_view_1_800.jpg


dt_23_joint_view_2_800.jpg


The next job is probably to start working on the tapered dovetail housing joints (aka tapered sliding dovetails). I'll probably do one or two practice goes before doing anything for real as my only experience of dovetail housings is a couple of practice joints I did a few months ago when thinking about this project. Enough time has passed since then that I feel the need for some more practice.
 
Before sawing off the mitred corner, I used an old mitre marking tool to make a knife line at 45° on the edge of the board
A souvenir of your trip to Beer?

Nice looking work, Al. And you're not the only one who has marked out a mitre the wrong way like that. I can even think of someone who has stuck a little triangle of wood back on!:mad:

Getting the right fit on dovetails is difficult, not least because hard and soft woods behave so differently. I remember my school woodwork teacher telling us that a professional would never do a test fit, but assemble straight from the saw.
Needless to say, his joints were a lot better than ours!
 
A souvenir of your trip to Beer?

Maybe, but not on the recent visits: I bought it back in 2020, not long after I first started woodwork.

Nice looking work, Al. And you're not the only one who has marked out a mitre the wrong way like that. I can even think of someone who has stuck a little triangle of wood back on!:mad:

I bet that made someone say "fiddlesticks"

Getting the right fit on dovetails is difficult, not least because hard and soft woods behave so differently. I remember my school woodwork teacher telling us that a professional would never do a test fit, but assemble straight from the saw.
Needless to say, his joints were a lot better than ours!

I've read in a few places that the first full fit should be with glue, but I can't see the harm of a test fit & I'd much rather be gluing up with confidence that it'll go smoothly.
 
I had a fairly slow start this morning and have been taking my time, working fairly slowly (probably operating at about 50 milli-Mike Gs rather than my normal 100). I wanted to practise a tapered dovetail housing joint, so I started by getting a couple of ash offcuts. One was cut off the end of one of the shelf unit's side pieces, so had already been planed square and to dimension. The other was rough and had a nasty knot in it, so I decided just to get the thicknesser out to get it a bit more respectable.

Interestingly, one result of this is that I've finally figured out why I'd been getting intermittent results with the thicknesser, sometimes getting loads of snipe and sometimes getting none. To sort this plank out (which was twisted and bowed), I put it on a piece of melamine-coated chipboard, shoved some wedges under it in strategic places and hot-melt glued it in place. I scribbled over the top in pencil and then, mounted on that "sled", it went through the thicknesser until the pencil marks had gone. There was loads of snipe.

The in-feed and out-feed tables on the thicknesser are raised above the bed slightly, so the ends of the board are lifted when they leave the thicknesser. However, sitting on the "sled", this action doesn't happen and hence there's nothing stopping snipe. If I then turn the board over and do the other side (without hand-planing down to the level of the snipe, which I did this time) the underside snipe results in a lack of support at the end and you may get snipe on the second side.

I guess it serves me right for trying to use a thicknesser as a surface planer.

Anyway, on to the practice piece. I decided to go slightly over-board with marking out the socket:

dh_01_marked_up_practice_piece_800.jpg


Part of the reason for quite so much information is to help me remember what I did (so if it works, I can do it again). Some of it (e.g. the big arrows pointing to the reference edge) is there so I can assess how well I did.

With all the marking up done, I ran a knife line along the edges of the tapered bit and then chiselled out a 20 mm long square pocket at the end:

dh_02_knifed_and_chiselled_square_800.jpg


I then clamped a block of wood (sweet chestnut I think) that I'd made a few months ago to the face of the board and used it as a guide to chisel the angled sides:

dh_03_chiselled_at_angle_800.jpg


To cut the rest of the side wall, I used a western-style 16-TPI (circa 1.6 mm pitch) cross-cut saw. I prefer using Japanese saws for most things, but I don't think they work very well for this type of cut. I'm never likely to win any awards for my sawing skills and only having 20 mm of stroke certainly doesn't help matters. It was a bit of a chore, but I got there in the end:

dh_04_sawing_at_angle_800.jpg


I also sawed a line down the middle as I figured this would make it easier to knock out the waste ...

dh_05_sawing_mid_line_800.jpg


... which I did with a chisel ...

dh_06_rough_out_with_chisel_800.jpg


... before finishing the bottom surface with a router plane & a 6 mm cutter:

dh_07_finish_with_router_800.jpg


With the socket complete, I could start work on the "shelf". I placed the offcut on top of the socket ...

dh_08_plank_placed_800.jpg


... and marked the width of the socket at the outer end:

dh_09_mark_width_800.jpg


I used a marking gauge to cut a shoulder line all the way round the plank. For the real shelves, I'll transfer this distance from the inner walls of the dovetails on the top and bottom parts (to get a consistent width all the way down through the unit) and then determine the overall length of the plank from those marks, but for the offcut it made sense to just square up the end and mark in from there.

I used a square to bring the pencil marks down to the shoulder line and then a 1:6 dovetail marker to bring them back up again to the end face:

dh_10_construct_shape_800.jpg


To mark the parallel edge, I used my edge distance gauge thing. For the tapered edge, I used the same sliding bevel I'd used to mark the taper on the socket.

dh_11_transfer_lines_800.jpg


I then spent a bit of time pondering how best to approach this. I wondered about doing the entire exercise with a chisel, but in the end decided to have another go with the western saw. I started by cutting a fairly deep knife wall (having two goes: knife, chisel, knife, chisel).

dh_12_knife_wall_800.jpg


I then used the knife wall to guide the saw:

dh_13_sawing_shoulder_800.jpg


After playing around with a few options, I clamped the 1:6 guide block in the vice, lined it up with the mark on the end grain and then used a chisel to pair down to the saw cut:

dh_14_chiselling_taper_800.jpg


I was a bit careless setting it up on the first side (the untapered side) and ended up cutting a bit deeper than I should have. I'll know not to do that on future ones. On the tapered side, it worked really well. For the tapered edge, the guide block was (obviously) at an angle relative to the top surface of the bench. That meant I could use it to guide me as I took a light cut, then check the angle with the sliding bevel. Having ensured the angle was right, I could keep taking more cuts, sliding the "shelf" along the bench and thereby (because of the angled guide block) taking a very slightly deeper cut each time as I crept up on the right dimension.

The finished result:

dh_15_finished_result_800.jpg


The overzealous cutting on the first side means that it doesn't line up perfectly with the reference line (which would mean that a shelf would be very slightly tilted). I know why that happened though, so I'm not too concerned:

dh_16_slightly_offset_800.jpg


There's also a bit of a gap where it should be nice and flush on the shoulder line:

dh_17_slightly_gappy_800.jpg


I think that's down to my (lack of) sawing skill: I'm pretty sure the blade wandered a bit as I cut the shoulder line on the "shelf". I haven't decided what to do about that on future tries, but a safe fall-back is to cut slightly-away from the line with the saw and then pare the last bit off with a chisel: I'm much more accurate with a chisel than I am with a saw!
 
There are some themes I recognise here. The urge to try out different approaches - knife or saw; saw then chisel or just chisel? (...don't you have any dovetail planes yet? ;))

Writing detailed posts like this is a good way to take notes. I've been on the same journey as you but can't remember what worked best!
 
There are some themes I recognise here. The urge to try out different approaches - knife or saw; saw then chisel or just chisel? (...don't you have any dovetail planes yet? ;))

Not yet, no :)

Writing detailed posts like this is a good way to take notes. I've been on the same journey as you but can't remember what worked best!

That's part of the reason I do it to be honest. Partly I find it quite good to get my thoughts down in writing, partly it helps me think back on what I've done and how to do it better, partly it gives me somewhere to refer to if I want to do it again and partly I get lots of useful feedback from the good citizens of the forum to help me learn better (or just different) ways of doing things.
 
I was generally happy with the socket that I'd cut this morning, but less so with the tail. Therefore, rather than re-cutting the entire joint, I thought I'd just have another go at cutting the tail, using a slightly different method.

After marking out in much the same way as before, I started the cutting process by cutting off the haunch section, this time using a Dozuki and staying half a millimetre or so from the lines.

dh_18_dozuki_800.jpg


I then chiselled that bit back to the lines and then cut the tail shape out, this time working entirely with the chisel. Until I'd got down a couple of millimetres, I stayed away from the shoulder line to avoid damaging it. Once I'd got a reasonable depth down, I just alternated paring cuts and shoulder-line chops, but I undercut the shoulder a little so that the back of the chisel wasn't quite touching the shoulder and hence couldn't damage it.

dh_19_chiselling_tail_800.jpg


After going back and forth quite a few times sneaking up on the fit, I was much more pleased with the result. There's still a small gap between target pencil line and the actual plank, but the gap is less than a millimetre, which is good enough for me:

dh_20_better_alignment_800.jpg


More importantly, the shoulder line looks a lot better:

dh_21_much_less_gappy_800.jpg


I'm much happier with this method (vs the sawn shoulder line) and I don't think it took me any longer really, so this is what I'll go with when I do the real shelves.
 
I've been gradually making a bit more progress on the shelf unit. Progress has been a little slow as it's been quite hot and there's only so much time I can manage to spend in the workshop at the moment. Four mistakes have been made (three of which are relatively minor) and I'm putting those at least partly down to keeping on working beyond the limits of my heat tolerance!

Anyway, I started the dovetail housings by marking the width of the shelf unit onto a story stick (from the inside dimension of the top and bottom dovetailed pieces) and then used that story stick to mark the width of the shoulder lines onto one of the shelves:

fdh_01_story_stick_800.jpg


I then transferred that across to the other shelf.

fdh_02_transferring_across_800.jpg


Another line was added 8 mm outside the shoulder lines. On the second shelf, I shot one end square and marked a line 8 mm in from the end and used that as one of the shoulder lines. That was a better method than on the first one, where I marked the two ends at arbitrary locations and hence had to chop off both ends of the board.

fdh_03_marking_length_800.jpg


With the boards marked to length, I sawed them roughly to length with a Kataba:

fdh_04_chopping_to_length_800.jpg


Dovetail housings reference off the shoulders and the sides of the tails, so the end isn't that important really, but I figured it couldn't hurt to quickly shoot them square and to the knife line:

fdh_05_shooting_to_length_800.jpg


I then got on the sockets. I decided to cut as many as possible in one go and then cut the tails afterwards. I started by marking up the frame side pieces, ensuring that the straight edge of each socket lined up between the two sides of the frame:

fdh_06_marking_sockets_800.jpg


Cutting the sockets went much the same as before, except that I made one minor tweak in the process. When sawing the first side of the first socket, I slipped slightly with the saw and took a bit of a chunk out of the board face:

fdh_07_saw_slip_800.jpg


It's not a big deal (I'm not even counting it as one of the four mistakes I mentioned earlier!) as it'll get hidden under the haunch of the shelf, but for the remaining saw cuts, I clamped a stop block to make sure the saw couldn't go further than I wanted it to:

fdh_08_stop_block_800.jpg


In some ways, I'm really pleased I made that slip: having the stop block there made the sawing process a lot quicker and easier as it was one fewer thing that I needed to concentrate on.

I cut as many sockets as I could without needing to mark up positions based on fitted shelves, then started working on the tails.

fdh_09_lots_of_sockets_800.jpg


On one of the tails, I made my first mistake. I think what I did was that I offered it up to the wrong socket when doing a test fit. There was quite a lot more to be removed, so I took quite a lot off with the chisel. I then offered it up and it was very loose. To fix that, I trimmed a bit off a thin offcut I had in the drawer and re-did the process of testing and adjusting until it was a nice tight fit with the offcut shoved in as well. Then I glued the offcut onto the tail:

fdh_10_fixing_whoops_800.jpg


The second mistake was similar, except it was just a case of being a bit overzealous when paring and leaving a fit that was only very slightly loose. For that one, I fixed it by gluing a piece of paper to the side of the tail and that was enough to sort it out.

With the tails of the two full-width shelves done, I could assemble the unit:

fdh_11_taking_shape_800.jpg


This is where I noticed the most significant of the four mistakes. If you remember back to my third post on this shelf unit, there was a bit of a notch in one of the pieces. I said at the time that "with careful planning that should get removed when I cut the rebate for the back".

fdh_12_back_to_front_whoops_800.jpg


Somehow I managed to arrange the panels such that the notch is at the front! Fiddlesticks!

I haven't decided exactly what I'm going to do about that; my initial thought is to round over the inside corner of the outer pieces, which should hide that blemish (but risk showing up any gaps in my mitres!)

With the frame assembled and the two shelves in place, I could use an offcut of plywood to mark the distance between the base and the bottom shelf:

fdh_13_marking_upright_height_800.jpg


I did that on both sides. The difference was less than a millimetre (which I was pleased about) and I split the difference when marking the upright.

This brings me on to mistake number four. Somehow, when I cut the piece for the upright that goes in the middle at the bottom, I cut it too short. Thankfully, it was only a few millimetres too short and I realised this after I'd only marked up the shoulder line on one end and before I'd cut the second of the two sockets into which it will engage. The fix in this case was to make the upper tail shorter (5 mm deep) than the lower one (which is 8 mm deep like all the others). Being an upright rather than a shelf, that tail isn't under much strain.

The shorter tail:

fdh_14_shallow_tail_800.jpg


Compared with the length of the other ones:

fdh_15_full_tail_800.jpg


Anyway, the frame is now fully assembled:

fdh_16_full_frame_800.jpg


I've still got quite a bit more to do, in particular:

  1. Ploughing the rebate for the back;
  2. Giving everything a very thorough going over with a card or cabinet scraper;
  3. Gluing it together & applying finish;
  4. Preparing this rather shabby bit of plywood that will become the back:

shabby_plywood_800.jpg


The plywood is going to get painted (hopefully not by me!) so it should look a lot better than it does at the moment. The frame feels extremely rigid, so I suspect it would probably be fine without a back, but I'm going to follow the advice I got from this forum and fit a back anyway.

The last thing to do after all that is sorted will be to add fixings to hold it onto the wall.
 
Referring to fitting shovetails earlier, I always test fit but only for the first few mm or so, never all the way to the bottom of the socket. By doing that, you can then see what's too tight and needs a little adjustment with a chisel for a much better fit.

You're right in that a professional cabinet makers would fit and glue straight from the saw, especially if they were working against the clock where 'time is money' and they were up against it. As mostly amateur woodworkers on WH2 (ie we don't get paid for our work, professionals do) we have the luxury of being able to take our time and think our way through a project (doesn't always happen :ROFLMAO:...I have all the T shirts). Even so, some pro' makers I know will still trial fit their shovetails if they're going to be 'on show' - Rob
 
After a bit of a break and a short ride out on the motorbike, I got back to it, starting with setting up the #45 to plough the rebates in the back of the side panels.

ff_01_ploughing_rebates_800.jpg


I had quite a few options for planes to use for this, including the #45 combination plane, a #55 combination plane, a #78 rebate plane and various fence-less options like a #10½ carriage-maker's rebate plane or a #311 shoulder plane. The #45 seems to work very well once it's set up, so that was the one I chose. Like an electric router, it takes a little while to install the cutter and set up the fence and depth stop, but once it's set up it takes very little time to cut the rebate. Unlike an electric router, it's a quiet & enjoyable job involving no ear defenders or dust mask!

ff_02_curly_shavings_800.jpg


With that done, I needed to get the notch (that should have been removed by the rebate) sorted. I installed a 50° iron in my low-angle block plane (to give a high cutting angle as the ash's grain is all over the place) and attacked the inside corners. I doubt they're all exactly the same, but that's part of the charm of hand tool wood work, isn't it?!

ff_03_rounding_corners_800.jpg


I also gave a very light rounding off of all the other corners that wouldn't be accessible when the unit is assembled and then I got a cabinet scraper and card scraper and gave the inside surfaces all a quick once-over:

ff_04_scraping_800.jpg


That didn't take long at all and is infinitely preferable to using sandpaper in my book.

During the next stage I didn't take many photos, so you'll just have to imagine it. I started by pouring out some of my current favourite glue:

ff_05_glue_800.jpg


I learnt recently that liquid fish glue is typically made from fish scales (whereas the dry flakes that you treat like hide glue flakes are made from isinglass). Either way, it is similar to Titebond Liquid Hide glue in that it likes to be applied warm. It takes a long time to set, which is really nice when you're doing a fairly complex glue-up.

I started by gluing the dovetails, following the David Charlesworth approach: glue on the tapered sides of the tails and a thin coating of glue on the outer half to two-thirds of the sides of the pins (so that the glue on the pins gets pushed down to the inner half of the pins, rather than being squeezed out of the inside of the joint). The only other glue I put on the dovetail joints was on the faces of the mitres.

Once the frame was assembled, I added the shelves one-by-one, gluing the three sides of the tails and similar on the sockets. I put a bit on the ends of the housing tails as well, but I don't think it'll do much. It all went together fairly easily without too much stress and it felt structurally sound enough that it probably didn't need any clamps.

However, I figured they couldn't hurt:

ff_06_lots_of_clamps_800.jpg
 
The unit came out of the clamps this morning and it was time for a tidy-up. I started by using my recently made block plane (which has a low bevel angle for planing end grain) to get the bulk of the sticking-out bits down (not that there was much to remove):

f01_block_plane_800.jpg


I then used this lot to finish off the outside faces:

f02_more_planes_800.jpg


Thanks to blind luck careful planning (ahem), the gaps between the shelves were just big enough for the vice jaw to go through, so it was quite easy to clamp the unit the bench when sorting the faces out:

f03_fits_in_vice_800.jpg


Once the faces were done, I plonked it down on the bench and planed the faces with a smoothing plane and added a light chamfer to break the sharp corners with the Quangsheng block plane:

f04_planing_front_face_800.jpg


The last detail to deal with was the internal round-overs. These were just done by eye, so of course they didn't quite line up:

f05_roundover_before_800.jpg


A few seconds work with a chisel resulted in:

f06_roundover_after_800.jpg


With that, the frame is done (apart from applying finish and adding something to allow wall-mounting):

f07_frame_finished_800.jpg


Before applying some finish, I thought I'd cut the shabby bit of plywood to size ready to hand it over to my other half for painting / covering / whatever she wants to do with it. The plywood sheet really isn't great and will henceforth be referred to as the "banana":

f08_banana_800.jpg


The frame has been made entirely with hand tools, but I couldn't quite summon up the enthusiasm for hand sawing this bit of horrible sheet, so I just got the track saw out. Unusually for me, I used the track clamps to hold the track down rather than just relying on the friction strip: I figured it would probably do a better job of cutting the banana if it was held flat!

f09_tracksaw_800.jpg


I could then place it in the frame:

f10_banana_2_800.jpg


To deal with that bow, I'm going to screw the plywood to the cabinet, with screws going into some of the middle shelves rather than just around the edge. To make sure I drill the screw holes in the right place, I turned the unit over and used a pencil to draw round the shelves:

f11_marking_around_shelves_800.jpg


Resulting in this, which should make it easy to position a selection of screw holes, which I'll drill before handing it over to Carolyn:

f13_marked_round_shelves_800.jpg
 
I've just caught up with this Al. Great write up, and it's a nice little project coming together nicely.

A few random things:

-what's a 16mm chisel? By that, I mean is it a metric chisel designed to be 16mm (why would they do that?), or is it a just-about 16mm (5/8") Imperial chisel?

-your sawing technique when sawing out the sides of the sliding dovetail. You say you only had 20mm of movement, but if you knife-and-chisel the line you should actually get a full length cut right from the start. Establish the saw line a mm or two deep, then drop the heel and cut down to full depth nearest you, establishing the angle, then work your way down at the far end, with only a 20mm follow-through. It's still a full length stroke, though.

-I'm fascinated by your use of jigs, such as, for instance, a saw guide for the sloping sides of the slot for the sliding dovetail. If I had some broad advice for you, given how quickly you've developed these last couple of years, it would be to trust yourself more. Jigs might have a place when you're starting, but you're now quite a skilled woodworker, and I think they're possibly slowing you up.

-the sliding dovetail is a classic, I think, of the offer-up-and-adjust school of woodworking. I'd be really disappointed if one fitted first time. I cut the male side of the joint oversized, and then it's a shoulder-planing and paring exercise to get it to go all the way in. That makes it a relatively quick joint to make, because you are never striving for perfection until the very last moment. A wax crayon can help guide your planing.....and as with most joints, it's the shoulders which are really doing the work.

-I really must try fish glue. I've spent a lifetime rushing glue-ups against shorter and shorter open times.

We must make a plan, Al, to find a way of having a day together in my workshop. You bring your toolbox, and we can just faff about cutting some joints. Or, I make Dursley a call on a trip out west to see Andy T...maybe when Tally Ho sails into Bristol docks.
 
I've just caught up with this Al. Great write up, and it's a nice little project coming together nicely.

Thanks Mike

A few random things:

-what's a 16mm chisel? By that, I mean is it a metric chisel designed to be 16mm (why would they do that?), or is it a just-about 16mm (5/8") Imperial chisel?

Urmm... it's a chisel that's 16 mm wide! It's made by Narex. Being a Czech company, they make things in metric sizes. I rather like that they're in metric sizes as I work in metric, so I don't have to engage the brain much to pick the best chisel for a given space (e.g. if I measure, or even just eyeball, the gap between tails as being about 5 mm, I'm probably going to reach for a 4 mm or perhaps 5 mm chisel; they're in order in the rack, so this is quick & easy and works well for me).

- your sawing technique when sawing out the sides of the sliding dovetail. You say you only had 20mm of movement, but if you knife-and-chisel the line you should actually get a full length cut right from the start. Establish the saw line a mm or two deep, then drop the heel and cut down to full depth nearest you, establishing the angle, then work your way down at the far end, with only a 20mm follow-through. It's still a full length stroke, though.

That makes sense - I think I was keeping most of the blade in contact with the wood all the way down (so sawing evenly rather than dropping the heel). That meant I was limited by the 20 mm follow through all the way through the cut.

-I'm fascinated by your use of jigs, such as, for instance, a saw guide for the sloping sides of the slot for the sliding dovetail. If I had some broad advice for you, given how quickly you've developed these last couple of years, it would be to trust yourself more. Jigs might have a place when you're starting, but you're now quite a skilled woodworker, and I think they're possibly slowing you up.

You might be right, but I'll admit to being nervous about losing the jigs. This is the first time I've done sliding dovetails and it's quite nice to be able to trust the jig and just worry about the process of getting a good joint.

When I started making normal dovetails, the jigs I made were a god-send as I could practice chiselling & careful marking up and alignment without worrying about sawing. Once I'd mastered the former, I could ditch the jig and just focus on sawing, knowing that the rest would be okay.

I feel in a similar place with sliding dovetails (and sawing is definitely my weakest woodworking skill, especially with western style saws).

-the sliding dovetail is a classic, I think, of the offer-up-and-adjust school of woodworking. I'd be really disappointed if one fitted first time. I cut the male side of the joint oversized, and then it's a shoulder-planing and paring exercise to get it to go all the way in. That makes it a relatively quick joint to make, because you are never striving for perfection until the very last moment. A wax crayon can help guide your planing.....and as with most joints, it's the shoulders which are really doing the work.

I did a lot of offer-up-and-adjust with this one, except I used the jig & a chisel rather than a plane. Adjusting it didn't take very long (once the jig was set up in the vice, I could deepen the cut by just sliding the board along the bench). I can see that a plane would be quicker though. What sort of plane do you use for it? My shoulder plane would (I think) cut into (or at least rub against) the shoulder as it would be canted over at the angle of the tail. I don't have a sliding dovetail plane.

-I really must try fish glue. I've spent a lifetime rushing glue-ups against shorter and shorter open times.

I really like it, although I don't think it is markedly different to Titebond Liquid Hide glue. I'm sure part of the reason I like it is that I came across it at a similar time to getting smarter about where glue gets applied (thanks mostly to David Charlesworth's videos), but the long setting time seems to help my naturally rather slow pace!

We must make a plan, Al, to find a way of having a day together in my workshop. You bring your toolbox, and we can just faff about cutting some joints. Or, I make Dursley a call on a trip out west to see Andy T...maybe when Tally Ho sails into Bristol docks.

That would be brilliant.
 
Back
Top