• Hi all and welcome to TheWoodHaven2 brought into the 21st Century, kicking and screaming! We all have Alasdair to thank for the vast bulk of the heavy lifting to get us here, no more so than me because he's taken away a huge burden of responsibility from my shoulders and brought us to this new shiny home, with all your previous content (hopefully) still intact! Please peruse and feed back. There is still plenty to do, like changing the colour scheme, adding the banner graphic, tweaking the odd setting here and there so I have added a new thread in the 'Technical Issues, Bugs and Feature Requests' forum for you to add any issues you find, any missing settings or just anything you'd like to see added/removed from the feature set that Xenforo offers. We will get to everything over the coming weeks so please be patient, but add anything at all to the thread I mention above and we promise to get to them over the next few days/weeks/months. In the meantime, please enjoy!

Upgrading my wearing out shed - in stages on a budget

So true. Thing is, I never even actually asked him. It was a ****ing forum and I opened up a 'off topic' thread about building a shed in brick. Plenty of helpful suggestions but he couldn't help chip in with 'you're incapable' or something like that. I just ignored it and never remarked back with, your incapable of doing your own bike repairs 😆.

Anyway, yes, thats what I did. I didn't use muck though, I used mortar 🤣. Just kidding, you sound like a builder... Having a nice earned rest now that I know I'm soon ready to start throwing the paving slabs back on!
 
🤣... right...

Not a builder sharing - just, at times, a quick learner 😎😉. I was 'instructed that sand and cement, once mixed, was referred to as "muck"... I got quite messy first few times... 🤣
 
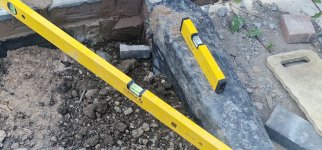
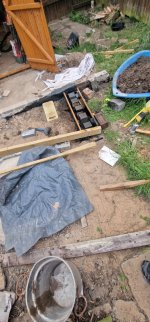
Here we go. After ages, finally I can see the inside of my cheap gorilla bucket (don't know why they stopped making em like the proper Gorilla buckets, must be happy to think we're all stupid). A few levels dotted around...20260715_192636.jpg20260715_192631.jpg20260715_192627.jpg20260715_192543.jpg20260715_192349.jpg
 
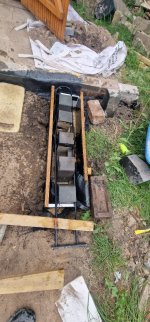
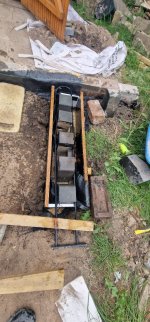
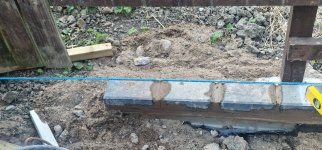
Quick update as I sacrificed the mtb ride! I thought about it and knew it would say over time. So some side supports going in with makeshift rebar and gaps for drainage hopefully.

MOT as the base hopefully helps drainage towards the grass too!!
20260718_114721.jpg20260718_114716.jpg20260718_114704.jpg
 
What is your plan for the patio concrete slabs?
You are working in very tight area. :)
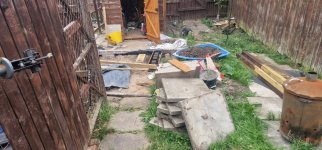
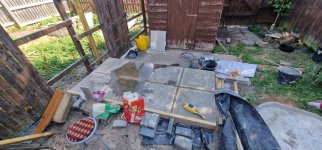
Once I've got a decent level (about now) I'm gonna throw at least 8 of them concrete slabs back onto the sand that I've tried to retain with that weak 3 tier wall. Hoping I've overengineered enough that the water falls nicely away and not too much side pressure onto the wall.

Yes, very tight area indeed but once 8 slabs are down/levelled then I can use up 2 of the fence posts to repair/support the weak posts that have rotten and get the other 8 slabs down. Then move down towards the shed and get some more area levelled and slabs put down.

Makes sense in my head, I think.
 
20260718_171456.jpg
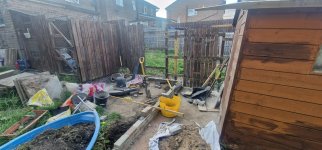
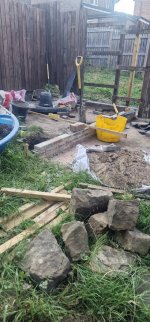
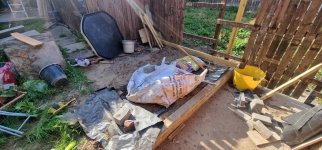
Mud from the kids water pool retired back into area it came from (under the slabs, I think). About 6 rocks and loads of old bricks smashed (safety spec on, also had a massive rock-shimmy across the garden!!) and mingled into the top soil.

Just next to the reatinign wall I used the smashed rocks and sharp sand to hopefully reduce stress here and allow water to escape easier. Sand thars been kept in the white builders sack, put back inside the ditch and cover it all over in the hope the cats will not come and s*it all over again!!

Used the sledge hammer/axe to tap/tamp it all down. Beats using my heels which is what was done 20+ years ago (worked well) whilst doing my old garden at Huddersfield. Am hoping I've tamped it enough thar the top soil will make its way around the smashed rocks sufficiently 🫣.

Money ran out but also need to go yo my mums for pizza. I reckon on Monday (pay day) I can spend 8 bags of sharp sand to get this half all level and then one more fence post in before completing this section of paving/patio (whatever) slabs.

Cats!! Can constantly smell their poo as they probably haven't had soft ground to do their deeds in for years. Still, not all of em bury it (of which I'm not thankful as its harder to find!).
 
@shafiq ... re the cat problem... you could try laying a barrier of dome sort where they're doing it - wire netting for example or some things scattered around to make it difficult.

You could also try to scatter lemon, lime, or orange peels on the area. There's also some plants like Coleus canina (the scaredy-cat plant), which emits a strong odor that cats find incredibly offensive. Other good choices include lavender, rosemary - but not sure about the lavender thing. We have two cats and some lavender plants - cats don't take notice of the lavender! But... 😉😎 I know your not presently looking to put plants in where your workshop is going 😉.

Coming along nicely 👌 👍 😊
 
View attachment 56488
Mud from the kids water pool retired back into area it came from (under the slabs, I think). About 6 rocks and loads of old bricks smashed (safety spec on, also had a massive rock-shimmy across the garden!!) and mingled into the top soil.

Just next to the reatinign wall I used the smashed rocks and sharp sand to hopefully reduce stress here and allow water to escape easier. Sand thars been kept in the white builders sack, put back inside the ditch and cover it all over in the hope the cats will not come and s*it all over again!!

Used the sledge hammer/axe to tap/tamp it all down. Beats using my heels which is what was done 20+ years ago (worked well) whilst doing my old garden at Huddersfield. Am hoping I've tamped it enough thar the top soil will make its way around the smashed rocks sufficiently 🫣.

Money ran out but also need to go yo my mums for pizza. I reckon on Monday (pay day) I can spend 8 bags of sharp sand to get this half all level and then one more fence post in before completing this section of paving/patio (whatever) slabs.

Cats!! Can constantly smell their poo as they probably haven't had soft ground to do their deeds in for years. Still, not all of em bury it (of which I'm not thankful as its harder to find!).
Maybe to help with materials you can search market place for free stuff, I do it often and have done well doing so.
 
Haha. Thanks for the cats info @Accipiter but once the sand is all covered up we should be sorted. Am working on how to increase the food/berrys for birds without yoo many feeders so maybe I could kill/feed 2 birds with one stone.

Once the shed/slabs are all sorted then I can work on 'whats next'. Coleus Canina, I'll remember that. 😀
 
Maybe to help with materials you can search market place for free stuff, I do it often and have done well doing so.
Thanks Duke. So far so good. Alot of the stuff thats gone in the ground was recycled. Sharp sand and building sand all shop bought by me. There is a builders bag of sharp sand 10 miles away, but I'd rather not figure out how to move that in my small Toyota Estate. So certain things I'll just wait until pay day and buy.
 
Conflicted! Do I start putting down some slabs to reduce the footprint of where the cats can do their business. Of do I use my head and go indoors and continue tomorrow... Hmmm

20260721_220448.jpg

Earlier
20260721_205805.jpg
 
I Asked AI about building a single skin brick shed (well, a hybrid is what I'm thinking) but it seems to think I'll get condensation/damp risk! Surely a few vents should sorr that!Screenshot_20260724_052519_ChatGPT.jpgScreenshot_20260724_052534_ChatGPT.jpgScreenshot_20260724_052542_ChatGPT.jpgScreenshot_20260724_052556_ChatGPT.jpg
 
*My* thoughts @shafiq ... vents would help but would most likely need a fan of some type to draw the air/moisture/damp out. You can get some that are kind of 'automatic'; don't need wiring in. I forget the name/type but readily find' able via a search.

When I extended mine - already had an 8' x 8' in the place when buying the house, built from concrete/breeze blocks: 4 x 18 x 9 inch... corrugated roof sheeting. I built the extension from concrete/breeze blocks so continuing the wall thickness. Single skin.

I didn't see any 'condensation' but it was, as would be expected, cold in the cooler months of the year. I had access to some 1" old celotex type insulation boards and put them on 3 wall of the back (old) unit - also the ceiling in that area. Unfortunately doing the ceiling hid a crack in some of the roof sheeting and rain got in... unknown affecting some of my tools that the water/rain fell on. Roof replaced.

I didn't get round to doing the interior of the extension until 2021~23... I lined the inside with 12mm OSB and then covered that with a 1.5mm 2mm uPVC sheeting. I also (about the same time) covered the outside of the blocks with timber cladding. Attached batten to the block wall and the feather edge fence boards... I didn't cover with any type of plastic sheeting to act as a barrier - probably should have.

Although as you've said, and has the AI, you'll loose on the interior of your unit if lining the inside with some insulation, you could consider putting the insulation up on the outer face of the bricks and the cladding over that. Probably not the look you are after with using bricks?

Consider timber frames on the brick plinths, infill the voids in the frames with insulation, line with a barrier membrane over and then clad with something you/your "boss" would find amenable to look at. Using timber frames, infilled with insulation and then clad will not take away from your inner dimensions.
 
Thanks @Accipiter good info as always. I have access to some thick insulation (Celotex I think) which my sister did not use. I might ask him if I can buy the job lot off him and see about insulating from the outside and then possibly some sort of render. Overthinking it I know, but ever since our local Uni (Huddersfield) upgraded their building designs to add the insulation from the outside and rendered over, I've always been intrigued.

Roof, still thinking about that but I bought a book called, Great Shed (designs) so am keep to get it looking rather unique/nice. I know that will cost a bit of money but the money saved so far on treading carefully can hopefully be spent later...
 
Anyway, gents. Everyone loves a good and successful picture... Did a quick pour water test and it seems I might just have gotten the levels right. Every lift was me feeling like I'm in a StrongMan competition though so had to be super careful!!

Have also added some pf the spare mortar behind the sand on this side to hopefully help it from sagging until I gets to the second 8 slabs!
 

Attachments

  • 20260724_103138.jpg
    20260724_103138.jpg
    223.1 KB · Views: 9
Thanks @Accipiter good info as always.
You're welcome. Just based on my experience - done correctly or not - and it seemingly works 🤔

I have access to some thick insulation (Celotex I think) which my sister did not use. I might ask him if I can buy the job lot off him
😎... I'd be *hinting* at "being super helpful, I'll take it off your hands to help get it out of your way. No charge for removing it to give you the space back"... worth a punt 😎🙃😂

and see about insulating from the outside and then possibly some sort of render. Overthinking it I know, but ever since our local Uni (Huddersfield) upgraded their building designs to add the insulation from the outside and rendered over, I've always been intrigued.
Doubt you're over thinking... I've not tried that - rendering insulation boards outside. May need a certain pre coating to get the render to stick properly... 🙃🤔... If it gives more internal space then, again, worth looking into.

Roof, still thinking about that but I bought a book called, Great Shed (designs) so am keep to get it looking rather unique/nice. I know that will cost a bit of money but the money saved so far on treading carefully can hopefully be spent later...
Yes... I was limited for *spare dosh* to do mine. Used the black corrugated bitumen sheets on both - old section and the extended (new) section. Initially just boarded and felted. Over time the felt split so over coated with a bitumen treatment out of a tin.

As I recently (2~3 years ago now?) had to replace/renovated all of it - new boards over the old - I was able to remove the corrugated roof sheets to reuse. Needed to make the new section roof a tad steeper to help with rain run off. Used some firrings for that, ply boards on top, 2 coats of a resin/bitumed treatment, corrugated bitumen sheets back...

I did consider used EDPM roofing, rubber sheet, but for costs and being able to reuse the corrugated. A nice EPDM covered roof does look rather good 👍

Just some stuff, my ramblings 🤔😎😂, for you to think on based on what I'd had to go through not too long ago.

I'd also had to replace the roof material on the back of the house lean-to at the same time - that took priority. Used firrings for that also, covered with new felt. Because of the width of the lean-to (and having to cut the boards to be able to get through the house - no rear access) I had some (10 off 48" x 27" 18mm) ply offcuts which I used for the fliptop workbenches for workshop.

Good progress so far with yours Shafiq 👍
 
Thanks v much @Accipiter and regards that insulation. She asked me to make an offer (8 sheets, around 75mm thick celotex) and I said £100. Lots of wood they have given me for free and the brickettes to make my wall and a few to bury and get this level right...

Anyway, for the paving slabs, despite trying to keep concrete usage to a minimum. I still ended up building up a massive (thin but deep) trench towards the grass. This hopefully means water can drain out from it to the garden and the slabs will stay put. Used some gravel beneath the concrete to ensure the drainage...

Thanks again.
 
I'm not a builder and am unfamiliar with your soil type etc, but I have doubts the "slab" you have constructed would be able to support a brick walled building. I think you should make it as light as possible using wood studs with insulation to prevent the "foundation" from settling.

Pete
 
I'm not a builder and am unfamiliar with your soil type etc, but I have doubts the "slab" you have constructed would be able to support a brick walled building. I think you should make it as light as possible using wood studs with insulation to prevent the "foundation" from settling.

Pete
Its true. I was thinking the bulk of the bricks would be on concrete slabs (side and back) and under these slabs I went deep down to the clay. The 8 slabs I've laid now are part of the garden and not for the shed. It might hang over via the roof!
 
Thanks v much @Accipiter and regards that insulation. She asked me to make an offer (8 sheets, around 75mm thick celotex) and I said £100. Lots of wood they have given me for free and the brickettes to make my wall and a few to bury and and get this level right.
Fair doos shafiq 🙃. I was kinda joshing with you and the "worth a punt" to see if you could "get for free" - not being aware they've provided you a fair bit of timber and such 😎
 
Back
Top