• Hi all and welcome to TheWoodHaven2 brought into the 21st Century, kicking and screaming! We all have Alasdair to thank for the vast bulk of the heavy lifting to get us here, no more so than me because he's taken away a huge burden of responsibility from my shoulders and brought us to this new shiny home, with all your previous content (hopefully) still intact! Please peruse and feed back. There is still plenty to do, like changing the colour scheme, adding the banner graphic, tweaking the odd setting here and there so I have added a new thread in the 'Technical Issues, Bugs and Feature Requests' forum for you to add any issues you find, any missing settings or just anything you'd like to see added/removed from the feature set that Xenforo offers. We will get to everything over the coming weeks so please be patient, but add anything at all to the thread I mention above and we promise to get to them over the next few days/weeks/months. In the meantime, please enjoy!

Post a photo of the last thing you made...

Thanks Andy, but I wouldn't by a new Cliffie as the old green ones were IMO better...so I bought a couple of 'old skool' ones from CHT 😁 - Rob

Edit - this No.4 though would be great for a newbie to the forum who needed a decent smoother at a respectable price point
It’s all I’ve ever used -or needed, I did lash out on a LN 4 but sold it as I couldn’t hold it comfortably with my big hand.
I bought a plastic handled Stanley 4 over here and it’s been great with virtually no extra work needed.
 
A three legged oak stool.

Only two legs on display! ...

View attachment 39746

Octagonal tapered legs which I planed on a simple jig ...

View attachment 39747

Slightly dished seat ...

View attachment 39748View attachment 39749

Probably should have made the tenons a bit thinner ...

View attachment 39750

I could have oriented the legs a bit better as the oak had some lovely medullary rays which are inward facing on two of the legs ...

View attachment 39751
Great looking stool Rob.
 
The thing I love about the results of the CNC machine, except when I cock up the settings, is the absolute repeatability.

3EF7B53C-16C0-487F-A18E-10A822DD8CA7.jpeg

I used to make these by hand for my sisters' craft stall, but I could never get them as identical as this.
 
Last edited:
Not much, but it is to me. Thought it best to post it on here this time as they're probably sick of me and my jointing of late. I'm very thankful to God and all those that helped me get this far as I never ever thought I'd be making my own boards one day, without screws and that.

Anyway, before anyone starts rattling with the suspense. I give you, a drawer side 😆
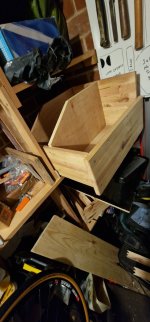
. I did read the rules in the first post by Trim so will only post the one. Though this is probably my best yet.

20260327_005558.jpg20260327_005602.jpg20260327_005616.jpg20260327_005620.jpg

One side still looks a bit scalloped as its function over looks. Went a bit too thin for such a wide board probably, but the Blum runner its fitting inside needs 16mm max thickness, so no choice! All recycled wood generally and some recycled more than once.

Three joints in case it's that good that you can't see the lines. Got a bit carried away with quick planing and took out a chunk, so its gone back on (call it the 3rd joint).
As you were 😆
 
To bring this drawer side into perspective, please explain what you are building? :)
The younger (in terms of date of production) but taller and hopefully prettier brother of this Duke. This next one will take my dried sycamore (well, it might get microwaved at aome point before use) in stood up lengths/blocks.

First drawer box as pictured, had a 6 or 7mm ply base, recessed in. This next one might have to have a 12mm or thicker - not sure as the weight of the wood shouldn't hinder it longevity, but equally the Blum Runners are only rated to 30kg. So I'm assuming 60kg total capacity - recessed base. Sides are 16mm as a given. The centre section won't be glued in but removable 12mm ply.

The front, right side and back will be of same/similar height. As it's not at eye level I think this more equal design wonder hinder its usefulness. It'll go beneath the first one. Reason for such a silly design is that it should be mainly accessible from the side, so once opened.
 

Attachments

  • 20260315_005207.jpg
    20260315_005207.jpg
    117.1 KB · Views: 11
  • 20260315_231435.jpg
    20260315_231435.jpg
    129.1 KB · Views: 10
  • 20260315_231438.jpg
    20260315_231438.jpg
    116 KB · Views: 11
  • 20260315_231443.jpg
    20260315_231443.jpg
    124.3 KB · Views: 11
Last edited:
Fits in there just right.
Thanks Malc. Took alot of maths and an out of square, square (I'm gonna bin it soon and just use my roofers Hultafors, until I can save up for a nice shiny accurate one). Keen to make the second box alot prettier and managed to get outta bed early today to (almost) finish squaring the 3 sides up. Back will be ply, so straightforward.

Just one more glue-joint to go. Currently sat 'weathering' under a bit of weight on the glass table.

20260327_081012.jpg
 
Shafiq? Don't waste money. Peen the angle between the two arms of your square and get it back accurate again. (I'm assuming its a roofing square?). It took 8 'goes' to rectify mine after I dropped it - from a roof! That was 15 years ago and it's been spot on since.
 
Shafiq? Don't waste money. Peen the angle between the two arms of your square and get it back accurate again. (I'm assuming its a roofing square?). It took 8 'goes' to rectify mine after I dropped it - from a roof! That was 15 years ago and it's been spot on since.
The roofers square (Hultafors) is actually currently my best square (after the small engineers square that only comes out for dovetails). Its a standard made in Poland (I think). I'll look at trying to get it more precise first 😀.

"Don't waste your money", I do like the sound of that Sammy. Thanks.
Have a look at the Bacho combination squares they are very acurate and cheap, you have to knock some sharp edges off.
They do a 4000mm blade one which is very nice.

Pete
 
Couldn't joint the end to end grain (unless I wanted a substandard front side to the drawer). Added a couple of dovetail joints. Not the prettiest but they fit nice and tight. Rather happy and thankful that I managed to achieve it.
 

Attachments

  • 20260327_214534.jpg
    20260327_214534.jpg
    109.7 KB · Views: 7
  • 20260327_233755.jpg
    20260327_233755.jpg
    106.5 KB · Views: 7
  • 20260327_233757.jpg
    20260327_233757.jpg
    131 KB · Views: 7
Have a look at the Bacho combination squares they are very acurate and cheap, you have to knock some sharp edges off.
They do a 4000mm blade one which is very nice.

Pete
Will do thanks Pete. Though a 4m blade might be above my needs 😄 and difficult to manage.
 
Have a look at the Bacho combination squares they are very acurate and cheap, you have to knock some sharp edges off.
They do a 4000mm blade one which is very nice.

Pete
Seconded. I have one and its piddly wee brother, 100mm I think. The castings come with surprisingly sharp edges, you can kiss them with a file if you want, but their accuracy is just fine. Peter Millard put.me on to them; he used them widely in his videos.
 
Looking at these,the spoons ,bowls,Dr Als bench plane and marvelling at the massive diversity all under the 'woodworking' label.
I need to get out into the shed and generate some sawdust
 
Looking at these,the spoons ,bowls,Dr Als bench plane and marvelling at the massive diversity all under the 'woodworking' label.
I need to get out into the shed and generate some sawdust
Same here - but sawdust from something other than for the workshop itself 🤪. Turning a bowl or three... make a box or something... not a wall unit or mobile unit of some sort... 😎
 
Well, I screwed up something (well, something that was part of the plans of not being screwed up) but I'll not bother with the details of what. Let's just say, I was impatient and now I'll not be having a removable plywood divider in this one. Dropped a bit of glue in one groove to allow it to set straight (impatient... or maybe just trying to keep everything that was unsquare, square).

Tomorrow I'll dig out 2 more grooves and get the ply base in and screw it all together and hopefully into place!! Taken it's time, but there's no rush 😆.

20260331_021335.jpg
 
Back
Top