duke
Old Oak
Looking very nice.


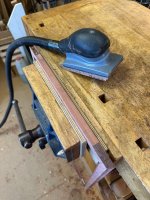
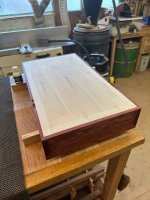
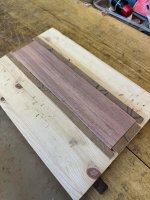
The shelves were quarter sawn as I mentioned Ian and so very prone to horrible tear out and other such nasties. I deliberately left them at 5mm from the planer thicknesses, knowing that I would be sanding off a lot of material to finish at 4mm. At least quarter sawn shelves ought not to bow or twist as I'd left them 'conditioning' in stick for a couple of months.Yes nice, particularly like the small (non clunky) section of the shelves. That stuff is a beggar to work Rob, I would have been tempted to dispose of it some way I think! As I mentioned before I don’t think I have your almost extreme level of patience lol.
I’m curious about the B square as to why the corner has been removed by the maker, I would definitely have preferred it almost sharp to aid marks being transferred, I did look at their site and it’s various uses btw.
Ian
And you had me looking at it again with a covetous eye, then I saw the internal diameter at just under 20mm, looked at my fat sausage fingers and realised there was no way they would fit, shame.The shelves were quarter sawn as I mentioned Ian and so very prone to horrible tear out and other such nasties. I deliberately left them at 5mm from the planer thicknesses, knowing that I would be sanding off a lot of material to finish at 4mm. At least quarter sawn shelves ought not to bow or twist as I'd left them 'conditioning' in stick for a couple of months.
The little B square belies it's usefulness as it's something I reach for time and again to aid marking out etc. It's not cheap, but it's nice, heavy cast iron gizmo to have on the 'Tool Wall' and after having used it now for some time, it's not something I'd be without. No idea though, why that corner has been machined off! - Rob


There is obviously some truth in that, but beyond the very fine grades, you can't see them! We did a trial years ago when I worked for a firm making stuff for Linley (Linners) and at 320g and up the scratch pattern couldn't be seen; you could even sand across the grain and still not see the scratch pattern. Everything made for Linners was finished to 320g and often 240g on open grained timbers like Oak.A video on my YouTube feed the other day about finishing wood surfaces had me wondering... based on some Japanese methods... no sanding but using "scrappers" instead to get a smooth surface - sanding leaving scratches even when using extremely fine grades...
If I come across it again - or it comes up in the feeds again - I'll get the link to share for discussion.
First thing that came to my mind was tad painful on the thumbs
Quite agree about the grades, a lot of them over here say they go over a thousand, bonkers, surely they can (or can’t) see that there’s no discernible difference?There is obviously some truth in that, but beyond the very fine grades, you can't see them! We did a trial years ago when I worked for a firm making stuff for Linley (Linners) and at 320g and up the scratch pattern couldn't be seen; you could even sand across the grain and still not see the scratch pattern. Everything made for Linners was finished to 320g and often 240g on open grained timbers like Oak.
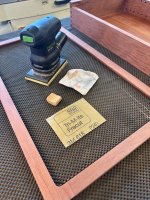
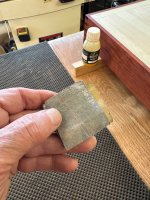
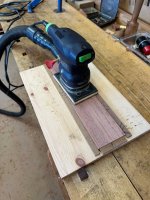
That little Festool jobbie is a finishing sander and I can guarantee that you won't see the scratches at 320g....can you spot any on the back panel ('cos that's how it was finished)?? - Rob


That's completely barking Ian!Quite agree about the grades, a lot of them over here say they go over a thousand, bonkers, surely they can (or can’t) see that there’s no discernible difference?
Most of the time, the Japanese use very different timbers to those in the West and as far as I recollect, there's none that they use to make furniture (Japanese Oak and Zelkova are common) which are like Bubinga and similar, though more than happy to be proved wrong! That means that their lovely, relatively straight grained timbers are easy to plane and scrape.I agree with you both Rob, Ian... I was just intrigued by his video - a fair bit of waffle and shots of different stuff such as using a Japanese plane to get the thinnest of shavings from the wood, almost able to see through - but that belongs with the competitions they hold... and the video shared not so long ago.
As well as the scraper use there was also the mention of the finish applied - Urushi? - and furnishings with wood shavings. *Master Kenji" - This one possibly... if you've 20 minutes to spare - or 5 if you skip through
Most of the time, the Japanese use very different timbers to those in the West and as far as I recollect, there's none that they use to make furniture (Japanese Oak and Zelkova are common) which are like Bubinga and similar, though more than happy to be proved wrong! That means that their lovely, relatively straight grained timbers are easy to plane and scrape.
Having seen fragments of that clip, quite a lot of it is the usual UToob crap and needs to be taken with a large dose of salt. The Japanese unquestionably use urishi lacquer for all very fine furniture finishing and having been up close and very personal to it (less than 100mm on a Kenji Suda piece) it easily surpasses any finish (inc French Polish) that we use in the West - Rob
... I do take most of what I see on Utoob with a "big pinch of salt" anyway