• Hi all and welcome to TheWoodHaven2 brought into the 21st Century, kicking and screaming! We all have Alasdair to thank for the vast bulk of the heavy lifting to get us here, no more so than me because he's taken away a huge burden of responsibility from my shoulders and brought us to this new shiny home, with all your previous content (hopefully) still intact! Please peruse and feed back. There is still plenty to do, like changing the colour scheme, adding the banner graphic, tweaking the odd setting here and there so I have added a new thread in the 'Technical Issues, Bugs and Feature Requests' forum for you to add any issues you find, any missing settings or just anything you'd like to see added/removed from the feature set that Xenforo offers. We will get to everything over the coming weeks so please be patient, but add anything at all to the thread I mention above and we promise to get to them over the next few days/weeks/months. In the meantime, please enjoy!

A Little Somethimg for Christmas

DaveL

Old Oak
Joined
Jul 21, 2014
Messages
2,044
Reaction score
132
Location
Sudbury, Suffolk
I have a subscription to Woodturning magazine and this is based on a two part project that Colwin Way did.
All of the timber came from things I have been given as fire wood, but it was much too good for that.
I used my old Wadkin, Multico and Perform, saw, planer and thicknesser to get down to the sizes you see me working on.
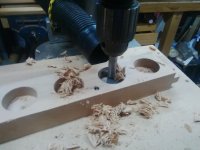
IMG_20171208_155341.jpg
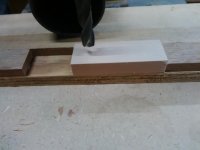
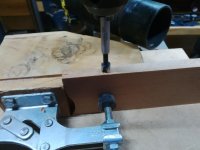
First there are going to be Tee light holders so holes drilled to take the nice brassed inserts.
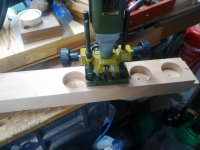
IMG_20171208_160026.jpg
I used a cheap Chinese round over cutter in my Proxxon it the router attachment to ease the edges of the holes.
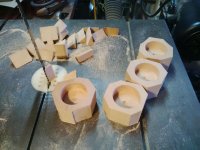
IMG_20171210_120847.jpg
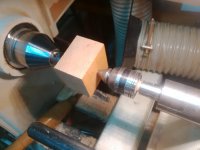
Each hole is then cut from the length of stock ready for turning.
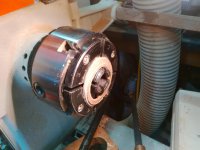
IMG_20171210_121305.jpg
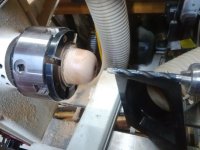
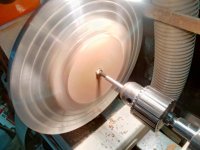
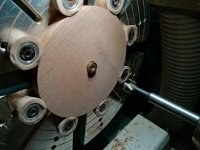
I use a spacer in the form of a disc of hard board to get the work out from the jaws.
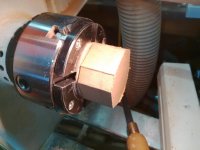
IMG_20171210_121340.jpg
Ready for turning.
IMG_20171210_162838.jpg
Turned and a hole drilled for it to sit on a dowel peg.
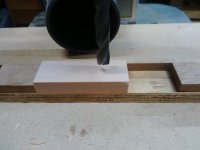
 
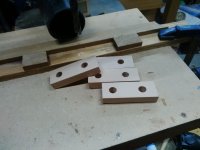
The feet are little bits of flat stock with a couple of holes for dowel and a rounded end.
They were cut using a stop on the mitre guide on the Wadkin.
IMG_20171210_202256.jpg
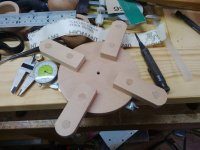
A simple jig allows the holes to be drilled.
IMG_20171210_202301.jpg
At different distances from each end, by using two stops, with one drill position.
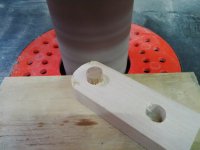
IMG_20171210_202541.jpg
Then over to the bobbin sander to round one end.
IMG_20171210_202932.jpg
The jig just has a dowel to pivot the leg on and a stop that sits against the edge of the table.
 
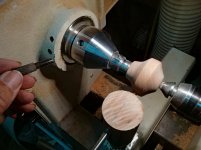
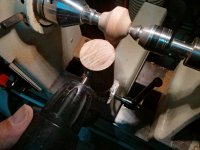
I machined some thin boards for the bases, there are two. One the the feet fit to and a thinner one that mounts on the centre column, I marked the centres for these and cut them roughly to size on the bandsaw, then mounted them on a screw chuck to turn them to the finished sizes.
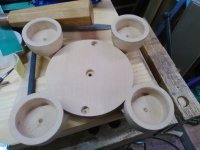
IMG_20171212_202111_hdr.jpg
The stationary base has a counter bore in its centre.
IMG_20171212_202212_hdr.jpg
To take a small brass bearing cup, that is not quite deep enough.
IMG_20171217_152310.jpg
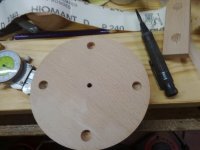
It then has four holes in the underside to take the dowels in the feet.
IMG_20171217_152338.jpg
Which are just a press fit, I made the dowels using the Veritas dowel maker just like I did for the table.
The top of this base has two holes for the support columns to fit into.
IMG_20171217_152407.jpg
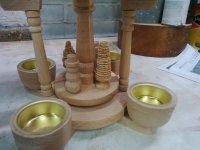
As you can see here. The tee light holders just press on to the dowels in the feet.
 
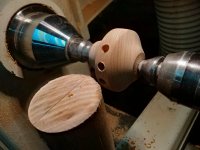
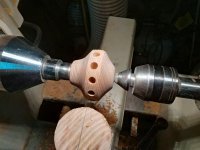
There is a hub that needs 12 holes in its edge.
IMG_20171212_160140.jpg
This is turned between centres.
IMG_20171212_163435_hdr.jpg
Then with a home made drill guide setup in the tool rest support, I unpluded the lathe and for the first time used the indexing pin.
IMG_20171212_163555_hdr.jpg
Then the first of the 12 holes was drilled.
IMG_20171212_163743_hdr.jpg
The index pin was wound out and the spindle advanced to the next indent.
IMG_20171212_164204_hdr.jpg
I repeated this until I was back at the start.
 
DaveL":14xllnsz said:
Then with a home made drill guide setup in the tool rest support, I unpluded the lathe and for the first time used the indexing pin.

Brilliant, thanks for showing that. When I wanted to drill evenly spaced holes in the side of a bowl I carried the bench drill over to the lathe and clamped it to the lathe bed and drilled vertically. Your way is much easier.
 
I turned a centre column with a tenon on its base to fit a hole on the revolving base. This had a 3mm hole though it, I had to buy some long series drills to do that job.
IMG_20171213_150444.jpg
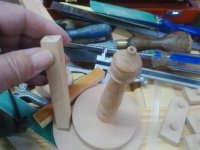
Then two support pillar need turning.
IMG_20171217_153510.jpg
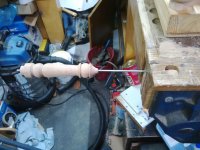
The centre column has a length of 3mm silver steel pushed though the hole with a point on the end to run it the brass bearing in the base.
IMG_20171214_201302.jpg
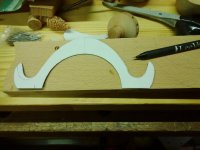
A support arch sits on top of the to support columns, marked out.
IMG_20171214_201937.jpg
Holes drilled before the arch is cut out.
IMG_20171217_143747.jpg
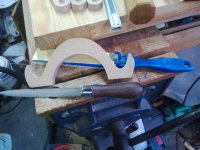
Cut out on the bandsaw, I then used the bobbin sander and a rasp to clean up the profile.
IMG_20171217_145954.jpg
And to my relief it fitted on the top of the pillars.
IMG_20171217_153554.jpg
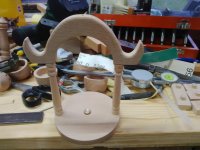
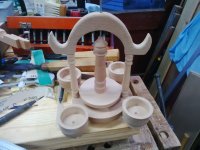
Here are the main parts fitted together.
IMG_20171217_153726.jpg
Of course the sliver steel rod was too long and I hacksawed the end off.
 
Nice work, Dave.

I have to say, the first time I saw the arch, I thought it was a Dutch milkmaid's hair! :D
 
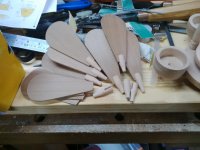
The last thing needed to complete this is a fan, I showed the hub I made. The blades are two part, the blades are made from cedar, Mike best stop reading now, I cut up an old drafting table to make these. Resawing into thin strips and planing them down to 3mm.
Sorry no pictures, but I did use a trick to get down to that thinness, my Perform thicknesser will not go that thin, but by fitting a bit of laminate flooring with a stop that hooked on the end of the cast iron bed I could get down to the 3mm. I use a cardboard template to mark them all out on the now thin board, cut them on the bandsaw and used a very fine disc on a disc sander to clean up the edges.
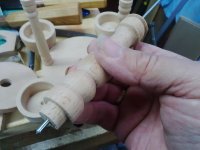
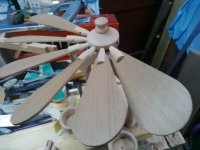
The blades are held by little turned adaptors with a tapered end that pushes into the holes in the hub.
IMG_20171217_154524.jpg
I had to use a steel rule with a strip of sand paper wrapped over it to adjust the fit of the slot.
IMG_20171217_154713.jpg
The hub is a push fit on the end of the silver steel and I fitted a little knob on the top to give something to hold onto while fitting the blades.
IMG_20171217_155232.jpg
I turned some little snowmen and Christmas trees to go on the centre base.
 
Andy I am glad that will help you out, it is a common technique that is often used.

Its funny the Dutch connection keeps popping up on a number of things recently. 8-)

I do have a bit of video, but I have not had time to upload it, the thing does work but its very slow to start, which is a bit of a disappointment.
I now have to write some instructions on how to put it together, I am giving this to my sister for Christmas.
 
Brilliant Dave. We have a small metal one of those which turns by the heat if the wood stove, as well as the candles. Yours is much more classy.

The best thing about your WIPs is the uncluttered workshop in the background :) . This makes me feel so much better about the state of mine.
 
Dave, that is VERY nice indeed. The idea and the work you put into it.

:eusa-clap: :text-goodpost:


The brass cups - where do you source them from? I have looked locally and struggle to find even glass ones for the T-lights.


Andyp":1k6udb4f said:
We have a small metal one of those which turns by the heat if the wood stove, as well as the candles.

We have a brass one, a Glockenspiel, which was an Xmas pressie from a German lady when I was about 10. Still have the original box, gets unpacked each year. (58 years ago! Quite frightning how time has passed.
The lady is still alive living in North West Germany.)
 
Great set of photos Dave thanks for taking the time to share :eusa-clap:

I’m sure your sister will be delighted with it, nice one :eusa-clap:
 
TrimTheKing":262n6ivk said:
Very nice Dave, though my mind does see something of the phallic in that top of that centre column... :shock: :oops: :lol:

Cheers
Mark


With a mind like that you need to steer clear of turning mushrooms on a lathe :lol:
 
Dave and others.

Can you recommend a good source of those cups to hold the tea lights please.

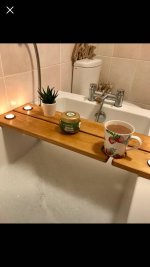
Someone has asked me to make something like this.

Bath board.jpg

So I need metal ones not glass for safety in the bathroom and possibly anodised aluminium for best resistance to corrosion when used/stored in a steamy atmosphere.

TIA
Bob

PS I've not used tea lights before. Are they all a standard size? Need cups to hold the largest common size really.
 
I got something unpleasant for Christmas - a nasty cold!!
It’s been doing the rounds with the family but hit me a couple of days ago. [emoji53]
 
9fingers":1076v42x said:
PS I've not used tea lights before. Are they all a standard size? Need cups to hold the largest common size really.


The ones I buy are a b-hair under 38mm. I use a 38mm Forstner for the holes.

Depth 15mm although I have seen smaller.
 
Phil":1au5pqpg said:
9fingers":1au5pqpg said:
PS I've not used tea lights before. Are they all a standard size? Need cups to hold the largest common size really.


The ones I buy are a b-hair under 38mm. I use a 38mm Forstner for the holes.

Depth 15mm although I have seen smaller.

Thanks Phil
The cups seem to be offered as 12mm or 18mm so I went for the deeper ones to be on the safe side.
Cheers
Bob
 
The metal tee light holders were bought on eBay, from a seller in Germany, even with the postage they were cheaper than any I could find in th UK. I think I bought 24, I do plan to make more of these, that's the other reason for coming up with the jigs used in the production of this one.
 
Back
Top