• Hi all and welcome to TheWoodHaven2 brought into the 21st Century, kicking and screaming! We all have Alasdair to thank for the vast bulk of the heavy lifting to get us here, no more so than me because he's taken away a huge burden of responsibility from my shoulders and brought us to this new shiny home, with all your previous content (hopefully) still intact! Please peruse and feed back. There is still plenty to do, like changing the colour scheme, adding the banner graphic, tweaking the odd setting here and there so I have added a new thread in the 'Technical Issues, Bugs and Feature Requests' forum for you to add any issues you find, any missing settings or just anything you'd like to see added/removed from the feature set that Xenforo offers. We will get to everything over the coming weeks so please be patient, but add anything at all to the thread I mention above and we promise to get to them over the next few days/weeks/months. In the meantime, please enjoy!

Barrister Bookcases- the end is nigh!

9fingers

Moderator
Staff member
Joined
Jul 21, 2014
Messages
10,414
Reaction score
164
Location
Romsey Hampshire between Southampton and the New F
I had to have a stern word with myself recently to complete phase three of this project.

The first two phases were straightforward stacks of 5 book cases but the third phase to be located at the other end of the room picked up the odds and ends requirements but in the same style as the others.
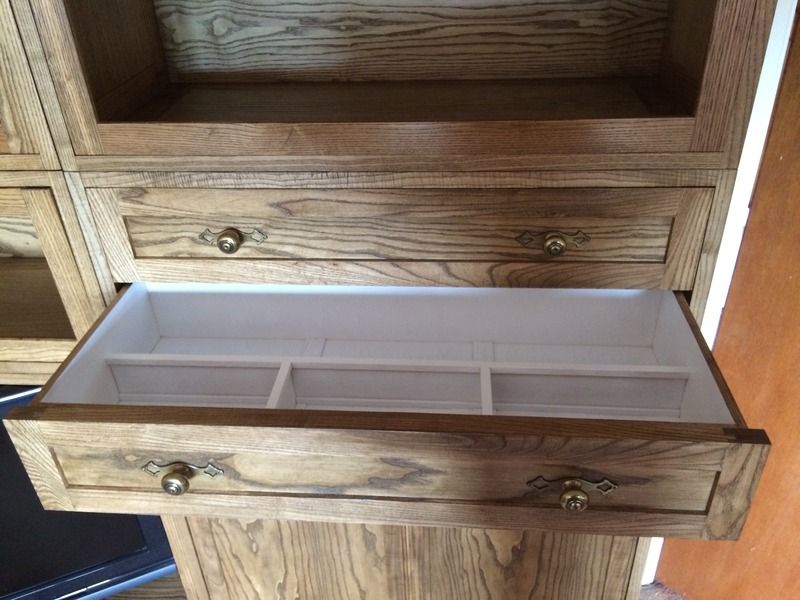
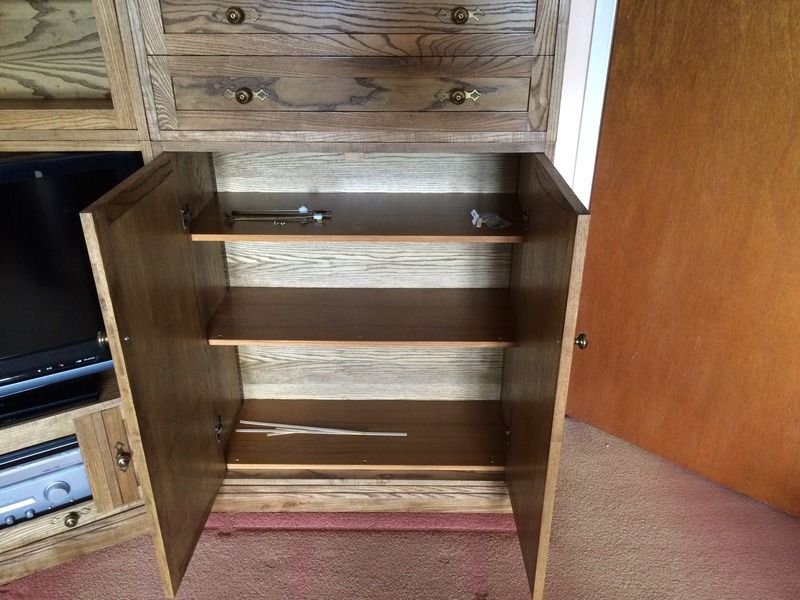
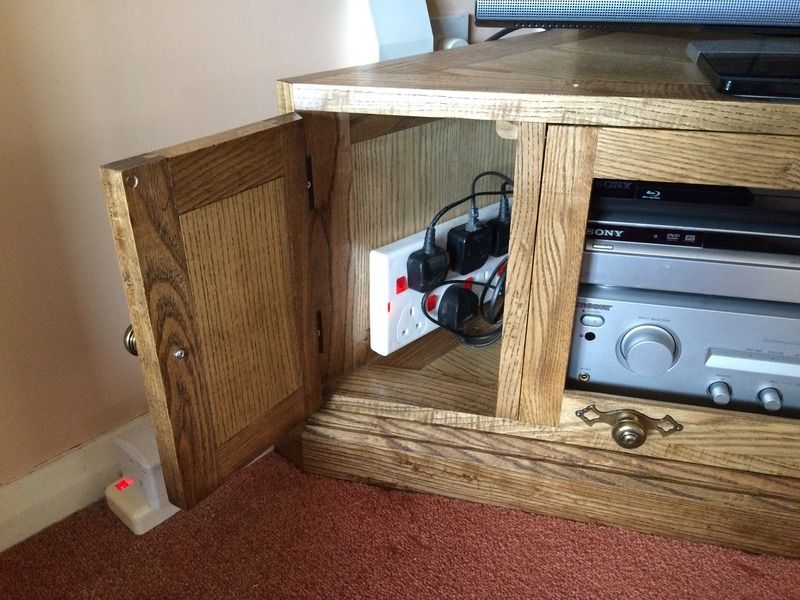
A unit for the TV, PVR, DVD and audio amp. A couple of drawers for things like stamps, sellotape envelopes scissors that used to be in the desk in the lounge but got consigned to the upstairs office a couple of years back and a cupboard for drinks, glasses etc. This phase also has three bookcase cum display units to the standard design completing a double width stack 1700 wide and 1720 high.

I still have to order the glass and am holding off that task until I've done the coffee table referred to elsewhere. So in the photos, the barrister doors are propped in place unglazed and without knobs and the cupboard shelves are made from scrap MFC as they too will be glass.

A few photos
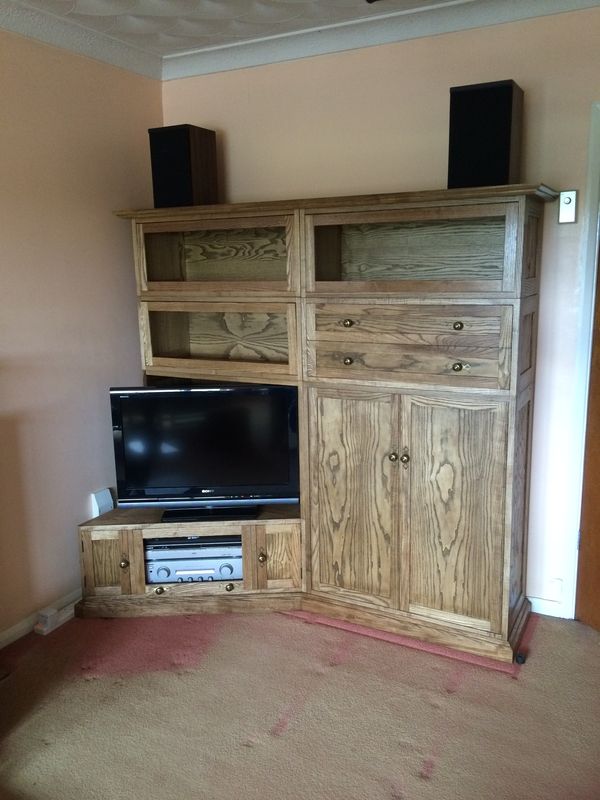


The small doors under the TV are just to hide cables and give a degree of access to the rear of the electronics.


I've not looked back through the threads to see when I first started posting about this project but it was a good while ago. So thanks for your interest and tolerance at my tardiness.

I am now starting to do the detailed design of the coffee table with integrated occasional tables. Looking at some cunning mechanics to pick up the small tables and lift off the carpet as they are slid under the main table. Parts are on order from Wun Hung Lo and associates to make a prototype for this.

Bob
 
TrimTheKing":1nepnr6i said:
Nice Bob, and that's some level 11 carpet fadeage there!!! :eusa-whistle:

Cheers
Mark

All this furniture work was planned to be done just after I retired (2009) and at that stage we needed a new carpet so bought cheap as chips on the basis that it would get replaced quite quickly and secondly it would get marked by the footprint of the old furniture and that we would have new decent quality carpet fitted when the all the furniture was done.
The plan has slipped a little. :lol: :lol:

Bob
 
Woodbloke":1jyf7eob said:
Nice job...what's the finish on the oak? - Rob

Wot oak? :lol:

I'd made quite a lot of pieces with oak and decided we wanted something with a bit more of an interesting grain.
So I used ash and ash veneered mdf. It is stained with Rustins medium oak spirit based stain.
I dislike heavy varnish finishes and had been disappointed with Chestnut HWO as it was too high build for my liking.
Someone here (Rod??) suggested thinned PU and I did some samples and liked the result. It hardly looks like there is a finish on there but it is nevertheless sealed against marking.
I used two coats of Rustins satin PU thinned 2 parts PU- 1 part white spirit. It is like water to apply which does mean that any runs form immediately and can be dealt with. It does dry slowly - just about get two coats per day with background heating in the winter months. Final treatment is wax applied with the finest wire wool.

Bob
 
9fingers":2kja262s said:
Woodbloke":2kja262s said:
Nice job...what's the finish on the oak? - Rob

Wot oak? :lol:

Bob
See... knew it weren't oak! :lol:

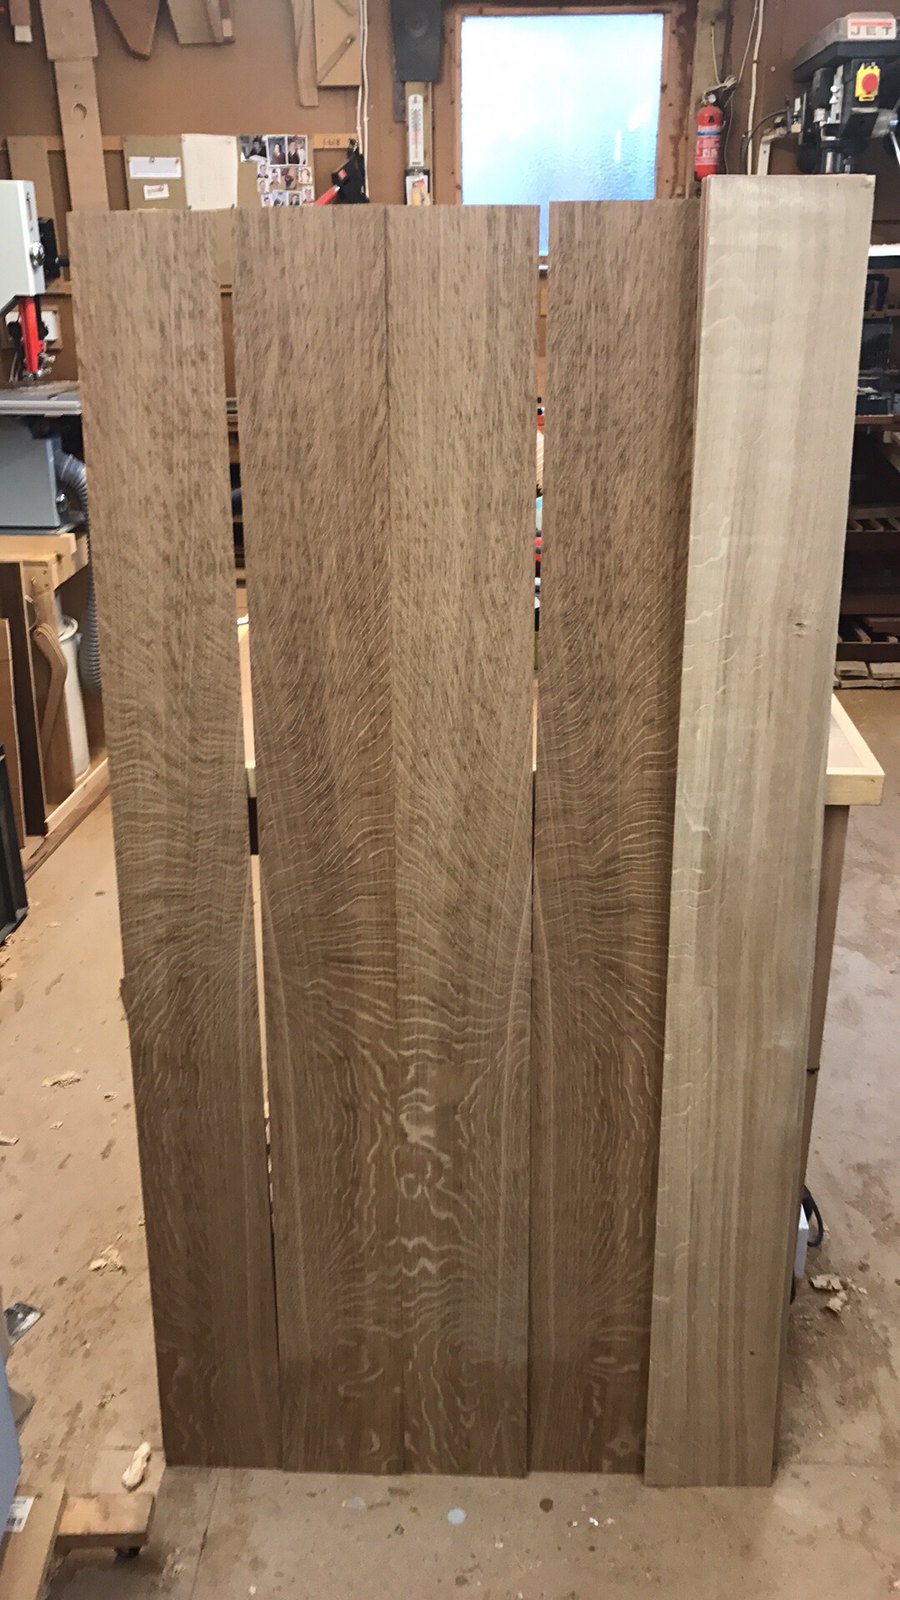
This is proper Brown Oak veneers (3mm thick) with 4mm backers for the next project but one...

33550806444_74a9d5e6dd_h.jpg


Interesting to see that finish you used. On the Corbridge Cabinet just completed I used Satin Osmo-PolyX thinned 50% with white spirit which was much better than using the standard gloopy stuff, then over the top with some good Swedish beeswax from CHT applied with a grey Webrax (instead of 0000 grade wire wool) - Rob
 
I think it was me Bob though I picked it up from another forum.
I used to use Sam Maloof's mixture but got similar and much cheaper results with diluted PU.

Rod
 
Rod":186ymyd7 said:
I think it was me Bob though I picked it up from another forum.
I used to use Sam Maloof's mixture but got similar and much cheaper results with diluted PU.

Rod

Well that is three of us that have used very similar process now. I like the results very much and can't see me using much else different in the future.
Thanks for introducing me to it.
Bob
 
Bob,

I've been following this project with interest, as it showcases your wonderful design and making skills. I also like the finish, which I must try in the future.

Neil
 
Newbie_Neil":3fkymn97 said:
Bob,

I've been following this project with interest, as it showcases your wonderful design and making skills. I also like the finish, which I must try in the future.

Neil

Thank you for your generous comments Neil I'll pay you later lol :lol:

It has been a long old job to get 4 stacks of units completed but I've been fitting other stuff in between as motivation goes up and down.
nNxt problem is the whole lot has to be dismantled and stored elsewhere whilst we decorate and re-carpet the room. :shock: :(

Bob
 
Sam Maloof used to use 7 coats of his mixture followed by (I think?) 3 coats of his beeswax paste.
Bit overkill but on some of his pieces he had an ongoing contract to maintain them which meant an annual rewaxing.

Rod
 
Having dug around the net for Sam Maloof mixture I can across the following and paste it here for reference

That mixture has been long known as an "oil/varnish" mixture. It was probably first publicized in the 1960's when Watco came out with their then "magic" finish. Here is something I found that sort of summarizes the whole "Maloof Finish" issue.

The Sam Maloof Finish Recipe

The Sam Maloof finish consists of two finishes: A varnish/oil mixure followed by an oil/varnish/beeswax mixture. The first mixture is applied until you are satisfied with the build-up. Then you apply the second finish, which does require some elbow grease! You can purchase the finish pre-mixed from Rockler, or you can mix your own. I provide two Mixture 1 recipes. Mixture 1 Version 1 is the traditional Sam Maloof finish. It takes a while to dry--leave at least 24 hours between coats. Mixture 1 Version 2 is an oft-used finish that provides a little better penetration, is easier to apply, and dries faster.

Mixture 1 Recipe (Version 1)
Mix equal parts of the following:
- Boiled Linseed Oil
- Raw Tung oil (not Waterlox, Dalys, or other tung oils containing resin additives)
- Semi-Gloss urethane varnish

Mixture 1 Recipe (Version 2)
Mix equal parts of the following:
- Thinner. Use paint thinner, mineral spirits, or naphtha. Feel free to use a bit less thinner and more varnish or oil. The thinner is present to help the finish penetrate the pores of the wood, rather than lay on the surface.
- Varnish. Virtually any quality varnish will do. I prefer a standard oil varnish rather than a fast drying varnish.
- Oil. Use either boiled linseed oil or raw tung oil. Again, do not use Waterlox, Daly's, or other tung oils that have added resins.

Mixture 2 Recipe
Mix 2 handfuls of shredded beeswax to equal parts of boiled linseed oil and raw tung oil. Heat the mixture in a double-boiler on an electric hotplate just until the wax melts. Due to the volatile nature of the ingredients, brew your mixture outdoors. When cooled, the mixture should have the consistency of heavy cream.

General Application
Apply three to four coats of Mixture 1. Let oil sit on surface for 5-10 minutes. Optionally, sand mixture into wood using 400-600 grit wet and dry sandpaper. Remove excess oil with a clean cloth/paper towel. Allow at least 24 hours drying time between each coat. Apply two to three coats of Mixture 2. Rub Mixture 2 into the surface vigorously.


Bob
 
Back
Top