• Hi all and welcome to TheWoodHaven2 brought into the 21st Century, kicking and screaming! We all have Alasdair to thank for the vast bulk of the heavy lifting to get us here, no more so than me because he's taken away a huge burden of responsibility from my shoulders and brought us to this new shiny home, with all your previous content (hopefully) still intact! Please peruse and feed back. There is still plenty to do, like changing the colour scheme, adding the banner graphic, tweaking the odd setting here and there so I have added a new thread in the 'Technical Issues, Bugs and Feature Requests' forum for you to add any issues you find, any missing settings or just anything you'd like to see added/removed from the feature set that Xenforo offers. We will get to everything over the coming weeks so please be patient, but add anything at all to the thread I mention above and we promise to get to them over the next few days/weeks/months. In the meantime, please enjoy!

Cabin beds

MattS

Nordic Pine
Joined
Jul 4, 2016
Messages
975
Reaction score
103
Location
In the Weald of Kent
Just about to start a new project. Most of my time at the moment is spent on DIY for the house which sometimes include woodworking and if it does is invariably sheet goods! Not quite at a level worth sharing on here :lol:

My next project is two cabin beds for my children though which are a bit bigger in scale and I thought might be of interest and also that I may want to ask advice so I'm starting a WIP.

This is the design, not modelled for manufacture (e.g. ladder is just resting!) just for rough design so there'll be some working out as I go. It's all to be made from 18mm birch ply, of which I recently got a job lot of strips to avoid the price hike and supply issues. It will as a result be compromised a little on grain direction but will do the job fine. Here's the design, feedback welcome!
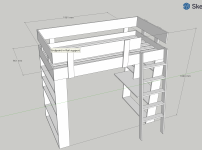
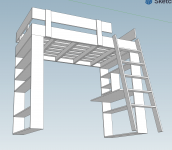
Bed 1.png

Bed 3.png
 
Yes you are correct, I intend to bolt left end and back side to the wall as it's in a corner to give it some rigidity!
 
Hi Matt. Fixed to the wall that looks like it should be OK. I certainly wouldn't make the ladder out of ply, though, because ply produces horrible splinters. The shelves at the left hand end of the image.......I presume they'll be against a wall. Otherwise, they'll need a backing board. If this construction is intended to be against a wall, then have a think about the skirting boards, and how you'll get over the gap they cause.
 
I'd consider tieing the ends together across the back at low level even if if you are bolting it to the wall, future proof it now, just in case, it won't add any burden to the build and use but could save you a headache later.

I'd also consider slatting it in a more traditional manner with horizontal slats rather than vertical, this would let you do away with the cross members.
 
Absolutely the level to share on here, otherwise it gets to become exclusive.
 
Good point Malc. I had missed that on Matt's post.

Lets be clear to all and sundry that there is absolutely no material nor construction method that is not worthy of inclusion in this forum.
We welcome everyone of any ability to share their projects. Those artisans we do have here I am sure did not start by producing high end furniture. Back then though there was no way of publishing their work to a wider audience.

We will all get better by learning off each other be it projects made with sheet goods jointed with nails and bolts or exotic timbers with secret mitre dovetails.

We welcome all.
 
I'll chime in as well on those slats.
Beams and rafters will take enormous weight, but they have the same effect as putting the mattress on the floor.
side to side bed slats are forgiving and give some softness.
 
A few months back I increased the width of a couple of small single beds to single width. I wanted to use sprung beech bed slats but I thought the cost to buy new was prohibitive. I went on ebay and found two metal bed frames with aforementioned slats for 20€ each. I used the slats and stored the metal frames for future use.

Might be worth considering perhaps.
 
If you have no option but a rock hard base for a mattress, Ikea sell a plastic louvre type setup that gives a surprising amount of softness.
 
Thanks for all the comments guys!

I’ll add a brace at low level, a good idea to include before I start.

I had realised the issue with skirting and sitting tight to the wall. Haven’t decided on a solution may just set the shelving in from the edge, happy with open backed shelving.

The comments about slats - I didn’t even know that they added to the comfort!! I say this is for my children one is fast reaching teenage years this gains some much needed floor space in the room so I was concerned over strength hence the cross pieces and vertical slats. I may redesign it with a sturdy shelf and horizontal slats that aren’t full width.
 
You can actually buy the pre-formed slats separately from Ikea, think even b and q do "bed slats", the former might work out more cost effective.
 
greeno":cyhzyu3o said:
You can actually buy the pre-formed slats separately from Ikea, think even b and q do "bed slats", the former might work out more cost effective.

Over here I couldn't find sprung beech bed slats for less than €6each, 20 slats for a 6' bed were therefore €120 and I had two to do. The bed frames at 20 each were a bargain.
 
I think that I would cost this up and then look at IKEA offering, often you can get decent stuff cheaper than the wood.
Then you can strengthen and bling it with your wood work skills.
 
I have remembered that I saved two sets of bed slats from an old double bed - buried at the back of the garage now :lol: I can remember they were flat not arched so not as good as a sprung set but they'll be an improvement will dig out and check measurements and try to use those instead.

Lurker, I have already got the wood very cheap, this bed will cost about £250 including an Ikea mattress. Also it will be one of a pair and the other needs to be a bespoke size so DIY was the only option for matching beds.
 
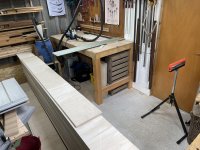
Started on this today, my workshop is only small, the rear of my garage and so space is limited! The large pile down the middle is the material for the beds. As mentioned in the first post, I bought these strips super cheap equivalent to a large number of sheets but obviously very compromised on component size. Most are thick enough to yield a 200mm panel, and some have enough width for 260mm.

I’m starting with the shelving unit, which will be from the wider 260mm panels.

DB13C433-4B0C-4D9D-8C64-3DC404A844FA.jpeg

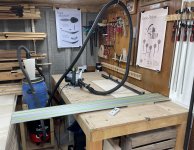
Given the limited space, I like a few others have large bench peppered with holes to use with my track saw, rails and dogs. I know not many people use this approach but it’s great for sheet goods and I’ll post a few shots on my process.

First rough cut the panels to length, using the fence and track saw, the rail has dogs underneath so it’s square to fence.

9D17755B-DC65-482C-AE9B-CA2F7AD35B64.jpeg

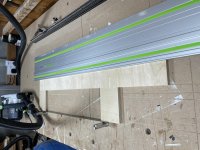
Next trimming to width, this would be easy on a table saw but using the track saw, I cut a couple of spacers to enable me to cut a clean edge, flip and add a ruler behind the spacers and cut the other edge exactly parallel.

440DF9F2-AC9D-4236-BBC1-31742F3DE2DA.jpeg

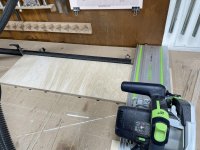
I could then return to the fence, again cut a clean edge, flip and cut to length using the flag stop.

4E9BB4C8-E446-4EC7-A470-77F7DA51D3B1.jpeg

Finally for today, I cut holes for dominos in all components and that was all for today. I may cut a few other domino holes for the brace at the back and fixing to the bed. I’ll think about that before I go back in the shop. Otherwise next step is sand and glue up. I intend to finish the shelving unit then desk end, then bed base.
 
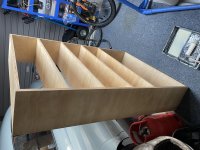
I’ve been fitting in the odd bit of time here and there but haven’t posted an update for a while. The first unit glued together without a hitch and I moved to the car half of the garage to be finished

285DBCF9-D854-4904-ABE7-AC3F34158304.jpeg

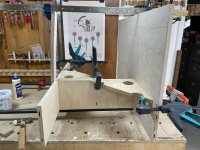
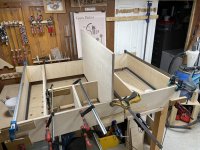
This meant I could start on the other end unit, I had a day off a couple of weeks ago and got all the components cut, dominoed and sanded. Being a bit more complicated I did the glue up in two stages. Firstly the desk and smaller shelves, hate glue ups, getting pressure on this wasn’t easy but an off cut seemed to do the job OK

6722D37E-A7E7-447F-BDE2-C6BF099D9B5E.jpeg

13808E1A-2DBA-4BD5-B8C1-8C349A58A287.jpeg

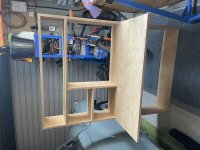
Bringing this up to date today I did final planing on a few edges and sanding and started applying finish

8E85ED45-A4EA-4352-B7C6-567528528FC7.jpeg

I need to redesign the top, to use bed slats and also think about construction a little more as I can’t make this in the workshop but need to do final construction in the room. Both of us get super busy with work in the run up to Christmas so don’t expect to make much progress before then.
 
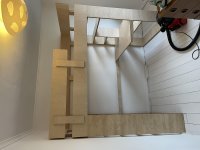
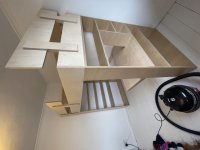
Thought I should bring this up to date, as expected nothing more happened last year, and in fact early January was busy with work and so very little workshop time. However after a couple of 3 day weekends I'm nearly there!

IMG_2348 copy.jpg

IMG_2349 copy.jpg

IMG_2350 copy.jpg

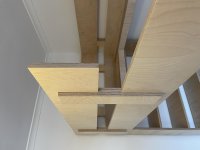
I took on board the feedback and made some mods to the top, it has 2 ply u channels either side to allow narrow bed slats ( which I already had) to be used. I also added a tie at lower level, this along with fixing to the walls has made it super rigid. I integrated the rail as a desk support, thought this would work well, not sure I am that keen on how it looks.

Overall it's the biggest think I have made and pretty happy, the odd grain direction isn't ideal but I was working with what I had. Bit of final varnishing and fix the ladder in place and it is complete. Just go the second one to make now! Any feedback welcome.
 
Hi Matt, I think it looks pretty good, certainly unusual, as you say the grain direction is what you had to work with, my only comments are that I agree with you about the rail holding the desk up I think that spoils it and you might have been able to get away with a triangle or a shaped bracket underneath on that side. My only criticism? Is that some of the corners look a bit sharp but it’s difficult to tell from photos, I like the way you’ve managed to build it without any screws showing! Ian
Edit, silly me there aren’t any ha ha, I hope it didn’t need any.
 
looks good to me, could you add a shelf the entire length of the support rail and make it a feature? could hold phones pictures teddies etc
 
Having had kids in bunk beds, my only concern would be that top rail on the room side and pressure being applied to it as the kids lean over/look down - the support on the outside is weaker than a support on the inside would be - you might want to keep an eye on it, especially if the pull on it going up the ladder. Apart from that, very nice!
 
How big is that gap for the front support? I don't know how old your kids are or the ages of any kids who may be round your house playing, but that gap reminds me of this regent tragic story

https://www.thesun.co.uk/news/17438755/ ... 0his%20mum.

TLDR - Child put his head through a 6" gap, got stuck and effectively hung himself.

I'm imagining a young child could do the same thing with that cabin bed... climbs the ladder, puts their head through the gap in the middle, loses footing on ladder and well...

If you look at the IKEA cabin beds, they either have solid supports or 2 narrower gaps.

Even if you have older children yourself and don't see it as a risk, do consider it if you were to pass them onto someone else.
 
Thanks for the comments, with regards to the concerns over the rails - my children are old enough to not be concerned about this, that being said I consulted the standards before building and I think the gap should be 75mm which I increased to 90mm but the mattress fills over half of the gap. I also made sure the height of the top of the rail was above the standard due to the overall height of the bed so was cautious in that regard.

flying haggis":3effeano said:
looks good to me, could you add a shelf the entire length of the support rail and make it a feature? could hold phones pictures teddies etc

This is a good idea, we plan to put some pictures on the wall anyway, will probably live with it for now and access in a month or so

StevieB":3effeano said:
the support on the outside is weaker than a support on the inside would be

I was slightly concerned by the strength of this, although the support is dominoed, glued and screwed. Your idea is a very good one. I don't think I have left enough room to do that here but will keep an eye. That will be a mod for bed number 2.
 
Back
Top