

BentonTool
New Shoots
- Joined
- Apr 6, 2025
- Messages
- 88
- Reaction score
- 115
- Location
- Benton, PA, USA.
- Name
- Alex Acle
- LOCATION
- Benton, PA, USA.
Hello Brothers,
I have found restoring old chisels (and gouges, planes, marking gauges, etc.) a pleasant pursuit for my retirement years...
with one exception... flattening the back.
I am certain that many of you share that sentiment.
Often, otherwise excellent chisels are heavily pitted and the backs are grossly out-of-flat.
I find that the backs are most often convex, with high spots in the middle, presumably from sharpening on dished stones.
Take for example, this otherwise outstanding vintage fully-laminated (that is, laminated from edge to socket) Butcher chisel.
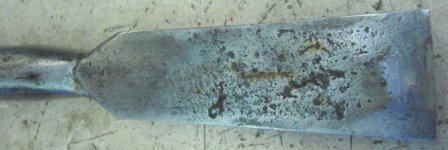
Here is a pic of the back. It is heavily pitted and far from flat, but it has a thick steel lamination extending from stem to stern:
So (as I am sure that you know) flattening the back of this chisel would be a laborious many-hours-long task if you were to do it only with stones (or sandpaper).
I am fortunate enough to own an excellent 2 x 48 inch belt grinder (Ameribrade Kamimura Trident). I use this grinder wherever possible to do a majority of the clean-up work on these old tools, but even with a flat platen, the backs never result flat. I had already made and mounted a new handle prior to grinding.
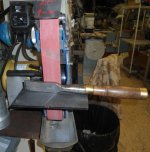
This is a picture of the back, fresh off the grinder. It appears cleaner and reasonably flat, but in fact it is quite convex, as I will demonstrate.
How I approach the flattening of the back was inspired by the way the Japanese grind the backs of their chisels, and by the way that machinists scrape various items flat.
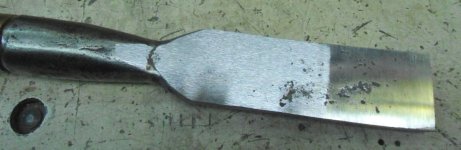
After the coarse grinding as above, I take the chisel to my coarse DMT diamond stone and give it a few passes to identify the high spots.
Although it may be difficult to see, I have outlined the high area (in the center) where the stone has made contact. As you can see, the back is convex, and the periphery is low.
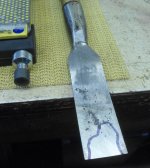
Next, I use a an 80-grit sandpaper flap-wheel (to which I have slightly rounded the corners) on a Dremel-type grinder to abrade down the high areas.
Stay clear of the edges and the low spots, and abrade the high spots for a few seconds at a time, removing a small amount of metal with each pass, as shown below.
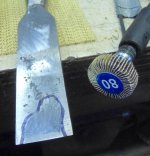
Go back to the diamond stone, and lap the back for 30-60 seconds. That is most often enough to remove all the marks from the previous grinding, and further flatten the back. Re-identify and mark the high spots. Repeat the grinding with the sandpaper flap wheel, and go back to the stone.
Keep repeating this process until the back is flat. With each step, the flat becomes larger.
In the picture below, I did not grind the back near the socket, concentrating instead on the area nearest the blade.
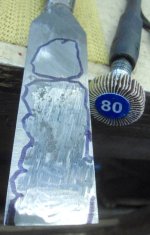
Rinse and repeat...
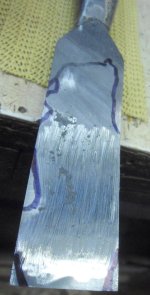
Now, as you can see, most of the back is flat. Continue to grind-lap-grind-lap...
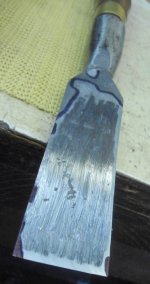
The further you go, the slower it gets (as usual).
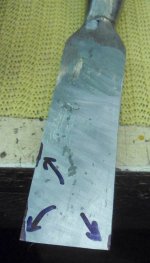
Now, the only important remaining low areas are the corners. The pits are of no consequence.
The low areas in the pic below are under the black ink.
I will repeat; I have usually only had to lap for 30-60 seconds on the coarse diamond to remove the grind marks.
At this point, I feel obligated to credit my shop companion (American Bully "Macho-Man" ):
):

Now remaining are the obstinate little corners... keep at it! Continue to grind-lap-grind-lap...
Some of the linear streaks you see at mid-blade are grind marks not fully lapped-out. Again, of no consequence.
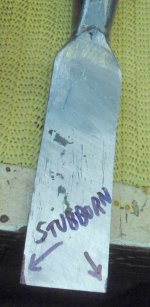
Continue to grind-lap-grind-lap...
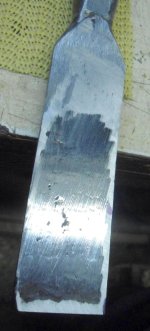
Eventually you will arrive at this point in your efforts...
just like childbirth... it's all worth it at the end!
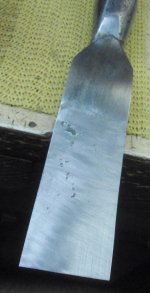
Prior to restoration, the entire chisel was as pitted as the back and socket. Now, (IMHO) a thing of beauty!
A little work on an 8,000 grit water stone and you are all set to go!
I have found restoring old chisels (and gouges, planes, marking gauges, etc.) a pleasant pursuit for my retirement years...
with one exception... flattening the back.
I am certain that many of you share that sentiment.
Often, otherwise excellent chisels are heavily pitted and the backs are grossly out-of-flat.
I find that the backs are most often convex, with high spots in the middle, presumably from sharpening on dished stones.
Take for example, this otherwise outstanding vintage fully-laminated (that is, laminated from edge to socket) Butcher chisel.
Here is a pic of the back. It is heavily pitted and far from flat, but it has a thick steel lamination extending from stem to stern:
So (as I am sure that you know) flattening the back of this chisel would be a laborious many-hours-long task if you were to do it only with stones (or sandpaper).
I am fortunate enough to own an excellent 2 x 48 inch belt grinder (Ameribrade Kamimura Trident). I use this grinder wherever possible to do a majority of the clean-up work on these old tools, but even with a flat platen, the backs never result flat. I had already made and mounted a new handle prior to grinding.
This is a picture of the back, fresh off the grinder. It appears cleaner and reasonably flat, but in fact it is quite convex, as I will demonstrate.
How I approach the flattening of the back was inspired by the way the Japanese grind the backs of their chisels, and by the way that machinists scrape various items flat.
After the coarse grinding as above, I take the chisel to my coarse DMT diamond stone and give it a few passes to identify the high spots.
Although it may be difficult to see, I have outlined the high area (in the center) where the stone has made contact. As you can see, the back is convex, and the periphery is low.
Next, I use a an 80-grit sandpaper flap-wheel (to which I have slightly rounded the corners) on a Dremel-type grinder to abrade down the high areas.
Stay clear of the edges and the low spots, and abrade the high spots for a few seconds at a time, removing a small amount of metal with each pass, as shown below.
Go back to the diamond stone, and lap the back for 30-60 seconds. That is most often enough to remove all the marks from the previous grinding, and further flatten the back. Re-identify and mark the high spots. Repeat the grinding with the sandpaper flap wheel, and go back to the stone.
Keep repeating this process until the back is flat. With each step, the flat becomes larger.
In the picture below, I did not grind the back near the socket, concentrating instead on the area nearest the blade.
Rinse and repeat...
Now, as you can see, most of the back is flat. Continue to grind-lap-grind-lap...
The further you go, the slower it gets (as usual).
Now, the only important remaining low areas are the corners. The pits are of no consequence.
The low areas in the pic below are under the black ink.
I will repeat; I have usually only had to lap for 30-60 seconds on the coarse diamond to remove the grind marks.
At this point, I feel obligated to credit my shop companion (American Bully "Macho-Man"
):Now remaining are the obstinate little corners... keep at it! Continue to grind-lap-grind-lap...
Some of the linear streaks you see at mid-blade are grind marks not fully lapped-out. Again, of no consequence.
Continue to grind-lap-grind-lap...
Eventually you will arrive at this point in your efforts...
just like childbirth... it's all worth it at the end!
Prior to restoration, the entire chisel was as pitted as the back and socket. Now, (IMHO) a thing of beauty!
A little work on an 8,000 grit water stone and you are all set to go!
