• Hi all and welcome to TheWoodHaven2 brought into the 21st Century, kicking and screaming! We all have Alasdair to thank for the vast bulk of the heavy lifting to get us here, no more so than me because he's taken away a huge burden of responsibility from my shoulders and brought us to this new shiny home, with all your previous content (hopefully) still intact! Please peruse and feed back. There is still plenty to do, like changing the colour scheme, adding the banner graphic, tweaking the odd setting here and there so I have added a new thread in the 'Technical Issues, Bugs and Feature Requests' forum for you to add any issues you find, any missing settings or just anything you'd like to see added/removed from the feature set that Xenforo offers. We will get to everything over the coming weeks so please be patient, but add anything at all to the thread I mention above and we promise to get to them over the next few days/weeks/months. In the meantime, please enjoy!

Making another stool WIP - updated with making the legs octagonal

Blackswanwood

Old Oak
Joined
Jun 27, 2020
Messages
1,502
Reaction score
1,046
Location
North Yorkshire
Name
Robert
This is a WIP of another stool which will be similar to one that I posted a couple of months ago. They are quite enjoyable to make as firstly the dimensions are determined by what looks right using the wood I’ve got. Secondly, while it involves angles and flat faces a few undulations to the touch are welcome.

With stool and chair making, as with most woodwork, the same outcome can be achieved in different ways. Very happy for any experienced chairmakers to chip in with any pointers!

Looking through the boards I have dotted around was an offcut I picked up at British Hardwoods open day. Rounding down from the width of the board 300mm is a decent width for the seat so I marked this out.
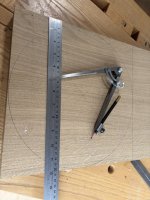


SeatlayoutLarge.jpeg


The blade in the bandsaw was too wide to cut the circle out in one go so I used straight cuts to take the corners off and then a further series of cuts to get as close to the circle line as I could.
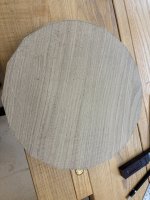


Seatcut Large.jpeg


Seeing this shape made me wonder about having the seat as an octagon … perhaps next time.


I then brought it down to the circle line and tidied the edge up using first the farriers file (rhs), rasp (middle) and Japanese carving file (lhs).
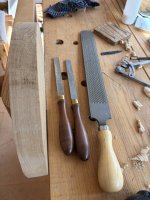
SeatroundingLarge.jpeg

Next it’s holes for the legs. I like the look of wedged tenons so I’m going to drill all the way through. As I didn’t have anyone around to help with the sighting (to do it by hand and eye) I decided to use the drill press.


This is my sophisticated jig – two pieces of osb, two hinges, a piece of scrap wood screwed in place to drill the hole so the leg splay will be 12º.
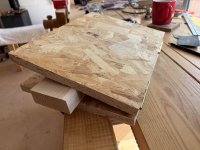


SeatjigLarge.jpeg


Note the pencil line which is essential for aligning the seat.


Here is the seat mounted on the jig/drill. You can see two additional circles that have been added which are 275mm and 250mm diameter. The inner circle is to locate the seat holes and the outer one is the marking for a chamfer which will be added shortly. The leg holes are at 12, 4 and 8 o’clock on the inner line. I just find these points using the compass to divide the circle into thirds.


SeatdrilloLarge.jpeg


This picture shows the seat lining up with the pencil line that I mentioned earlier. The jig isn’t big enough to see the line once this seat is on it so the lay out lines have been extended on the edge of the jig and seat to align it correctly. This needs to be as accurate as possible but in reality it’s not going to be an issue of it’s not spot on.
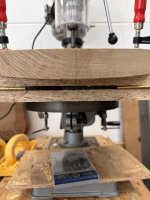
SeatlineupLarge.jpeg

Here is the seat drilled – I was using a 24mm Forstner bit in the drill press.
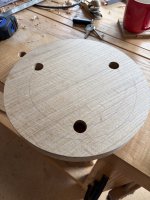
SeatdrilledLarge.jpeg

I now want to get some lines drawn on the top of the seat so it can be shaped later. I could have gone back to the compass but I didn’t want to faff around finding the centre so reached for these that are for doing a similar job when marking out chairs seats.


SeattoplayoutLarge.jpeg


Flipping the seat back over I have then put a chamfer on the underside. I find the quickest way to do this is with spokeshaves …


Insert seat chamfer


… and then tidied up with a cabinet scraper and sandpaper to remove the pencil lines.

SeatchamferfinishLarge.jpeg

To be continued ...
 
Last edited:
Looking great so far! For the bottom bevel, on mine I used the Chris Schwarz trick of angling the bandsaw table and using that. As for drilling, I have seen Chris use a green laser level I believe for solo work, but I haven't tried it myself. I just used the old bevel gauge trick.
 
Me too.
It takes me so long to level my BS table I am reluctant to angle it for drilling. That jig is ideal.
BS table? band saw? or drill press table?

Pete
Oops , too much wine tonight. Talking BS there wasn’t I.😉

Drill press table is in fact easy to adjust. That jig is still a good idea though.
 
Great stuff Robert.

I have a friend coming for some lessons in the autumn, and I really like the idea of doing something like this stool with her. I'll show her this thread and see what she says.
 
Nice! I would have done that chamfer on the lathe, but if you ain't got one..... - Rob

Good point Rob. I have considered that before and was mulling it over while getting on with the legs this morning.

From a practical perspective I cannot think how I’d mount it on a chuck without leaving screw holes in the seat. Is there an easy way to do it?

From an aesthetic perspective there would be fewer “undulations” using the lathe which could either be a positive or negative depending on the desired finished product.
 
Yours is more of a *personal* touch Robert... on a lathe it would be 'uniform' but lack the personal hands on finish/feel... that's my thinking anyway - plus my lathe doesn't give me the requirements for anything over 9" 🙃. You've shared a way for a hands on approach for those without a lathe 🙏 - much as I agree with Rob about using a lathe 😉
 
I quite like the handcrafted look that is difficult to get spot on: not looking machine made, but also not looking, well, a bit rough really. I think this is heading in the right direction.

I made a 3 legged "milking stool", where the piece of elm I had for the seat was a bit thick, but I was too lazy to reduce the whole thickness by hand tools. So I put a chamfer on the underside like this, but made it wider and angled so the leg mortices could be drilled into, and perpendicular to the chamfered surface, making it a little easier without a pillar drill. I like the drilling jig - I was balancing a sliding bevel and squinting at it to keep the auger at the correct angle.
 
Good point Rob. I have considered that before and was mulling it over while getting on with the legs this morning.

From a practical perspective I cannot think how I’d mount it on a chuck without leaving screw holes in the seat. Is there an easy way to do it?

From an aesthetic perspective there would be fewer “undulations” using the lathe which could either be a positive or negative depending on the desired finished product.
I’m no expert, but i have seen in videos of bowl making etc people gluing on sacrificial blocks of wood to use for that, either super glue or double sided tape and then knock it off later with a hammer
 
Good point Rob. I have considered that before and was mulling it over while getting on with the legs this morning.

From a practical perspective I cannot think how I’d mount it on a chuck without leaving screw holes in the seat. Is there an easy way to do it?

From an aesthetic perspective there would be fewer “undulations” using the lathe which could either be a positive or negative depending on the desired finished product.
The infamous paper/glue membrane is the way I would mount it, mentioned on another thread somewhere a while back. To the show face of the seat, spread a circular coat of glue (say 70mm), add a piece of circular printer paper (same size) add another layer of glue then add a sacrificial piece of scrap, then cramp and leave to thoroughly set. This is a Paduk bowl blank:

IMG_8224.jpeg

...ready for turning. Once turned, tap the pine sacrificial thingie and it will easily separate from the job, then clean up with a card scraper etc - Rob
 
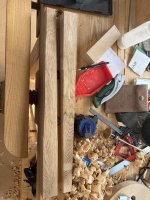
The legs and stretchers are being made from this board.

Board.jpeg


It’s a tad longer than needed but there are a few cats paws hiding in there plus a cracks at the ends that need to be avoided.

I used the band saw to rip three pieces which will end up being iro 600 x 45 x 45mm. The only "red line" dimension to bear in mind as the legs are prepared (chamfered) is that the tenon to attach them to the seat is 24mm in diameter. They also went through the planer thicknesser as I was feeling lazy and were left overnight (50 x 50mm) to rest.

Choices.jpeg

The defects are marked in chalk and the highest common length that could be achieved was just short of 600mm - nothing to worry about. The wood had hardly moved overnight and I cut them to length and flattened/squared the faces to 45 x 45mm.

Chosen.jpeg

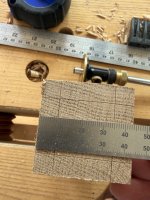
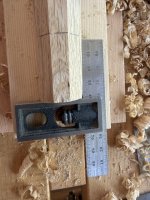
The end which will be the top of the leg is marked for the "square" chamfers on the leg. A wheel gauge makes this really easy ….

Endmarkup.jpeg

… and pencil lines are added to mark the line to plane to on two opposite faces. (Marking them all at this stage is a waste of time as on the other two faces they will be removed as soon as planning commences!)

Layout.jpeg

To reduce the amount of plane pushing time I took the majority of the waste off at the bandsaw and then got on with planing the first two "square" chamfers.

planing.jpeg

As you will notice my little helper decided to have forty winks at this point!

When the first two faces have been planed, the other two are marked with pencil lines and the exercise repeated. This shows two of the legs post their second trip to the bandsaw waiting to be planed.

Legshpe.jpeg

I really ought to tidy my bench up!

To be continued with marking out and planing the faces on the leg to make it octagonal.
 
Good WIP thanks Robert, going well, I’m not surprised the legs didn’t move overnight as that bit of wood looks well old! But good.
My only concern is that at 600 long, by the time they are Octagonalised won’t they be a bit small in section at the bottom?
Ian
 
Good WIP thanks Robert, going well, I’m not surprised the legs didn’t move overnight as that bit of wood looks well old! But good.
My only concern is that at 600 long, by the time they are Octagonalised won’t they be a bit small in section at the bottom?
Ian
Hi Ian - hopefully the next post will answer your question but in short, I'm basing it on a traditional stick chair so the thicker part of the leg is the bottom and it tapers into a 24mm round tenon at the top.
 
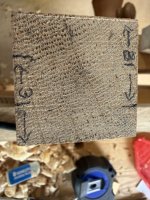
This picture shows the top and bottom of one of each of the legs to give a sense of the taper which doesn’t seem to come across in the photographs. They taper on each of the four faces – wide at the bottom of the leg and narrow at the top. As I mentioned earlier it’s critical that there is enough thickness at the top of the leg to create the 24mm round tenon.

Startpoint.jpeg

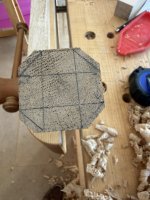
The next stage is to add the extra faces so that the legs are octagonal. This is the simple way that I use to mark the octagon on the ends of the legs

Octagon.jpeg

Measure across two diagonally opposing corners … so in this case on the bottom of the the leg it’s 62mm.

Divide by 2 and measure in from each corner on opposite faces as shown … so 31mm


Octagonmarks.jpeg

Repeat on the other two faces and join up the lines as shown

Octagon markedout.jpeg

Once this has been done on both ends I use this jig to hold the legs while planing the additional faces


Planingjig.jpeg

As the leg is already tapered once in the jig it’s a case of pushing the plane up or down hill depending how it’s oriented to take account of grain direction.

Jig in use.jpeg
stagedplaning.jpeg

More wood (breadth and depth needs to be taken off at the bottom of the leg so I start 100mm from the top of the leg and make a few passes with the plane, extend the distance by another 100 mm, make the same number of passes and then keep extending and repeating until I’m making passes across the full length.

Keeping the plane iron sharp throughout the leg making process makes it much easier and more enjoyable. I have the original chip breaker in my Clifton plane so it’s relatively quick and easy to re-establish the secondary bevel /strop.

checking.jpeg

It’s easy enough to adjust the combination of length and number of passes to gradually creep up on the lines marked on the top and bottom of the leg.

Once the bulk of the material has been removed I mark out the length of the tenon on the top of the leg.

Tenonlength.jpeg

For continuity with the pictures I’ll cover how I do the tenons and why I don’t finish shaping the legs until after I’ve done this in another post shortly.
 
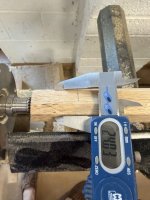
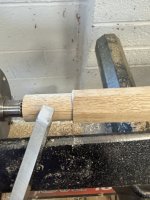
I kept it simple when creating the tenon and used the lathe.

Lathe.jpeg


There was enough thickness left in the leg. The tenon is round and not tapered so there will be a shoulder to deal with later. My preference is to see where this is before I finish planing the legs as it ends up with a neater finish without risking planing too far.

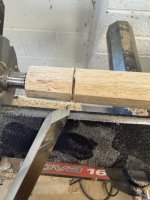
I just create a first cut with the point of the skew…

Skew.jpeg

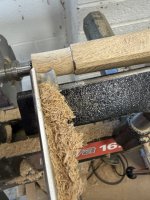
… make it round with the roughing gouge …

roughing.jpeg

… carefully take it to size with a parting tool …


Parting.jpeg

I imagine some of the woodturning experts will be rolling their eyes :unsure:🤣


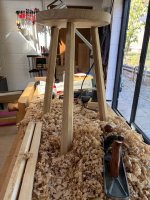
The important thing is that the tenons fit snugly - it’s taking shape. As you can see I've still not tidied the bench!


first fit.jpeg


Next I will finish the legs and then add the stretchers.
 
Back
Top