• Hi all and welcome to TheWoodHaven2 brought into the 21st Century, kicking and screaming! We all have Alasdair to thank for the vast bulk of the heavy lifting to get us here, no more so than me because he's taken away a huge burden of responsibility from my shoulders and brought us to this new shiny home, with all your previous content (hopefully) still intact! Please peruse and feed back. There is still plenty to do, like changing the colour scheme, adding the banner graphic, tweaking the odd setting here and there so I have added a new thread in the 'Technical Issues, Bugs and Feature Requests' forum for you to add any issues you find, any missing settings or just anything you'd like to see added/removed from the feature set that Xenforo offers. We will get to everything over the coming weeks so please be patient, but add anything at all to the thread I mention above and we promise to get to them over the next few days/weeks/months. In the meantime, please enjoy!

More time in the metal shop.

9fingers

Moderator
Staff member
Joined
Jul 21, 2014
Messages
10,414
Reaction score
165
Location
Romsey Hampshire between Southampton and the New F
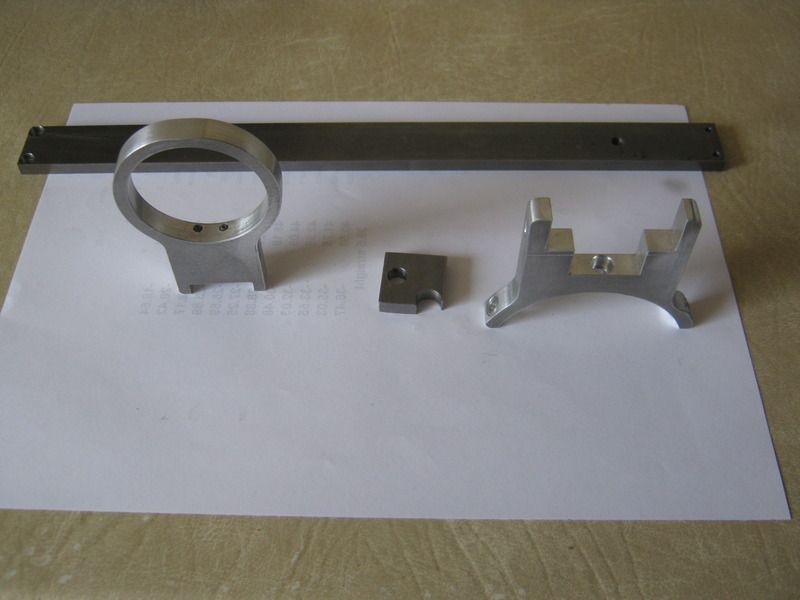
I spent some of the weekend making these parts.
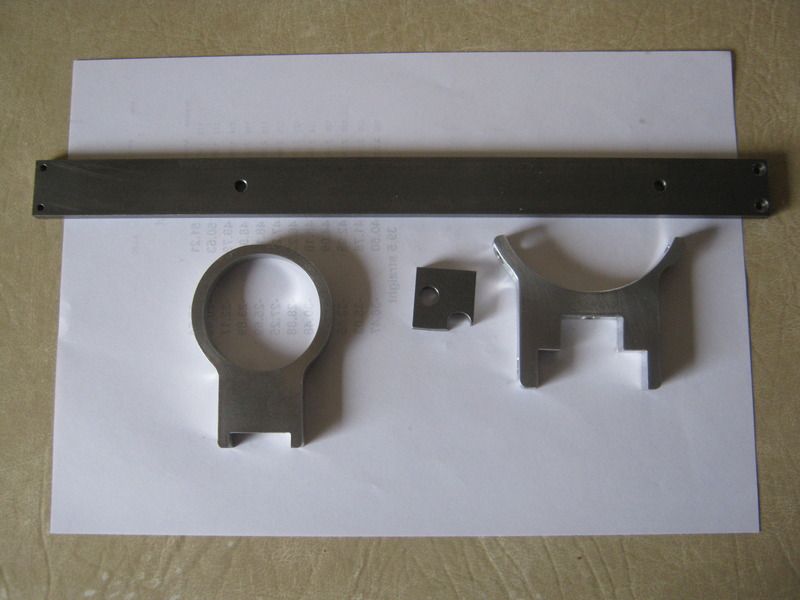


Making parts with only parts of circular features is a bit of a pain with manual machines designed for cutting straight lines (milling) or round things on a lathe.

You start by calculating the coordinates of where the edge of a circular cutter will intersect with the profile that you want to cut. Spreadsheets can be very useful for this once you have the maths correct.

Once you have a list of the coordinates like this:-
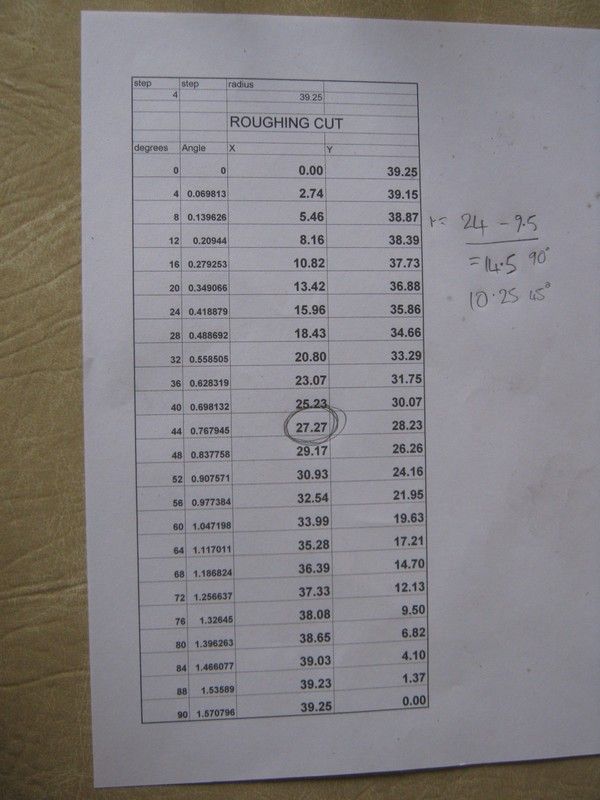


You set pairs of x y coordinates and make a cut, move to the next pair and repeat. This table covers 90 degrees of the circle. For the rest of the profile, the numbers are the same you just flip the sign, remembering to stop when the curve turns into a straight line or other different part of the profile.

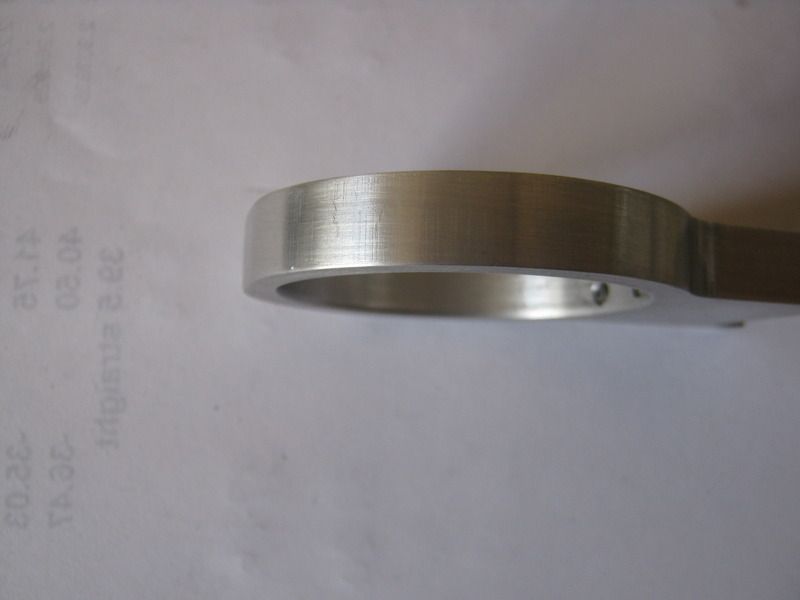
Then it is a case of hand work with files and emery to blend the surface into a smooth curve like this.


Can you work out what these parts are for? Clue: it's relevant to my recent other project.

Bob
 
Rod":38438u7j said:
Digital readout depth gauge

Rod


Give that man a coconut!

This is my third thicknesser to have this Wixey gauge fitted to it. However this planer has been the most complex to fit with not a flat surface in sight to mount it on.

The ring bracket fits on the top of one of the four pillars that support the cutter head.


Two small grub screws hold this in place. Not easy to see but you might just spot them here


The next curved bracket fits on the part of the cutter head that runs up and down the pillar.


The long steel strip has the other small steel part screwed on and fitted top the top bracket covering the access holes to the 'secret' grub screws.


At the bottom, a thread is tapped into the casting to take the hex bolt. The trick was to make sure everything was in line and sliding smoothly as any misalignment makes the gauge move in jerks.
It did take a bit of fiddling but the vertical steel bar is spot on parallel to the axis of the pillar and proved to be well worth the effort.

Previous incarnations of my mounting attempts still need to be tapped like a barometer to ensure the reading was right.

Now the easy bit - fit the gauge.


Next the embarrassing confession :lol: The bracket holding the read head was fractionally too large meaning I could not open the battery cover :oops:
Still easily fixed with a few strokes of a coarse bastard (file) and now the display works


Just to the left of the "MM" on the read head, you might just see the precision shim needed to perfect the alignment - 4 layers of masking tape did the trick.

I think I need to get back to working with this strange fibrous material now. About 3 months after buying the machine, I'm almost ready to make some shavings :eusa-whistle:

Bob

Bob
 
That looks great, could do with one of those on my P/T!...sometimes a bit of parallax error reading the flat needle edge against the gauge....a trip to spec savers might be in order too

Jim

Sent from my HTC One_M8 using Tapatalk
 
Jimmy Mack":qp3vrizf said:
That looks great, could do with one of those on my P/T!...sometimes a bit of parallax error reading the flat needle edge against the gauge....a trip to spec savers might be in order too

Jim

Sent from my HTC One_M8 using Tapatalk


I don't think wixey make that one any more but they do others.
http://www.machine-dro.co.uk/digital-sc ... ?brand=801

Bob
 
Back
Top