• Hi all and welcome to TheWoodHaven2 brought into the 21st Century, kicking and screaming! We all have Alasdair to thank for the vast bulk of the heavy lifting to get us here, no more so than me because he's taken away a huge burden of responsibility from my shoulders and brought us to this new shiny home, with all your previous content (hopefully) still intact! Please peruse and feed back. There is still plenty to do, like changing the colour scheme, adding the banner graphic, tweaking the odd setting here and there so I have added a new thread in the 'Technical Issues, Bugs and Feature Requests' forum for you to add any issues you find, any missing settings or just anything you'd like to see added/removed from the feature set that Xenforo offers. We will get to everything over the coming weeks so please be patient, but add anything at all to the thread I mention above and we promise to get to them over the next few days/weeks/months. In the meantime, please enjoy!

NPT Thread Helicoil

Chris152

Sapling
Joined
May 2, 2021
Messages
452
Reaction score
64
Does anyone know where we can buy one from? - I understand it's a 1/4" NPT that we need, to replace the thread in a 1/2" hole (I have no idea why 1/4" for a 1/2" hole, but we read that on a BSA Bantam site). We've searched online and can only find really expensive npt helicoil kits, it'd be far cheaper to buy a reconditioned complete unit - which we may end up doing. I proposed re-threading the alloy housing and making a new cap on the lathe, but the lad insists the volume of petrol within the cap may be critical - again, I've no idea.
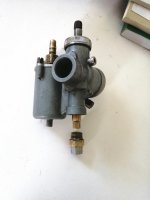
IMG_20230507_170416_edit_3467385073172445.jpg
Any thoughts much appreciated.
Thanks, Chris
 
Youre watching too much american stuff. :shock:
NPT is National Pipe Thread. Thats an american thread for water and gas pipes. It's quite coarse.
ALL BSA motorcycles were made with Whitworth threads.
Amal Carburettors were mostly BSF (British Standard Fine) or possibly BA (British Association). If its just the cap buggered, spend some time with a thread gauge, or vernier and internet, to discover exactly which thread,or else youre going to have to alter both male and female threads to get a fuel tight seal.
The amount of fuel under the cap isnt critical. Its atomised as it is sucked in through the main jet 8-)
 
I agree that NPT woulb strange to find on a british bike unless the carb was a hangover from ww2Whe US threads started polluting british engineering to an extent

1/4 NPT is 18 TPI
and
1/4 BSP is 19 TPI.

Thread sizes are based on the pipe bore of standard pipe that was used at the time. As pipe wall thickness has reduced somewhat over the years, Nothing about 1/4" pipe threads actually measures 1/4"

I might have taps/dies for either size but no helicoil kit.

Bob
 
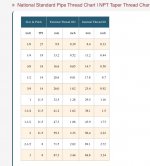
Thanks SB! We did wonder about the thread being American and for pipes, but went with it as the lad found reference to it on a site and we couldn't match the thread to anything else - we've measured a few times and keep coming up with 18 TPI and 1/2" diameter. That doesn't equate to either BA or BSF according to our chart (BSW is 12, BSF is 16 at 1/2" diameter). According to this NPT chart the 1/4" (.52" external thread, 18 TPI) is about right, allowing for a bit of wear.
What you've written about BA / BSF and Whitworth makes complete sense to me (I'm just learning, but it clearly fits the bike - 1953 BSA). Gawd knows, this is way beyond me!
NPT Chart.jpg
 

Attachments

Of course the big problem here is whether its already been butchered.
i'm talking as made in the 50's. I suspect a lot of hands have fiddled with it since.
If youre confident with your thread measurements go with it.
 
Thanks Bob - OK, so the 1/4" pipe will have changed with time, that I can follow. The reason we kept re-measuring is that the fit of the gauge onto the thread wasn't quite as snug as it seemed it should have been - our gauge set doesn't have a 19 tpi, it jumps from 18 to 20. (Is that normal? Just a cheap set?) So it could well be 19tpi and therefore BSP! Do you think that could then fit historically with Amal/ BSA bikes, SB?

ps If the volume of fuel in the cap isn't crucial, I quite fancy having a go at making one - it'd be the first 'real' thing we've made with the lathe. Tho lazy me is still tempted by a helicoil! :oops:
 
Carburettors are a meeting place for pipes and other fixings so not uncommon to find BSP

Assume your lathe has a standard set of Myford Changewheels then you can set up to screw cut 19TPI thread. The chart is inside the gearbox cover. It does not have to be a precise diameter so just cut a 1/2 or so of thread on scrap of round stock any where between 1/4" and 1/2" diameter say and you have yourself a 19 TPI gauge.

Yes 19TPI is common in UK and would normally appear in a British set of gauges. Anything starting out from USA or Japan could easily omit 19. My lathe quick change gearbox has 19 as standard without fiddling with loose gears.

Incidentally many plumbing fittings in Europe still use BSP threads. Some years back I wanted a pressure vessel and was given one from a Volvo truck. Every port was tapped BSP

Bob
 
Brilliant Bob - that's tomorrow morning sorted. Once we know what we've got we can make a decision to helicoil it or remake the connection/ cap.

Thanks Both,
Chris
 
In your photo the male thread looks like it might be tapered?
If that fitting is required to seal then in the absence of a shoulder to take a fibre washer then the seal would have to be achieved with a taper thread and sealing tape or gloop as in traditional plumbing work.
There another related thread known as BSPT (T for taper) and also 19tpi

Bob
 
That's another excuse I have for getting inconsistent readings on the diameter! There is indeed a taper, oh dear. I've just set the lathe up for 19tpi, what a palaver that is, but quite enjoyed getting it right eventually.
So, am I right thinking we need to cut the thread on a taper, or might we get away with cutting it straight and using sealer? In the diagrams of the carb, there is a washer between the cap and the body.
I'm finding BSP Helecoils now, but not BSPT.
 
For your gauge to establish pitch alone, a parallel thread should be fine.
Your damaged thread is the female I assume, and that will be a parallel thread.
Find out the helicoil tapping drill size next and check you have enough meat in the carb body to take it safely.

When you are looking at helicoil kit costs, compare that to the price of a used carb from a enthusiasts club.

Bob
 
I am bowing to the lathe expert on all things thread cutting 8-)
But my gas fitting career gives me insights into pipe threads and my mis-spent youth lets me talk for hours about British motorcycles :lol: :D .
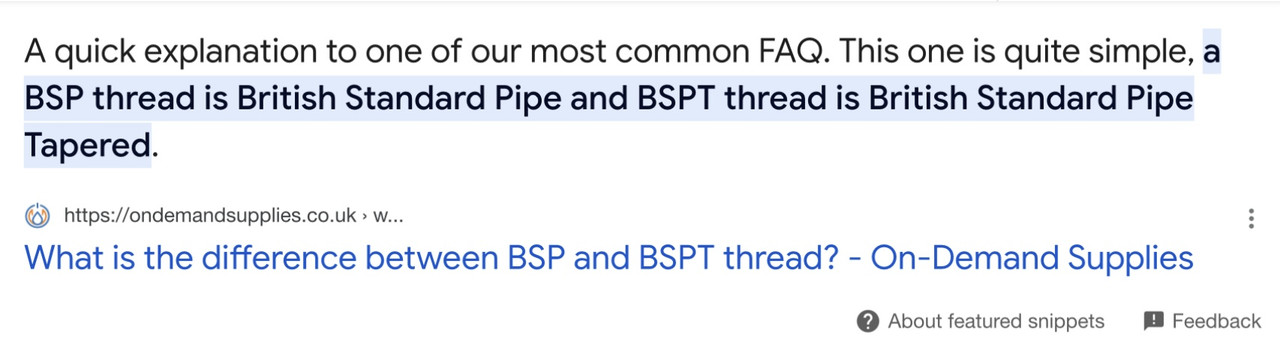
BSP Isnt a correct description. BSPT is the official description. People through laziness or ignorance have dropped the "T" over time.
Old British motorcycles and associated companies used BSW (Whitworth) and BSF (Fine).
With the flood of american videos in recent years that has been forgotten and NPT has become dominant.

The strangest cross over I have come across was on my Kawasaki 1500 cruiser (avatar picture). Despite being a wholly designed metric bike (although actually built in America), the oil pressure and water temp sensors were American NPT, purely because kakwasaki dont make those sensors and bought them in from an american company. That knowledge saved me 50% of the dealer price when I had to replace them. 8-)
 
Right. From what I can tell, we'd need:
1/4" x 0.3" BSP Helecoil
17/32 drill (https://www.thorintl.com/Drill-Sizes-He ... F-BA.shtml)
1/4" x 19tpi tap.

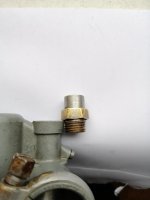
However! Bob - on the question of having enough material left on the housing to drill and tap, I'm having serious doubts. With the jet in place, there's no real lateral movement of the cap in relation to the housing/ damaged thread, but when I removed the jet that movement increased a fair bit. The diameter of the male part is 0.5"; the diameter of the stripped thread body is 0.529" at the opening, and a bit less further in (it seems to taper somewhat, I'm not sure). So, the helicoil will have to bridge a bigger gap than I'd thought.

Further, the diameter of the casting of the housing drops off before the full depth of the thread on the cap is reached (see pic).
IMG_20230508_090434.jpg
I think that by the time we've drilled and tapped for the cap, there could be little/ nothing left at this point!

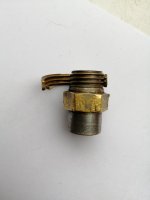
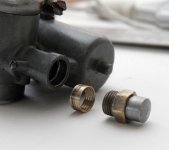
Something I hadn't mentioned earlier because it made no sense at all to me - when we took the cap off, this layer/ collar of brass was embedded in the thread of the cap.
IMG_20230508_091238.jpg
We heated and removed it and I forgot about it - but now I wonder, given the gap between the thread on the cap and the housing, is it possible somebody at some point made up a brass collar to replace the thread on the housing, perhaps going back to pre-helicoil days, as per your suggestion of previous 'mods' SB?

That replacement unit is looking increasingly attractive! :eusa-doh:
 
Mad suggestion maybe, but couldn’t you wind on some lead solder into the existing male so that it takes up all the slack and fills the gap with a wadge of metal?
Sort of like thick wadge of ptfe tape.
 
I'd abandon helicoils. Making a replacement brass bush seems like a good option.

If you want to borrow a pair of BSP taps let me know. I have taper and 2nd.
Simple, careful lathe work to make a new threaded bush that is a honeymoon fit into the carb body.

Bob
 
Thanks Bob - that's what we'll do, I'll order the hex bar tomorrow. Would it be brass or bronze? I saw on the Villiers site that they are making replacements to sell with aluminium, maybe the way to go. I don't know if it's bad etiquette, but I guess there's no reason to stick with BSP if we're going to replace both threads? Might get confusing for the next person who has to work there, but that seems to be part of the fun?! :?
 
sunnybob":2gz14wwq said:
BSP Isnt a correct description. BSPT is the official description. People through laziness or ignorance have dropped the "T" over time.

This is incorrect. I have a couple of taps of both types.

IMG-5896.jpg
 
Lurker":1x19ky8z said:
Mad suggestion maybe, but couldn’t you wind on some lead solder into the existing male so that it takes up all the slack and fills the gap with a wadge of metal?
Sort of like thick wadge of ptfe tape.
Sorry Lurker, I missed this when I replied to Bob. Sounds a reasonable idea to me but I'm guessing it might not last? We need practice on the lathe anyway and it's a good chance to make something useful with it.
 
9fingers":14dafs9a said:
I'd abandon helicoils. Making a replacement brass bush seems like a good option.

If you want to borrow a pair of BSP taps let me know. I have taper and 2nd.
Simple, careful lathe work to make a new threaded bush that is a honeymoon fit into the carb body.

Bob
I just re-read the thread as we need to get this done, and I think I misunderstood your last post, Bob - my reply is talking about replacing the cap and re-threading the housing, but you said to make a bush and use that. Apologies, it's the terms that I'm getting wrong. :oops:
To be clear, you're suggesting we make a female bush (threaded inside; smooth outside) that'd be held in place purely by compression of the cap being screwed on?
 
Basically do a better job of what was there before at the last repair.
It would be held in by a decent metal epoxy putty but do check it is fuel proof (as well as fool proof! :lol: )

Design the seal between the bush and the cap cover or whatever it is, to not need high tightening torque to seal as this almost certainly led to the previous failure.

Bob
 
Thanks for your patience, Bob. Would a reasonable sequence of work be:

face and reduce round brass rod to test fit snugly into the alloy housing;
drill then tap the interior of the brass rod to required TPI/ profile;
part the required depth of bush;
fit the new bush using fuel/ fool-proof epoxy and once set, screw the threaded cap in place?
 
My plan would be to put your lump of brass in the three jaw chuck and dont take it out until job is complete.

Bore and tap a short length of internal thread and confirm the dimensions and pitch are correct.
this confirms the thread and leave plenty of meat on the OD for strength.

Now drill and tap it deeper for more than enough internal thread.

Sort out the details of your seal and get that as good as you can.

Now start reducing the OD for best fit in the carb body. Allow a few thou gap for the putty.

Part off to required length.

Clean the bonding surface on the carb with brake cleaner or favoured volatile solvent NOTWD40 or similar products that will leave residues.

Grease the cap threads and screw into the bush and clean the outer bonding surface off. Dont touch it again. hold only by the the original cap

Working indoors in the warm, Allow all components to stabilise to room temperature and no sign of any condensation.

Apply modest but sufficient putty to the first 2/3rds of the brass bush as evenly as you can.

Fit bush into the carb with a rotating motion to spread it evenly over the whole length of the bush, removing any excess putty.

Set aside to cure with the carb upside down and bush vertical. Make absolutely sure there is no putty on the cap that might glue it in place This is the function of the grease but check anyway.

Test the left over putty waiting until it is fully hard preferably overnight before even attempting to test your handiwork.

Clean off the grease.

I assume that this covers the main jet. Provided that you have in inline filter on the inlet to the carburettor from the tank and the emulsion tube behind the jet is scrupulously clean, then there should be no need to keep taking the cover on and off applying stress to the repair.

Good Luck

Bob
 
Thank you Bob, we really appreciate your help. I'll post again once we're done.

Chris
 
Just an update - the thread is definitely 1/4" BSP and the cap screws perfectly into it; on the mill we drilled out the diameter of the carb to 14mm to create space for the bush and putty, there's now a few thou gap for the putty and a slight shoulder for the bush to sit against; we're waiting for the fuel/ fool-proof putty to be delivered!

_MG_1179.jpg

Very pleased with ourselves so far :)
 
Back
Top