• Hi all and welcome to TheWoodHaven2 brought into the 21st Century, kicking and screaming! We all have Alasdair to thank for the vast bulk of the heavy lifting to get us here, no more so than me because he's taken away a huge burden of responsibility from my shoulders and brought us to this new shiny home, with all your previous content (hopefully) still intact! Please peruse and feed back. There is still plenty to do, like changing the colour scheme, adding the banner graphic, tweaking the odd setting here and there so I have added a new thread in the 'Technical Issues, Bugs and Feature Requests' forum for you to add any issues you find, any missing settings or just anything you'd like to see added/removed from the feature set that Xenforo offers. We will get to everything over the coming weeks so please be patient, but add anything at all to the thread I mention above and we promise to get to them over the next few days/weeks/months. In the meantime, please enjoy!

Shed rebuild

Just to be perfectly clear, not all "flat" rooves need raised edges. Small stand-alone buildings almost certainly don't. My little 2.4m x 2.4m shed doesn't, or at least, it won't. There are circumstances where they are a good idea, such as with larger buildings, rooves which are right on a boundary, buildings with the door under one of the sides (rather than ends) of a roof, and so on. But in most cases, I really can't see the need.
 
To be honest I’m struggling with raised edges (kerbs) because of my too-short epdm. If I do cut / buy / whatever triangular pieces, even at 2” high it means I’m still stuck with not enough roof material even if I reduce my roof width both sides by 3cm. As current roof width is 488cm, if I cut 6cm off it is 482cm, with the extra 2” kerb both sides that adds back 9cm which = 491cm. As the supplied epdm is 491cm it means there would be zero to drape below the board line, thus problems of how to attach it securely etc.

In short, it’s too short!
Obviously if I was loaded I just would have purchased 5.5m and not had any agro, but I’m trying to do it on a budget. I think now, I might forget the side kerbs and just have one rectangular timber along the front lip as I have spare material front to back. And if I use rectangular batten I won’t have to mess about trying to cut it at an angle etc.
 
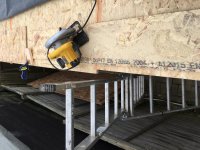
Well, I used a piece of OSB as a guide and used the circular saw to take 3cm off each side. It worked ok. Will rotate pics later.

IMG_2627.JPG

it now left the rubber overhanging like this:

IMG_2628.JPG

no pics of the process but then I rollered out the glue and stuck down the EPDM. Afterwards I used the contact adhesive for the boundary (the final 10cm). here it is stuck down. I didn't use any kerb in the end.

IMG_2630.JPG

IMG_2633.JPG

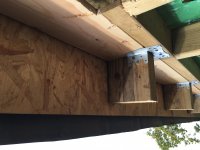
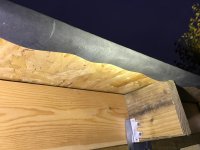
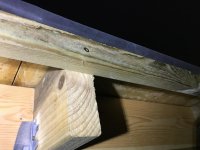
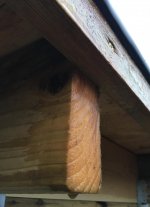
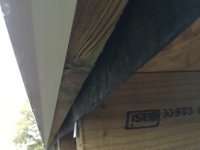
I then folded the rubber over the edge and stapled frequently to hold it in position (you need a proper stapler to do this). But the actual mechanism to hold the rubber securely long term is the batten I've attached tightly like so, to trap the rubber:

IMG_2634.JPG

IMG_2635.JPG

still working in the dark. This edging is not ideal in my opinion as water could run over the edge, track around the curve and travel on the underside of the board in towards the shed. But, it’s the best I can do and if necessary I will modify in the summer. Only just had enough rubber with trimming 3cms off the edges so worth noting if anyone builds similar to this - have a bit of sacrificial roof built into your design!
 
I admire your ingenuity, but why not simply contact the supplier and inform them they have supplied an undersized piece? If you ordered 5m and got 4.91m they should be replacing it shouldn't they?

Roof looks good and flat though - well done!
 
bit complicated but I initially ordered the wrong size (4.5m) which was entirely my fault. I contacted them the same day to correct, but it had already been sent out. That meant when it arrived I had to get it returned and then buy the correct size. That cost me £20 in p&p, various phone calls, and they waved (fortunately) a restocking cost of £40!

Then when you receive it, it is so big and heavy there is literally nowhere to lay it out until your roof is ready. Hence when I did and found out it's too small it would've been a) a massive pain the backside to wrap back up and send back, and b) I have time off work this week so has to be done now - I can't wait another few days of toing & froing to mess about waiting for a 3rd one!
 
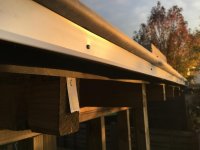
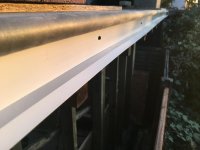
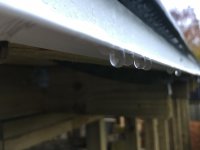
Didn’t have much time today, just fitted other side batten, and did the rear. For the rear where the water will run off because of the slope, I used the same method as shown above - folded rubber over, stapled, used batten to secure. Then I added a plastic drip trim; costs about £13 for 5m length. This has a special shape to force the water to drip rather than track around it. I tested it after fitting, and it works.

Use proper poly pins to secure this to the batten as they are stainless steel; buy from ebay they’re about half price of builders merchant. Only the front edge to do now!

9DF3CB63-B4E5-44E0-82B4-853A216E3DD4.jpeg

A7091BDD-045F-4612-99C1-AD011A52D7C5.jpeg

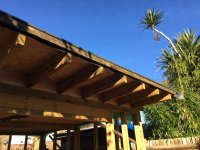
The drip trim is spaced far enough from the rafters ends that I can fit guttering at some point later.
 
Mine buckled quite badly in the sun (it's south facing). If you can get extra pins and put them half way between the ones you've got, you'll have a better chance I reckon.
 
Thanks, I will do then. The batten goes all the way across so I should be able to fix in between the joist ends. Also that is west facing so gets evening sun, not really the heat of the day, so fingers crossed!
 
Light bit of drizzle this morning but I can at least see the drip trim works! And as predicted one of the side noggins does have water tracking back to it. I will probably fit a drip trim to this side too, it’s not visible really so looks won’t be a concern.

Water tracking over the side:
E7A8E176-9394-4642-A4D2-34767E746E97.jpeg

Drip trim

9ABF8380-2607-456C-881E-6EE158D694AA.jpeg

Bone dry underneath:

FCD10E22-4119-4DEB-997D-57764F3EBADA.jpeg

Video!
https://youtu.be/B300qkv8lzQ
 
I'd run a bead of silicon at the junction of the batten and the EPDM if I were you. Silicon sticks well to rubber, and that would seal off the potential route for water onto the top of the batten.
 
It’s interesting, it’s only that one spot that is doing it, and it appears to be from the fact that there is very little overhang just there compared with other areas either side. And of course at the back there is a much greater amount of overhang.

So, I might try a thinner batten - thus putting the batten effectively more inboard and increasing the amount of overhang. Seeing it in real life it appears that this could help / solve the particular issue just here. I tried an off cut of drip trim on this one spot and it doesn’t seem to work as the water seems to be able to creep above & behind it, and is still running down the noggin. Although that could be because it’s just a short piece, my impression is it’s more to do with the amount of overhang which is too limited and is not forcing the water to form into a droplet.
 
How about replacing those battens with a fascia board an inch wider than the depth of the joists? So if your joists are ex 150's, your fascia would be 175x25. Push this hard up under the EPDM, and seal the gap with a bead of silicon. That way there would be a drip formed which didn't allow the water onto the end grain of the joists.
 
I have added a temporary batten to the front. My main aim for these battens is to stop the wind getting under and lifting the epdm, and after the winter I’ll probably do as suggested and buy 3 lengths of fascia board (both sides + front) when I’ve got a bit more money.

5C1C1455-8396-4956-BD57-2E93CFC4AE48.jpeg

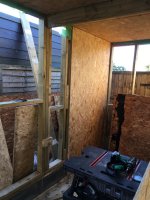
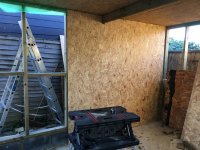
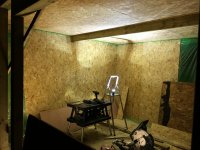
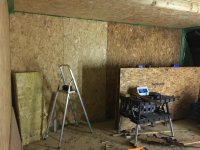
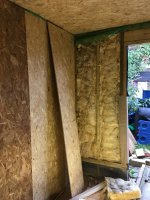
I also have started cutting the interior boards, a bit off the length and a bit off the width as none coincide with my studs.

F0AA062E-6DAF-49AE-8A58-92E611B257E9.jpeg

C5B51FCB-F1E1-4CFE-A860-1EDCD314872B.jpeg

5C999C90-D8AD-44FA-98FB-55F262F93AD6.jpeg

5A8BD68F-08F4-4E79-A11E-90041BFA6B7D.jpeg

Sadly these are just held with 1 screw each for test fitting, I need to take them all down again as I am going to run the green vapour barrior sheet behind them before I fix properly. But it feels good to see them going up and start getting some walls!
 
Do you need a vapour sheet behind OSB?
I thought it had so much glue in it that it is waterproof, need Mike to answer this I think.
 
No need for a vapour barrier behind those boards. Breather membrane on the outside, OSB on the inside, insulation between........that's all good.
 
Just to keep my thread up to date.

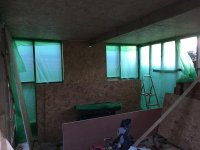
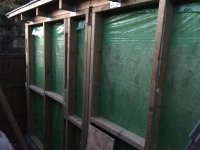
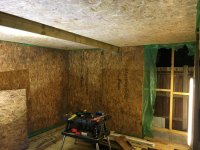
A ghostly green glow

05450B28-1B16-4A87-96B5-4429B013415F.jpeg

7A3430EB-3A4E-4A52-8BF5-876E4E2759B5.jpeg

I know it might not need it but a) I have it so might as well use it b) it might help to keep spiders out

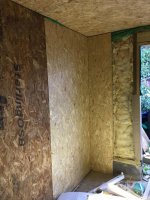
These boards now screwed. It’s all feeling more firmed up now these are screwed up.

4EE89357-EC7B-4A6C-AA6B-995AE2D4AA5E.jpeg
 
No, Rod. The vapour barrier goes on the warm side of the insulation, and the vapour permeable membrane goes on the cold side.
 
Still at it. Did a few hours last night cutting the next 2 boards and installing 1 extra stud required for the board edge. Then tonight just had to staple the vapour sheet and screw in the prepared boards. These are old boards I’m reusing hence the dark colour (they’ve been soaked multiple times!).

The right side is to be the dirty side of the workshop ie where I will work on my motorbike’s so this is ok. The left side with the new boards is going to be a ‘clean’ room for my modelling. I also bought a cheap electric sprayer off amazon ready to whitewash the interior when all walls are up.

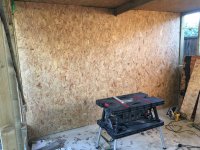
Back wall now done

87D29732-144E-4C77-9249-541F9432F810.jpeg
 
2 more up tonight. Flipping never-ending this job 1 more required on that side, then just the front wall to do either side of doorway.

8634AAA3-BC21-4B06-97DF-D8286342976F.jpeg

ACD268E9-E1AF-4EFB-84A5-21F01336E6E3.jpeg

Edit. And 1 up before breakfast

7685EAB4-812C-4012-B454-834A765B900F.jpeg

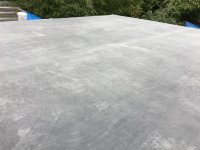
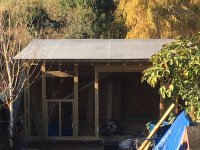
An overview of the roof material in clearer weather for anyone else considering epdm. It does actually have factory seams in it where they join sections. I think it looks ok though. It looks more severe in the picture than in real life, maybe caused by the low morning sun

34889CFB-7587-4585-9235-50F0853B0628.jpeg
 
It's time to get out the white paint and give the inside a good coat, that will make the shed feel bigger and you don't have lots of stuff to move about while doing it.
 
DaveL":3nbn5zwm said:
It's time to get out the white paint and give the inside a good coat, that will make the shed feel bigger and you don't have lots of stuff to move about while doing it.


:text-+1:


And still looking good!
 
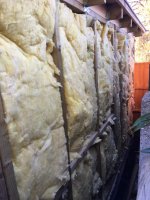
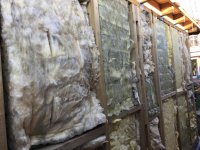
Today the sun was out and it hasn’t rained in a few days so the wooden frame isn’t too wet. It was a good (maybe my only, if the weather changes) opportunity to install all the insulation and cover it up. It was a bit of a bugger to be honest. I was reusing all my old original insulation. Much of needed cutting to fit between noggins etc (use garden shears for this).

As Mike has pointed out elsewhere ‘batts’ are much better as they rigidly stay upright, but most of mine was cheaper regular stuff which is worse to work with and wants to slump. I had to put a few staples in here and there to hold it in position.

0E8D8DF8-491B-4E87-8FA9-89F991864190.jpeg

7F7CEFA9-1FB9-4B4E-9777-76A4A20EE394.jpeg

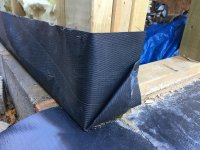
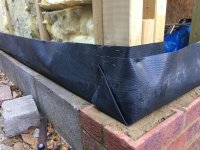
After I had fitted it all round I stapled up the DPM. I didn’t bother with a wedge shape piece of wood - frankly out of time, and I don’t think it’ll make much difference anyway.

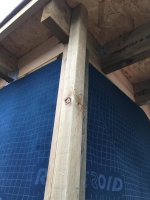
Corner:

E3D8BE0C-6237-4CD9-BD4F-EE15762FFBE2.jpeg

4E6CF1D8-1D61-414A-9FFC-775FD611245E.jpeg

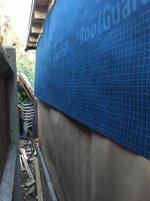
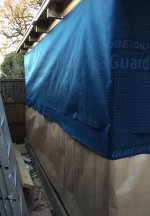
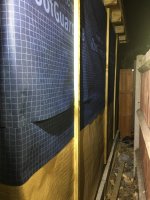
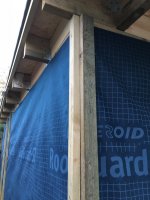
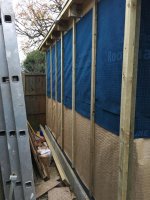
I used building paper (cheaper) on the bottom row around the building and some more pricey roof membrane on the upper half which I had left over from prior jobs a few years ago. I didn’t have enough for overall job hence the building paper. Once I had done it I wasn’t too happy with the amount of overlap and since I had some left over I added another mid section with large overlaps. Looks less neat but does the job and won’t be seen afterwards.

56D1424A-6140-42E3-A5D0-7E8D288546F3.jpeg

1F78B318-417A-497B-9C28-8CA9D19D65D9.jpeg

I added a few battens to keep material secure from wind etc but not managed to complete them all yet. But that’s a fairly easy job to do during evenings after work now.

82A4FB8B-5A39-41DF-A9D4-7C98C82B0828.jpeg
 
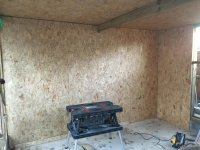
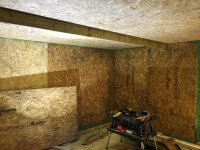
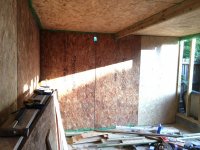
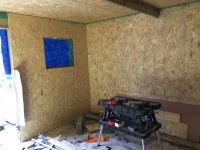
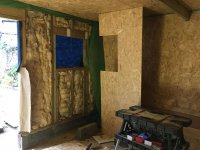
Insulation in front walls and OSB fitted (window cut out). All internal walls now boarded. Next job spray white:

IMG_2765.JPG

IMG_2767.JPG

IMG_2766.JPG

IMG_2768.JPG

For the corners I've decided to do them like this. Two 2 x 1 batons on each face then a 2x2 square in the corner. The 2x2 is screwed to the 2x1s.

IMG_2770.JPG

IMG_2773.JPG

IMG_2774.JPG

This givers the featherboard an edge to butt up to:

IMG_2775.JPG

28423305-8C59-41C9-A003-6B6F0A09B5EF.jpeg

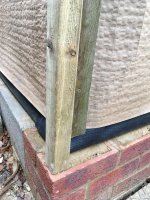
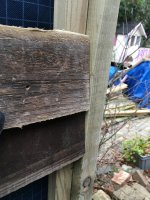
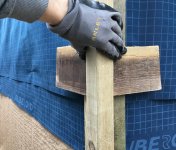
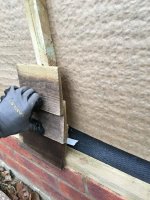
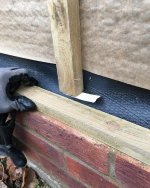
At the bottom I'm going to use a simple baton to space the lower board out. It leaves the board at just the right angle to clear the brick, so seems to work and it's easy enough to fit. I know long term it would rot but not too much of a problem I think, and I haven't got time to make wedges

IMG_2782.JPG

Got more batons up:

IMG_2785.JPG
 
Racing along there!

I like your corner.

Would the battens sitting onto of the brick perish through rising damp?
 
Just lift the ends of the corners, and the kick out battens, up from the brickwork by 10mm using wedges and that will stop them sitting in water and rotting.
 
Malc2098":3i79u5hc said:
Racing along there!

I like your corner.

Would the battens sitting onto of the brick perish through rising damp?

I thought water rising up through cement mortared bricks by capillary action, or rising damp, was proved to be a myth many years ago.
 
It's a claim you often hear, Andy, but I lived opposite a house where you could watch the "tide-line" move up and down the plinth seasonally, and stop at the underside of the DPC such that there was a clear colour difference between the bricks above and below.
 
Yes the main upright batons aren’t in contact with the wall (6cms above); as you can see in this shot

8C0FD3DF-3C17-46DD-A627-9A460632F4ED.jpeg

The corner piece I could perhaps chop 1cm off so it doesn’t sit on the brick. I feel like it’s getting there now. Cheers for the moral support guys!

Edit

I’ve just realised I can’t use the batten horizontally as in my pic as there’s no way to secure it to the frame without screwing through the DPM! So I will have to use wedges on the upright batons to kick out the lower board as per other projects!
 
Mike, The example that has always stuck in my mind, from many years back, was the university, or other research establishment, who built several brick pillars several feet high with the first few courses left submerged in water in a controlled indoor environment. They could not get water to rise up the bricks. The conclusion IIRC was that poor external, or internal, coverings were the cause of “risng damp”. I have just done a quick google and there are a number of imminent surveyors, who are not paid by rising damp prevention companies, who also debunk the idea of rising damp.
I am not at all qualified to know one way or another.

Apologies for going offtopic Coolhands. Your shed looks built to last to me.
 
Coolhands":30wl1emg said:
I’ve just realised I can’t use the batten horizontally as in my pic as there’s no way to secure it to the frame without screwing through the DPM! So I will have to use wedges on the upright batons to kick out the lower board as per other projects!

Why does it need to be fixed? It will be trapped between the wall and the cladding, and sits on the brick plinth. It is not going to move! No nails or gripfill it (other adhesives are available) if you are really worried.....
 
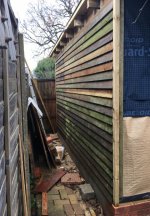
Small update. On sat I completed all battens and corners ready for featherboarding & completed the main wall that gets the weather (except the eaves right at the top). Tonight I did 1/3 of the rear wall (no pic). It’s a bit time consuming initially as I am reusing all old materials so I have to sort the featherboard and find the best combination that marries up with particular uprights utilising the max length. Then I trim them to finish half on the batten so the next lot can meet up. You can just see the line towards the rear of this wall.

Need to buy some more nails. I am able to do this work in the evening by torchlight! Tonight finished at 10pm :)

F6F5D3D7-4E61-4DA4-ABCF-E4516D82B2B5.jpeg
 
That is making good use of the old boards, well done. I have a new head torch that is rechargeable, very useful bit of kit.
 
Back
Top