• Hi all and welcome to TheWoodHaven2 brought into the 21st Century, kicking and screaming! We all have Alasdair to thank for the vast bulk of the heavy lifting to get us here, no more so than me because he's taken away a huge burden of responsibility from my shoulders and brought us to this new shiny home, with all your previous content (hopefully) still intact! Please peruse and feed back. There is still plenty to do, like changing the colour scheme, adding the banner graphic, tweaking the odd setting here and there so I have added a new thread in the 'Technical Issues, Bugs and Feature Requests' forum for you to add any issues you find, any missing settings or just anything you'd like to see added/removed from the feature set that Xenforo offers. We will get to everything over the coming weeks so please be patient, but add anything at all to the thread I mention above and we promise to get to them over the next few days/weeks/months. In the meantime, please enjoy!

Table tops

MY63

Old Oak
Joined
Oct 17, 2018
Messages
1,251
Reaction score
0
Location
North East England
My neighbour has a small restaruant and like many is struggling to reopen after the lockdown.
The guy who was going to refinish the table tops has let him down so I volunteered ( I really need to stop doing this) to help him out.

2020-07-06_09-28-19 by my0771, on Flickr

I have applied some dark mahogany wood stain to half as you can see above. The tops are solid wood but appear to have a veneer applied to the top surface. I wonder if it could be paper.

I need a reccomendation for a final finish to seal the top a satin or mat finish is preferred.

2020-07-06_09-28-50 by my0771, on Flickr
 
You don't say how many you have to do. I guess in a perfect world you'd have plenty of time, in which case a bar polish or a resin finish like Rustins Plastic Coating could be favourite. My guess is you don't have the time and I'm also guessing there are budgetary constraints as well. Bob's suggestion of a water based satin varnish is quick, easy and cheap.
 
Thanks Bob I will get some today.
RogerM I have two more round ones to do, he also has a few smaller square ones which I will finish over the next few months.
 
MY63":37gi191x said:
Thanks Bob I will get some today.
RogerM I have two more round ones to do, he also has a few smaller square ones which I will finish over the next few months.

OK, so not too many. Mind you, my comments still stand. Unless this is an establishment for "Fine Dining", then a finish that is bomb proof and which can just be wiped down, and where it won't matter if glasses and coffee cups are put down in a spillage is most important. If this was a fine hardwood dining table for use in your home my answer might be different!
 
RogerM":3g7vwns6 said:
Bob's suggestion of a water based satin varnish is quick, easy and cheap.

:text-+1:
It's pretty hard wearing as well. I used it a few years ago on an old 'puter table and it took a lot of knocks. If I recollect, I bought mine from the now defunct Homebase in town. I use Polyvine now which is also good stuff - Rob
 
OK now I have the varnish and am about to start applying it to the second top, I would appreciate any tips on application. Screwfix reccomaned a brush, but I was hoping to use a roller for speed or maybe a pad of some type.
Ideas appreciated.
 
Use a brush, roller or rag.
Leave for about 20 mins then wipe off any excess.
Leave to dry overnight, gentle rub down with a fine grade of paper.
Keep repeating until you’ve built up a few layers.

Rod
 
Rod":3pdwdfay said:
Use a brush, roller or rag.
Leave for about 20 mins then wipe off any excess.
Leave to dry overnight, gentle rub down with a fine grade of paper.
Keep repeating until you’ve built up a few layers.

Rod
Wot Rod said. I'd use a worn bit of 320g paper to de-nib the finish, then use the 'shop vacuum to suck up any debris - Rob
 
OK I have definately done something wrong with the varnish, I used a roller with a gloss sleeve to start with ans was left with a textured finish which although interesting was not what I was looking for.
Next I tried a sleeve with a longer pile but that was just as bad, only when the roller jammed and stopped turning did I get a nice finish.
I am going to get some paint pads next.
 
Thanks Rod that would explain why it looks so bad. I did sand and then applied extra coats with a brush I am going to get some more sanding disks tomorrow and sand back to where I started.
I think I may try the cloth method first.
 
Rod":3jha1dyo said:
I always use a brush or a cloth pad.
Don’t apply thickly and wipe off after a few minutes

Rod
:text-+1: Wot Rod said.

I usually use a decent quality varnish brush to apply, then once the coat is on, I dry off the brush on a piece of cotton rag and go over the surface again to remove the excess, drying the brush as I go on the cloth. I find this still leaves a good covering, but most or all of the varnish or polish which is going to cause a problem is removed - Rob
 
Clearly my mistake was to apply to much varnish to quickly which I plan to rectify with my sander asap.
The top is about 1.5m diameter when I apply the varnish it seems to dry before I can get the whole thing coated.
 
Rod":3boiz5pm said:
Try diluting the varnish

Rod
Agree again. I use Osmo-PolyX almost exclusively these days and it's a bit 'gloopy' straight out the tin. I usually decant some into a glass jar and then thin it down with around 10% white spirit which then makes it much easier to apply - Rob
 
Woodbloke":14x0ntpz said:
Rod":14x0ntpz said:
Try diluting the varnish

Rod
Agree again. I use Osmo-PolyX almost exclusively these days and it's a bit 'gloopy' straight out the tin. I usually decant some into a glass jar and then thin it down with around 10% white spirit which then makes it much easier to apply - Rob

I think Michael is using water based floor varnish and that could perhaps be diluted with a little water. However I find it is quite quick to dry and should be applied and laid off progressively across the surface rather than applied all over before finessing. Thin coats are the order of the day and as it dries so quickly 2-3 per long day is feasible.

Bob
 
9fingers":3bu4kfs1 said:
I think Michael is using water based floor varnish and that could perhaps be diluted with a little water. However I find it is quite quick to dry and should be applied and laid off progressively across the surface rather than applied all over before finessing. Thin coats are the order of the day and as it dries so quickly 2-3 per long day is feasible.

Bob
Bob, when I made that Alan Peters chest a couple of years ago, I used some acrylic Polyvine varnish and I reckoned on one brush coat applied coat every 20 minutes so that I could get a complete section ready for gluing in an hour - Rob
 
I tend to be nervous of attempting to rub down/denib too quickly.
As it happened, I making a small plinth in Iroko and got the first coat of "No-Nonsense trade clear floor varnish" on before brekkie plus a leisurely coffee and it was ok to sand. two more coats during the morning and the item is on the wall in service this afternoon.
So I agree my time estimate was a little generous.

Bob
 
As I started sanding the top of the table to remove the varnish I found there was some sort of reaction between what was there and the varnish I had applied. So I decided to remove it all.

My sander had other ideas and started firing sanding disks across the garden Zoe the spaniel thought it was a game. The last time this happened I had to buy a replacement pad (not cheap) It is a black and decker random orbit sander. Has anyone got a fix.

2020-07-29_09-46-37 by my0771, on Flickr

The top is stained wood do I need to remove all of the existing colour before I add more stain.
 
Thanks Bob
I have only used it for about an hour, is it normal for the velcro to give out this quickly ? are the newer machines any better?
 
MY63":39s83y19 said:
The last time this happened I had to buy a replacement pad (not cheap) It is a black and decker random orbit sander. Has anyone got a fix.
Here's a dead cheap fix. When the pad wears out, head for you local haberdashery store and buy a metre or two of 50mm wide Velcro strip which ought to set you back about £2. Then proceed at a leisurely pace round to your local shed and buy a tube of impact adhesive. Cut the Velcro to fit, stick the strips to the pad and trim to shape with a Stanley knife. If there are any holes that need to be made in the Velcro, I use a 10mm leather punch to make them. It's cheap and it works; I'm on the second pad for my little Festool sander - Rob
 
Woodbloke":jt9l9snk said:
MY63":jt9l9snk said:
The last time this happened I had to buy a replacement pad (not cheap) It is a black and decker random orbit sander. Has anyone got a fix.
Here's a dead cheap fix. When the pad wears out, head for you local haberdashery store and buy a metre or two of 50mm wide Velcro strip which ought to set you back about £2. Then proceed at a leisurely pace round to your local shed and buy a tube of impact adhesive. Cut the Velcro to fit, stick the strips to the pad and trim to shape with a Stanley knife. If there are any holes that need to be made in the Velcro, I use a 10mm leather punch to make them. It's cheap and it works; I'm on the second pad for my little Festool sander - Rob

Sounds like a plan as cunning as a very cunning thing! I'll try that on my triangular sanding pad on my multitool. :text-bravo:
 
RogerM":3ar81qgd said:
Sounds like a plan as cunning as a very cunning thing! I'll try that on my triangular sanding pad on my multitool. :text-bravo:
Thanks Rog; it's the hight of cunningness :lol: Seriously for a mo', I've found that the 'stickiness' of the pads fails after a fairly short time as the hooks tend to wear down fairly quickly. This is a cheap and nasty 'fix' that works well, especially if (as I do) you use the Abranet Mirka abrasive sheets.

If you've fallen far enough from sanity :lol: to find time to play on the lathe, you can also replace the surface on a Flexipad as the frictional heat generated makes them wear out incredibly quickly. I've got three of these things on the go at any one time - Rob
 
Thanks guys that sonds like a good plan, I think it is reassuring to know that this is not a fault with my sander more like a design issue.
Am I right in thinking all of the colour needs to come off before I can apply more stain.
 
MY63":381s68aj said:
Thanks guys that sonds like a good plan, I think it is reassuring to know that this is not a fault with my sander more like a design issue.
Am I right in thinking all of the colour needs to come off before I can apply more stain.

Not necessarily but you need to get it back to an even level of colour to reduce the risk of a blotchy result.
If these tops are veneered timber, mdf or ply then make absolutely sure you dont sand through the veneer!

Bob
 
Although I originally thought this was some sort of veneer when I sanded through the colour especially at the edges I found I could follow the grain over the edge as well as the joint lines.
I actually have some cabinet scrapers although I am not sure how my hands will stand up to hand scraping.
 
9fingers":3001h606 said:
If these tops are veneered timber, mdf or ply then make absolutely sure you dont sand through the veneer!

Bob
When I was working in the 'trade' years ago, I actually watched one of guys go through the burr walnut veneer on top of an über-spendy walnut commode. Boss distinctly unchuffed :lol: - Rob
 
I think I might be getting the hang of this now, I am now trying to put as little varnish as possible and speading it with the brush.
It was very hot today and the varnish was drying very quickly, I did manage to get three good coats with a light rub with 320 grit mesh with one of those clever little handles that attaches to my shop vac.

2020-07-29_09-46-37 by my0771, on Flickr

2020-07-31_09-23-26 by my0771, on Flickr

This is the end of day shot today I managed to get three projects in this picture table top garden planter just finished and an oak Captains chair not yet started.
Thanks for the help
 
That will do nicely Michael

Coincidentally I've been using that varnish on a simple pine table I made yesterday.
I did not get into the workshop until 4pm but got two coats on with a gentle sand in between one before dinner and one after.
For basic jobs I'm converted to this stuff.
I think I will still use my (well Rod's really!) version of Sam Maloofs mixture for what I like to laughingly call fine furniture though.

Bob

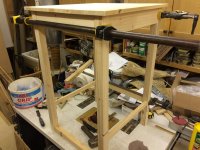
This is the only photo I took of the frame in glue up

B294F5E3-9532-4DA8-B645-3F3C08B584F3.jpeg
 
Nice job Michael. You'll get the rest done in no time now that you have a "modus operandi".
 
The top looks good Michael.

If you can get hold of a spray gun you can get more even coats on, with an 800grit between coats.
 
Back
Top