• Hi all and welcome to TheWoodHaven2 brought into the 21st Century, kicking and screaming! We all have Alasdair to thank for the vast bulk of the heavy lifting to get us here, no more so than me because he's taken away a huge burden of responsibility from my shoulders and brought us to this new shiny home, with all your previous content (hopefully) still intact! Please peruse and feed back. There is still plenty to do, like changing the colour scheme, adding the banner graphic, tweaking the odd setting here and there so I have added a new thread in the 'Technical Issues, Bugs and Feature Requests' forum for you to add any issues you find, any missing settings or just anything you'd like to see added/removed from the feature set that Xenforo offers. We will get to everything over the coming weeks so please be patient, but add anything at all to the thread I mention above and we promise to get to them over the next few days/weeks/months. In the meantime, please enjoy!

Anyone repair their own shoes?

TomTrees

Sapling
Joined
Aug 19, 2014
Messages
380
Reaction score
98
Just asking incase I don't have any alcohol to clean/degrease the rubber before for bonding,
as that seems to be the go to from a minutes research.

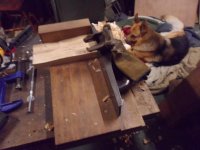
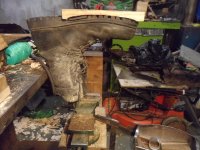
Made a last for me boot today, took a bit of a while to make something which would come back out again :lol:
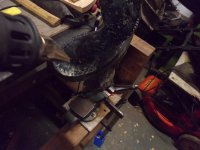
Seems like it will be good enough for the job, having found out that a maul head and block stuffed into another boot doesn't seem the best solution for the job, rubber didn't bond, and is badly warped now, I've moved onto these for the time being.
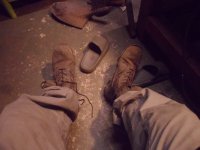
SAM_5925.JPG

Would it be alright to use paint thinners, white spirit, (or naphtha in the form of lighter fluid if I have some), or something else for the job?
I've got plenty of thinners or w/spirit.

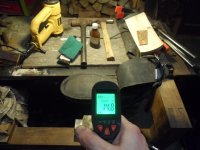
Thinking I should be sorted with this contact adhesive, heat gun and infrared gun
to whatever temperature I should be shooting for?
little bit of a hacksaw blade for roughing up, but not cutting stitches, and a bit of baling twine
for wrapping up.
Should I keep warming it after the sole is tied down?

Thanks
Tom
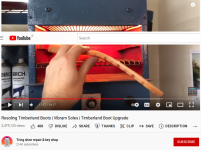
 
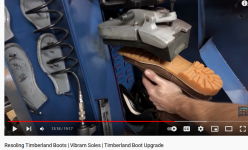
This fella is kitted out, looks like he has a good thing going.

He hasn't used alcohol on these boots, but the soles and midsole are new, and not old boots
which have been awaiting a repair for a few years.

Thinking I stand a chance using the heat gun rather than needing an oven,
Screenshot-2022-5-18 Resoling Timberland Boots Vibram Soles Timberland Boot Upgrade - YouTube(1).png

I note that the boot isn't prewarmed but the sole is,
and glue was applied prior

Seems I might be as well off to clamp and forms after using string,Screenshot-2022-5-18 Resoling Timberland Boots Vibram Soles Timberland Boot Upgrade - YouTube.png

Thanks again

Tom
 
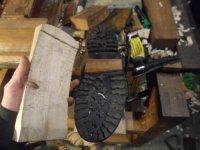
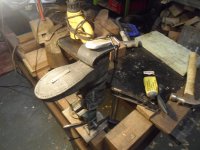
Made a former as it seemed from watching some more videos like a good idea.
SAM_5927.JPG
SAM_5931.JPG
Rough as old boots as the saying goes, I didn't want to customise it for just the one foot.
Just chipping away to get some idea, seems I'll have contact pretty much everywhere now without the string.
SAM_5934.JPG
SAM_5935.JPG

Seems my best shot at this is cleaning, haven't went looking for whatever old high strength pure alcohol maybe still in a bottle somewhere.

And seems I'll be best to add the glue to both parts, then hit with the heat gun
but apparently not enough to even scorch a finger, as I didn't see that fella
handle them like a hot dinner plate on multiple videos.

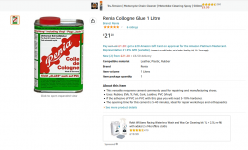
Seems it's just contact adhesive is what he's using, Renia is the brand, I haven't heard him say its anything special, but seems he may expect folks to be watching all his vids, if that is the case.
Screenshot-2022-5-19 Renia Collogne Glue 1 Litre Amazon co uk Automotive.png

but not the usual Barge stuff they all seem to use read which appears similar to the Pattex stuff I have with a shoe on the box.
Haven't came across too many folks on shoetube, but if someone could advise about the approach I might try from another youtuber that doesn't use an oven,
as the place is chock-a-block with the general publics videos on the matter.

Seems one has to apply to both surfaces, pretty much let the stuff dry to the touch on a presumable warmish surface, unsure if preheating is a good idea or not,
Hit it with a heat gun to reactivate the stuff before bonding and clattering the perimeter of
the surface with a plenishing hammer, I'll have a few options ready for the job.
and clamp as fast as you can.
Hopefully my Pattex will be the same, bit odd waiting for the stuff to dry fully,
some even add another coat or two once dry, think this guy even did that once or twice
but its hard to distinguish what video that was, since I watched a few.

Could take a bit of trial and error I suppose.
Will be needing to get me boots done soon, as I can't be doing this malarkey in me sandals :lol:

Cheers
Tom
 
Tom, I take my hat off to you (my boots too) for trying something I wouldn’t dare. I never imagined that a non-specialist would take on that sort of task!
 
Andy Kev.":qefl2ij6 said:
Tom, I take my hat off to you (my boots too) for trying something I wouldn’t dare. I never imagined that a non-specialist would take on that sort of task!

Seems that everyone is going to be noticing this nowadays. :cry:
My Caterpillar boots were toast after less than a year , might need to make a midsole for them, if I can find a good enough amount of decent leather, as there is plastic used on nearly all similar boots with seemingly a 5 year lifespan regardless of whether new or otherwise!
Screenshot-2022-5-19 Hydrolysis of polyurethane soles -warning.png


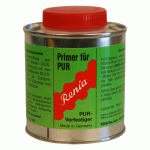
There is primer used for these polyurethane midsoles, seems it melts the stuff on contact,
doesn't like moisture or metal, and goes off quickly.
It's some sort of chlorine solution.
renprim_l.gif


The other type primer is for thermoplastic and soft rubber
Screenshot-2022-5-19 Renia Rehagol - Primer for TR.png

Wee video about the differences
https://www.youtube.com/watch?v=aoy9XEXGWAU
Not sure what sort of material the midsole is made from on these army boots
seems worth a shot seeing if I can identify by some googling.

Might have to go back to working on these Caterpillars as I can work with leather without all the rest.

Thanks for the encouragement folks, seems the cobblers don't mind showing their trade these days, which was a different kettle of fish to what it used to be even a decade ago.
A local old curmudgeon wouldn't even tell me what thread he was using before, :?
but looks like their business is picking up from the shortcuts from the footwear manufacturers.

Got a big bottle of this Pattex so I'll keep ye updated, might be good for some laughs,
as it looks like the ol'seven year rule to being a scrimper holds true :D

Cheers
Tom


Tom
 
Back again for an update, just bonded the MKIV's seems like it may have somewhat worked...
Was intending to make some midsoles for the Cats, but found out they were stitched! :lol:
so not as easy as the Timberlands midsole to repair whatsoever.
I had to go on youtube and find out some more, as I was delving further and further into a big rabbit hole, bit to much of a mouthful to swallow, but slowly getting the answers.

I was thinking there maybe some good ideas out there, and thankfully I found half the answers
from this youtuber not afraid of a bit of elbow grease.
My internet is playing up, but here is the link
https://www.youtube.com/watch?v=gICAhFN ... x=1&t=951s

A lot to take in, and will be going over this video again for sure, as I'm not sure if the other boots are fixed, and even if so, for how long.
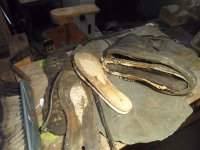
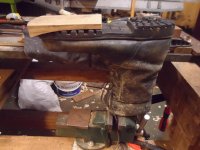
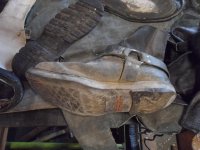
SAM_5939.JPG
SAM_5949.JPG
SAM_5959.JPG
Likely a few mistakes were made , not giving the rubber a bit more stretch to line up perfectly,
the form tool is pants, and needs a lot more thoughtful chiselling and not just winging it,
Possibly should have warmed the parts up beforehand and not left the door open, maybe some other caul on the underside, and likely other stuff I don't know yet.
Found some alcohol, likely primer would have been the go to for this afterwards.
Hopefully this willdo the trick
SAM_5960.JPG

The other project I was intending to get started at the same time
thinking of laminating some auld jackets for insole and midsole, but that will have to wait.
Lots of work to do before I get there.
Crappy plastic midsole and welt, a challenge and a half without the proper materials and kit,
but Bedo's leatherworks videos and maybe Harry Rodgers vids will have all the tips I need.
Here's what to look out for.
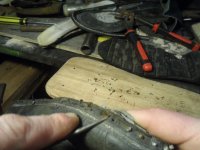
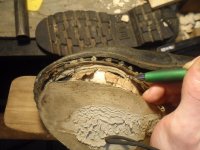
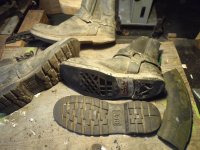
SAM_5944.JPG
SAM_5948.JPG

All for now
Tom
 
Braver man than I, Although I understand the process it is quite difficult to get it right.
Steve from Bedos leather works is a Master cobler he does some amazing restorations.
For a beginer you have done very well. Personally I would advise caution when applying heat to glues for leather, Most are toxic, corrosive, and generally highly flamable.
 
Great thread, Tom :eusa-dance:

One of your recent photographs looks just like the c**p trainers from New Balance. Carefully designed to fail one day after their lousy 6 month warranty. Once was bad luck. Twice is corporate edict. Shysters.
 
Used to use contact adhesive for glueing down Formica, temperature didn’t seem to make a difference to the end result just on how long I had to wait for it to become touch dry, no doubt it’s different stuff to what you’re using, though I always thought shoes were glued together using a hot glue gun type system.
Stitching – I used to stitch my school satchel together using the type of copper wire found on table lamps then twizzled, that was really permanent!
 
Cool thread. Too difficult for me as it really needs a proper sowing machine and other gear that I can't justify.

However, I will say this: quality pays.

I have several pairs of Church shoes. First pair bought 40 years ago, for City interview. All pairs are still 100% serviceable. I have 1 pair of John Lobb and a similar hand made Italian brand (bought for a wedding...). 25 years old and still as good as new. Literally perfect.

I have two pair of RM Williams boots. Both relegated to garden and workshop duties now, but both still in use after 25 years.

And I have 2 pairs of Gant Suede boots, both pairs knackered after 2 years despite sole repairs, entirely due to carboard, yes cardboard, layer in the sole construction. Ludicrous. And they were only a bit cheaper at full price than RMW tough as old boots stuff (though I bought at half price sale).

My wife has about 120 pairs of shoes. Men are different to women.
 
Thanks for your kind words folks

Just for making note, seems my army boots sole only failed because the rubber sole was a size too big, and it bonded fine with the pattex,
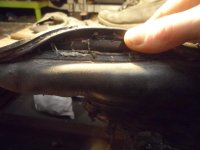
(the other boot has delaminated at the arch)
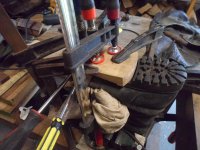
As you can see I didn't do a great job of it, mainly due to the shape of the timber,
but if it fails, it seems that would largely be down to the gap factor, rather than the glue,
and can do both should they both start talking.

Since cut off that end bit of the timber as it was troublesome, and could likely even do a better job of getting it a better fit with some paper with graphite to note the contact areas, as graphite on rubber doesn't work I was to find out, probably close enough and likely differing on each brand of boot anyway.
SAM_5978.JPG

Having spent since a good few days looking at various things, like differing methods of construction, to do a somewhat half way functional job.
Upon a proper look at the boots again with some extremely basic understanding of things now,
I ended up coming to the conclusion that the above video of Steve at Bedo's leatherworks was the only way I could make these old boots solid again,
and not a mish mash of various roundabouts which might be more suited to those who make a proper shoemakers last instead of a shoe repairers last.
Regardless it seems I bit off more than I could chew, as I totally underestimated the sheer amount of leather required.
And the only way of coming even close would have involved near a bag full of leather,
and too much sowing, so sorry to disappoint as I was thinking I coulda bodged it somehow, and found the answer on youtube. :cry:

With that said thought you still might be interested in seeing the boots again from a perspective of repair,
say if I had a meter sized sheet of 3mm thick leather, which I presume ain't cheap...


Those staples kinda rotted the leather on these Caterpillars, and I guess Steve would bond another layer to these, (pure guess)
SAM_5982.JPG

Thinking I might get away with it, I ploughed on and marked the locations of the inner sole and the boot, counting the stitches for alignment
Just saying as a warning to others as I nearly or possibly went too far and should have done this beforehand.
SAM_5989.JPG

Change of tack needed and turned my attention to the last pair or keepers,
which unfortunately have a plastic sole also, but gotta make do with it,
(a charity shop job for 35 quid)
Done some experimentation with the sander, and I spent all day in a hedge afterwards unsuccessfully looking for old rubber soles :lol:

SAM_5990.JPG
Seems like it possibly could be successful to use the old soles for these to make a machinery themed scrimpers pair, or rat boots if you like ;)
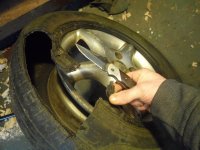
After spending too long searching in the hedge, I eventually turned my attention to an old car tire
which I was refraining from wanting to use, after once taking a hub off was difficult if you do it wrong, but doing it like the poor folks on youtube isn't that bad at all,
and at least the wall of the tire is cut able.
SAM_5991.JPG

Seems a great resource which may come in handy for other stuff!
went back for another slice which was closer to the inner bead and might save me some work packing that heel.
SAM_5994.JPG

Sorry for the delay in replying but wanted to give a decent attempt/response .

Tom
 
Great to see you do this Tom. My grandfather used to repair his boots and I have seen my father do it too. He still has a couple of lasts in his workshop. I’ve had my eye on them but purely as a decorative item.
 
Back in a bit miffed, this rubber just dang wants to stay as a tire.
Thinking I might have been able to shape it with multiple hammer blows,
and even a very blunt large cold chisel and the hardy hole of the sledgehammer head nah, not happening.
It must be that thread keeping it shaped I thought, so I set about first trying to abrade down to the threads, very unsuccessfully, and afterwards attempting to fillet it instead
so I'd have something a bit more workable.

Might have been a tad optimistic, or over the top for a pair of boots which just might do, but I've often wanted rubber for other stuff.

SAM_5998.JPG
SAM_5999.JPG
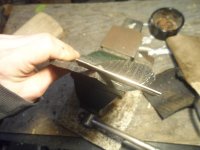
I used the knife after a bit, likely could have gotten better results with a proper sharp one,
or perhaps something with a serrated edge?

Ended up cutting through some of the material, and not going to do this again, as there's just not enough meat there to reliably get any sort of result out of :cry:
Thought I as onto a free supply of rubber for life.
SAM_6001.JPG

Not pleased with anything, I cut another piece of the wall after that, and just stuck it against the sander and wiped off the writing off the rubber and chanced sticking it to the damn boot.
Didn't have the patience to wait for the contact adhesive to go off, as I had a fair idea that things were going to get slippery once clamping force was applied.
I wasn't wrong about that, and won't be surprised if the thing "pops" off afterwards due to having a bit of memory to it.
Just a mucky rubbery pile of rubbish, waste of time and the obligatory little scratch or two was achieved today. :lol:
Might have another bash when I clean the place up a bit, getting a bit cramped up with rubbish everywhere and no patience left for it.
I don't think I'll ever be doing that again, would'a been a cinch to use an old boot for the job instead.
SAM_6003.JPG

Hopefully I can post back with some sort of result, as it might be worth the laugh.
Likely will need to pull the soles off another boot instead, as I need wings and possibly toe plates
since these are a size larger and reallly wide compared :lol:

All the best
Tom
 
For flat rubber soles, you want industrial or commercial conveyor belts. the commercial ones get scrapped when super markets change their checkouts .Industrial ones get scrapped for many reasons. Both are extremely hard wearing. If you want the deep "tread" on the soles part , you want the tread parts of tyres, or rubber doormats or industrial mats. The leather used for the "welts" or "leather soles" need not be expensive , you can use veg tan "splits", much cheaper than top finished, buffalo ( water buffalo ) is harder wearing than cow. De-greasing where the the old soles were is important, but you also want to rough up the surface of it and whatever material you are using as the soles.If you are hand sewing, wax your threads and polyester lasts better than nylon.If machine sewing, wax when sewn , not before or you'll get wax all over the machine,especially in the tension discs ( b*gger to get out ).Some old specialised machines put the wax on while the thread was being sewn.I have one of these.I have a bunch of specialised industrial sewing machines for leather and very heavy textiles and tarps, outdoor heavy blinds, covers for vehicles pickups, trucks, boats and so on, even circus tents. An industrial sewing machine ( there are many types ) is a a very useful thing to have*, if you have the space.Some are electrically powered, ( clutch or servo, servo is better ) some are treadle, some of the older treadle singer types, are just very beefier versions of the kind of sewing machine that was in many houses after ( and before ) WW2 . Sewing machines are mechanically fascinating.

Old thread, but hope this helps. :)

Ps..*You can make and repair leather or textile tool rolls, aprons, clothing, boots, gloves , sheaths, axe covers, all kinds of things.
 
Last edited:
For flat rubber soles, you want industrial or commercial conveyor belts. the commercial ones get scrapped when super markets change their checkouts .Industrial ones get scrapped for many reasons. Both are extremely hard wearing. If you want the deep "tread" on the soles part , you want the tread parts of tyres, or rubber doormats or industrial mats. The leather used for the "welts" or "leather soles" need not be expensive , you can use veg tan "splits", much cheaper than top finished, buffalo ( water buffalo ) is harder wearing than cow. De-greasing where the the old soles were is important, but you also want to rough up the surface of it and whatever material you are using as the soles.If you are hand sewing, wax your threads and polyester lasts better than nylon.If machine sewing, wax when sewn , not before or you'll get wax all over the machine,especially in the tension discs ( b*gger to get out ).Some old specialised machines put the wax on while the thread was being sewn.I have one of these.I have a bunch of specialised industrial sewing machines for leather and very heavy textiles and tarps, outdoor heavy blinds, covers for vehicles pickups, trucks, boats and so on, even circus tents. An industrial sewing machine ( there are many types ) is a a very useful thing to have*, if you have the space.Some are electrically powered, ( clutch or servo, servo is better ) some are treadle, some of the older treadle singer types, are just very beefier versions of the kind of sewing machine that was in many houses after ( and before ) WW2 . Sewing machines are mechanically fascinating.

Old thread, but hope this helps. :)

Ps..*You can make and repair leather or textile tool rolls, aprons, clothing, boots, gloves , sheaths, axe covers, all kinds of things
Kinda gave up on making use of the leather offcuts bag, well at least for the time being... (though would likely salvage some for
an apron), if I tripped across a nice couch getting skipped, and there wouldn't be that much sewing involved that a machine would be needed. not holding my breath though!

Funny that the thread popped up, as the first pair of Wrangler's Juma's I bought, not so long after, have only started giving up last week.!
This time it's between the boot and the midsole, and I'm afraid to see if it's serious. :eek:
I'll probably be back next week when they start talking to me :ROFLMAO:

All the best
Tom
 
Last edited:
The type of leather used in couches wouldn't be of any use to you for soles Tom, it is chrome tanned, ( tanned using Chromium salts ), nowhere near hard wearing enough for soles. The leather used for soles is Veg tan, vegetable tanning, done with ( usually ) oak chips and leaves in water into which the hides are placed and left until stable.A much older method.
Chrome tan is used for furniture and clothing, and in modern boot and shoe uppers. If you cut a piece of chrome tan, and look at the edge ( you may need a magnifying glass if it is thin ) you can tell it is chrome tan , because it will appear as a "sandwich", with a light grey or blue middle layer.That is the colour that leather goes when chrome tanned.Afterwards they add colour layers and finishes.
Veg tan doesn't have that grey/ blue layer, it is usually thicker and stiffer, than Chrome Tan.It can also be molded by wetting and shaping over forms, when dry again it keeps the shape of the form.Chrome Tan stays floppy.
Splits are from when the leather is "split" to get a show side ( outside part of the skin ) and an inner side, which is just as strong, but rougher.
Splits are cheaper, much cheaper per sq foot.
Veg Tan is harder ( denser ) to sew for the same thickness.
Stretch leather is usually very thin lambskin bonded to a knitted type material ( if you look close at the reverse side it looks like tee-shirt material ) which has some elasthane added, so it will stretch , usually more in one direction than another.

Sounds like the "welt" is letting go on yours.If you open them up carefully you can maybe replace the piece of leather that makes the "welt" .It is attached to the uppers, and then re-attach a new sole to the welt.If you go for a ready made rubber sole, the best are those that are used to resole fireman's boots, they are thick flexible rubber, and very hard wearing, solvent proof etc.Here a pair of those soles is about €35.00 fitted.
If you ever get the chance to get a pair of french parachutists boots, I heartily recommend them , they have shock absorbing heels.at the annual NATO forces get togethers at Nijmeggen, all the UK guys would try to cadge or buy the french para's boots. so much more comfortable even than Doc M's.
 
Thanks Mike, that makes for some interesting reading.
I've not heard of the term "splits" before, nor what's involved in the process of veg tanning, using oak.

In regards to old couches, I was referring to making an apron from, as I think that's where I would be drawing the line from
anymore...
Though I suppose this could have stood a chance of sedgewaying into this thread regarding shoe repair, but thankfully you have saved me some (much) potential bother on that front,
in making up a new "welt" from. (I've forgot the terms already)
I have noted on the chrome tan leather, the laminated appearance,
so good to know to stick with such for lesser purposes, though I don't think I'd be too keen to splash out
on getting proper splits either, as that would warrant another hobby in itself, what's not very feesable to me, for too many reasons.

Cheers
Tom
 
Hydrolysis...

I once had a very nice pair of black shoes I kept for best. I wore them to a job interview in Nottingham city centre and as I was walking along I could feel my shoe behaving oddly. The sole was coming away. I kept walking. The sole was breaking up and I was literally almost on my uppers.

I had to buy a new pair of shoes and asked the lady what was happening to my shoes, as I'd hardly worn them, though they were serveral years od. It's called "hydrolysis" she said. I wore my new shoes and ditched the old ones.

I didn't get the job.
 
Same thing happened to me, an old pair of unworn steel toe cap shoes I decided to wear in the workshop, just crumbled away in about a minute.

Pete
 
Hydrolysis...

I once had a very nice pair of black shoes I kept for best. I wore them to a job interview in Nottingham city centre and as I was walking along I could feel my shoe behaving oddly. The sole was coming away. I kept walking. The sole was breaking up and I was literally almost on my uppers.

I had to buy a new pair of shoes and asked the lady what was happening to my shoes, as I'd hardly worn them, though they were serveral years od. It's called "hydrolysis" she said. I wore my new shoes and ditched the old ones.

I didn't get the job.
Must have been soul destroying .

Sorry
 
Must have been soul destroying .

Sorry
Well, me other nice brogues didn't last too long, though they got a good send off whilst digging ditches.
Plonking a foot into the half dug soak pit was final straw for them.

Don't suppose I'll be doing much walking in these yolks :confused:...
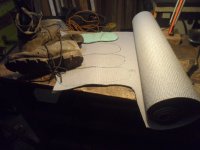
but at least they'll be somewhat more comfy than they were before, thanks to some nice thick yoga matting! 🤗
SAM_9796.JPG

Join me next week for even more money saving tips! ;)
SAM_9797.JPG
:sick:
 
Back
Top