• Hi all and welcome to TheWoodHaven2 brought into the 21st Century, kicking and screaming! We all have Alasdair to thank for the vast bulk of the heavy lifting to get us here, no more so than me because he's taken away a huge burden of responsibility from my shoulders and brought us to this new shiny home, with all your previous content (hopefully) still intact! Please peruse and feed back. There is still plenty to do, like changing the colour scheme, adding the banner graphic, tweaking the odd setting here and there so I have added a new thread in the 'Technical Issues, Bugs and Feature Requests' forum for you to add any issues you find, any missing settings or just anything you'd like to see added/removed from the feature set that Xenforo offers. We will get to everything over the coming weeks so please be patient, but add anything at all to the thread I mention above and we promise to get to them over the next few days/weeks/months. In the meantime, please enjoy!

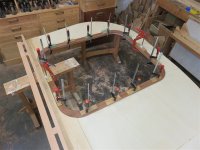
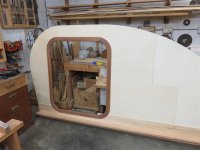
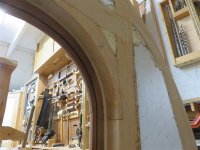
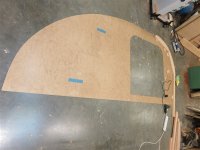
Mike builds a teardrop (tongue box and conduit)

The fabricator is slipping in his timetable, and the chassis won't be with me until the end of next week. That's about 3 weeks late, which is disappointing. However, I have enough to be getting on with in the meantime.
 
I've re-read this thread, just to check, and I'm curious about one - as yet unreleased - detail:

What form of mattress are you specifying please Mike? You mentioned that it was a 5'wide, presumably standard 6'6" long. With the limited teardrop doorway, I'm wondering about the tradeoff of flexibility to get it in, versus firmness to provide support.
Those blasted split squabs are also possible, I suppose, but they do have drawbacks.
S.
 
Interesting question, Sam, and it shows you've been thinking this through.

I'm planning to use a self-inflating mattress along these lines. I've only tried one, alone, and it felt comfortable.....as far as you can tell in a shop, fully clothed and without a pillow. They're light and flexible. I've been told that a memory foam "topper" works well with self-inflating mattresses, so we'll add one of those if necessary. It would be easy enough to put in a normal indoor mattress (pocket sprung etc), but getting it back out would be a challenge, as would accessing the battery & tank well underneath. It would also be very heavy.

There is another issue with mattresses in teardrops, apparently. There is no air circulation underneath, and some teardrops can be prone to condensation. This means that it's good practice to stand the mattress up on edge when not in use, and that would be a bit of a battle with a normal mattress. And weight. Everything in a teardrop revolves around weight. Again, the self-inflating camping mattresses are pretty light.
 
Thanks, Mike. Agreed, a conventional mattress would be an absolute bear to remove and air and yes, it would seriously affect your kerb weight and possibly, axle position.

Yes too, condensation underneath can be an issue. Lons, I am sure will weigh in here, he has more experience than I have, but in 15 years trailer-tenting, I saw slatted bed supports, "circulation mats" (remarkably like router mats and they weren't marketed for long), "wicking layers" and solid under-surfaces like yours. With a self-inflater, moisture travel to the lower surface should be nil, the mattress topper will 'take the strain' and need the ventilation. Quechua is a respected manufacturer; seen a lot of their stuff over the years, it should serve you well - but make emphatically sure, you are provided with a decent-sized patch and a more than adequate supply of glue!! That mattress is only as good as the first puncture, or manufacturer's pin-hole, or slightly leaky seam! DAMHIKT!

The presence of your tank underneath, unless you take care to isolate (as opposed to insulate? pedantry!) the tank's top surface, there is a possibility of condensate from the tank's top surface moving upwards into the floor under the bed and - possibly - the bed under surface. I hope you've provided for air flow over the tank. I see this as the only (possibly) problematic area in what you have published so far, and I'd agree with Bob (Lons) re the attraction of a lug-a-round water barrel and drop-in Whale pump.

Speaking of ventilation, the camper a relatively small volume and - if I read you right - will shelter three bodies at night? Yourselves and Mabel? Have you got a good passive ventilation route thought up? You could be looking at circum 2.5L of moisture released per noctem.

Finally, when you do get it on the road, maybe next month at the rate you're knocking it out, may I please wish all three passengers many happy miles, views, and chill-outs in it?

S.
 
Thanks, Mike. Agreed, a conventional mattress would be an absolute bear to remove and air and yes, it would seriously affect your kerb weight and possibly, axle position.

Yes too, condensation underneath can be an issue. Lons, I am sure will weigh in here, he has more experience than I have, but in 15 years trailer-tenting, I saw slatted bed supports, "circulation mats" (remarkably like router mats and they weren't marketed for long), "wicking layers" and solid under-surfaces like yours. With a self-inflater, moisture travel to the lower surface should be nil, the mattress topper will 'take the strain' and need the ventilation. Quechua is a respected manufacturer; seen a lot of their stuff over the years, it should serve you well - but make emphatically sure, you are provided with a decent-sized patch and a more than adequate supply of glue!! That mattress is only as good as the first puncture, or manufacturer's pin-hole, or slightly leaky seam! DAMHIKT!

The presence of your tank underneath, unless you take care to isolate (as opposed to insulate? pedantry!) the tank's top surface, there is a possibility of condensate from the tank's top surface moving upwards into the floor under the bed and - possibly - the bed under surface. I hope you've provided for air flow over the tank. I see this as the only (possibly) problematic area in what you have published so far, and I'd agree with Bob (Lons) re the attraction of a lug-a-round water barrel and drop-in Whale pump.

Speaking of ventilation, the camper a relatively small volume and - if I read you right - will shelter three bodies at night? Yourselves and Mabel? Have you got a good passive ventilation route thought up? You could be looking at circum 2.5L of moisture released per noctem.

Finally, when you do get it on the road, maybe next month at the rate you're knocking it out, may I please wish all three passengers many happy miles, views, and chill-outs in it?

S.
Are you putting a small skylight in. Nothing fancy just enough to ventilate.
 
Are you putting a small skylight in. Nothing fancy just enough to ventilate.
Precisely that. A 500x500 pop-up rooflight, which will probably be cracked open at night.
 
Last edited:
Not much I can add to Sam's post except that caravans and motorhomes have compulsory ventilation requirement that has to meet NCC standards to be approved, of course home built will be different story. Even with what sometimes seems excessive fixed ventilation there can still be a fair bit of condensation after a night's sleeping and that's using windows partly open.

Slatted beds of course but modern caravans and motorhomes from my experience don't seem to have that, the bases being solid ply as it was in our last Elddis caravan (2017) and the Burstner motorhome. They appear to have developed specific mattresses and put a layer of netting type material under though I fail to see how that heped much.

We had no issues with mattress condensation over the last eight years but then both vehicles were large and windows and roof lights were mostly open so air circulated. We used a mattress topper btw. The only time I needed to take precautions was over the winter but I can see an issue in a tiny space like a teardrop.
I know next to nothing about self inflating airbeds.
 
Last edited:
.......I saw slatted bed supports, "circulation mats" (remarkably like router mats and they weren't marketed for long), "wicking layers" and solid under-surfaces like yours.

I have thought I might put some sort of slats on the ply base, to give air a chance of moving under there. I might see if it's an issue first.

......Quechua is a respected manufacturer; seen a lot of their stuff over the years, it should serve you well - but make emphatically sure, you are provided with a decent-sized patch and a more than adequate supply of glue!!

I'll take a look at their stuff........including a puncture repair kit. Thanks.

The presence of your tank underneath, unless you take care to isolate (as opposed to insulate? pedantry!) the tank's top surface, there is a possibility of condensate from the tank's top surface moving upwards into the floor under the bed and - possibly - the bed under surface. I hope you've provided for air flow over the tank.

Yes, the well will be ventilated, and there will be insulation above it (and thus below the cab).

Speaking of ventilation, the camper a relatively small volume and - if I read you right - will shelter three bodies at night? Yourselves and Mabel? Have you got a good passive ventilation route thought up? You could be looking at circum 2.5L of moisture released per noctem.

Just the two of us. At the moment, I am think of 2 low-level vents, permanently open, and then the two windows and the roof vent. Do you think that will be enough? I also have in mind a high level vent with a small computer fan ticking over when we're on board, but will probably suck-it-and-see on that one. The wiring will be there, and the vent can go in if found to be necessary.

Finally, when you do get it on the road, maybe next month at the rate you're knocking it out, may I please wish all three passengers many happy miles, views, and chill-outs in it?
Very kind of you.....but it won't be next month!

-

In other news, I visited the chassis today, and it looks excellent from what I can see. Very neatly made, and I don't seem to have got anything obviously wrong on the drawing.
 
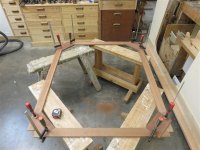
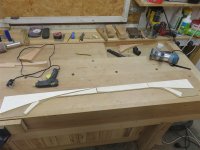
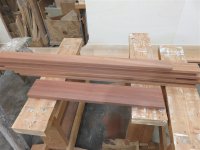
It's the simplest thing on a drawing: draw a rectangle, fillet the corners to a 150 radius, and offset the whole thing by 60mm. Fifteen or 20 seconds............A few seconds pondering whether it looks right, and that's decision made: I like the detail, so that's what we'll do. It's a whole other kettle of fish when you are faced with a few offcuts of sapele:

IMG_8228.jpg

I did all the normal stock preparation: cut to rough length, face, edge, thickness, saw-to-width, final planing. No problem. The idea was to do some 45 degree corner pieces half-lapped with the sides and ends. I set the trimming router depth:

IMG_8229.jpg

IMG_8230.jpg

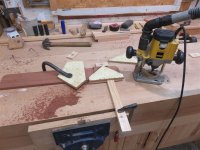
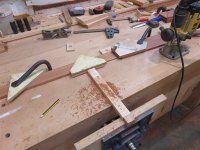
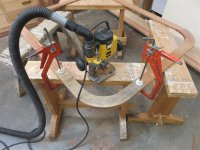
I made a jig, and cobbled together a way of holding the workpiece and the jig, as well as a spare piece to stop the router base tipping:

IMG_8232.jpg

The trial went OK:


IMG_8234.jpg

.....although it threw dust everywhere despite the extraction:

IMG_8235.jpg

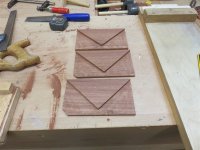
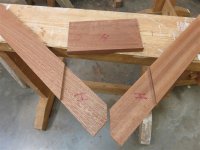
I cut out and squared up the corner pieces:

IMG_8237.jpg

IMG_8238.jpg

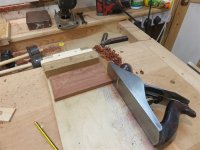
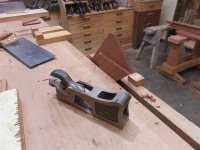
Cleaning up the shoulders was quick and easy with a shoulder plane:

IMG_8239.jpg

Just because of the work-holding, I did the sides and ends in two stages: all the right hand ends, then all the left hand ends:

IMG_8240.jpg

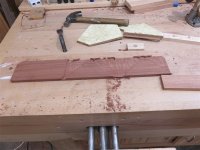
Faffing about with holdfasts, scraps of wood, the jig, thew waste, the workpiece.......well, it turned into a real schlep. There must be a better way. Again, there was a mess all over my bench:

IMG_8241.jpg

I then needed a groove for the door seal, so did my setting up on a bit of scrap:

IMG_8242.jpg

....before running all the straight pieces through the mounted router (with 2.5mm wing cutter):

IMG_8243.jpg

It took me ages to fettle each joint:

IMG_8244.jpg Time for a trial fit:

IMG_8245.jpg

More fettling, more marking:

IMG_8246.jpg

I then made a jig to shape the corners, glued everything up, and retired for the night

How on earth have 2 relatively simple frames taken TWO days to get this far?
 

Attachments

  • IMG_8247.jpg
    IMG_8247.jpg
    133.9 KB · Views: 2
Last edited:
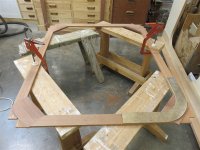
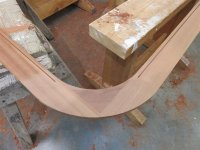
After de-clamping and scraping off the excess PU glue, I offered up the corner template so I could mark them out roughly:

IMG_8248.jpg

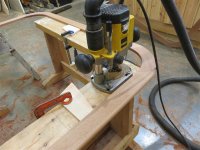
A few minutes with the jigsaw and the corners were roughed to shape. I could then clamp the template very carfully into the exact position necessary, and buzz around with a trimming bit in the router:

IMG_8249.jpg

Eight of them, and I had the frames shaped:

IMG_8250.jpg

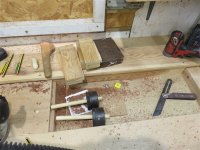
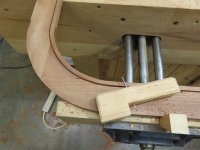
The back needed a curved groove for the seal, to join up with the straight bits. I thought of many different ways of attempting this, and couldn't come up with anything more practical than a scratch-stock, so, using an old nail, that's what I made:

IMG_8251.jpg

IMG_8252.jpg

Workholding was a bit of a chore:

IMG_8253.jpg

When all the scratching was done, two edges needed rounding over:

IMG_8254.jpg

I'm not normally someone who sands, but when using a router there aren't many alternatives. So I spent a bit of time hand sanding, before picking up a spokeshave to do the arises on the inside edge

IMG_8255.jpg

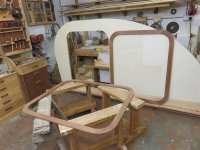
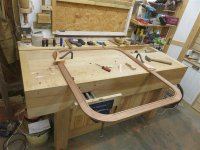
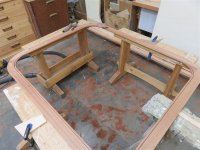
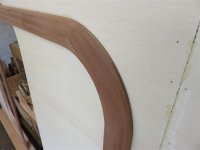
I'm really, really pleased with how they turned out, but really, really disappointed that these two frames took two and a half days. I've got another two to do for the outside, in bog oak, which promises to be much more difficult. Anyway, these came up well:

IMG_8256.jpg

IMG_8257.jpg

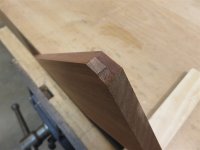
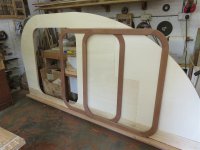
Now, I need to fit them. I have this fun little detail to get over:

IMG_8260.jpg

I have a plan..........
 
Last edited:
At the moment, I am think of 2 low-level vents, permanently open, and then the two windows and the roof vent. Do you think that will be enough? I also have in mind a high level vent with a small computer fan ticking over when we're on board, but will probably suck-it-and-see on that one
Mehhh...probably! The roof vent is the important one, as freshly breathed out air (with moisture) will rise.
 
Are you going to line the door opening so that no moisture can get near the poplar plywood. Whilst it is light and suitable for the interior. It is hopeless in any circumstance where it can get wet. I once went to look at a job where the owner was complaining that new doors and windows had rotted in 3 years despite a very good quality paint system. Turned out the wood was poplar. It is not durable. So take care to keep moisture away from the plywood.
 
Coming on Mike no matter how frustrating at the time taken for the frames. You would find a palm router far easier to handle btw. My little Makita is my go to these days.

I find sapele horrible stuff. I have used a lot and still have a load in the form of old science benches but I'm starting to get a reaction to the dust. I made a couple of plant stands in the form of 3 legged stools on the lathe last week as per my daughter in law's request and despite wearing an air powered helmet was still affected a little. It can only get worse.

Have you changed your name to E Jones? (no 4 plane) ;)
 
Last edited:
Are you going to line the door opening so that no moisture can get near the poplar plywood. Whilst it is light and suitable for the interior. It is hopeless in any circumstance where it can get wet. I once went to look at a job where the owner was complaining that new doors and windows had rotted in 3 years despite a very good quality paint system. Turned out the wood was poplar. It is not durable. So take care to keep moisture away from the plywood.

Yes, the door opening (the reveals) is going to have a laminated lining after the cedar out skin has been done, and will then be fibreglassed. There are going to be two seals around the door, an inner one, which I've just done the groove for, and an outer one on the door itself. I'm very conscious of what is going to be weather resistant and durable, and what needs to be kept dry, and the door detail is one I must have drawn 10 different versions.
 
Last edited:
......You would find a palm router far easier to handle btw......

I found out this evening that my main router won't fit for the next part of the job, so I'll have no choice but use my palm router.
 
Last edited:
Interesting project Mike
I was working for a firm building tiny houses on trailers. A couple of years ago they changed to white rubber for the roofs to help keep them cool. Is that available in the UK?
 
It had lots of dust on it and needed a good wax to run smoothly it’s not a well used jig.
You can still hand saw then cleanup in the jig.


Pete
 
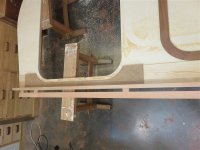
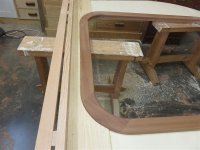
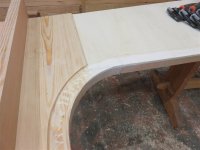
This is where the door surround will go:

IMG_8261.jpg

And here is the issue to overcome:

IMG_8262.jpg

I routed out the PAR board down to the same level as the ply, using a jig to guide things accurately. The jig took some careful shaping to get a decent fit to the sapele surround:

IMG_8263.jpg

It then needed thickening up to suit the bearing-guided cutter:

IMG_8264.jpg

I then hot-melt glued it carefully in place, checking multiple times that the resulting overhang distances of the surround over the door opening were the same everywhere:

IMG_8265.jpg


It worked out pretty well:

IMG_8266.jpg

I don't often mix glues in a glue-up, but the section I had routed in the pine was a bit rough, and that would suit a PU glue, but I badly didn't want squeeze-out on the ply section, so I used whatever the white 502 glue is:

IMG_8268.jpg

IMG_8269.jpg

I was out for the afternoon on my bike, and de-clamped when I got home. It's gone well:

IMG_8270.jpg

This is what it looks like from the other side, showing how it will act as a door stop. I'll get a better picture another time:

IMG_8271.jpg

The structural opening will, as I mentioned, be covered with a laminated build-up once the cedar strips have been fixed in place, and will be fibreglassed over.

The second side is underway. I won't show much of that because it is just the same (well, mirrored) as the side you've seen:

IMG_8272.jpg
 
I am just catching up with what is going with this.
It's good to see that old shoulder plane being put to good use.
Good progress, in a few weeks I will be able to come over and view in person.
 
I am just catching up with what is going with this.
It's good to see that old shoulder plane being put to good use.
Good progress, in a few weeks I will be able to come over and view in person.
Thanks Dave. Yep, I love that shoulder plane. It's not needed often, but when it is, it's spot on.

I'll give you a buzz in a day or two and get the latest.....
 
Mike:

What are you doing for lights? As a trailer user (ok, it's a flatbed, not a camper) the most annoying thing is making sure the lights work. And I'll bet you have plans for some interior LEDs so you can read in bed & find stuff when you drop something, plus a light in the cooking hatch.

Kirk
 
The electrics is the thing I look forward to the least, Kirk.

I've got the trailer road-lights already. These are single-unit lights with running light, brake light, and reverse lights built in (I think that's right). I had hoped to mount them on the chassis below the body, but they will now be mounted on the galley hatch, with an access panel behind. These will be the only wires which run inside the bodywork. Everything else will be surface-mounted, so that when I stuff the wiring up, or it shakes itself to bits, I can access it easily to fix. These lights, plus the number-plate lights and the forward-facing marker lights, will run off the car battery in the normal way via a 13 pin plug. I will also be doing a high-level brake light, and possibly a high level reverse light. All the under-body cable runs will be in conduit.

I took an early decision not to use the chassis as neutral. That's where a lot of trailer electrical issues arise, I think. I will run two wires to everything.

The other lights will run off the trailer's leisure battery. These will be internal lights, galley lights, and some external lighting for the awnings ("porch" lights, over each door). The galley will have the choice of both red and white lights to light it, because red attracts fewer insects after dark.
 
The electrics is the thing I look forward to the least, Kirk.

I've got the trailer road-lights already. These are single-unit lights with running light, brake light, and reverse lights built in (I think that's right). I had hoped to mount them on the chassis below the body, but they will now be mounted on the galley hatch, with an access panel behind. These will be the only wires which run inside the bodywork. Everything else will be surface-mounted, so that when I stuff the wiring up, or it shakes itself to bits, I can access it easily to fix. These lights, plus the number-plate lights and the forward-facing marker lights, will run off the car battery in the normal way via a 13 pin plug. I will also be doing a high-level brake light, and possibly a high level reverse light. All the under-body cable runs will be in conduit.

I took an early decision not to use the chassis as neutral. That's where a lot of trailer electrical issues arise, I think. I will run two wires to everything.

The other lights will run off the trailer's leisure battery. These will be internal lights, galley lights, and some external lighting for the awnings ("porch" lights, over each door). The galley will have the choice of both red and white lights to light it, because red attracts fewer insects after dark.
If using led lights you could power them using a car jump starter power pack which are light and compact.
 
If using led lights you could power them using a car jump starter power pack which are light and compact.
No, I'm going to have a leisure battery (100 -120AH) because there's a fridge to run, and a water pump, plus any internet-related stuff.
 
I've a small solar setup in the garden shed running garden lights and providing power for music etc on the patio next to the shed.
It's been running for a few years now. I started off with a 'leisure battery' which was a large lead acid battery. Within a year it was down to half its rated capacity and 18 months from new it was scrap. Now it wasn't the most expensive brand but for what I paid I expected better. I now have a LiFePO4 12V100AH battery - lithium iron phosphate (the type does not catch fire) and it has been perfect for over 2 years. It was one of the cheapest at the time but I saw a tear down review on youtube and it was well made inside.

So my advice - don't get lead acid. LiFePO4 is much better and much lighter weight.
 
No, I'm going to have a leisure battery (100 -120AH) because there's a fridge to run, and a water pump, plus any internet-related stuff.
Get a lithium if you can afford it as you pay twice the price but you'll get twice the capacity....
 
What about an AGM battery?
Better than lead acid but they used to have a shorter life due to less charging cycles, that may have changed though I never had an issue with mine. Lithium are better imo. Lighter, smaller but you would need to look at the charger you use and ensure your solar panel controller is rated for lithium.
 
There are other considerations that might affect choices. How are you going to recharge the battery? Do you want solar panels to do that (flexible ones are light weight)? Do you want to power anything with mains voltage from the battery (100A from a single LiFePO4 battery will give you just over a kilowatt)? How important is knowing the state of charge? (LiFePO4 has constant voltage during discharge so you'd need a shunt and monitor to count the amp hours in and out - about £60).

You can monitor voltage on lead acid to gauge state of charge but I've never found it reliable.
 
The electrics is the thing I look forward to the least, Kirk.

I've got the trailer road-lights already. These are single-unit lights with running light, brake light, and reverse lights built in (I think that's right). I had hoped to mount them on the chassis below the body, but they will now be mounted on the galley hatch, with an access panel behind. These will be the only wires which run inside the bodywork. Everything else will be surface-mounted, so that when I stuff the wiring up, or it shakes itself to bits, I can access it easily to fix. These lights, plus the number-plate lights and the forward-facing marker lights, will run off the car battery in the normal way via a 13 pin plug. I will also be doing a high-level brake light, and possibly a high level reverse light. All the under-body cable runs will be in conduit.

I took an early decision not to use the chassis as neutral. That's where a lot of trailer electrical issues arise, I think. I will run two wires to everything.
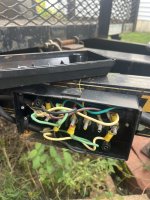
Yes, I now run a ground wire to each light to ensure a good circuit too.

IMG_018047.JPG
I also strongly suggest, assuming you haven't already ruled it out for some reason, using a real junction box with ring terminals on all your wires to connect your brake/running/reverse lights to the car plug. This may look a little like a rat's nest because I'm using heavy duty extension cord on my lights instead of trailer wire, but properly crimped ring terminals won't come loose. I bought one that came with the plug I needed for my truck. The other thing you may consider is soldering the connections to the light fixture rather than just taping & wire nutting them.

Kirk
 
There are other considerations that might affect choices. How are you going to recharge the battery? Do you want solar panels to do that (flexible ones are light weight)?

In a couple of ways, at least. Firstly, I'll do a split charge system from the car alternator, so that once the car battery is fully recharged it can put its output into the leisure battery whilst driving. Secondly, there'll be a shore-power connection to enable 240 volts to come in to a charger on board. This will be the 240 volt system's only role. Nothing will run on mains. Finally, I am still umming and ah-ing over solar. A fixed panel may not be well oriented, and may be an annoyance when choosing orientation when setting up camp. It won't help when parked up between trips, as the camper will be kept in a garage.

Do you want to power anything with mains voltage from the battery (100A from a single LiFePO4 battery will give you just over a kilowatt)?

No. There'll be no need for an inverter.

How important is knowing the state of charge? (LiFePO4 has constant voltage during discharge so you'd need a shunt and monitor to count the amp hours in and out - about £60).

You can monitor voltage on lead acid to gauge state of charge but I've never found it reliable.

Interesting. I didn't know any of that. But yes, I'd want a gauge to show me the state of the charge.
 
Back
Top