shortbusruss
New Shoots
- Joined
- Apr 10, 2026
- Messages
- 79
- Reaction score
- 121
- Name
- Russ
- LOCATION
- Oundle/Peterborough
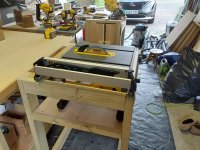
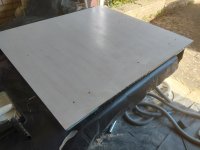
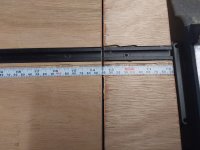 The veneer on this plywood not that great, but it is a piece of shop furniture.
 The veneer on this plywood not that great, but it is a piece of shop furniture.

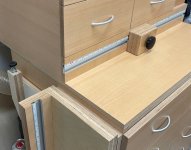


Here is a photo of the back of the block showing the aluminum strip, plastic window, and brush hair. I used a small triangular file to cut a shallow groove into the aluminum and plastic to hold the hair while I tacked it into place on the ends. Ignore the two holes on the right side of the aluminum strip because I worked with what I had. The elongated hole allows some adjustment of the cursor.Very neat Mike, I like the idea using a brush hair behind plastic, It took a second to work out how you’d zero it to the saw blade but easy enough I suppose. You had got me with the hair not being level with the block!
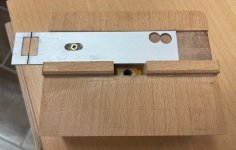
Brill, that’s the method I thought about when I pondered it. I like the saw cut for the hair I would have struggled with glue on my fingers I suspect.Here is a photo of the back of the block showing the aluminum strip, plastic window, and brush hair. I used a small triangular file to cut a shallow groove into the aluminum and plastic to hold the hair while I tacked it into place on the ends. Ignore the two holes on the right side of the aluminum strip because I worked with what I had. The elongated hole allows some adjustment of the cursor.
View attachment 56941
After I installed the T-track, I loosely inserted the self-adhesive scale into the upper track without removing the backing. I measured and cut a 800mm length of wood and left it clamped to the table. There was nothing special about the 800mm and any length could have been used.
I slid the stop block to the left end of the wood and tightened the knob to keep it from moving. After moving the scale so the 800mm was under the cursor, I peeled the end of the backing from the right end of the scale and started pressing it in place. After the scale was secured to the T-Track, I used a utility knife to cut it at the places where the T-track folded away from the main section.
Uggggh. I wish. No. I have nothing but a No. 5 plane, and planing end grain seemed like it would be beyond my ability to have a good outcome at this point in my journey. SO many mistakes, and a lot of hackish fixes. The legs ended up quite a bit off from each other due to lack of a good stop block setup while cutting them. Ended up trying to get the toppers for the legs level by just using an orbital sander.. Too much material. Ended up using a router on the bottom side of one end of the leg toppers (the pieces between the wings and main saw platform..) to trim the material a bit.Very neat Mike, I like the idea using a brush hair behind plastic, It took a second to work out how you’d zero it to the saw blade but easy enough I suppose. You had got me with the hair not being level with the block!
@shortbusruss coming on well, when I made one for Dil I sat the saw on a piece of ply and packed under it to level it with the side tables, but I like your idea too, presumably you plane the “feet” till all is level?
Ian


I built my MFT-style workbench using 40x40mm and 80x40mm aluminum extrusion. All but a few pieces of the extrusion were machined by the vendor.I expect I will build a new miter saw station at some point.. Need to find a better solution for cutting aluminum cleanly too. Maybe a good metal blade on my jigsaw? The miter saw was melting the aluminum, even when using wax on a metal cutting blade. Plus, that wax made a mess.
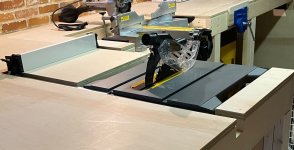
Yeah, that is the general idea, only there will be a router station where your fence is sitting right now. Your setup looks more or less exactly what mine will end up looking like. How wide is this table when looking at the front of the saw? With the other two work benches to sit against an approximate space of 11 feet, I have almost exactly 48" of width available for the final table saw workbench. I really need to clear out that section and put the workbenchs in their final positions, so I can measure "exactly" how much space I have up to the door jamb. It feels like an extra inch or three is really going to matter in this final workbench build.I’ve shown this ad nauseum but this close up of the bit you’re talking about might help you in your design for the proper one? Ian
View attachment 57160

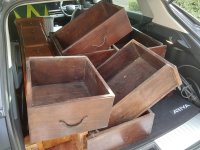
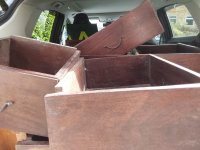
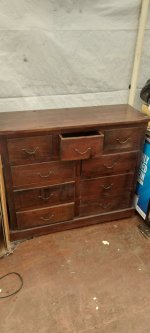
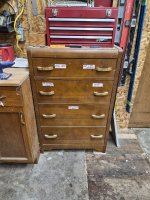
Seller said that some are pine, and some are oak.. There are multiple dressers available. If I am looking for a quick fix to get some storage, would pine not be recommended? The garage is getting a little out of hand, and I "really" need to use up some of my remaining three plywood sheets on the main workbench drawer box and French cleat wall backer board, to free up room both to remove the plywood sheets from the temp worktop they are on, and to start storing tools. I am somewhat time-constrained, so simply taking the best solution I can do within the time I have.Hmm, sorry to say Russ, but they’re both Pine.
Fair enough. I will definitely prioritize any oak pieces.. For a newbie.. Any particular way to tell the difference?You may find that the construction of the pine drawers isn't very robust; the fronts could be held on with nothing more than two or three dowels and if you'r lucky, there might be a dab of glue included. Under workshop conditions they're liable to fall apart quite rapidly so not recommended. The dressers appear typical of the sort of economical pine furniture which is very common; we had quite a lot which has gradually been replaced with oak pieces somewhat better constructed - Rob
On better quality pieces you'll probably find a machine dovetail construction on the drawers. You can usually tell when they're made by a commercial machine as the tails and pins are identical sizes - RobFair enough. I will definitely prioritize any oak pieces.. For a newbie.. Any particular way to tell the difference?



Ain't that the truth. We'll, for now.. I have so many tools and parts cluttering the house, the wife would kill me if I bought a drill press before I got the garage sorted.. So for now, I am just going to have to wait. I did push things a little and bought a combo spindle sander for prettying up the tool hangers. But without any cleats to store anything on yet, it is still in the box waiting for it's first day of glory." If I had a drill press." A must for a workshop. Go on, time to get one.
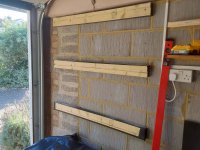
I used gaffer's tape to wrap two side caps to seal off the rear of the backer board from the wall, to keep it from absorping moisture. Backer board has DPM stapled to it. I did a decent job on the other side cap, because I think I wrapped the gaffer's around the edges and stapled it to internal edge.The one giving me provlem was not done that way, and the tape edge is showing, and starting to lift. And I used my 18G brad nailer to secure it, so.. Not so easy to take off and fix.The tape problem, are you talking about the tape around the battens on the wall for the backer board to screw onto? Just curious why it’s there at all really?
Ian