shortbusruss
New Shoots
- Joined
- Apr 10, 2026
- Messages
- 94
- Reaction score
- 151
- Name
- Russ
- LOCATION
- Oundle/Peterborough

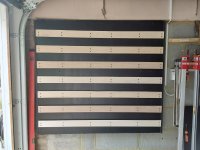
My god, no. It was just a battery ecosystem choice starting from zero good tools, ever. I am going with black and tan for all the furniture. Black French cleat backer board, birch tool hangers. Black frames, birch tops. Drawers, hardwood plywood, black stained mahogany false fronts.Will you paint the unit dewalt yellow with black accents?

Always good to have ample supply of screws, nails etc. too many is never a problem.
It does happen to me which entails a 1 1/2 hr return trip for hardware.


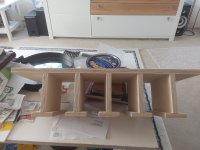
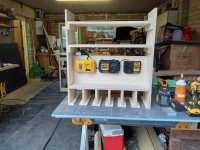
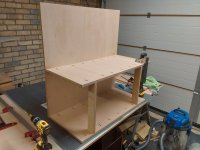
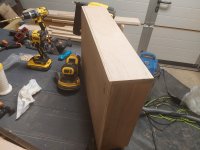
I glued, pin nailed, and screwed in those top two shelves, and I believe there are screws in the last inch or so of both those top shelves. It came out nice enough, that I don't really want to get too creative trying to get the entire thing to sit 3/4" closer to the wall. I think having another 3/4" inch piece behind the top portion and the tool hangers is not the worst thing in the world for antiracking anyways, so..Are you not able to trim the ¾"/18mm from the sides and shelves - either the back or the front edge? If you could that would take care of it sitting out from the wall ¾" further than necessary... Just a thought. Otherwise it's looking good
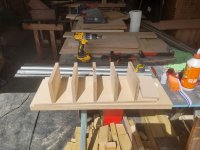
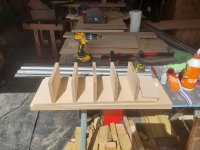
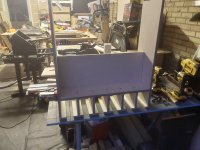
Yeah.. Drill, driver.. Pin nailer, and anything else that has either a head or handle thin enough to insert between the legs.Well that looks fine to me, but is it for 6 drill / drivers or something else?
I’ve seen YouTubers with rows of them and always wondered what on earth they do with them all.
Ian
Yeah.. I could screw the cleats into the thin edge of the shelf sides. It's gonna be the heaviest shelf on the wall though, when loaded, so I was not sure about relying on just screws into the thin edge of 3/4" plywood.Ok, Am I missing something here. If the cleat is screwed to the backside of the shelf sides, yes it will be proud but when you set it on the wall cleat the back of the unit will be flat to the wall.?
Edit: As Frank said maybe slip in ply between the unit shelf and below supports.
Coming on nicely...Anudda one bites dah dust...
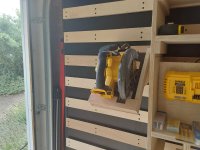
Yeah.. There is a leg on the right side for this purpose, but I probably should have made the holder deeper so I could store blades in it. Honestly, have been in kind of a rush to just get "some" storage online as quickly as possible, just to get tools where I can find them, and off of worktop. I am not super happy with how some of these are coming out, as in the moment, I started using some lower grade 1/4" plywood I bought for drawer bottoms, and on some of the holders, it has kind of ruined the look I was going for, which is less utilitarian, and more clean and well thought out.Coming on nicely...
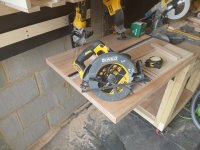
Just one take on the holder for the circular saw... I would be extending the support (triangular pieces) down so the weight is also resting/pressing against the lower cleat as well as hanging from the top one it's 'hooked' on.
 . You can return to it later as you make room on the worktops getting your stuff out of the way. You'll more than likely find where you put some of these that they don’t quite 'work out' placement wise and you'll move them around. That's the fun of having these sort of tool holders.
If it does the job, it's good enough. Looks are (relatively) unimportant. Save your time - and finesse - for when your creation is highly visible or decorative. Spending time getting something "purty" that might then get 'clattered' by unexpected workshop events (a.k.a. SNAFU's) is counterproductive.it has kind of ruined the look I was going for, which is less utilitarian, and more clean and well thought
 .
. . I'm relearning after a long time of not doing this stuff... making mistakes - but learning to adapt as I go along. My fliptop workbenches have design faults, measurement faults, assembly faults... but they're workshop units and not *Fine Furniture* for any competition

 )
)
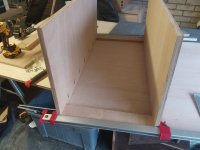
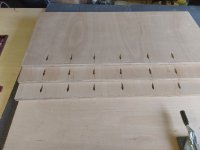
You didn't miss much IanI’ve never caught the pocket screw bug, but I could imagine that the action of screwing them together will pull things out of line a bit?
I’m sure there are ways to cramp it all tight so this won’t happen.
Ian
 - Rob
- RobI just appreciate having folks to chat with on this stuff. It seems as if it is a simple natural process that one has to follow to learn the craft.. I.e., "screwing everything up a little", as one is developing their own process.When I 'returned' (?) to getting back into woodworking and sorting out my workshop I'd had a long time away from what was changing (as far as I was aware) - things like pocket hole jigs and screws. MFT tables, plunge saws and tracks and such. Quite an eye opener. I got hooked with these things and got some bits and pieces - yet to put to use... yet to decide if money wasted. Sorting/trying to sort out the workshop, make workbenches that would be usable without taking away worktop space with some power tools - mitre-saw, lathe, thicknesser - took some working out. Seeing YouTube videos of fliptop workbenches got me thinking of if possible to use
Seeing a number of these 'pro' (?) woodworkers designing and building *furniture quality style* workshop benches was *very enticing* to try to emulate BUT it didn't take me long to realise I'd NEVER be able to achieve those *furniture finish* units for my little workshop space. It's meant to be a work shop which will get knocked about, scratched, stained, marked in wsys I've not even yet thought of or considered...
I've shown photos of 'where I'm at' with my little 'shop - still very much a WIP... slow WIP... It'll be *tidied up* as I put edging to the plywood side panels of the fliptop workbenches. My 'drawers' (such as they are) were quickly designed and assembled with glue and screws using up old chipboard/melamine faced boards I'd rescued over time from disassembled furniture: kitchen, bedroom... Built for the purpose of getting stuff out of the way as quickly as I could... to "revisit and recreate at a future time"
I applaud you for your approach with your 'shop and these drawers. Don't put yourself down if/when you realise you've made a mistake somewhere along the way... If they fit and suit the purpose you have for them then job done - next stage/step to take you further
(Sincerest apologies for the rambling... got to be an age thing in my case
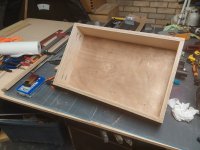
I do have a full dresser's worth of reclaimed mahogany I can use as false drawer fronts, depending on what width I can get out of the carcass sides. I am focusing on getting the drawers in and seeing if they slide properly, before I do any work on the mahogany.I have often used the Kreg pocket screw system for cabinets, fast accurate and sturdy. They all are pretty much the same and do the job well.
Once you face frame the cabinets with solid wood ie., stained hardwoods or paint grade wood you can achieve a professional job when required or for your shop it is perfectly acceptable.
Yes, I have the mahogany dresser that I need to reclaim the wood from, strip, and stain black. The drawers from that dresser are interesting bent cotter pin iron attachments, so I am planning to use a solvent to clean up the iron handles, paint them an antique gold, for a nice pop that meshes with the black and tan theme.Aah, so good a feeling to sort things out, but as I’m sure you know you are going to need a whole lot more!
Maybe you were going to but it’s crying out for a false front on there. Best left till all the drawers are in.
Ian
Hmmmmm.. Maybe you are right. I do have quite a bit of 18mm birch plywood, and it would make things a bit easier, as I would need to worry about wood movement with the mahogany, which I don't think is as much a condern with the birch plywood. Plus, it would not require stripping.Personally I wouldn't stain mahogany black, especially old stuff. I would save the mahogany for jewellery boxes etc and use a commonly available wood to blacken. Birch or your sycamore for example. The hardware hints at the wood being old and therefore real mahogany. Too nice and impossible to get new.
Pete