• Hi all and welcome to TheWoodHaven2 brought into the 21st Century, kicking and screaming! We all have Alasdair to thank for the vast bulk of the heavy lifting to get us here, no more so than me because he's taken away a huge burden of responsibility from my shoulders and brought us to this new shiny home, with all your previous content (hopefully) still intact! Please peruse and feed back. There is still plenty to do, like changing the colour scheme, adding the banner graphic, tweaking the odd setting here and there so I have added a new thread in the 'Technical Issues, Bugs and Feature Requests' forum for you to add any issues you find, any missing settings or just anything you'd like to see added/removed from the feature set that Xenforo offers. We will get to everything over the coming weeks so please be patient, but add anything at all to the thread I mention above and we promise to get to them over the next few days/weeks/months. In the meantime, please enjoy!

Bed - Finished and sleepable inable!

A bit more done today.
Getting the width right is important, as I already have the slatted base and mattress. The base is 1400mm, or rather it is 2x700, a fact that I didn'tt appreciate when I ordered it. No matter, but it does mean that the bed will need a central spine.
So let's say that I need the 1400mm, plus a bit of clearance, say 5mm. But when the two sides are butted up, I already have 55mm, so the rails need to be 1350mm long.
So having cut them to length it is time to mark out the curve. I already have a video on how to mark out long shallow curves when I know only the cord and the bulge - 1350 and 40.mm respectively. That gives a radius of about 5.7m - that would be one helluva trammel.
But it's easy with a couple of sticks. Simply let them be in contact with each end of the arc and cross at the bulge point. Glue them together.
View attachment 34438

Trim off the excess at the crossover:View attachment 34440

Then run it against the blocks with a pncil in a notch at the crossover point. One perfect circular arc.
View attachment 34439

I did have to shorten one arm by quite some length because the walls of my workshop got in the way, but I managed.
I would have carried on and got them bandsawn, but eyes went AWOL again. Sigh.

If you need more detail of the technique, there is a YT here:

S
Mathematical witchcraft! I love it!
 
Well having been awake since before 3am and then crumpling when it was actually time to start the day, the morning disappeared. My sleep hygeine is very poor and that affects just about everything else. But still, when I did eventually start, it all went well.

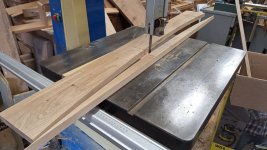
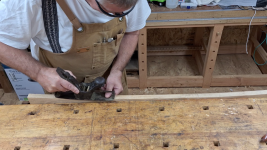
The first job was to refilm a scene I shot yesterday, because the clip was out of focus. After that, I was able to get that curve bandsawn, which considering I was doing it one-eyed, was pretty decent. Not perfect, but near enough to be able to clean it up easily with a compass plane and spokeshave.

bandsawn curve.jpg


using compass plane (Small).png

One of the few advantages of being slow at this game is that it gives me time to think. I've been pondering options of what to do with the tops of the legs. All that blockwork is on show and it is not pretty. I like what duke has done with his, but I can't do that with this design, so it will be caps of some kind. There is a reason for going off on this tangent...

There are two lower rails and two crest rails. Three of them are 24mm thick, but one of the crest rails is a tad under 21 mm and it looks a bit skinny and obviously different to the other three. And actually, there is still a rough patch on it, so I might even have to take it down to 20mm. So I'm going to fit a 35mm cap along the top of the curve. Then they will both look identical (until someone examines the back, which will never happen). I can rout a groove on the underside of the cap to fit the 24mm crest rail, centrally along its length, then make the other groove narrower to fit the skinny, but keeping the same lip on the front face. If I make that cap 8mm thick, I can get a bull nose on it with a 4mm roundover cutter, which I just happen to have.

Then I can make caps for the legs, also with a bull nose, and they will complement each other nicely. Two problems, one fix. BOGOF.

I've still got it, guys, it may be increasingly hidden, but I've still got it. For now :)

I can't do any more today, as after I'd prepped the caps, I found they both had a split in the ends and I didn't have enough spare length to simply cut it off, so they both have a squirt of glue and are clamped up until tomorrow. Plus my battery went flat, as was the spare :(

Never mind, It's time to make fish pie, anyway. Mmmm.

S
 
Last edited:
Well having been awake since before 3am and them crumpling when it was actually time to start the day, the morning disappeared. My sleep hygeine is very poor and that affects just about everything else. But still, when I did eventually start, it all went well.

The first job was to refilm a scene I shot yesterday, because the clip was out of focus. After that, I was able to get that curve bandsawn, which considering I was doing it one-eyed, was pretty decent. Not perfect, but near enough to be able to clean it up easily with a compass plane and spokeshave.

View attachment 34453


View attachment 34454

One of the few advantages of being slow at this game is that it gives me time to think. I've been pondering options of what to do with the tops of the legs. All that blockwork is on show and it is not pretty. I like what duke has done with his, but I can't do that with this design, so it will be caps of some kind. There is a reason for going off on this tangent...

There are two lower rails and two crest rails. Three of them are 24mm thick, but one of the crest rails is a tad under 21 mm and it looks a bit skinny and obviously different to the other three. And actually, there is a rough patch on it, so I might even have to take it down to 20mm. So I'm going to fit a 35mm cap along the top of the curve. The they will both look identical (until someone examines the back, which will never happen). I can rout a groove on the underside of the cap to fit the 24mm crest rail, centrally along its length, then make the other groove narrower to fit the skinny, but keeping the same lip on the front face. If I make that cap 8mm thick, I can get a bull nose on it with a 4mm roundover cutter, which I just happen to have.

Then I can make caps for the legs, also with a bull nose, and they will complement each other nicely. Two problems, one fix. BOGOF.

I've still got it, guys it may be increasingly hidden, but I've still got it. For now :)

I can't do any more today, as after I'd prepped the caps, I found they both had a split in the ends and I didn't have enough spare lenth to simply cut it off, so they both have a squirt of glue and are clamped up until tomorrow. Plus my battery went flat, as was the spare :(

Never mind, It's time to make fish pie, anyway. Mmmm.

S
Oh I can definitely see you’ve still got it Steve. That’s a good fix for the thin bit, and you’re correct nobody will ever know, apart from all the thousands of us of course ……
 
Steve, if you're sleep hygiene is so poor, that in my book is insomnia, which is bloody horrible. I sorted out my particular issues but it took a long time and a lot of work. Sorry to digress - Rob
 
Oh, it's been lousy for years. It's actually been rather better of late, but 3 or 4 hours at night has been the norm for years. Then the rest when I should be up and doing stuff.
I have an appointment with a sleep specialist in September, but I'm not hopeful, TBH. I often have a bath late at night and I am convinced that hekps, and I take Dornomyl, which is for "short-term" sleep issues, but this is not short-term, by any definition.
S

PS Sometimes it is quite worrying when you read some of the research... Increased risk of Alzheimer's etc. :(
 
Last edited:
I would have a test to see what your Magnesium level is Steve, and start to take a supplement, it won’t hurt you if you already are fully topped up, but I bet you’re low - nearly everybody is!
Just Googled Magnesium and poor sleep and it’s a well known one.
I take it every day btw.
 
I did take Mg for a while, but, TBH, I didn't see a difference. I do get a blood test every 3 months to monitor my general bodily degradation and it has never showed up as a problem (there are much greater issues!).
S
 
Last edited:
Oh, it's been lousy for years. It's actually been rather better of late, but 3 or 4 hours at night has been the norm for years. Then the rest when I should be up and doing stuff.
I have an appointment with a sleep specialist in September, but I'm not hopeful, TBH. I often have a bath late at night and I am convinced that hekps, and I take Dornomyl, which is for "short-term" sleep issues, but this is not short-term, by any definition.
S

PS Sometimes it is quite worrying when you read some of the research... Increased risk of Alzheimer's etc. :(
Without wishing in any way to stray into the egg sucking area, 'sleep hygiene' is a series of practical things that you can do to aid sleep, such as sleeping alone, black out curtains, no big LED alarm clocks, no caffeine after 7pm, no screens in the evening (phones, iPad etc) and going to bed when actually bone tired, not at the same time each night. Most importantly, absolutely no napping of any sort during the day as this lessens the body's ability to naturally drop off to sleep at night.

All that is relatively easy to do compared to the process of 'sleep restriction' (I've done it twice and have absolutely no wish to do a third time) which is positively brutal - Rob
 
no caffeine after 7pm

I'm always slightly jealous when I read things like that. If I have a cup of coffee after about midday it'll stop me sleeping that night. In general I'll stick to decaf after about 10am and I won't even risk the residual caffeine in decaf coffee after about 4pm. The idea of an after-dinner coffee is always appealing in theory but never something I can have in practice.
 
I'm always slightly jealous when I read things like that. If I have a cup of coffee after about midday it'll stop me sleeping that night. In general I'll stick to decaf after about 10am and I won't even risk the residual caffeine in decaf coffee after about 4pm. The idea of an after-dinner coffee is always appealing in theory but never something I can have in practice.
My wife and are are both the same way - even our breakfast tea is decaf. About the only time I'll have any 'normal' coffee is if I've got more than two to three hours of driving to do.
 
I'm always slightly jealous when I read things like that. If I have a cup of coffee after about midday it'll stop me sleeping that night. In general I'll stick to decaf after about 10am and I won't even risk the residual caffeine in decaf coffee after about 4pm. The idea of an after-dinner coffee is always appealing in theory but never something I can have in practice.
My wife and are are both the same way - even our breakfast tea is decaf. About the only time I'll have any 'normal' coffee is if I've got more than two to three hours of driving to do.
The caffeine thing with me was never too much of a bother, but just to be sure I never drank coffee etc post 7pm. I still have an occasional espresso from the Gaggia after a special meal (Christmas etc) in the evening but never close to bed time - Rob
 
Well this morning got taken up with Life, but I did have a couple of productive hours this afternoon.
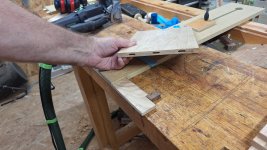
You may remember that the two crest rails are different thicknesses. Indeed, the thinner one still had a bit of a still-rough-sawn area on it, so it went through the planer again. So they have ended up just under 24 and just over 20mm respectively - an obvious difference.
So I cut two 35mm cap strips, about 8mm thick and routed a groove along its length. By turning the workpiece and-for-end I could make sure that it was central, and sneak up on the width until it was a perfect fir for the 24mm crest-rail.
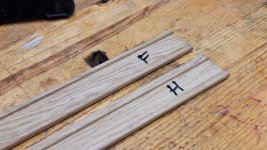
Then, without moving the cutter or fence, I used that setting for the first cut in the second cap strip. That means that both pieces have the same overhang at the front. Then it was just a case of moving the fence back bit by bit until the groove fitted the 20mm board. You can see the difference here:

two different cap strips.jpg

I don't have an 8mm bullnose cutter, but I do have a 3mm roundover, which makes an approximation and a bit of sandpaper will sort out the rest.

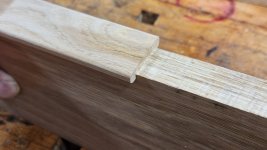
So now they each fit their board properly:
cap strip fits.jpg

And I think they are going to look just fine.

I'm not gluing them on just yet, I want to get all the mortising done first.
S
 
Well that’s what sometimes happens when you’re trying to get out of a problem and the solution improves the look of the thing completely!
Finishes it off nicely. Hope those thin sections don’t cup too much before you get to glue them on.
 
The next task is to do quite a lot of M&T joinery on the slats. It should be straightforward, this is just the scale of joinery for which the domino was invented.

However.

My slats are 12mm thick. indeed they are slightly under now that they have been sanded, maybe 11.7mm.

A few months ago I bought a third-party replacement thickness stop, which included a 12mm setting. "Great!", I thought. There is only one teensy-weensy problem. The fence of the machine does not go down far enough to hit the 12mm stop, so the slot is nowhere near central.

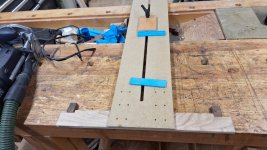
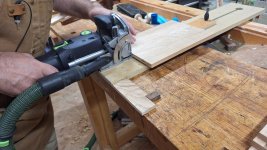
So if we can't move the fence down far enough, we do without the fence altogether and use the base of the machine as the reference. The centre of the cutter is 10mm above the base and I want it to be just 6mm above the base (to be central in the slat), so I slipped a couple of 4mm shims underneath the workpiece:slat domino spacers.jpg

Then I can cut the slots:

dominoing slat slot.jpg

And lo and behold I have central slots.

slat domino slots finished.jpg

I've done the short slats, I still have the long ones to do. They are a bit trickier as they are too long to fit on my jig, so I'm going to have to clamp each one rather than just push against the stop.

The only mishap today was the filming. I was feeling dead chuffed that I got the shots I wanted, no fluffed lines, all Right First Time Every Time. Or so I thought. It was only after I'd downloaded the footage that I've discovered that it is out of focus and I've chopped the top of my head off. So I'm going to have to do it again.

I have a busy couple of weeks coming up, including a 2-week visit of a SIL with dementia, so I'll either get no workshop time at all or I will live in there permanently...
S
 
Last edited:
I realise it is pricey, but Veritas have a very nice Domino table with which you can do this. Or you can build the original by Carmonius Finsnickeri yourself. He has provided all the information you need for that. Nothing wrong with Steve's way of doing it though.
 
Ooh, that's a nice jig. I have seen it before, but I had forgotten all about it. Thank you for the reminder.
It doesn't really address the problem of really thin stock though, other than by shimming as I have done.
Excellent jig, though.
S
PS I do hope that that is his real name!
 
Yeah, that's why I referred to the Domino Joinery Table from Veritas. They have a built-in solution for thin stock. Although "built-in" is a bit much, because it still is shimming.

The guy's name is Ola Carmonius. He has a real good knack for making jigs. Finsnickeri is Swedish for a (high end) cabinetmaker's shop.
 
I've finally finished all the slat mortices, without incident (!).
I then transferred all the mortice centres to the crest rail. I wasn't difficult work but I do have to be careful.
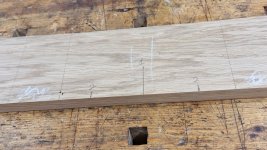
When pushed together the slats come to 735mm. That leaves 615mm for the spaces or 61.5mm each. So I set my school dividers to 61.5mm. This is easier than it may sound, as the very fine points actually sit in the engraved scale of my ruler. So I started in the middle and worked outwards, marking the safe areas with chalk so that I didn't accidentally put a mortice where a mortice should not be.

marking crestrail mortices.jpg

The centre mortice is Waggle1 wide, so that there will be an exact registration. The rest are all W2, except for the next-to-narrowest, which is W3. In that way there is some wiggle room for getting everything spot on.

I used the 22mm thickness setting for all the rails. Not exactly central for any of them, but acceptably so for them all, and they are all the same which is the main thing.

finished crestrail mortices.jpg

Of course there is a snag (well, there would be, wouldn't there?). When I'd finished mortising all four rails, I turned them end for end against each other, fully expecting them to match either way round. They don't. Some are out by a few mm and I don't know why. It's not terminal, but I need to get it right or else it won't assemble squarely.

But I've had enough for today. I was in the workshop before 9am today, unheard of this side of the Channel, and that after something resembling a proper night's sleep, too. But I need to do these diagnostics on a fresh head, and my eyes have done for the day, too.

S
 
Ooh, that's a nice jig. I have seen it before, but I had forgotten all about it. Thank you for the reminder.
It doesn't really address the problem of really thin stock though, other than by shimming as I have done.
Excellent jig, though.
S
PS I do hope that that is his real name!
I’m a bit of a Luddite in some ways and the Domino thing had missed me really, but that video shows how quick and useful it is, what a comprehensive demonstration with a beginning and a summary, and no waffle, most of the other YouTubeists could learn a lot from Mr Finsnickerie. So thanks for that Steve, I may invest in one, but not just yet! I’ve got a workshop and a Bench to build and I don’t think it will be needed for either of those.
 
Ooh, that's a nice jig. I have seen it before, but I had forgotten all about it. Thank you for the reminder.
It doesn't really address the problem of really thin stock though, other than by shimming as I have done.
Excellent jig, though.
S
PS I do hope that that is his real name!
That's a handy looking jig but mostly all doable without using it. Thin stock is a problem but one that a mate told me how to solve some years ago, which is to machine the work sections to as thin as practical for the Domino to work (usually the 16mm setting), cut the joints and then pass each individual bit through the thicknesser taking a bit of each face as necessary until the work is the thickness needed and the domino slot is centred, more or less. Works a treat! - Rob
 
That's a handy looking jig but mostly all doable without using it. Thin stock is a problem but one that a mate told me how to solve some years ago, which is to machine the work sections to as thin as practical for the Domino to work (usually the 16mm setting), cut the joints and then pass each individual bit through the thicknesser taking a bit of each face as necessary until the work is the thickness needed and the domino slot is centred, more or less. Works a treat! - Rob
Well yes till one piece gets a bit of snipe, then it’s a real problem.
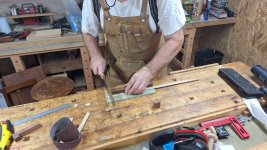
 
We have visitors at the moment......

However, I managed to sneak out for a couple of hours today.

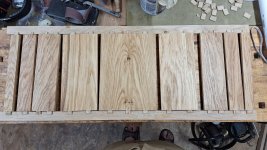
I cut a load of 4mm dominoes and glued them in place. I sanded all the short slats to P320 (150 off the drum samder, then 180, 240 320). Removed the arrisses and gave them all a coat of hardwaxoil. This is the Aldi stuff I bought a month or two back. Ususally I give oak a coat of BLO first, because I like the colour it gives, but this is going to be two-tone. I'm beginning to wish I had used BLO first, TBH. I know it's only one coat, but they look a bit lifeless Not too late, I suppose.

cutting 4mm dominoes.jpg

oiled slats.jpg
 
Last edited:
I only see the rails being a little grey, how will you as you say golden the finish?
Boiled linseed oil gives a nice golden colour to oak. I ususally put BLO on as a first layer, then a couple of coats of HWO (usually Osmo, but this is Aldi special). I don't know if putting on BLO after the first coat of HWO will be the same.
That's a lot of TLAs, n'est-ce pas ?
 
Boiled linseed oil gives a nice golden colour to oak. I ususally put BLO on as a first layer, then a couple of coats of HWO (usually Osmo, but this is Aldi special). I don't know if putting on BLO after the first coat of HWO will be the same.
That's a lot of TLAs, n'est-ce pas ?
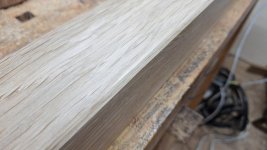
I used the Aldi hard wax oil on my Welsh stick back chair because it didn’t darken the ash, the yew and olive ash seat had more contrast.


Pete
 
I've been doing a bit more in the last few days, most of it very tedious and repetitive.
All the necessary joinery has now been done of the short rails. Today I have spent a good two-and-a-half hours sanding those rails, 120, 180, 240, 320 grit. In a couple of places I still had some rough grain, so had to go back and fix it. So now they are silky smooth, but my fingers tingle...
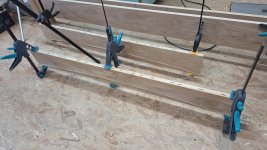
This is what they look like with the cap strips glued on. The cauls are the offcuts from when the curve was cut:

clamping of crestrail capstrip.jpg
S
 
I'm beginning to think that I am actually beginning to see the light at the end of this interminable tunnel.
All the other mortises have been cut, all surfaces sanded and all sharp edges chamfered.
You remember all that veneering I had to do to cover the glue lines? Well I am particularly pleased with how they have turned out:
chamfered veneered edge.jpg

OK, that is the best one, but most are perfectly fine, only one is still a bit obvious, but I'm sure that that will disappear in the finish. I now have staining and oiling to do, plus make a set of leg caps.

I have three weeks of bachelorhood starting this evening, so with any luck I shall have this finished by the time she comes home.
S
 
Last edited:
I'm beginning to think that I am actually beginning to see the light at the end of this interminable tunnel.
All the other mortises have been cut, all surfaces sanded and all sharp edges chamfered.
You remembere all that veneering I had to do to cover the glue lines? Well I am particularly pleased with how they have turned out:
View attachment 34828

OK, that is the best one, but most are perfectly fine, only one is still a bit obvious, but I'm sure that that will disappear in the finish. I now have staining and oiling to do, plus make a set of leg caps.

I have three weeks of bachelorhood starting this evening, so with any luck I shall have this finished by the time she comes home.
S
Three weeks! Enjoy! Do you mean you had better have it finished by the time she comes home lol. Anyway it will be a lovely surprise for her.
 
Back
Top