• Hi all and welcome to TheWoodHaven2 brought into the 21st Century, kicking and screaming! We all have Alasdair to thank for the vast bulk of the heavy lifting to get us here, no more so than me because he's taken away a huge burden of responsibility from my shoulders and brought us to this new shiny home, with all your previous content (hopefully) still intact! Please peruse and feed back. There is still plenty to do, like changing the colour scheme, adding the banner graphic, tweaking the odd setting here and there so I have added a new thread in the 'Technical Issues, Bugs and Feature Requests' forum for you to add any issues you find, any missing settings or just anything you'd like to see added/removed from the feature set that Xenforo offers. We will get to everything over the coming weeks so please be patient, but add anything at all to the thread I mention above and we promise to get to them over the next few days/weeks/months. In the meantime, please enjoy!

Dreadnought SS Guitar (Demo Time)

Fed up with waiting for the outside temperature to reach room temperature so I can continue with lacquering the two guitars.

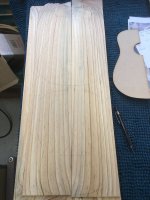
So I've started preparing some wood for the next couple of Concert Ukuleles: Pinus Radiata or Monterey Pine, felled near Ilfracombe, North Devon.

IMG_0952.JPG
 
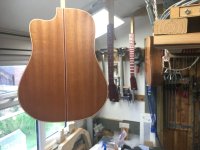
Well, the weather warmed up just enough to get 6 more coats of lacquer on the two Dreadnoughts. No photos because I didn't think you'd want to watch lacquer drying. :)

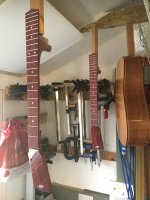
I've rubbed back with 600 grit leaving a dull mottled effect, and they're now hanging in the workshop for the lacquer to cure for a couple of weeks. Then, I'll get on with the rubbing back with micro-mesh up to 12000 grit.
 
I'm wondering Malc if it is worth thinking about constructing a humidity and temperature controlled chamber to aid control over drying your finishes and speed up the process so that re-coating can be done when you want. I am presently making a fair bit of charcuterie and so have a need for such a thing myself so am looking into simple solutions and it appears pretty cheap to do as controllers are inexpensive. Inkbird is a frequently recommended brand available on river shop. People use plastic storage boxes which are cheap too.
 
I'm wondering Malc if it is worth thinking about constructing a humidity and temperature controlled chamber to aid control over drying your finishes and speed up the process so that re-coating can be done when you want. I am presently making a fair bit of charcuterie and so have a need for such a thing myself so am looking into simple solutions and it appears pretty cheap to do as controllers are inexpensive. Inkbird is a frequently recommended brand available on river shop. People use plastic storage boxes which are cheap too.

Thanks, Adrian. The way I process my builds is that as I only make a couple (or four this coming project) per year, and I programme the spraying for June/July, and then start the next project. I have no indoor space to make a spray booth, so I hang dust sheets around the roof of the deck and spray out there. The workpieces flash dry relatively quickly and I bring them in overnight and sand back next day before the next three coats. The final two weeks curing is done in the workshop. I have to spray outside for H&S reasons, but curing is ok in workshop temperatures.

But the outside temperature dropped so low after the first six coats, that I could not continue the remainder of the sprays outside.
 
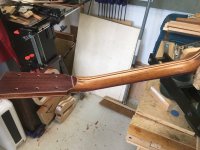
I've still got to learn the skills of spraying nitro, but here's the first headstock cutback to 12000.

0B6833F6-B07B-4830-B3B5-74D5B8A1A24D.jpeg

Not brilliant. I still always have trouble with the edges.

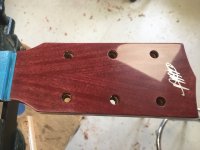
That Purpleheart looks dyed, but it's natural and brought out by the lacquer.
 
"I always have trouble with the edges". Bind the headstock in a way that matches the body? But also imperfections are less visible once the pegs and strings are fitted.

Still have the very first complete guitar I ever made. Triple layer home made binding on body top and bottom plus headstock and single layer along fretboard. I look at it now and it is somewhat imperfect :rolleyes::cry: but I was only 17. Don't think I have ever made anything that is perfectly perfect. You are your own worst critic. You've done a good job though.
 
then again Adrian, if it was perfect, it would be quite disturbing, the imperfections proves we are human and mortal, even stradivarius must have been unhappy with some of them, I could point out to you several mistakes on my first build but nobody else (so far) has spotted them.
 
Thanks, Gents.

The trouble I have with the edges is not so much the physical edge, but the cutting of the lacquer. I try so hard to avoid the edges for the main rubbing back, but however much I try, they almost always cut back to wood. Practice and experience, I suppose.

I have learned a little about how to rectify, and also how to remove a run. Because nitrocellulose does not work as a layer on top of the previous layer, you can take advantage of how the current layer chemically fuses to the previous layer.
 
"then again Adrian, if it was perfect, it would be quite disturbing, the imperfections proves we are human and mortal, even stradivarius must have been unhappy with some of them, I could point out to you several mistakes on my first build but nobody else (so far) has spotted them."

Yes, I agree 100%. Nowadays I aim for "good enough". Interestingly, to me anyway, studies have shown that instruments from the premier gold age makers, may have benefited from small mistakes in construction. For example elongation of f holes through templates getting worn and small errors in knife work on a thin graduated top. I've studied in Cremona a bit, but I only have Italian texts on this subject. Here is a Telegraph article which picks out a few bits: https://www.telegraph.co.uk/culture...ccidental-genius-of-Stradivarius-violins.html

Del Gesu, Stradivari et al were expert, but they were still jobbing makers at the time and pretty much operated as a production operation and made compromises and cut corners when they had to.
 
Malc - if I knew a solution to the cutting back issue I would spill the beans! But I think everyone finds it difficult. Long time since I last tried it. Are you spraying the nitro cellulose? I used to use a modelling air sprayer that was excellent (originally bought for making model aircraft) which gave a very fine mist. Had to use special thinners to stop clouding of the lacquer. Expect everyone uses rattle cans nowadays.
 
Malc - if I knew a solution to the cutting back issue I would spill the beans! But I think everyone finds it difficult. Long time since I last tried it. Are you spraying the nitro cellulose? I used to use a modelling air sprayer that was excellent (originally bought for making model aircraft) which gave a very fine mist. Had to use special thinners to stop clouding of the lacquer. Expect everyone uses rattle cans nowadays.

I use a LVLP spray gun. Much less overspray and negligible bound back. I use nitrocellulose from a reputable wholesale supplier, i.e. they decant into either 0.5l cans or 400ml aerosols. I use their own thinners. I'm getting better at spraying. I'm getting better at cutting back large areas 1500 through to 12000 micro mesh. I need more practice with small areas with edges and corners. I use the cans for touch ups and recovers over back to wood.
 
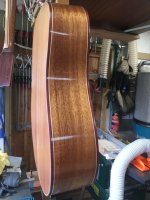
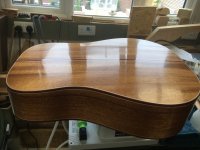
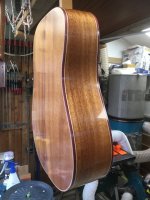
Getting better! That's the rim cut back to 12000 on this body.

708A497F-99ED-450D-BE87-B5D53C682A27.jpeg

BBEFF3B9-5A9F-4AF2-8B91-044613581317.jpeg

It needed some touching up with the aerosol where it went back to bare wood, but then it cut back nicely.


Doing it by hand, I have to make sure every part gets the same amount of rubbing. I settled for twenty strokes all over.

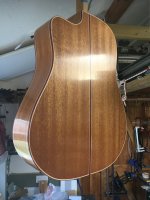
Next, on to the back, followed by the top.
 
How many coats to go ? Looks glass like already,
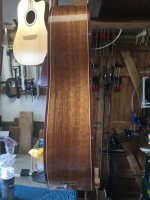
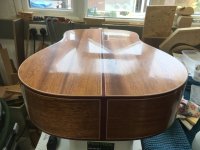
That's 12 coats of nitrocellulose gloss clear lacquer, which, with my spraying, is orange peel matt. But then I go through the wet and dry grades from 1000 up to 12000, and that's how far I've got with the sides and back of the symmetrical body.
 
Been a while. Had some decorating to do, had some family stuff on the go, but I have been getting there with the rubbing back to 12,000.


And I really like how the fretboard/neck Purpleheart/Mahogany combination have come out.

35DF3BBB-6676-4A3D-A331-4CC3C14A3EBE.jpeg


7DD2C68F-6EB2-42BD-824E-B8F175F0486B.jpeg


D4B52CE5-1F6C-48B0-94E5-D1B11F35E7B7.jpeg
 
Am I getting the impression some members might not know about abrasives up to 12,000? This is what I use.

MICRO-MESH is a unique cushioned abrasive that produces a very fine and uniform scratch pattern. The mixed pack of 150 x 75mm abrasives is supplied in nine grades ranging from 1,500 to 12,000. The 1,500 is similar in grit range to conventional 400 grit wet/dry sandpaper. The 12,000 will leave a scratch pattern that cannot be detected by the human eye.
 
The spraying looks very well dome Malc, I have a kitchen on the go which I hope I will be able to spray before the weather changes too much. I find July and August are the best months if you don't have a dedicated spray room but circumstances often dictate when you can spray and it's not always the best time of year.

Very nice work Malc.
 
First, yesterday you saw the cutaway model rubbed back, today here's the symmetrical model.
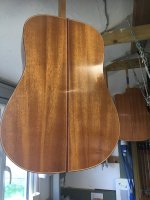
3B18130E-65B8-4992-A487-06B0D9059425.jpeg

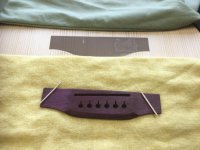
Back in the saddle….there's a groove or slot in the bridge made by the CNC machine that I have got to fit the saddle to. The saddle is made of bone, ox or cow bone I'm told. It's only a matter of sanding the sides so that it fits the width of the slot and shoe-shine sanding the ends to a semi-circle to fit the rounded ends of the slot.

Then I have to crate the lateral curve identical to the curve of the fretboard, 12' radius If I recall.

But lastly, I have to round over the top of the saddle, and this tip I learnt on the luthier course I took a few years ago.

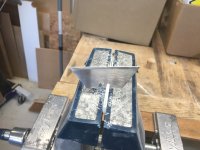
Clamp the saddle in the vice, and draw a pencil line along the centre.
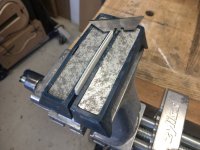
BCBE5CEC-4511-495F-A55B-BB5EAD894DED.jpeg

Have you spotted the Stanley blade?


6519A9E5-FD9F-4770-96D9-A1CF70AA16C2.jpeg

Those locating holes make perfect spokeshaves for the saddle. Except, they don't quite shape the very ends.
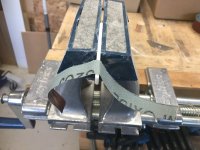

4AED35D5-EB1E-4AC8-A05A-23A9CD385460.jpeg

So I use the shoe-shine method of sanding to finish rounding over the top and also round over the corner.
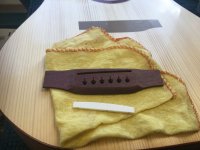

FE8128A4-184D-4BEF-B173-EAD98049790A.jpeg

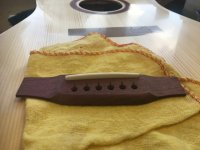
Saddle and its slot in the bridge.


8756DE72-044B-432E-8FE0-5F16DD75FFA8.jpeg

Fitted. It's a loose fit. One hundred and fifty pounds of string pressure stops it falling out.
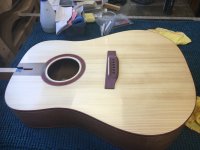

9D7717E5-6521-4FE6-9D91-911053CE7848.jpeg

Where it'll end up.

Rinse and repeat for the symmetrical model.
 
No intonation/compensation on the saddle?
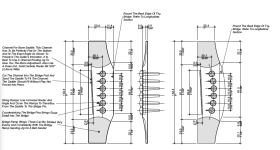
The plans that I work to show the compensation in the angle of the saddle away from parallel with the bridge. The scale length is measured on the saddle at the second (B) string. I realise that some makers file their saddles to a point, but the scale length will still be measured at the second string and the remainder of the saddle will be angled.

Screenshot 2024-09-18 at 09.22.37.png
 
Saddle for the symmetrical model shaped.

E12840FE-2E82-44E3-BE57-7E1A59B6B90E.jpeg

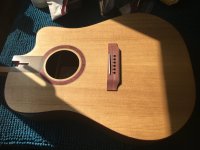
Time to glue the bridges to their bodies.
 
The bridge now has to be glued to the soundboard. One of the ways of fixing it is with lightweight deep throat clamps. My evening class teacher had one in the 90s, which he called, Linda. (You have to be of a certain age. :) )

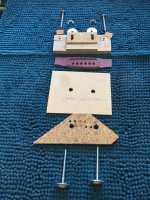
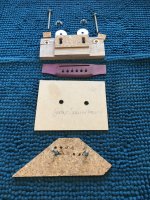
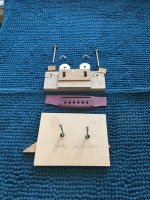
I don't have any, so I have to make my own jig/clamp/caul.

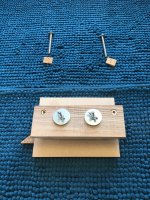
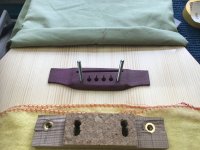
here are the component parts.

394610E6-EF7E-4B32-B250-56449EBD6BC0.jpeg

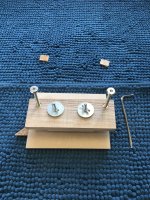
Stretch your imagination to consider the thin mdf to be a part of the instrument soundboard.

8EADCC34-DA96-43BF-8521-1C5698EC4642.jpeg

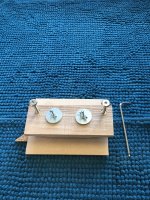
The triangular shaped caul with the cork lining goes inside the instrument body and fits inside the X Braces, and the two M4 bolts come up through two holes the exact width part as the two outer string holes of the bridge.

FC92A76C-96B6-45DA-B082-4EBF6F6F61E8.jpeg

Of course, two corresponding holes have to be drilled through the soundboard to allow this bolts to come through. I'll get to how that is done shortly.
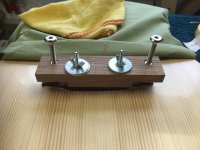
1B29E0E3-1505-4B7A-9044-4CF2E3D67816.jpeg

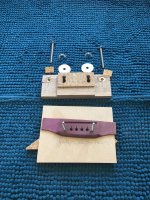
The bridge is glued to the soundboard and the M4 bolts pushed up through the outer string holes.

D385D277-C56B-408D-9695-3E7546CC80F8.jpeg


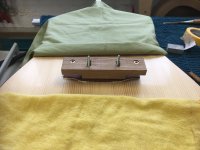
The external caul is then placed over the bridge and bolts…..


C53DC6DF-5B02-43B2-963E-45EE198F243C.jpeg


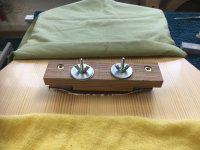
…and screwed down till there is even glue squeeze out.


C29C6CCB-25A3-4B7A-8DC1-3E4E3E144828_1_201_a.jpeg


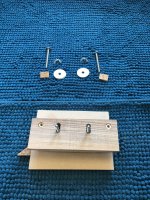
But there isn't even squeeze out because the bridge wings aren't clamped. So I insert the wing screws...

1BB72A36-07A1-4608-9FAE-4C865D50EFEA.jpeg


…and add the little cork cauls and screw them down onto the wings.
 
Last edited:
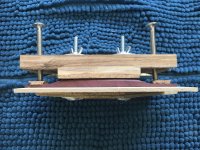
And here's the cross section of the whole thing.

92CDA62D-8453-4C9B-A1C7-5B3DB5CC3A8D_1_201_a.jpeg


Oh, and how did I get the bridge in its exact position?

97F42276-F13C-4471-A5CF-CC52363445EB_1_201_a.jpeg

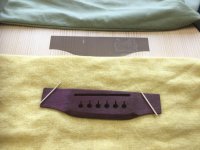
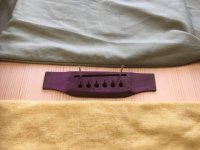
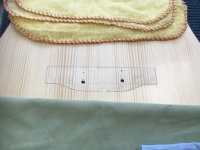
Back a while, you may remember how I drilled tiny holes in the saddle slot through into the soundboard with the bridge exactly in place, and that I used parcel tape to protect the gluing area from the lacquer at spraying time.


51CB2CAA-BAC1-475E-856D-10C9F7489C46.jpeg


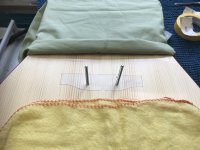
Then I relocate the bridge using those cocktail sticks, and drill the two holes through the outer string holes to allow the M4 bolts of the bridge jig/clamp/caul to pass through.
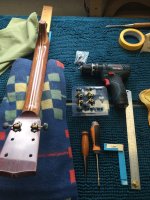
I've now got to spend the next day or so meticulously removing the parcel tape and its adhesive mess, ready to glue and clamp the bridge.
 
D4D9C364-B6AF-49A8-903E-3293564414E7_1_201_a.jpeg

EF6A39FB-3F92-4F2C-BE83-EF3C27AAE24E_1_201_a.jpeg1D420328-5627-4057-867A-B4C372778CB0_1_201_a.jpeg093254F0-557E-404D-A2CD-4D93D97FF56D.jpeg90B4E8EF-BC9D-4D10-B128-8B7C5E7CFE37.jpeg9711B5AB-0FB2-425B-8EDA-A3F8F2ABCC7F.jpeg


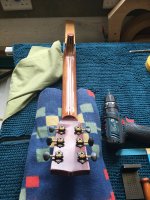
And while I'm waiting for the glue to dry, I might as well fit the tuners.


96692F31-5800-4DDB-8B57-E7749DBD019C.jpeg14BF44AE-92F7-4930-A809-ADD8AB866C51.jpeg
 

Attachments

  • 97F42276-F13C-4471-A5CF-CC52363445EB_1_201_a.jpeg
    97F42276-F13C-4471-A5CF-CC52363445EB_1_201_a.jpeg
    213.6 KB · Views: 0
Back
Top