I'll put this in a thread of its own, rather than add another digression to my current build project.
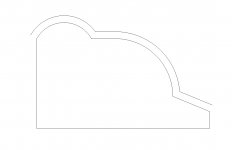
I needed to properly sharpen a moulding plane and as I had the camera out I thought I may as well take a couple of photos as I went along. It's this one, which I want to use on end grain. It's ok on long grain but only makes a complete cut if the iron is tapped out a bit too much.

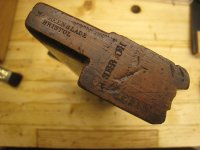
I started off by putting some masking tape on the sole to protect the surface of the wood.
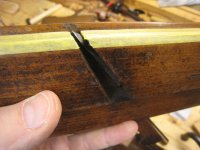
You can just about see from this photo that to get the blade to show enough to cut the rebates it has to stick out too much on the curve.

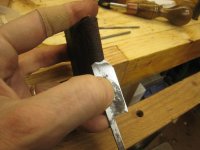
So the next step was to use a file to reduce the edge of the blade, back down so it was level with the shaped sole of the plane all round. I used a needle file. You don't want a handle as the file has to lie level. There are some cheap diamond files around now that are good for this sort of job.


When the file no longer cuts, the edge of the blade must match the profile of the sole.
Next, hold the blade somewhere convenient - a screw and a washer on an angled offcut are handy - and shape the freshly filed flats back to make a cutting edge, without going below the limit. I used a round slipstone and a flat one.

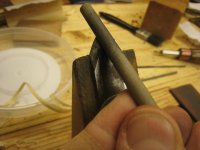
When that's done, remove the burr by stoning the flat side of the blade. Then hone on a bit of folded leather.
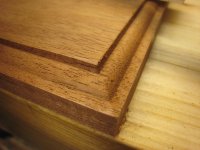
The result - a sharp blade which peeps up a consistent, small amount and produces far better results.
Now, you may be wondering about this method of filing back to the sole and wondering which online woodworking guru invented it. If so, I suggest that you get a copy of issue number 8 of the Woodworker magazine, published in May 1902. A Mr "G.R.F" of Dublin wrote to the editors, asking how he could sharpen some bead planes. He got the following answer:
Is the wood in your planes worn very much out of shape? If so, this should be brought right first, with a small round plane, after which insert the iron so that it can just be seen in every part projecting beyond the wood. The object now is to reduce the iron until it is the same shape as the wood, and this is best done using a small half round file without handle, rubbing it along the face of the bead plane until all the iron is filed away level with the wood. The quirk can be done in the same way with the flat side of the file. When all the irons have been done as above, they require grinding to an edge again. If no small grindstone or emery wheel is available this must also be done carefully with the file, taking care not to use too much pressure, so as to draw the temper, or the iron will be spoilt. The cutting edge after grinding (or filing) is put on with a sharping slip made purposely. A Was h ita at 1s. will answer all purposes, though an Arkansas at double the price is better and an emery slip as supplied by Nurse & Co., is a good article but somewhat expensive.
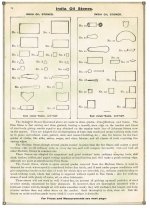
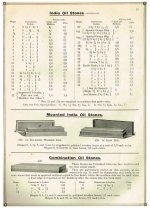
I just happen to have a 1902 catalogue from Nurse & Co and as you can see, the selection of sharpening stones was as bewildering as any modern tool dealer offers!
Progress eh - who needs it!

I needed to properly sharpen a moulding plane and as I had the camera out I thought I may as well take a couple of photos as I went along. It's this one, which I want to use on end grain. It's ok on long grain but only makes a complete cut if the iron is tapped out a bit too much.
I started off by putting some masking tape on the sole to protect the surface of the wood.
You can just about see from this photo that to get the blade to show enough to cut the rebates it has to stick out too much on the curve.
So the next step was to use a file to reduce the edge of the blade, back down so it was level with the shaped sole of the plane all round. I used a needle file. You don't want a handle as the file has to lie level. There are some cheap diamond files around now that are good for this sort of job.
When the file no longer cuts, the edge of the blade must match the profile of the sole.
Next, hold the blade somewhere convenient - a screw and a washer on an angled offcut are handy - and shape the freshly filed flats back to make a cutting edge, without going below the limit. I used a round slipstone and a flat one.
When that's done, remove the burr by stoning the flat side of the blade. Then hone on a bit of folded leather.
The result - a sharp blade which peeps up a consistent, small amount and produces far better results.
Now, you may be wondering about this method of filing back to the sole and wondering which online woodworking guru invented it. If so, I suggest that you get a copy of issue number 8 of the Woodworker magazine, published in May 1902. A Mr "G.R.F" of Dublin wrote to the editors, asking how he could sharpen some bead planes. He got the following answer:
Is the wood in your planes worn very much out of shape? If so, this should be brought right first, with a small round plane, after which insert the iron so that it can just be seen in every part projecting beyond the wood. The object now is to reduce the iron until it is the same shape as the wood, and this is best done using a small half round file without handle, rubbing it along the face of the bead plane until all the iron is filed away level with the wood. The quirk can be done in the same way with the flat side of the file. When all the irons have been done as above, they require grinding to an edge again. If no small grindstone or emery wheel is available this must also be done carefully with the file, taking care not to use too much pressure, so as to draw the temper, or the iron will be spoilt. The cutting edge after grinding (or filing) is put on with a sharping slip made purposely. A Was h ita at 1s. will answer all purposes, though an Arkansas at double the price is better and an emery slip as supplied by Nurse & Co., is a good article but somewhat expensive.
I just happen to have a 1902 catalogue from Nurse & Co and as you can see, the selection of sharpening stones was as bewildering as any modern tool dealer offers!
Progress eh - who needs it!