• Hi all and welcome to TheWoodHaven2 brought into the 21st Century, kicking and screaming! We all have Alasdair to thank for the vast bulk of the heavy lifting to get us here, no more so than me because he's taken away a huge burden of responsibility from my shoulders and brought us to this new shiny home, with all your previous content (hopefully) still intact! Please peruse and feed back. There is still plenty to do, like changing the colour scheme, adding the banner graphic, tweaking the odd setting here and there so I have added a new thread in the 'Technical Issues, Bugs and Feature Requests' forum for you to add any issues you find, any missing settings or just anything you'd like to see added/removed from the feature set that Xenforo offers. We will get to everything over the coming weeks so please be patient, but add anything at all to the thread I mention above and we promise to get to them over the next few days/weeks/months. In the meantime, please enjoy!

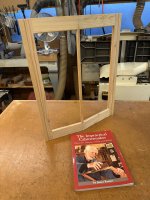
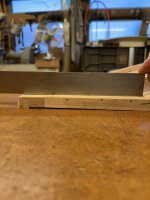
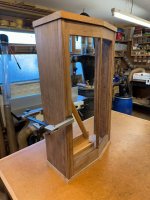
JK cabinet with a 'V' door

Ah sorry, I thought I was looking at the glass rebate on the inside.

Not so easy on the outside. Hard to get a router bit to exactly match the existing straight chamfers as it goes round a curve. Also hard to hold the fragile v-shaped door flat.

Maybe some sort of 45 degree guide block clamped on would help prevent any accidental filing away of too much wood in the corner. Or even a pair of blocks, above and below.
 
Ah sorry, I thought I was looking at the glass rebate on the inside.

Not so easy on the outside. Hard to get a router bit to exactly match the existing straight chamfers as it goes round a curve. Also hard to hold the fragile v-shaped door flat.

Maybe some sort of 45 degree guide block clamped on would help prevent any accidental filing away of too much wood in the corner. Or even a pair of blocks, above and below.
I did the corners with a small rat tail file as I machined the router cutter too close to the corners and of necessity had to make the right angle curve a bit too 'tight'. I may try another experiment with a trial joint and machine the chamfer 20mm or so clear of the corner, which ought to give me a bit more 'wiggle' room to make a smooth curve. Definitely difficult to make a very small right angle curve in the corner and it certainly don't look right! - Rob
 
A couple of further thoughts while you're still in the experimental stage. Just my personal opinions in case they prompt you to something that works - I've never made anything like this but I can think about how I'd try.

If the original has chamfers that go all round the glazing and follow a radius into the corners, that's a look I dislike. I've seen it on cheap windows and furniture that's been made up with straight edged components and then had a handheld router with a bearing guided bit in it run round after assembly. No skill needed.

You could do it that way. You could probably use a router table and do it all the other way up, if you don't need to see what you are doing.

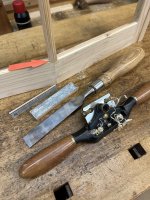
Alternatively, you could cut the same sort of chamfers with a small spokeshave, slowly, with clear sight of progress. You might need sandpaper on a bit of tube in the tight corners. You could rig up guide blocks to prevent the final sanding from going too deep anywhere.

But if you want it to look like quality hand work, why not just mitre the corners? You could do that conventionally, before assembly, or cut mason's mitres afterwards. I think either of those would look much better.
 
But if you want it to look like quality hand work, why not just mitre the corners? You could do that conventionally, before assembly, or cut mason's mitres afterwards. I think either of those would look much better.
I agree. I think doing so would better follow the aesthetic of the rest of the piece.
 
But if you want it to look like quality hand work, why not just mitre the corners? You could do that conventionally, before assembly, or cut mason's mitres afterwards. I think either of those would look much better.
I agree. I think doing so would better follow the aesthetic of the rest of the piece.

Yebut chaps, that's the easy peasy way and you ought to know by now that JK doesn't do 'easy':ROFLMAO: - Rob
 
With apologies to the other JK, ie JFK, Rob does this stuff not because it is easy but because it is hard.

Reach for the moon Rob.:)
 
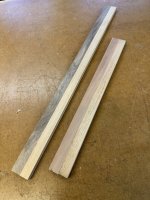
The prototype, lash up door has almost reached it's conclusion, so I started the penultimate session by:
IMG_6452.jpeg

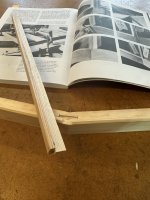
...prepping a couple of blanks for the very narrow glazing bar in the centre of the door. JK goes, in a sort of roundabout way, into a lot of detail on how to make this and he suggests gluing it to a support piece, as I've done. As you'll see later, this makes it much easier to plane the 'V'. I followed as best I could, his directions and used the smaller, trial bit to fit one end, which worked very well:
IMG_6457.jpeg

...the section being:

IMG_6458.jpeg

...so that when fitted dry it looked thus:
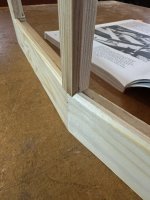
IMG_6459.jpeg

Having got that bit done, I repeated the exercise on the longer bit and fitted it to both top and bottom of the door rails. It's then apparent why the stiffener is added as it's then relatively easy:
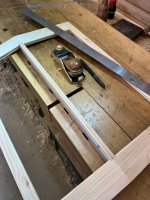
IMG_6460.jpeg

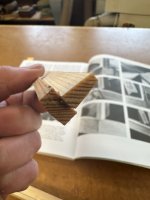
...to plane the 'V' in situ, provided the glazing bar's a snug fit. JK then mentions that a bevel needs to be machined on the inside to make the rebates square (arrowed below):
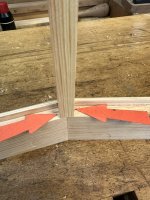
IMG_6461.jpeg

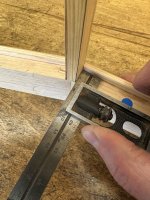
...and you can see from the try square that around 2mm needs to be removed:
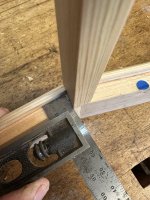

IMG_6462.jpeg

Once the marking out has been done, the bevel can be planed each side:
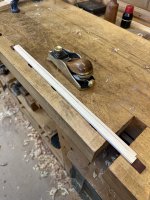

IMG_6463.jpeg

...and then checked:

IMG_6464.jpeg

It's then got to be rebated on the router table, a task I was a bit concerned about as the component is so small, but the routing went quite well. I hot glued a small section onto one face to allow some pressure in the correct place from the feather boards:
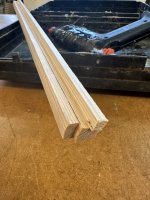
IMG_6465.jpeg

All went well until I shoved it through the wrong way!
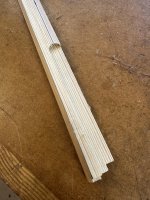
IMG_6466.jpeg

...requiring a slitherino to be glued in to effect a repair. Once that was glued in place and cleaned up, the centre glazing bar was glued in place as well as a couple of additional pieces on the outside of the doors.
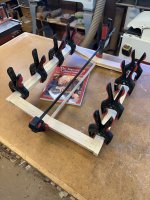
IMG_6467.jpeg

Once that's all set, I can clean it up and sort out the final chamfers on the glazing bar - Rob

Edit - the centre glazing bar is far too narrow to accept 12mm veneer pins for glazing, so I'm going to use a few teeny tiny blobs of hot melt glue to hold them (the strips of timber) in place at the appropriate time.
 
Last edited:
Well, I've just been looking at JK's book again, and I think your description is MUCH clearer!
 
The final session yesterday to finish off this prototype door went reasonably well with the finished door looking thus:

IMG_6469.jpeg

I decided to 'wing' it, and freehand the chamfers on the centre glazing bar with a shavespoke and just worked the graduation into the corner with a chisel, bevel side down and finishing of with some sanding sticks:

IMG_6473.jpeg

Seemed to work OK but difficult to see in pine. The door is actually twisted as the two thin styles were warped as being a 'Silly Billy' I neglected to check them for twist when I planed them earlier. I was also a tad careless in cleaning up:

IMG_6470.jpeg

...the section added to the styles. An interesting exercise though, showing that although JK's 'instructions' are a bit vague, if the process is followed through logically it's relatively straight forward - Rob
 
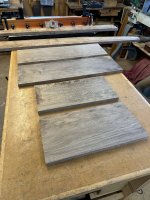
A coupla prime boards of 25mm thick English Walnut hacked up today, skimmed each side on the P/T to about 21mm; stuff on the router table for door components and back panel bits n'pieces:

IMG_6482.jpeg

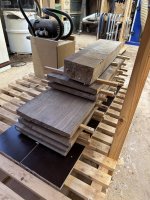
Now 'in stick' under the assembly table to allow it to 'do it's own thing' before final machining to about 18mm:

IMG_6483.jpeg

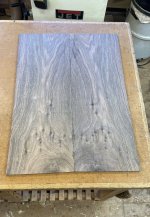
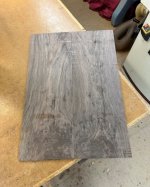
This stuff has been in the 'shop for at least 8 years so I don't expect it to do very much. Bookmatched back panel:

927662A8-28C2-40E6-B51D-30DC6EC7CC4A.jpg

Not too shabby! - Rob
 
Last edited:
Had a moment of horror just before tea as one of those bits on the router table was infested with old worm tracks so the bits that can't be used are now in the wheely bin and I've found another suitable board. Still managed to use quite a lot of it but the new board is the same colour and has fairly straight grain, which is what I was looking for the door components - Rob
 
Back
Top