• Hi all and welcome to TheWoodHaven2 brought into the 21st Century, kicking and screaming! We all have Alasdair to thank for the vast bulk of the heavy lifting to get us here, no more so than me because he's taken away a huge burden of responsibility from my shoulders and brought us to this new shiny home, with all your previous content (hopefully) still intact! Please peruse and feed back. There is still plenty to do, like changing the colour scheme, adding the banner graphic, tweaking the odd setting here and there so I have added a new thread in the 'Technical Issues, Bugs and Feature Requests' forum for you to add any issues you find, any missing settings or just anything you'd like to see added/removed from the feature set that Xenforo offers. We will get to everything over the coming weeks so please be patient, but add anything at all to the thread I mention above and we promise to get to them over the next few days/weeks/months. In the meantime, please enjoy!

Kitchen Table - Finished!

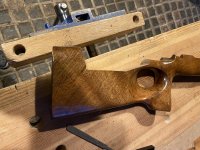
At this point I had a slight interlude to take drastic action to my rifle stock to fit an adjustable cheek piece. I've had this stock for nearly 30 years and its a stunning bit of walnut. I was really scared to cut into it, but I think the result is OK.

IMG_2996.jpeg

IMG_2997.jpeg

IMG_2998.jpeg

IMG_3003.jpegIMG_3002.jpeg
 
Back to the table. Before shaping the legs, I decided to start prepping the wood for the rails. There is one long rail and three cross-rails. I had to laminate to get the thickness I needed.

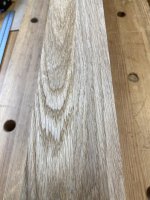
After some machine work to get things roughly to size, I then hand planed the surfaces that will mate together, checking for flatness and twist. This is the long rail.IMG_3004.jpeg

This is the join with no pressure being applied.

IMG_3005.jpeg

And being glued up:

IMG_3006.jpeg

I've done the same with the shorter cross-rails. That's as far as I've got. I'm going to be away for a week or so, so there won't be any updates for a while.
 
Last edited:
You have a lot of skill and have produced an excellent write up. Superb!
 
Given where those legs are and how much they'll be seen, did you consider making the laminations without a taper and just shaping the piece after gluing?

I love the arch-headed sash behind your bench!
 
Given where those legs are and how much they'll be seen, did you consider making the laminations without a taper and just shaping the piece after gluing?

I love the arch-headed sash behind your bench!
Yes, I like those windows too. Unfortunately They're not in great condition (mainly because the building didn't have gutters when we moved in) so there's another project for the future...

The reason for the tapered laminations is so that each layer runs right through the length of the leg. I think it's stronger that way.
 
As well as all the other good stuff, could I just give you a big (y) for that perfect long joint on the rail. Very satisfying!
 
As well as all the other good stuff, could I just give you a big (y) for that perfect long joint on the rail. Very satisfying!
Thanks Andy. Yes, I was pleased with that one! I'd say it's acceptable if there's a hair gap which can be closed with light pressure, but that one luckily came out spot on!
 
I won’t say I have the first idea what the modification to your Rifle stock is all about but it looked very professionally done and I can only imagine the trepidation you felt at the first cut.
 
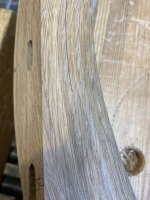
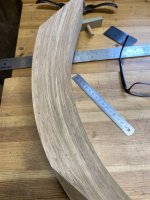
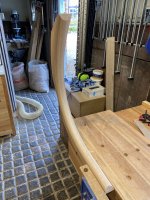
The next job on the table legs is to create the rounded profile on the inside curved surface. I needed to get from this...

IMG_3055.jpeg

To this...

IMG_3056.jpeg

Fortunately, unlike Malc's beautiful guitar necks, these legs aren't going to be handled so minor imperfections won't be noticed. If they look alright then they are alright! That said, I still want to get them all looking the same and so I need a way of carving them methodically rather than as some kind of freeform sculpture.

To make things a bit easier, I decided to go with a semi-circular profile. That means it's relatively easy to mark out lines for moving from a square profile to a (half) octagonal profile to a (half) hexadecagonal profile. More to follow.
 
To do the marking out on the inside face, I did experiment with making and using the type of tool that shipwrights use for marking out tapered masts to go from square to octagonal. I made this but quickly realised that because of the curve it doesn't work properly.

IMG_3058.jpeg

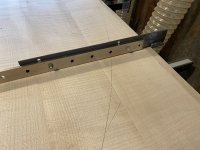
Instead, I marked points at three places on the face and used a flexible steel rule to join the dots.

IMG_3059.jpeg

IMG_3061.jpeg

IMG_3062.jpeg

IMG_3063.jpeg

The edges aren't so easy because it isn't really possible to bend the ruler to strike the line. However, I realised that I could draw the line 'free hand' byt following a line in the lamination. Hopefully this shows what I mean. It just so happened that the line between the 6th and 7th laminations was exactly where I needed to be.

IMG_3064.jpeg
 

Attachments

  • IMG_3065.jpeg
    IMG_3065.jpeg
    199.2 KB · Views: 0
I then just needed to remove the necessary wood. These were the tools of choice:

IMG_3057.jpeg

The vast bulk was removed with the spokeshave. Holding the tapered leg is a challenge. I just clamped it in the vice with some hardboard packers, carved what I could get to, and then moved it.

IMG_3067.jpeg

The other tool is a scraper I made at Edward Barnsley. It's made from an offcut of a HSS hacksaw blade with the teeth ground off and is about 3mm thick. It's sharpened like a normal plane blade and then burnished over like a scraper. It's very useful for fine tuning a surface. Here it's useful for flattening the slightly crowned surface you tend to end up with from a spokeshave.

IMG_3068.jpeg

It gives nice shavings.

IMG_3069.jpeg

That left me with a (half) octagonal profile.

IMG_3070.jpeg

IMG_3071.jpeg
 
Going from that to a (half) hexadecagonal profile is essentially the same process of marking out and removing wood.

IMG_3072.jpeg

IMG_3073.jpeg

From there I just removed the ridges with a spokeshave to achieve a rounder profile (and, by then, a decent pile of shavings).

IMG_3074.jpegIMG_3075.jpeg

The final step was to use sandpaper to achieve a smooth round surface. I've only sanded to 80 grit at the moment. There is lots more sanding ahead of me!

IMG_3076.jpeg

It took me a full morning's work to do one leg. I've now done three and have five left.
 
Nice work. Don't forget the benefits of sanding the 'shoeshine' method on a half round profile.
 
Excellent stuff, Nick.

Are you tempted to screw a batten temporarily onto the flat bit so that you can clamp the work further above the vice?
 
Excellent stuff, Nick.

Are you tempted to screw a batten temporarily onto the flat bit so that you can clamp the work further above the vice?
It's hard to tell from the photos, but it's a 90 degree "corner" rather than a flat. I might have a think about doing something like that though. The only problem I can foresee is that it's already a bit too tall to reach comfortably! I need to stand on a step stool for some of it and so moving it around in the vice has some benefits.
 
The repetition of doing that 8 times would drive me insane. I probably would have made an extra leg convinced that I would screw up the later stages.
 
The repetition of doing that 8 times would drive me insane. I probably would have made an extra leg convinced that I would screw up the later stages.
Another way of looking at it is that by the time you've made all eight you'd have learnt exactly how to do them!
Sometimes the glass is half full. :)
 
It is a bit repetitive, but each one gets a bit faster. I've got 4 legs done now, but, partly for a change, I'm next going to make a full size MDF template for the table top.

I need to do that to help me with the joinery of the rails and, in due course, I'll use the template to shape the actual top.

Making the template involves making a router jig which traces an ellipse. I'll write something up on that at some point.

In the meantime, I loosely put the four shaped legs together so I can see what they will look like.

IMG_3079.jpeg
 
I made the jig for marking out/routing the table top this afternoon. Here's a photo, but I'll try to get a video of it in action as that's the only way to really understand how it works. It's not something I came up with - there are lots of examples on youtube.

IMG_3080.jpeg

At the moment, I've only used it to mark out the elliptical shape of the table top in pencil. That will allow me to check the position of the legs and thereby work out the length and position of the other parts of the understructure.

In due course I will mount a router on the jig and use it to cut out the template. That will then be used to trim the actual top to final size. I don't want to cut the template until later on because it's bound to get knocked about and damaged which would make it less useful for use as a routing template.
 
I think I can see how it works, but how you decide on the positions to give which shape and size of ellipse is another thing altogether
Really? Seems straightforward enough to me. Simpler than working out the 2pins and string method.
Major axis is given by the distance between router and one slider and the minor axis given by the distance to the other slider
 
If I've got it right, when the end knob is slide into the middle of the jig, that defines the long axis of the ellipse, and when the other knob is in the middle, that defines the short axis.

Nick knows the dimension of his table, length and width, and makes the jig to meet those parameters.

If the two knobs were made to slide on the jig, that is move from their fixed position, then the jig would somewhat adjustable.
 
Malc's description is a good summary.

Half the long axis is 1050mm. Half the short axis is 600mm. So there is gap of 450mm between the knobs, 1050mm between the "back" knob and the pencil/inside edge of the router bit/ and 600mm between the "front" knob and the pencil/router.

I knew the dimensions I wanted so made the jig with fixed locations. I made a smaller one of these a few years ago which was adjustable by having a series of holes drilled in the arm of the jig. Unfortunately that jig was too small for this job so I had to make a new one.
 
Sorry there haven't been any updates for a while. Another apology is for the paucity of photos in this update...

For a bit of a break from shaping the legs, I decided to make a start on the "rails" which sit under the top. There is a long rail downthe centre of the table and three cross rails. The joinery is half lap joints. I didn't take any photos of doing these. I found them difficult to do well to be honest. They're reasonable, but they aren't as good as I'd have liked. However, they'll be plenty strong enough and they can't be seen without going under the table.

Having joined them together, I added some curves. Again, no photos of the process, but I made MDF templates to mark out the curves and then band sawed and spokeshaved down to the lines.

This is where they are at the moment, with one of the leg pedestals in position to show how they relate to each other (there will be brass strips to tie the legs to the rails.

IMG_3081.jpeg

IMG_3082.jpeg

There is more shaping to be done on the rails - bevelling the ends, and doing some fairly heavy round overs.
 
I then started on table top. To remind you, these are the sycamore boards I selected.

IMG_2818.jpeg

IMG_2819.jpeg

I toyed with the idea of re-sawing the boards which would have allowed me to get the whole table top out of one board. However, I decided there was too big a risk of ending up with a table top which would be too thin so I played it safe and used both boards. Again, not many photos, but I essentially cut each board in half and then cut each half in half again along its length. That left me with pieces that were easier to handle.

I had to discard quit a bit of the centre of each board which was essentially pith and had a lot of checks. The outer edges also had more of the 'ripple'.

Processing the boards was a mix of hand planing to remove the worst of any bow and twist, and then using my planer/thicknesser to get them close to final thickness.

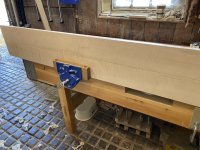
This is some of the hand planing work.

IMG_3087.jpeg
 
I ended up needing to use 8 boards to make up the table top. I spent quite a lot of time trying different combinations of boards to get something which avoided any defects (mainly the odd knot), and, hopefully, looks OK. The reality is that I can't try to hide the fact that there are multiple boards (rather than a single board from the biggest sycamore tree ever (before anyone asks, it's not the one from Hadrian's Wall...). I'm OK with that. I just wanted it to look alright.

Here's one potential combination being considered.

IMG_3090.jpeg

You'll see that some of the boards aren't perfectly flat. I think that's going to be OK. We'll see I suppose!

Joining the boards meant doing a lot of edge planing.

Here are a couple of boards side by side so I can check the joint.

IMG_3089.jpeg

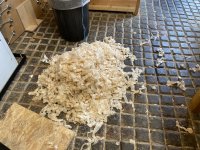
And the large pile of shavings I ended up with!

IMG_3088.jpeg
 
I used a few small dominos to help keep the long boards aligned when gluing them together, taking care (I hope!) to position them so that they won't reappear when I cut the oval shape.

I glued them together in sections. Pairs first, then two pairs together and, finally, the two halves together.

IMG_3091.jpeg

My sash cramps weren't quite long enough for the final glue up so I had to bolt a couple together and also make some extensions using some angle iron from an old bed frame I cut up. If you look closely, you'll be able to see my awesome welding skills on show (not...).

IMG_3098.jpeg

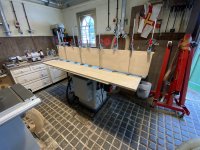
This is the final glue up as it currently stands.

IMG_3099.jpeg
 
I flattened one side of the top today. It's not the final surface, but it's getting there.

IMG_3100.jpeg

By moving my bench into the middle of the workshop, I could attack it from all sides which made the job easier.
 
Back
Top