• Hi all and welcome to TheWoodHaven2 brought into the 21st Century, kicking and screaming! We all have Alasdair to thank for the vast bulk of the heavy lifting to get us here, no more so than me because he's taken away a huge burden of responsibility from my shoulders and brought us to this new shiny home, with all your previous content (hopefully) still intact! Please peruse and feed back. There is still plenty to do, like changing the colour scheme, adding the banner graphic, tweaking the odd setting here and there so I have added a new thread in the 'Technical Issues, Bugs and Feature Requests' forum for you to add any issues you find, any missing settings or just anything you'd like to see added/removed from the feature set that Xenforo offers. We will get to everything over the coming weeks so please be patient, but add anything at all to the thread I mention above and we promise to get to them over the next few days/weeks/months. In the meantime, please enjoy!

Playing about with wooden threads again

AndyT

Old Oak
Joined
Nov 23, 2020
Messages
3,876
Reaction score
1,798
Location
Bristol
Name
Andy
Like many other people, I've been fascinated by wooden threads and how to cut them. Over the years I've read quite a few chapters of books, magazine articles and online discussions. I've watched videos. But nothing beats getting the tools and trying them for yourself.

I've made one or two bits and pieces, where threaded parts were needed. Most of them have been clamps, because apparently we all need more of them. But I'm not keen on making stuff that won't ever be used, so my experiments had stopped. That's a bit frustrating, as I have old wooden thread boxes and taps in a variety of sizes. I've also proved that I can cut coarse external and internal threads on my treadle driven metalwork lathe. But I've not done much of this sort of thing for quite a while.

So, it was very nice when chatting to my friend Peter the other day to learn that he wants to make himself a "Moxon Vice" and only has some nasty metal studding to use on it. I offered to make him a pair of suitably chunky wooden alternatives and he said Yes please. Time to reacquaint myself with how to do it!

First, I needed to find some suitable wood.

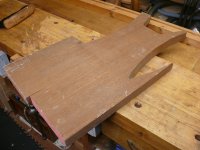
Here's one candidate, pulled from a skip some decades ago:
P1100180.JPG

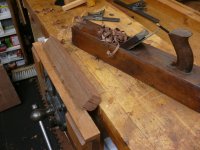
As far as I can tell, it's the sort of vaguely named tropical hardwood that most ordinary timber merchants used to keep in the 90s. Fairly heavy, with a spicy smell when you cut it. Not especially hard. Quite easy to cut:
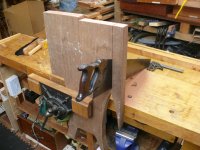
P1100181.JPG

plane the corners off

P1100182.JPG

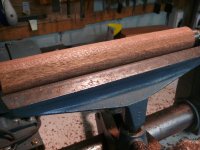
turn

P1100185.JPG

and get fairly straight. On other projects, in smaller sizes, I've hammered the turning through a dowel plate to regularise the size, but I don't have a big enough hole for this and decided against another side project.
P1100186.JPG

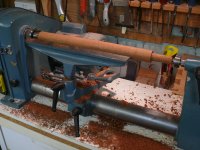
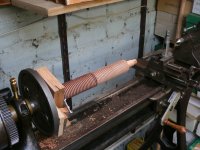
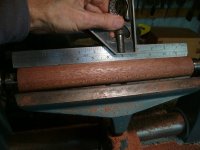
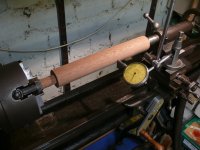
This wood is thick enough to yield a cylinder 1½" in diameter. I cut a smaller tenon on one end, which will be glued into a knob later. That also serves to grip in the 4-jaw chuck over on the other lathe. Here I was getting it all as set up as straight as I could - threads need to be reasonably accurate to work nicely.
P1100188.JPG

There followed some time getting my cutter - a carving v-tool - set up in the original old American style tool post, supported by some roughly carved bits of wood that I used last time.

What doesn't show is that I also spent far too long searching for a new, handle-less v-cutter that I bought specifically for a job like this and put in a safe place.
So safe even I couldn't find it, though I did find a screwdriver that I had lost and efficiently replaced. :(

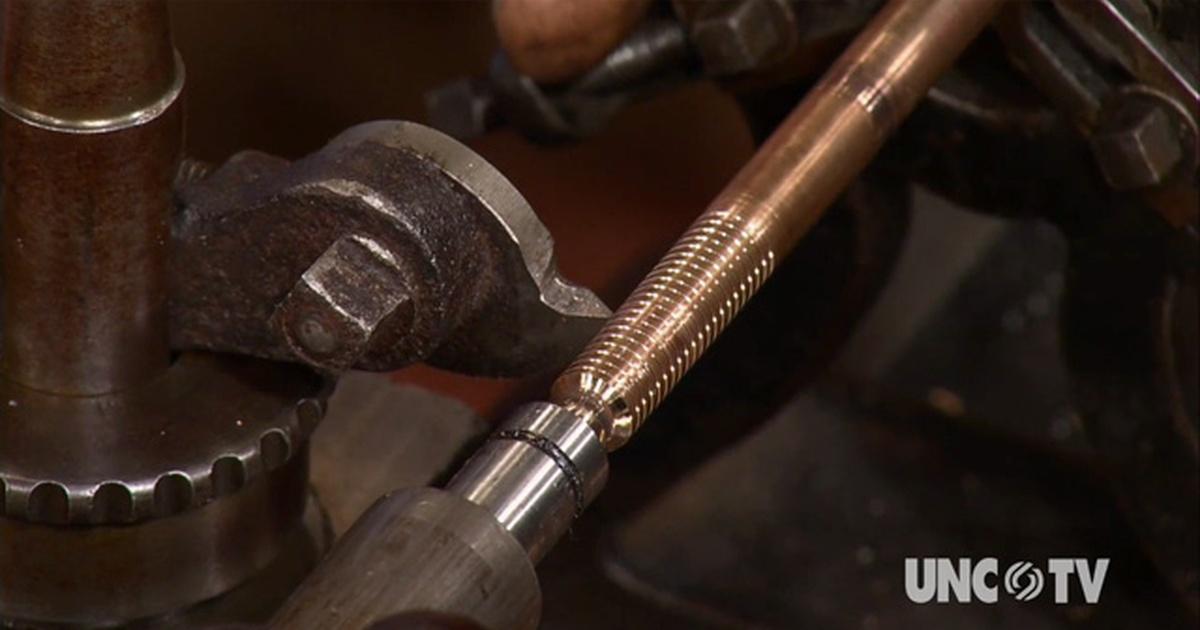
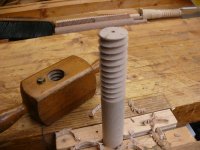
Here you can see that I have set up the lathe change wheels so that it will cut a nice 6 tpi thread and I have positioned the cutter so it just touches. One big advantage of using the lathe is that you can cut these threads in several passes, taking just a light cut each time.
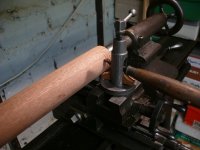
P1100189.JPG

Here's the first full pass. You can see that the cut isn't as deep on the left hand end and that's because the cylinder is a few thou narrower there. Fortunately, I was able to deepen the cut by eye when I got to that bit.
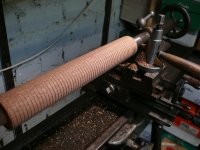
P1100194.JPG

I also found that the thread was a bit disappointingly rough in this softish wood. I did two things to help with that. One, which tool longest and was quite fiddly, was to arrange the cutter so it was more tangential to the wood, just like it would be in a thread box. If you get things lined up properly, you cut the bottom of the thread and the whole of the sides, with the cutting edges effectively angled forward so the defining lines on the surface are cut first.

I also applied some cheap runny CA glue to beef up the wood fibres a bit. Here is the better aligned cutter going over the reinforced wood to complete the profile:
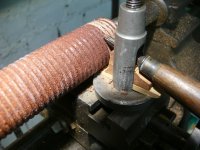
P1100206.JPG

And here's the whole thing, with a test nut that I made on a previous session that I can't find the pictures of at the moment.
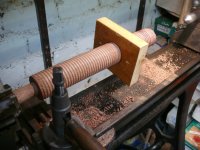
P1100210.JPG

Lots of fiddly fun.

To be continued!
 
That looks very much like sapele to me.

Now, I'll go back to reading your post......
 
This thread cutting malarky on a treadle lathe is crying out for a video🙏
Sorry Andy but that's a side project too far and would be embarrassing all round.

But I found my earlier post where I first experimented with this method. It was only last July, so I'm getting round to things quite early!


I did include links to some sources of information that I have found useful. And for the lathe itself, I still like Roy Underhill's video where he has fun with his new toy.

 
Understood Andy, I imagine there are some quite satisfying noises from the lathe gears, foot pedals etc, far nicer that the whir of an electric motor.
 
Understood Andy, I imagine there are some quite satisfying noises from the lathe gears, foot pedals etc, far nicer that the whir of an electric motor.
Indeed, but my continuous grin doesn't come through in the audio! 😀
 
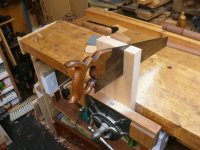
As well as the sapele, I had some bits of beech that I thought might be good for this job. They are offcuts of built-up worktop. The friend who gave them to me had cut them into what he thought of as chunky mats for hot pans, but I saw a source of thick beech for chisel handles and the like. For this job, there were only two places where I could avoid end to end joins and get a full length piece. I sawed the first one out on the bandsaw earlier in the week, but when I tried that today on the second one it seemed to be struggling. I spent some time swapping over to what I thought was a sharper blade but it was still very slow. So I did what I should have done in the first place. I put the wood in the vice and used a lovely little ripsaw, given to me by the same friend that will be getting these threaded bars. He's expert at sharpening saws and this one soon whizzed through the cut, even when it was being wielded by me.

P1100212.JPG

I'll sort the bandsaw out another time.

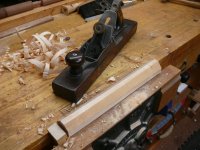
I don't like going straight from square to round on the lathe, so I spent a few minutes planing down to a rough octagon, as before. A piece of wood as a stop at one end of the vice is all you need.

P1100213.JPG

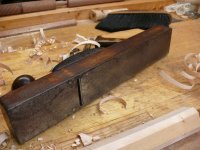
As we've got this far into the story without much in the way of old tool digressions, I chose to use a different jack plane for this little job. Not because it was any better, but just because there's no point in having a choice if you always pick the same tool.

It's my only "transitional" style tool, bought cheap on eBay when I knew enough to spot that it was unusual, without knowing what was under the dirt. I cleaned it up a bit at the time, but didn't need to change or replace anything.

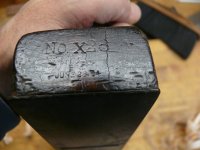
As you can see from the toe, it's an X26 with a patent date of June 28 [19]04:

P1100217.JPG

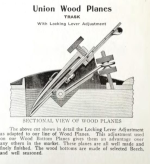
That leads to details of the patent, shown here on the Datamp site


where you can see that the patent was for the adjustment mechanism and that the planes were made by the Union Manufacturing Company of Connecticut.

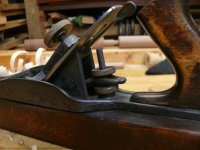
The USP of the adjuster was that the depth was set by a lever (like the common Stanley no 78 rebate plane and its copies) but instead of being vulnerable to being reset accidentally, there was a locking nut on either side. So if you took the iron out to sharpen it, you could put it back in the same position quickly and easily.

P1100215.JPG

1769183857849.png


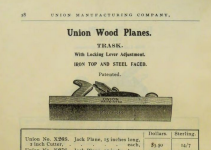
Although it looks like a Stanley "transitional" such as the #27, there's another feature that the clever designers in New Britain thought of - most of their wooden bodied planes had the option of being factory fitted with a steel sole, for longer wear. That should make this an X26S, but there's no S stamped on the toe.

P1100216.JPG

Here it is in the catalogue in 1905

1769182132338.png

(catalogue at https://archive.org/details/union-mfg-co-catalogue-5-1905/page/28/mode/2up)

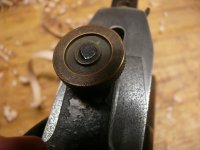
It's quite nicely made and has survived well, though the attachment of the brass knob to the steel threaded rod is a bit crude - it's just a through hole and a few blows from a hammer:

P1100219.JPG

But what do you expect for 14 shillings and sevenpence (£0.73)?

Anyway, it cleared the corners off so I could do some turning on the lathe, just like I did for the other one. I also prepared another bit of sapele.

To cut the thread on the smaller diameter beech rods, I wanted to use my recently acquired 1¼" thread box and tap set. (You may recall that I made a handle for the tap back in August last year - https://www.thewoodhaven2.co.uk/threads/playing-about-with-a-big-tap-holder-part-1.10944/)

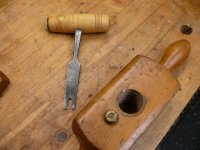
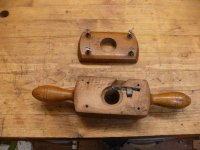
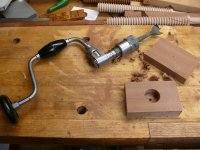
Before using the thread box I decided to give the cutting edges a bit of a tickle with a diamond file and adjust the set of the cutter a bit. To undo the bolt that holds the cutter, you need a split screwdriver, like you would use for screws on an old saw handle. I have one, but it's just a bit that fits in a brace. Or alternatively, it fits in a little boxwood bit handle!

P1100200.JPG

Here's the inside view. Some of these boxes have an assortment of screws to adjust the angle and position of the cutter, but with this one you must carve away some wood or insert some shims.

P1100199.JPG

After a bit of fiddling, and a false start with a rod that was slightly too fat, it was a simple job to cut the thread.

P1100222.JPG

That picture was from the second one, that I made today. I found that the best way to grip the rod was just two notched bits of softwood, without any leather or grippy matting.

I could stop there and kid you that all was just fine, but it's not so good round the other side:

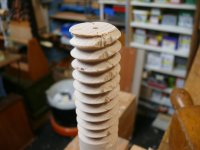
P1100223.JPG

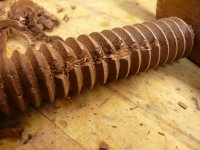
This beech is a bit too dry and crumbly. Although the threads will still grip with that much wood missing, I need to go shopping for some more superglue and see if a good soaking will stop that happening. Or find some more thick enough hardwood.

But I'm getting there and enjoying the journey!
 
Last edited:
My father took a different approach and cut them with a table saw. A powered thread box.

Pete
 
My father took a different approach and cut them with a table saw. A powered thread box.

Pete

I notice that you don't say that you followed his example, nor do you recommend it!

But I'm struggling to imagine how anyone could do that.
 
I haven't only because I haven't needed any but I would use the method without hesitation.

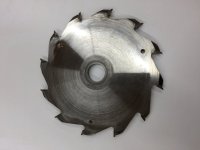
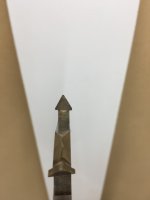
My father was trying to cut threads with a traditional 1 1/2" thread box and tap. Got too much tear out so I suggested getting a Beall router jig. He didn't like that idea because the tip of a pointed router bit doesn't cut and the sides of it are either with the grain or against the grain as it works. He said a larger blade like a saw blade would do a better job. Who am I to question a Danish trained cabinetmaker? I had a couple heavy 7" blades from a door and window plant so I took it to a German saw sharpener that lived and worked nearby sharpening for big cabinet shops. I told him I wanted the teeth to be recut to a 60º tip and left it with him. He actually replaced all the carbide so they could cut up to 3/8" wide. Didn't charge much either, I think because it was something different. Next two pictures are of the blade and a tooth.

IMG_3597.jpeg

IMG_3596.jpeg

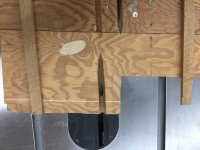
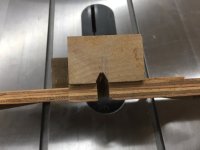
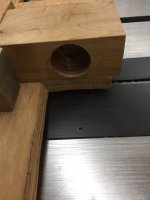
With the blade issue solved he made a sled, never one for fancy it looks pretty rough but functioned well. It was positioned over the blade and using the saw's height mechanism the depth of cut was made to allow whatever fit you wanted. Not one for making multiple sleds flipping it around allowed a second thread size. One side of the blade had the threads of the wood block removed to allow the dowel to fit in and the other side had the thread for the completed thread to come out. The block is angled to the blade the same as the pitch of that particular thread. With the sled clamped to the saw's table you feed the wood against the spinning blade, safely under the sled, and out comes a finished thread. Pictures of the bottom, in feed side, out feed side, and above of the sled.

IMG_3598.jpeg

IMG_3599.jpeg

IMG_3601.jpeg

IMG_3605.jpeg

IMG_3602.jpeg

IMG_3603.jpeg

IMG_3604.jpeg

Here is a picture of some of the threads he made. Two clamp are from metalworking taps I scrounged up and are 1" and 1 1/8". Bottom is 1 1/2" (tap from the thread box that didn't work very well) and the big one is 4" x 3tpi just to prove he could make one with the maximum pitch. That one used an electric die grinder with a 3 wing cutter set and clamped into a hollowed thread to act as a powered tap.

IMG_7001.jpeg

Let me know if the struggle is over. ;)

Pete
 
Fascinating!
I'm familiar with the Beal kit - I've got one - but I'd not thought of someone getting a saw specifically reground. Very ingenious.
Thank you 👍
 
You are welcome. I didn't show the smaller clamps he made using a lag bolt as a thread tap and a carving "V" gouge in a home made thread box. Not sure where they ended up. Goes to show that there are many ways to skin a cat. Some of them don't result in scratches either. :LOL:

Pete

I'll add that once upon a time it occurred to me that a regular blade with a flat topped tooth might be set up to cut a square thread but you would still need to come up with a tap with a square thread form.
 
Does soaking the beech in linseed oil first help ?

I suppose I could find out, as I have a thread box somewhere.
Yes I’ve read this too, I wondered if it might be a good idea to dry the dowel out gently in an oven then submerging it in Linseed oil (or maybe Coconut oil?) where it could suck it up like a sponge?
 
It might do. If I remember right, Douglas (who made my Moxon vice) used to do that.
 
It might do. If I remember right, Douglas (who made my Moxon vice) used to do that.
I think Douglas used to soak the wood in linseed oil, thinned with white spirit. I have had success with a 50:50 mixture of cooking oil and white spirit, soaking for about three days.
 
Time for a quick update. I now have two of everything but won't bore you with repetitive pictures of the same steps.

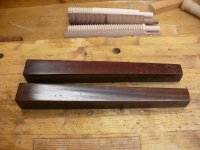
In my quest for some more suitable hardwood for cutting threads in, I found these two tapered legs. They are French polished which I think must mean they were from an old piano.

P1100224.JPG

I'm never going to make a two legged table, so they are ok for experiments. First, they need to be not tapered.

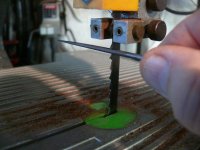
I marked out the biggest square I could cut from them - just over 1¼" - and went to the bandsaw to cut them down a bit. Progress was frustratingly slow, so I allowed myself a little digression and thought I'd sharpen the bandsaw blade a bit. You may recall that my bandsaw is a little Burgess three wheeler, probably made shortly after I graduated from riding a trike to a proper bicycle, but one advantage is that its blade is less than a mile long.

So I tightened up the guides a little and set to with a round needle file, giving each tooth the same tickle and tugging the blade around an inch or two at a time.

P1100225.JPG


A tolerable job on this scale, which made a noticeable improvement, but I won't be taking it up as a new hobby.;)

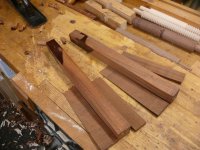
A little light planing and I had some useful wedges and two straight sticks.

P1100227.JPG

I suppose I could have just regularised these on the lathe, but there wasn't much wood to spare so I wanted to stick to the same method I had just used on the first and second pair.


P1100228.JPG

A bit longer this time.

However, when I tried cutting the thread, this was the result:

P1100230.JPG

Not too shabby? Come round the back and take another look...

P1100231.JPG

I think it's just a natural weakness in the wood that didn't matter at all when it was a full sized leg. Never mind, back to the other ones.

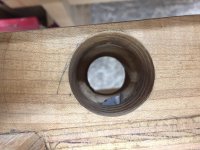
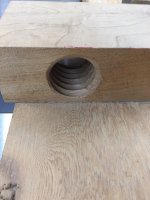
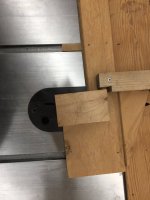
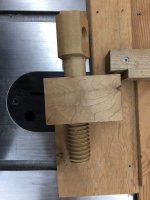
For these rods to work, there needs to be a pair of threaded holes in the back jaw of the Moxon vice they are intended for. To be able to send a kit in the post, I reckon the practical option is to make a pair of nuts, big enough to form on the lathe but small enough for Peter to inset into whatever size jaws he chooses.

I did some more experiments on some handy hardwood odds and ends.

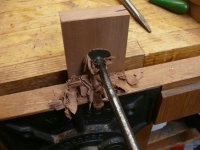
Here's some oak being drilled with a very modern "improved centre bit" from the middle of the 20th century:

P1100237.JPG

And then tapped:

P1100239.JPG

That was ok, especially if I ran CA glue into the hole first.

Some Idigbo was ok too, a bit rough but robust enough and an old style centre bit was just as good:

P1100241.JPG

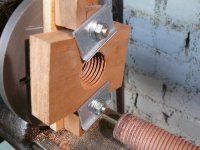
For the 1½" size, I needed to cut the threads on the lathe, as I don't have a suitable tap. To do this, I cut some suitable bits of wood again - sweet gum this time - and drilled a suitable hole. Justification indeed for having a 1 3/8" bit.

P1100249.JPG

I found that I also have a 1 3/8" square tang Forstner bit so couldn't resist giving that a go too:

P1100255.JPG


Nearly there, but it's teatime and I have to leave you in suspense for a little while longer - will this tiny project ever get finished?
 
I'm back...

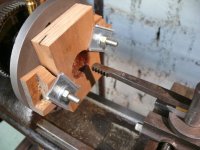
With the right size hole drilled, I mounted the piece onto the lathe faceplate. I set up a gauge and carefully adjusted everything until the hole was central, to within a few thou.

P1100262.JPG

All ready to use the coarse thread chaser (set up on the centre line, at 90 degrees to the workpiece) to cut an internal thread. Have you spotted my mistake?


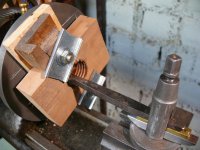
Fortunately, I did, before any damage was done. Here's the set-up, corrected. Spot the difference?

P1100264.JPG

I'd forgotten to allow space behind the work for the tool to run into, rather than having it crash into the faceplate. 😡

Admittedly, I was only going to be pulling the drive belt round by hand, very slowly, but having things lock up might have done some damage.

As I had already begun to cut a very shallow thread, I kept the back gears engaged and used some spacers which were 12mm deep, ie 3x the 4mm pitch of this chaser (which is close enough to 6 tpi to be ok). That way my new thread lined up with my tentative start.

I cut the thread in several successive passes, scraping just a little off each time, from surfaces that I had previously soaked with the same CA glue as before. Here's a finished thread:

P1100271.JPG

with the other part ready to try for size

P1100266.JPG

It fits!

I then repeated all that for the other one and took them off the lathe to test the fit properly.
After a bit of gentle fettling by hand, using the chaser in the nut and a coarse three-square file on the rod, I ended up with what I was aiming at, a set of parts that fitted well enough to use but would adjust easily.

I'm stopping there and leaving the rest to the recipient. He'll need to fit them to the jaws and make some suitable knobs for the front. He may need to shorten them as well - I just made these as long as I could with the wood I had to hand. I'm not trying to take over his project, just to provide the components that need a lathe and optionally a large thread box and tap.

The idea of the smaller section at the end is that the front jaws can have a ¾" clearance hole in, with knobs glued on in front. If the wood is thick, Peter can counterbore the front face of the front jaw, or extend the reduced diameter part with a saw, chisel and rasp. Or he could saw the thin parts off, drill centrally and insert some chunky dowels, thus maintaining the maximum length of the threaded sections.

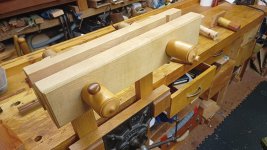
Here's a snap of the rather superior Moxon that Douglas made for me, with knobs fitted to rods which are retained in place that way, to try and clarify what I mean.

IMG_20260118_165105390.jpg

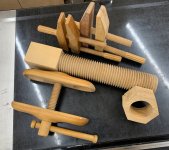
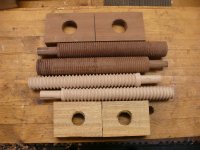
All in all, it's been an enjoyable little project. Most of the time taken was for setting things up and working out sizes that made sense. Actually cutting the threads was the quickest part of the job. Here's the finished kit:

P1100272.JPG

I hope this will inspire some similar productions!
 
Well done Andy, perseverance pays off. I have seen the thread chasers oh here previously but now I can understand how they are used thanks.
AFAIK, they are meant for metals more than for wood. Most of the ones I have are Whitworth sizes. So no good for softwoods and fussy about hardwood! Treat all of this as experiments only.
 
Back
Top