• Hi all and welcome to TheWoodHaven2 brought into the 21st Century, kicking and screaming! We all have Alasdair to thank for the vast bulk of the heavy lifting to get us here, no more so than me because he's taken away a huge burden of responsibility from my shoulders and brought us to this new shiny home, with all your previous content (hopefully) still intact! Please peruse and feed back. There is still plenty to do, like changing the colour scheme, adding the banner graphic, tweaking the odd setting here and there so I have added a new thread in the 'Technical Issues, Bugs and Feature Requests' forum for you to add any issues you find, any missing settings or just anything you'd like to see added/removed from the feature set that Xenforo offers. We will get to everything over the coming weeks so please be patient, but add anything at all to the thread I mention above and we promise to get to them over the next few days/weeks/months. In the meantime, please enjoy!

Shed rebuild

Coolhands":30lsh3qq said:
I work in a school, so in preparation for when I seat my framing on a bed of mortar, I asked the DT technician about me making some simple folding wedges after hours with offcuts. Guess what - not allowed, health & safety :lol: kids can use the bandsaw but a grown man cannot :eusa-clap:

He's just being a jobsworth. He could easily give you a short formal training on using it, fill in the form to say you've had the course etc. But, I guess, he needs to be present (as he would be if the kids were doing it). Beer money ?

In extremis I'm sure someone here could knock you some up.
 
Coolhands":bzhank1d said:
......... The sides slope gradually up the front so each stud is a different length; I've got about a 9 cm drop front to rear.......

:shock: Nightmare.

I'd be tempted to rip some 4x2s into long wedge-shapes, spike them together, and place them under the bottom plate. That way all your studs could be the same length.
 
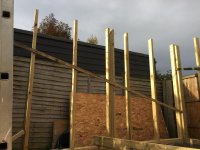
Yes I used trigonometry to calculate the length of each individual stud as each one varies depending on the distance from the (front or rear) edge! (I used the centre point of each stud as of course ideally the top should be cut with the 1 degree angle but I cut all mine at 90 degree, but now I’m being fussy). Hence my questions earlier about a ‘flat roof’!
 
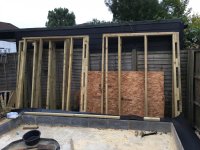
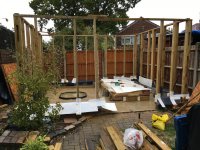
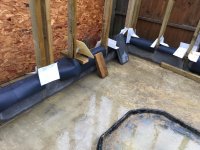
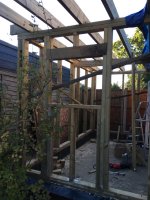
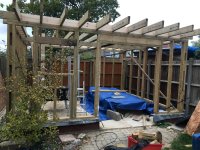
Day of action! Of course peeing down now but just about managed to get it all up just as rain arrived with the help of my dad (mortar duty) and brother (lifting & placement duty) who came over. Have had to run round trying to protect the mortar with excess DPM and plastic to stop it washing away. Hope it stays ok, the rain is getting heavy but nothing I can do.

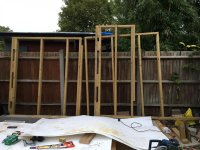
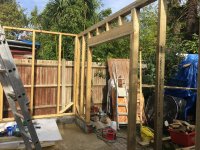
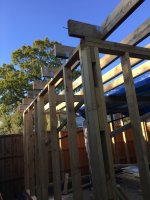
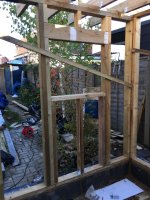
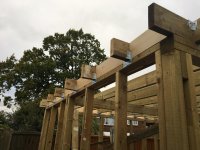
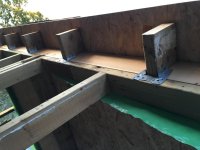
Over the last couple of weeks I'd made the wall sections after work in evenings. Each piece had to be manageable in terms of size and weight as making on my own. Each side wall 2 pieces, 3 for the back, and 1 for each side of the front doorway, so 9 main sections overall.

Double header plate for front door and window are constructed but left out until afterwards for weight reasons.

IMG_2478.JPG

IMG_2477.JPG

EB6B576F-DD1A-4134-B2A3-B7966E8BBD29.jpeg
 
34B8D059-1545-486E-AB6B-12B2A380653A.jpeg

B76807C6-4465-44F1-8B6D-646F30BA353D.jpeg

4AECE245-B76A-460F-8A34-611EC484087E.jpeg

only issue is the top plate extending above the door which has bent and twisted since I made it and now doesn't meet. I have bought more wood this afternoon and will replace with straight piece tomorrow. The front and rear wall then get another head plate (so will have 2 in total) as my joists won't be sitting above the uprights.
 
67678AF0-987C-47BC-A4DC-E0E5B4EC5EBF.jpeg

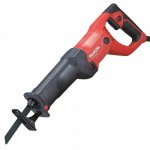
I will taking the header plates off all round and chopping 6” off all uprights then putting back together as it’s too high and imposing. Then roof joists can go on. A load more work but in the end I've decided to do it. I've bought a reciprocating saw to chop them all down :)

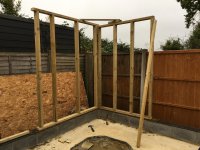
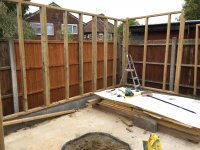
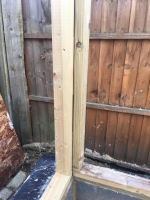
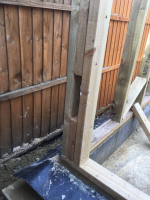
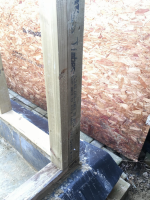
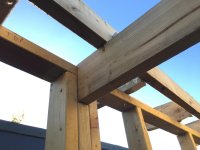
Corners - 3 views of the same corner:

1a.png

2a.png

3a.png
 
I've used those reciprocating saws and the blade flops around all over the place. I think that you will be very disappointed with the result given your application. As you have relatively few uprights, I'd be inclined to clamp blocks to the uprights in line with your cutline and then use a normal saw. That way you (a) get support for the saw and (b) end up with a square end.

Especially as the rest of it is so very neat and accurate.
 
Ah I didn't know that. How about my circular saw? (trying to get away from manual work :oops: ) It's the corners will be hard work otherwise!
 
Coolhands":2oq4pqmk said:
Ah I didn't know that. How about my circular saw? (trying to get away from manual work :oops: ) It's the corners will be hard work otherwise!

Very hard to hold at that angle, up there and keep square.

Just had a thought....when you say reciprocating saw I thought you might have been talking about the alligator type saw. But is it one like a Fein ? If so then you're sorted :eusa-dance: Just use the clamp/block technique to keep the blade square.
 
I'm afraid not. That's an alligator type.

Sent from my SM-G930F using Tapatalk
 
Those do have their uses but can be the very devil to keep straight cutting especially when working off the ground.
There are blades which have not only the set of the teeth but have a slower wave over several teeth. These are stiffer and don't wander as much due to the extra clearance in the kerf. Similar blades can be found for jig saws and also less prone to wander and are my goto blade of choice.

Bob
 
ok I haven't used it yet. I'm now in quandary - if I try it, I can't take it back. Don't want to try it if it's no good for the job! ie wanders off (blade flex) like a jig saw? Youtube videos of similar saws look quite good.
 
Trust me. Get a Fein or similar saw. Not at home so can't easily post a link. But out of all the powered hand machines I have its got me out of so many holes

Sent from my SM-G930F using Tapatalk
 
They will cut straight if you can use them in a comfortable position where you can see all round and possibly shift your position, grip, stance etc to correct any wander before it gets serious but up a ladder where there are other considerations like not falling off etc :lol: then wander is more of a risk.

I class these tools more for demolition type work, removing windows even cutting round tree roots than quality construction work or a "get you out of trouble" tool.

Yes they behave very much like a jigsaw. I dont think it is possibly the tool for the job in this instance if I understand the task correctly and a cheapo NEW hardpoint saw for a few quid will serve you better.

Good Luck

Bob

PS what Roger is talking about is a multitool, now offered by several makers which is a much more controllable device albeit slower cutting.

just one example of many https://www.toolstation.com/shop/p88296
 
That demolition saw will never cut straight.

Think I'd try the circular saw. Make up a guide/support for the saw base so it will cut at the right distance and not need awkward holding - something you can move and clamp on. You may have to finish some cuts with a handsaw but the cut will be started and square.
 
I really counsel against using a circular saw. It is bulky, awkward and heavy. You are going to be trying to balance it on a piece of timber that may/may not stay clamped in place. As you enter the cut, you're trying to balance the saw, get the aim right etc ad then when you exit the cut repeat it all again. And probably up a ladder to boot.

If you can take back that saw and swap it then it will (a) be much easier and (b) give you a useful tool for later. I never ever use my alligator saw these days.
 
RogerS":10puex9s said:
I really counsel against using a circular saw. It is bulky, awkward and heavy. You are going to be trying to balance it on a piece of timber that may/may not stay clamped in place. As you enter the cut, you're trying to balance the saw, get the aim right etc ad then when you exit the cut repeat it all again. And probably up a ladder to boot.

If you can take back that saw and swap it then it will (a) be much easier and (b) give you a useful tool for later. I never ever use my alligator saw these days.

Sorry Roger, disagree with you on the circular saw. Yes some can be bulky and heavy, but get yourself one your comfortable with and do it in a couple of passes, jobs a goodun. Done similar before with studwork that's needing adjustment ie ive cocked up !

For a guide a piece of 4"x2" offcut screwed into position. I would cut it the exact length to go up against the header, not going to go anywhere. Using the same guide each time of course saves measuring. Just make sure with a bit of care you hold/push the sole plate of the circular saw onto the timber. Getting yourself into a comfortable position on a sturdy pair of steps is important. Even better a couple of trestles and some boards at just the right height so you can kneel and hold the saw with both hands - told you ive been there before !!

Or as previously mentioned your not going to go far wrong with a square and a nice new saw.
 
Sorry very much agree with you on the reciprocating saw tho. Mine just gets used for demo work. Do not know how you could use one with any real degree of accuracy.
 
jules70":1830p06l said:
RogerS":1830p06l said:
I really counsel against using a circular saw. It is bulky, awkward and heavy. You are going to be trying to balance it on a piece of timber that may/may not stay clamped in place. As you enter the cut, you're trying to balance the saw, get the aim right etc ad then when you exit the cut repeat it all again. And probably up a ladder to boot.

If you can take back that saw and swap it then it will (a) be much easier and (b) give you a useful tool for later. I never ever use my alligator saw these days.

Sorry Roger, disagree with you on the circular saw. Yes some can be bulky and heavy, but get yourself one your comfortable with and do it in a couple of passes, jobs a goodun. Done similar before with studwork that's needing adjustment ie ive cocked up !.....

How many Weetabix do you eat ? ;) My puny arm muscles would only be good for a couple of studs. :lol:
 
I used the Makita.

Top plates off

5F1672BF-4ECD-4E53-8640-CCE028450F81.jpeg

Yes it was brutal & wandered but I couldn’t have used the circular saw, so it got the job done. My wife is killing me for spending too long on this and went ballistic when she found out I was taking all the header plates off to cut down the walls :cry: I did it anyway, I’m going to be looking st this for the next 10 years.
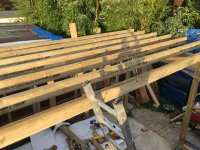
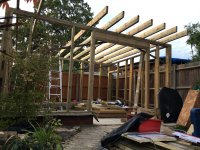
Right, hell of a day I was out there from 7.30am to 7.30pm. Got wall cut down and top plates back on, rafters on (except I’m 2 short!). So jobs a good ‘un.

B39E9D05-F9F9-4781-B715-5AD61D97FD62.jpeg

84B14687-A2EC-4E1D-9A74-41F768078C68.jpeg
 
Anyone help me with the roof / edges cost?

First I need if I buy plastic fascia board for all edges (probably from selco as local to me) so 4 x 5m lengths at about £24 each (so £100)

I want to buy EPDM. The cost for the rubber is only £256, well worth it. But by the time I add proper epdm 6 side pieces (kerb upstands as each one is only 2.5m long) + 2 back pieces (gutter trim), corners, glue etc it's a bit over £400. AND I am having 18mm OSB 3 board which is £245

so altogether at least £740 which to my mind is excessive mainly because of the cost of all the plastic fascia boards, kerb upstands etc which annoys me.

So is there a way I can do all the edge stuff cheaper but still use epdm and not ruin it :eusa-think:
 
Kerb upstands being raised edges to the EPDM to keep the water on the roof at the sides and top?

In that case, simply rip some 4x2's on the diagonal to make a triangular section, and fix these in place on top of the OSB before gluing your EPDM down.

If you can design in a fascia of some sort, maybe 4x1 timber, where you could take the EPDM down the face, under the bottom edge, and a short way up the back, then you'd have no need of the plastic trim. You'd need to mechanically fix the back edge of the EPDM. Use contact adhesive rather than the white gum adhesive for this detail.
 
yes for raised edges. OK I will think about that. I suppose might actually keep to 6 x 1" planed timber fascia (to keep depth same as joists) which is about £3.11 a metre so about £40 quid for all 3 sides which is lots better & I can don't mind buying proper epdm gutter trim for the back edge which will be approx £30.

As long as I can bring the epdm down and under the fascia & fix securely will be my only concern (eg keeping it tight all the way along). I can glue to side of fasica board as it comes down, and fix batten on inside edge or underside of fascia board along the length. Just thinking out loud. It's tricky cos I won't easily be able to pull up on inside edge of fascia board as the joists will be there at intervals.

anyway, ta

edit just seen your pic yes I understand. Problem is the uplift part on inside. Unless I go for 7 or 8" board but that might be crazy!

edit 2

Oh I see I hadn't thought about the fascia being mid-point along roof line I was imagining it hanging below. Thanks.
 
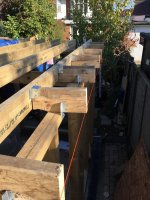
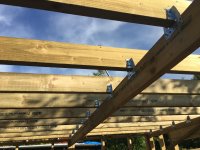
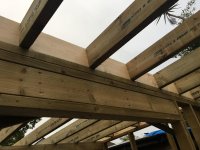
Side pieces done today and also put the cross member in across the middle, which was a bit difficult but got it done eventually. Overall took another day even though it doesn’t look like it. Trying to make the most of the good weather and make hay why the sun shines!

One of the side joists has twisted which made everything difficult, annoying as I picked the straightest ones for the edges when I installed last week.

I’ve been using various truss clips for my connections, with sheradised nails. Oh, fitted window sections too.

25C74DCC-95E8-4BD8-AF99-D6F44AB4045D.jpeg

2AF054DC-D437-4A73-855E-12F3E2729D7C.jpeg

392420D8-935F-4798-B002-B3A3D10E1024.jpeg

2830FDBB-E839-4188-9443-FBAE96B173AE.jpeg

34BCEF58-7718-49F7-989F-C7A54D44154D.jpeg

97CCD732-835F-4FD5-8B12-00AD561CBE68.jpeg
 
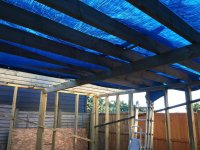
Oh, that blue hue of the tarps! Reminds me of mine going up.


Coming along nicely!
 
Coolhands":1cqh1m32 said:
As long as I can bring the epdm down and under the fascia & fix securely will be my only concern (eg keeping it tight all the way along). I can glue to side of fasica board as it comes down, and fix batten on inside edge or underside of fascia board along the length. Just thinking out loud. It's tricky cos I won't easily be able to pull up on inside edge of fascia board as the joists will be there at intervals.

.

If I'm understanding this right... In my limited experience you don't want to be pulling the EPDM when fixing it. It is elastic and if you stretch it, it tries to return to its original size and may eventually peel. It is more like wallpapering - you spread it out onto the glue without stretching.

I didn't buy the plastic edge trim for my shed or my workshop. Both have the vertical side returns retained with screwed on battens. The battens are cut with angled top and bottom to assist run off and make a drip edge.
 
Spent today closing the eaves and joining the rafters to the cross member:

3D6C3D0A-7547-4788-9FE5-E77081A2D824.jpeg

Took whole day! Around about 40-odd closers required, and I’m blooming knackered from being up and down the ladder all day. All nailed in place, flush with the exterior walls to make sure birds don’t rest there.

E72D30CF-660D-49BD-A7B4-80D1DE882DD9.jpeg

5A8FA9A4-31E5-4A88-99FB-6E1B74E5F170.jpeg

Side:4D00198D-7391-4C3F-81ED-BC68C24F75D8.jpeg

Now ready to install ceiling 11mm OSB sheet, add insulation, add top 18mm OSB, add EPDM. Hopefully all tomorrow.
 
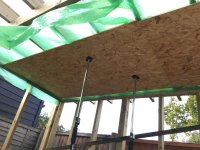
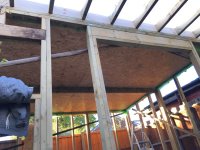
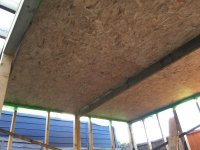
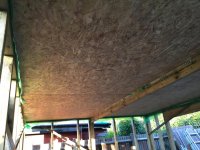
Got the inside ceiling up today. I actually thought I would get this done and the outside (topside) in 1 day but no. Can’t really explain where the time went but it took a long while, the cutting and moving of large boards really. 6 boards req all had to be cut lengthwise, and 4 sections either side of the cross member also cut to width.

I used a vapour barrier too as I’ve thought why not, it’s pretty cheap. Although quite hard to get up by yourself. I would also recommend these extending legs as invaluable if working n your own.

0EB1F73D-B21E-4668-9D85-1A2C89E6C9B0.jpeg

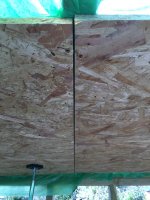
I left a decent gap as don’t want buckled boards:

9A83A201-F624-4C04-9563-25614D05FD35.jpeg

Hard to photograph a ceiling but here goes

C7881D6B-0C8D-4CA7-A475-E88A42ECB914.jpeg

33DFAEE4-FA3B-41AC-BD77-422C76065F0B.jpeg

4D6C522E-4468-4E36-8631-E8D2A5632B04.jpeg

I also managed to get 4 of the 8 required OSB boards up on top ready for tomorrow. They are bloody heavy and nearly killed me. My EPDM has arrived ready to put over when I’m at that point.

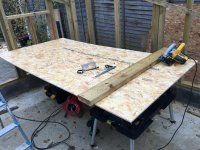
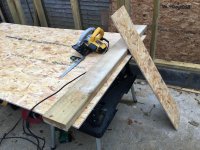
I would recommend this to anyone that hasn’t thought of it: screw large timber to the board you want to cut. Remember to leave extra gap according to your blade / fence dimensions 3cm in this case (probably most other makes too)

0EB328EF-5BC7-40CC-8C23-9FD2DC38CBFB.jpeg

BDCFA42F-5C59-47BC-B31E-44EA1A3289CD.jpeg
 
Mike G":n7bzqglt said:
In that case, simply rip some 4x2's on the diagonal to make a triangular section, and fix these in place on top of the OSB before gluing your EPDM down.
Anyone know how I can do this with a circular saw? I can’t work how. I can tip it 45 degrees on the base plate, but will that really work?
 
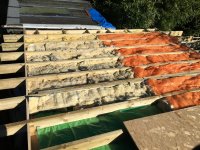
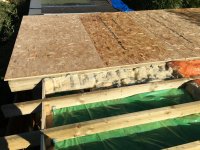
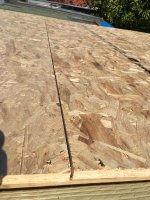
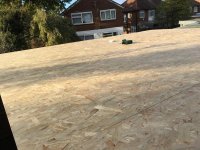
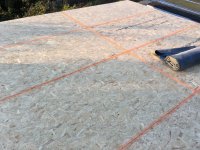
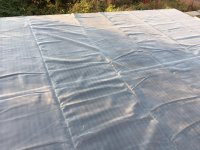
Today I got the insulation in and all boards fitted. I have to admit everything takes a lot longer than a) I plan / think and b) I would like. All went well except for the Great Unravelling of the EPDM. Of course, as I had almost suspected would likely be the case, it’s too short in one direction. It’s only 491cm and it should be 5m (5x5). The other dimension is fine (I assume this is the width of the roll from the manufacturer) but the monkey who cut it cut it too short.

This means tomorrow I now have to spend an age cutting 3cm off both sides of my roof to enable an overhang of material. This will take ages and really really annoy me. And it’s fortunate that I have enough spare overhang to just about be able to do this.

I used extra sticky scrim tape on my joints just because it might help to hide the lines when the material settles in. I also left pretty decent gaps to prevent buckling hopefully.

Reusing my original insulation

C6EEB310-9C2E-4E92-ABD2-20135E80FAD6.jpeg

Boards (by the way each board weighs 35kg and is bloody heavy in your own)

6098BA2C-0E79-40D8-B984-CEF257448DB2.jpeg

Gap:

98E6E30F-4845-42FC-8A48-788B3679E3FC.jpeg

All boarded:

32564CCE-C23F-40E4-B72B-07BAA8437BB9.jpeg

Taped joints

41B64779-5A3E-4E64-B539-C1C30B58BD26.jpeg

Rubber laid out (the roll weighs over 40kg and is very very hard to get up on a roof on your own)

2F0C7E00-3F00-4339-9546-E63EFC6031CA.jpeg

Overhang of one side, of which 3cm will have to be cut off

94AF4C1F-6C36-484C-8981-5920AD45C7D4.jpeg
 
Very nice work did you manage to cut the Aris as Mike G suggested for the edges. I have been pricing timber today and quite a few suppliers offer a 47 mm x 100 mm fillet piece as they call it £5 for 3.6 m or did you work out an alternative
I am following with great interest as I plan on using a pent roof myself.
Michael
 
Back
Top