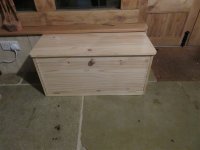
Mike G
Petrified Pine
We need a shoe rack in the sunroom. So, what's it to be: Krenov-style, or Japanese-style, or mid-century modernist style, or Swedish minimalist..........
..........were questions I never asked myself.
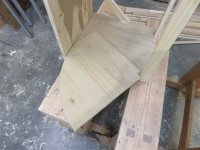
This was to be the first piece of furniture I had made in pine for as long as I can remember. I started by grabbing some freebie wood off Facebook Marketplace. Unfortunately, it had been left out overnight for 2 or 3 nights, and had got superficially damp. I stood it up to dry for a week, and it was soon back to about 12%. It was an old wardrobe:
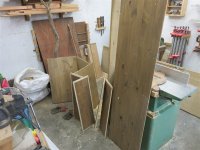
I picked out the flatter pieces for the top and front, and started cutting things to a rough size. Cutting this poor quality wood required a discipline. I had to score the back of the board with a knife, and then cut alongside the knife line to prevent awful spelching:
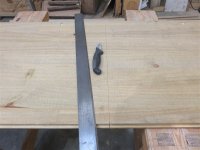

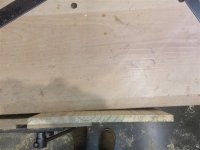
Here you can see the knifed side of the board on the left, and the other side on the right:

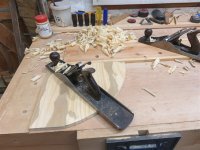
Even if I had wanted to flatten this lot by machine, I wouldn't have been able. It was too wide. And it certainly wasn't flat:


That helped stock up shavings for the fire.
I've got no space in the design for a frame, so I needed to fix the sides firectly to the top. I chose to do a sliding dovetail because I wasn't confident that these boards were going to stay flat, and locking them in a permanent arm wrestle seems the bast way to keep them as flat as possible. So, here's the female marked out:
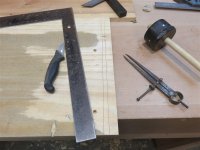

Any long saw cut across the grain really needs to start with a little bit of chisel work to a knife line, I reckon:
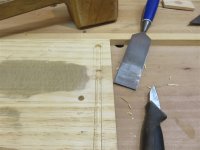
That makes the sawing very easy. The angle is just random:

The groove was too narrow to fit my router plane blade, so I used my old trick with a sharp screw as a depth marker:

To be honest, being over-deep doesn't matter, other than at the outside edge, so just doing this by hand, riding the bevel of the chisel, was plenty good enough:
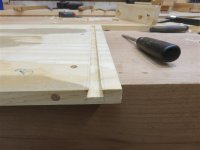
The male side of the joint was just knife and chisel work to start with, and a little bit of sawing:

Then I tried for the first time using a side-rebate plane for truing everything up, and it worked like a dream. It moves above a shoulder plane in the pecking order for doing sliding dovetails:
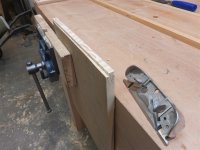

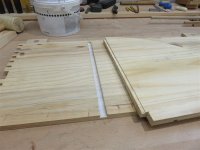
It only took a little adjusting to fit really nicely (and you'll note that I only flattened the underside of the top in the areas which count:

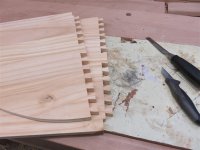
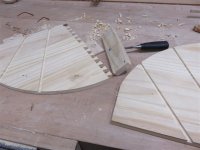
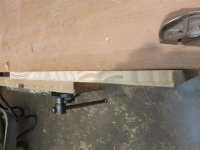
I had a couple of members at the bottom to do to tie everything together, and did some more dovetails for them:


Image limit. I'll be back in a minute.
..........were questions I never asked myself.
This was to be the first piece of furniture I had made in pine for as long as I can remember. I started by grabbing some freebie wood off Facebook Marketplace. Unfortunately, it had been left out overnight for 2 or 3 nights, and had got superficially damp. I stood it up to dry for a week, and it was soon back to about 12%. It was an old wardrobe:
I picked out the flatter pieces for the top and front, and started cutting things to a rough size. Cutting this poor quality wood required a discipline. I had to score the back of the board with a knife, and then cut alongside the knife line to prevent awful spelching:
Here you can see the knifed side of the board on the left, and the other side on the right:
Even if I had wanted to flatten this lot by machine, I wouldn't have been able. It was too wide. And it certainly wasn't flat:
That helped stock up shavings for the fire.
I've got no space in the design for a frame, so I needed to fix the sides firectly to the top. I chose to do a sliding dovetail because I wasn't confident that these boards were going to stay flat, and locking them in a permanent arm wrestle seems the bast way to keep them as flat as possible. So, here's the female marked out:
Any long saw cut across the grain really needs to start with a little bit of chisel work to a knife line, I reckon:
That makes the sawing very easy. The angle is just random:
The groove was too narrow to fit my router plane blade, so I used my old trick with a sharp screw as a depth marker:
To be honest, being over-deep doesn't matter, other than at the outside edge, so just doing this by hand, riding the bevel of the chisel, was plenty good enough:
The male side of the joint was just knife and chisel work to start with, and a little bit of sawing:
Then I tried for the first time using a side-rebate plane for truing everything up, and it worked like a dream. It moves above a shoulder plane in the pecking order for doing sliding dovetails:
It only took a little adjusting to fit really nicely (and you'll note that I only flattened the underside of the top in the areas which count:
I had a couple of members at the bottom to do to tie everything together, and did some more dovetails for them:
Image limit. I'll be back in a minute.
Attachments

Last edited: