• Hi all and welcome to TheWoodHaven2 brought into the 21st Century, kicking and screaming! We all have Alasdair to thank for the vast bulk of the heavy lifting to get us here, no more so than me because he's taken away a huge burden of responsibility from my shoulders and brought us to this new shiny home, with all your previous content (hopefully) still intact! Please peruse and feed back. There is still plenty to do, like changing the colour scheme, adding the banner graphic, tweaking the odd setting here and there so I have added a new thread in the 'Technical Issues, Bugs and Feature Requests' forum for you to add any issues you find, any missing settings or just anything you'd like to see added/removed from the feature set that Xenforo offers. We will get to everything over the coming weeks so please be patient, but add anything at all to the thread I mention above and we promise to get to them over the next few days/weeks/months. In the meantime, please enjoy!

Side "tables".

Mike G

Petrified Pine
Joined
Jul 30, 2014
Messages
12,728
Reaction score
3,512
Location
Suffolk
Name
Mike
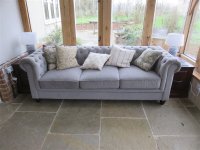
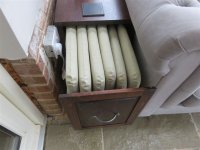
They're not really tables at all. More cabinets. I've made them for the small gaps at the ends of the settee in the sunroom. Their function is somewhere to place a cup of tea, and to contain the cushions we use in the summer for our outdoor furniture. This isn't really a WIP, as I have finished and installed them.......but it amounts to the same thing as it is a sequence of photos showing the construction of said boxes.

Two caveats: there is a lot more machining in these than in most of my projects, and there is a fair amount of low-grade pragmatic woodwork involved. They won't win me any prizes!

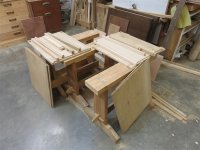
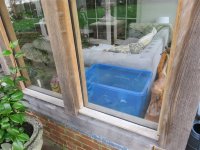
I started by mocking up the proposed size for my wife, using a plastic box propped up on some stuff:

IMG_7786.jpg

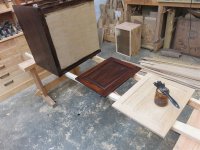
From the outside, this showed that I had to make one side "properly" as it would be seen:
IMG_7787.jpg

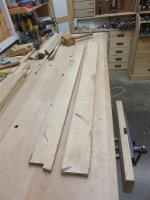
This was to be in dark oak to match the round table I finished recently, so I started with some more oak off-cuts and a stick of chalk:
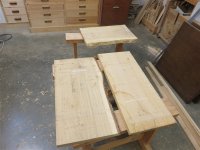
IMG_7788.jpg

Again, because of twists, I ripped everything in half, flattened them, and then put them through the PT. This is my PT set-up for thicvknessing. Yes, the stuff just ends up on the floor:

IMG_7789.jpg

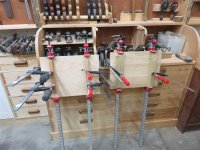
Here are the boards, and the glue-up:

IMG_7790.jpg

IMG_7791.jpg

IMG_7799.jpg

I spent a while sorting through my off-cuts pile, and found stuff like this:
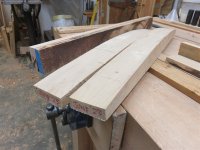
IMG_7792.jpg

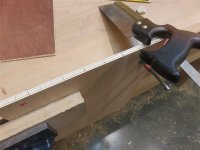
....which I ripped on the bandsaw, and pushed through the thicknesser:
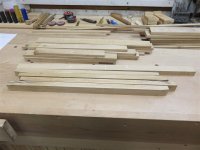
IMG_7800.jpg

I did some joinery:

IMG_7801.jpg

IMG_7802.jpg

It was a bit gnarly, so this time I cut the tenon cheeks rather than chiseling:
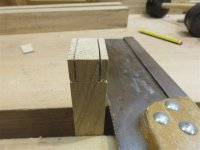
IMG_7803.jpg

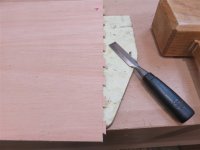
The mortices needed to be done very carewfully, as I had no great depth to play with:
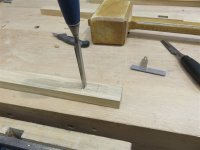
IMG_7804.jpg

IMG_7805.jpg

IMG_7806.jpg

IMG_7807.jpg

Three or 4mm when you are chopping out by hand means you tread quite carefully! But, all went well:

IMG_7808.jpg

I thought I didn't really have any spare height at the front (I did!), so I decided to joint directly into the underside of the top, rather than make a face frame:

IMG_7809.jpg

IMG_7810.jpg

Photo limit. I'll be back........
 
Bit confused. If you've thicknessed through the machine, why is it full of chips? Looks like a nice little machine. Short fence.
 
Bit confused. If you've thicknessed through the machine, why is it full of chips? Looks like a nice little machine. Short fence.
The moveable table of the thicknesser is way up high, and that's clear of chips. That stuff you can see is sitting on the top of the casing.
 
Last edited:
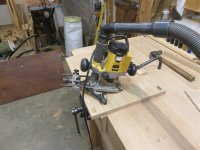
On to the side panel. I did some routing on my high-tech router table:

IMG_7812.jpg

This enabled me to do the tenons to fit the groove:

IMG_7813.jpg

I had a piece of oak veneered ply, and here is a rare glue-up photo of it all going together. I don't like the panel to be entirely floating, and generally retain it in place with a dab of glue near the centre-line:


IMG_7814.jpg


IMG_7815.jpg

IMG_7816.jpg

The back isn't so special:

IMG_7821.jpg

I said earlier that I thought I had less height than I ended up having, and that's because I tried all the drawer sliders in my collection, and none fitted:

IMG_7817.jpg

So, it would be good old-fashioned drawers.

Rebating the tops and panel to fit ply:

IMG_7818.jpg

IMG_7819.jpg

IMG_7820.jpg

IMG_7822.jpg

I must also have done some routing and made some back corner posts, and cut some of my crappy reclaimed ply to size:

IMG_7824.jpg

...........because next thing we know I'm gluing again:

IMG_7825.jpg

Yep, they're just ply boxes with an oak top and front (and one side of one). The sides and back will never be seen, other than the one we've looked at previously. When dry, it was time for a quick check to see that I'd got the measurements right:

IMG_7826.jpg

They look semi presentable, but don't look too closely:

IMG_7828.jpg

On to the drawer fronts, which are panels. The frames are the scrap left ovber from rebating the sunroom frame a year or two ago:

IMG_7829.jpg

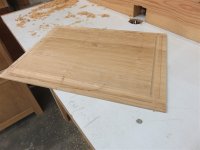
I then glued up some other scrap into flat panels:

IMG_7830.jpg

I must cut them to size, and started routing for the raised panel.....because the next photo we have is of a panel having been passed over a cove bit to form a raised field.

IMG_7831.jpg

I presume I cleaned this up with hand-tools next, but that excitement will have to follow as I've reached the image limit again.
 
Last edited:
No sign of any cleaning up of the panel, but I did do it, using my carriage-makers rebate plane, and some shaped scrapers. I must also have made the panel frames, with grooves and little tenons, then glued everything up. Again, there's no photographic evidence.

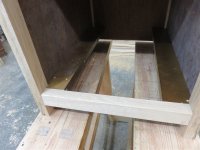
There IS, however, evidence that I didn't think ahead when I made up the cabinets, as I then had to chop out a rebate for the drawer runners, without much room to swing a mallet:

IMG_7833.jpg

IMG_7834.jpg

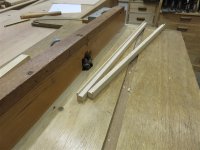
With a tenon on the end of some coated rubber-wood, I soon had working drawer runners (above). Below is a random photo of my smaller pinch sticks. I presume I used these to measure for the drawer box:

IMG_7835.jpg

The drawers are made of scraps of ply. I used whatever I had, so they're mainly 5.5mm Far eastern ply, which is only marginally better than cardboard. There was some 10 or 12mm shuttering ply involved too:

IMG_7837.jpg

How do you join thin ply at the corners? I can't think of any way other than dovetails (or box joints), so I did some quick dovetails:

IMG_7838.jpg

IMG_7839.jpg

IMG_7840.jpg

IMG_7841.jpg

I didn't really want to run ply along my drawer runners, so I made some oak things, which would not only form the runner, but hold the floos and walls of the box together:

IMG_7836.jpg

I glued and pinned these to the ply base:

IMG_7842.jpg

And then glued and pinned the base and runners into the drawer sides:

IMG_7843.jpg

The cushions they're designed for fit:

IMG_7844.jpg

Whilst the glue was drying on the drawers, I did a quick moulding on the router table, and then did some mitre-ing:

IMG_7845.jpg

IMG_7846.jpg

After a bit of tidying up of arrises and so on, I mixed up some van Dyke crystal, and stained everything a deep brown:

IMG_7847.jpg

......and then spent 5 days adding a coat a day of my 1:1:1 mix:

IMG_7848.jpg

.....before screwing on the drawer fronts and the handles, and bringing them both inside:

IMG_7849.jpg

IMG_7850.jpg
 
Last edited:
There will be timber cladding over the brick plinth, coming out to the line of the back of the face-plate. You'll note the stone finishes well away from the brick, and that is the gap which will be filled by the timber cladding to match the rest of the room.
 
Epic! The spirit of quick and practical work lives on.
 
There will be timber cladding over the brick plinth, coming out to the line of the back of the face-plate. You'll note the stone finishes well away from the brick, and that is the gap which will be filled by the timber cladding to match the rest of the room.
Understood, but there doesn't look enough room for the table to then fit in the gap... Or is that just because of current placement?
EDIT : Sorry I hadn't read the previous couple of comments before I posted this.
 
Back
Top