• Hi all and welcome to TheWoodHaven2 brought into the 21st Century, kicking and screaming! We all have Alasdair to thank for the vast bulk of the heavy lifting to get us here, no more so than me because he's taken away a huge burden of responsibility from my shoulders and brought us to this new shiny home, with all your previous content (hopefully) still intact! Please peruse and feed back. There is still plenty to do, like changing the colour scheme, adding the banner graphic, tweaking the odd setting here and there so I have added a new thread in the 'Technical Issues, Bugs and Feature Requests' forum for you to add any issues you find, any missing settings or just anything you'd like to see added/removed from the feature set that Xenforo offers. We will get to everything over the coming weeks so please be patient, but add anything at all to the thread I mention above and we promise to get to them over the next few days/weeks/months. In the meantime, please enjoy!

Small workshop

MY63":2kyofgn0 said:
Yes Rod that is it Sparrow hawk.
It is still raining here so much for the weather forecast of intermittent showers. :lol:

Has anyone ever used the Kreg rip cut guide.
https://www.toolstoreuk.co.uk/kreg-kma2 ... tric/p6757

My experience of these type of things is that they are too hard to keep everything in the right place at the right time. You've got to control the saw AND ensure with the other hand that the guide is staying tight against the edge. I much prefer the Festool track which has sticky rubber bits underneath.
 
MY63":2qtedesu said:
Yes Rod that is it Sparrow hawk.
It is still raining here so much for the weather forecast of intermittent showers. :lol:

Has anyone ever used the Kreg rip cut guide.
https://www.toolstoreuk.co.uk/kreg-kma2 ... tric/p6757

Yes, I've got one. I bought it before I got my cheap aldidl tracksaw. I used it to cut along the length of 8x4 sheets. I haven't got long enough track to use the tracksaw.

I get on OK with it. I've even used it as a big try square on occasions.
 
I should have pointed out what my tool budget was when asking such a question, well there is no tool budget because I have spent it all on timber :). When I did have a budget it was more Aldi than Festool.
Mike I like your style and am halfway there as I have those clamps it looks like you are using aluminium channel which I don't have however I could use the edge of another board in a similar fashion.
 
Yes, if you don't have a long aluminium channel like mine, you can use an old spirit level, or shower-screen extrusion, or 6 or 9 inch wide piece ripped off a sheet of MDF. There are lots of straight things kicking around if you keep your eyes open.
 
MY63":2svi76le said:
......there is no tool budget because I have spent it all on timber :).......

That is precisely the way it should be. If only more people did this.......
 
Speaking of spending money on timber I have just realised that I have not ordered enough sheets of OSB for the roof 3 sheets of 2440 x 1220 is not going to cover 2 sides at 1470 x 3600 at least it is not being delivered until Friday so I can go back tomorrow and change it.
 
Using an off cut of MDF or ply works fine to give a straight edge.
That’s what use with my elderly B&D circular saw.

Rod
 
As usual things did not go as planned but I have made progress.
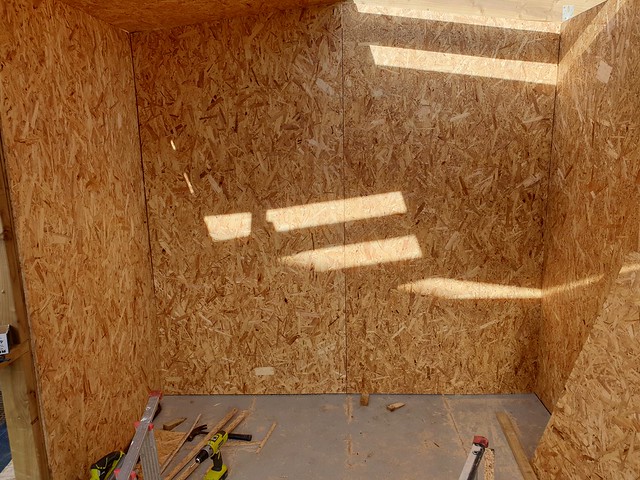
I started with the window wall I am not sure why the first board was difficult as the corner was slightly less than square. I used a large 4 x 4 in post up on the rear decking resting it against the end wall which squared it up nicely.

2019-02-21_06-21-13 by my0771, on Flickr

After cutting the second board to height I placed it in the second corner my plan being to use offcuts to fill the top and bottom around the window.
Rather than mess about with the front around the doors I decided to do the other side. I think I made an error cutting the first sheet of this side as I have a gap in the top right hand corner.

2019-02-21_06-28-21 by my0771, on Flickr

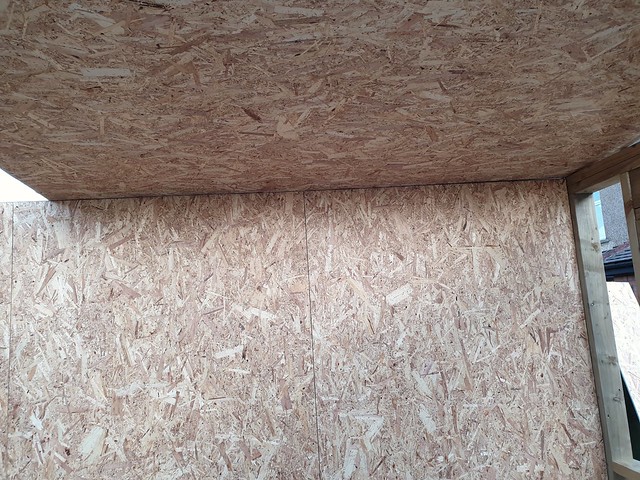
As you can see I have also managed to fit the first inner roof panel to do this I made a tempoary support and with the help of my long suffering wife we lifted it on to the support. Of course we had to take it down to take 5mm off the width.
The other thing I need to confess to is despite reading about sizes of sheets of OSB being 1220 x 2440mm I still made my joist spacings 600mm. My simple solution was to order more wood which is comming tomorrow. I also ordered 2 more sheets of OSB3.

2019-02-21_06-21-31 by my0771, on Flickr

When it comes to joints can they be anywhere or should they be at the top or the bottom.

My taupalin is supposed to be 5m x 4m but I could not get it on tonight so I hope it does not rain overnight.
 
I have never had the opportunity to put a shed together but I follow all these builds with interest and awe in what is achieved.

It looks very good to my untrained eyes.
 
MY63":3jhsaenl said:
As usual things did not go as planned but I have made progress.
I started with the window wall I am not sure why the first board was difficult as the corner was slightly less than square. I used a large 4 x 4 in post up on the rear decking resting it against the end wall which squared it up nicely...........

A tip for next time: Use the OSB to square things up. Be careful to line the bottom of the board up exactly with the sole plate, and screw just the bottom edge into place. Then go to the wall plate at the top of the board, and push or pull it against the edge of the OSB, until everything lines up. I know that's easy for me to say and would be more of a struggle for you, but this can all be done with wedges, screws, and one-handed clamps. As soon as it is clamped square you know you've trued up the whole wall.

Joints can be anywhere. Just work out where it is easiest to handle whole sheets into place.
 
Sorry Mike my poor description again it was the square edge of the OSB that showed me the wall was not square. I had remembered you mentioning using the board edge. I found the biggest timber I had and put it on the upper decking and pulled the frame until I was happy and the weight of the timber held it while I put a screw or 2 in.
I found an old set of Aldi drills with 2 x 2.5mm drills in so I used those to give me a nice gap.

I used off cuts of the sheeting to help guide my saw and also found the guide that came with the saw which was very useful. I actually find this quite easy to use as I need to use the saw in my left hand so I think the Kreg guide might work for me.
 
OSB is available in both 2440x1220mm and 2400x1200mm. If you can't find the 2400x1200mm size in your builders merchants, you should be able to source from a local timber frame (house building) company.
 
jules70":23b2xiod said:
OSB is available in both 2440x1220mm and 2400x1200mm. If you can't find the 2400x1200mm size in your builders merchants, you should be able to source from a local timber frame (house building) company.

Thanks Jules I was aware of the different sizes and I read posts where correct spacings were given but I still made the mistake. But I have added extra studs and have timber on the way to provide more should they be required. I have trimmed the roof panels to the correct size.
 
I boarded out the inside of my workshop a week or two ago, I left 3mm gaps using plastic packers as spacers and then covered all those with 100mm wide trims.

I lifted the bottom edge of the lowest sheets up by 50mm (ish) and then used more of the 100mm trims as skirting boards. The trims were likely unnecessary but I had the material and thought why not. If you want to see what it looks like have a look at my Instagram feed, there's a video or two on there showing the process and finished article.

Yours is looking good now, it'll soon be insulation and cladding time! Have you ordered the cladding yet? What are you going/gone for?

Will :eusa-clap:
 
Thanks Will I will have a look at your Instagram account.
This morning I have fitted the other long roof panel using a wooden batten to help hold it in place.

2019-02-22_01-28-12 by my0771, on Flickr

I have also cut the panels for the rear wall which needed a little help from the long 4 x4 post I used on the outside yesterday. With the textured floor I put it in place and tapped it with my foot until the edges lined up.

2019-02-22_01-31-21 by my0771, on Flickr

I just need to cut and fit the two smaller roof panels the front wall panels and the upper and lower window panels.
 
There is not going to be any sitting in this workshop medicine cabinet is an option :D
The sun has gone down and it is time to stop for the day.
I need to add some support on the front and rear rafters to fix the ceiling panels to lots of screws to add to final fix everything.
I had to take the insulation out of the garage to get the OSB for the roof in so it is now in the workshop under the tarpaulin.

2019-02-22_05-41-23 by my0771, on Flickr
 
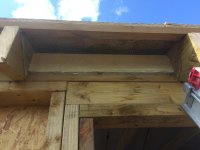
I have been re reading some threads on rooves namely Mr G s there is mention of eaves detail 145 x 45mm in between the rafters. Position wise they look like they are close to the edge of the upper plates and they are shaped by plane after fitting.
 
I didn't use any detail. I put a facia along the ends of the rafters which closes them off and gave me something to fix the guttering to. I then closed of the remain gap (where a soffit would normally go, I think) with insect mesh, so this contributed to the ventilation of the roof materials.
 
Thanks Malcolm some of the pictures from your thread are not visible I think it must have been around the time of the photo bucket issues.
My roof is made from 150 x 45mm so with the 100mm of insulation I am left with 45mm air gap I think that is the plan.
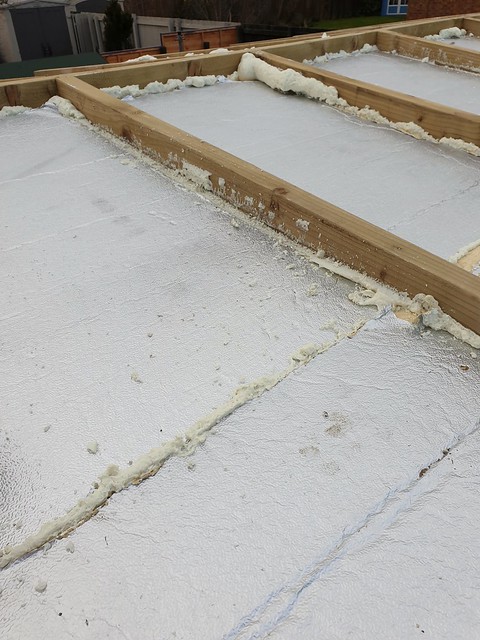
I will be trimming the rest of the foam tomorrow and will continue insulating the walls.

2019-02-23_06-21-39 by my0771, on Flickr

I may have gotten carried away with the foam gun :lol:
 
Foam gun can be good fun!

Closing off with insect mesh.
IMG_1245.JPG

Facia and gables fitted after the mesh was fitted.
IMG_1293.JPG
 
Question for Mike GI guess.

Looking at this photo

https://www.flickr.com/photos/47080473@N07/40223593823/

How does the air circulate ? There's that ridge beam that stops it. When I insulated my garage I made sure that the air could come in at one end and exit the other.

[Oh I give up trying to link to a photo in a thread !)

It's the one of the roof and insulation
 
Ideally airflow should be continuous over the ridge, but frankly, unless these buildings are occupied and heated every day, or used for a wet activity, it isn't a big deal. If there is a breathable membrane and tiles, then it is utterly irrelevant, but if the roof covering is OSB and rubber, or some other vapour-impermeable combination, then, yeah, in a perfect world there would be airflow over the ridge below the OSB.
 
Thanks guys.
I am going for the ideal world, As I currently have a 50mm gap I propose to fill that with insulation then vapour barrier and batten it. Then proceed with the OSB3 and EDPM.
 
Having averted an error this morning I covered myself up and started cutting and fitting the loft type insulation we have not had any rain however it was misty and damp until lunchtime. This did mean that there were no fibres floating around like yesterday afternoon.
When fitting the membrane does it wrap over the edge of the roof or does it end where the insulation ends.

2019-02-24_03-09-18 by my0771, on Flickr

As you can see I have placed it over the rafter ends which don't think need to be covered.
So I plan to move this before I start to fit the battens.
 
MY63":u6qd7rum said:
Thanks guys.
I am going for the ideal world, As I currently have a 50mm gap I propose to fill that with insulation then vapour barrier and batten it. Then proceed with the OSB3 and EDPM.


Sorry if I'm wrong but it seems the layers you have working from the underside of the roof are:

osb,
rigid foam insulation

and are then intending to put


50mm more rigid insulation
vapour barrier
osb and then epdm?

This is very similar to my roof construction but more of a hybrid?. I wanted a "warm roof" so I could have the rafters exposed inside. To my knowledge you shouldn't be putting a vapour barrier on top of the layers of insulation, it should have gone on top of the bottom layer of osb. On my roof I couldn't justify the expense of the top layer of osb so I just layed the epdm directly (glued) onto the insulation board. I did have a 50mm high batten all around the roof perimeter that I could glue the epdm to.

Sorry if I've got the wrong end of the stick or are confusing matters!
The epdm is breathable I think
 
tabs":18pv1ub8 said:
MY63":18pv1ub8 said:
Thanks guys.
I am going for the ideal world, As I currently have a 50mm gap I propose to fill that with insulation then vapour barrier and batten it. Then proceed with the OSB3 and EDPM.


Sorry if I'm wrong but it seems the layers you have working from the underside of the roof are:

osb,
rigid foam insulation

and are then intending to put


50mm more rigid insulation
vapour barrier
osb and then epdm?

This is very similar to my roof construction but more of a hybrid?. I wanted a "warm roof" so I could have the rafters exposed inside. To my knowledge you shouldn't be putting a vapour barrier on top of the layers of insulation, it should have gone on top of the bottom layer of osb. On my roof I couldn't justify the expense of the top layer of osb so I just layed the epdm directly (glued) onto the insulation board. I did have a 50mm high batten all around the roof perimeter that I could glue the epdm to.

Sorry if I've got the wrong end of the stick or are confusing matters!
The epdm is breathable I think

I have to be honest I am no expert I am following MikeG's plan The inner OSB3 acts as a vapour barrier preventing moisture from moving from the inside.
Then we have the insulation 100mm in the walls and now 150mm in the roof space between the rafters some is solid and the upper layer is glass insulation.
The next stage is a membrane to allow moisture out but not in.
After the battens go on I will put the final layer of OSB3 which will have the waterproof EDPM glued to it.
My understanding is that the outer cover keeps the weather out and the vented space allows any condensation to evaporate in the air flow.
 
Hi all
Nothing to update over the last few days I stood in front of my workshop on Sunday evening and thought this is too big. I wanted a small workshop as per the title and feel as though I have gotten carried away.
My neighbors are too polite to say anything but I don't think I would be too happy if one of them had built it.
Time for a rethink.
 
MY63":21nrycwf said:
Hi all
Nothing to update over the last few days I stood in front of my workshop on Sunday evening and thought this is too big. I wanted a small workshop as per the title and feel as though I have gotten carried away.
My neighbors are too polite to say anything but I don't think I would be too happy if one of them had built it.
Time for a rethink.

You will soon grow into it. Reducing size now will be madness :lol:

Bob
 
And once all the materials have been cleared away, it'll look much smaller in the garden.
 
Rod":13gjx5yj said:
I don’t think EPDM is breathable, it’s a rubber compound very similar to pond liners.

Rod
Yes, its a rubber like compund but its advertised as breathable.
 
tabs":1jsb8fn5 said:
Rod":1jsb8fn5 said:
I don’t think EPDM is breathable, it’s a rubber compound very similar to pond liners.

Rod
Yes, its a rubber like compund but its advertised as breathable.

Whoever is advertising it as breathable is wrong.
EPDM sheet is totally impermeable.
You might manage to get a few vapour molecules per fortnight to diffuse through under pressure but that is about it. :lol:

Bob
 
The EPDM isn't the issue, it's the board it sits on which prevents vapour transmission. It wouldn't matter if EPDM was a breathable as a sieve. Lead rooves have the same issue, and the same detail: ventilation below them.
 
Sorry about the wobble I believed I had done enough research to be sure I was not breaching any regulation or planning law.
As my local planning dept won’t give advice without a planning application or application for a certificate of lawful construction. I had to go searching for information regarding height, I had read this before but as usual could not find it again. The guidance below gives specific information regarding heigh of buildings section E sub section E gives the complete wording.

https://assets.publishing.service.gov.u ... _FINAL.pdf

If you don’t wish to see the whole document here is the relevant paragraph:

Any buildings within the curtilage can only have one storey. Buildings with more than one storey are not permitted development and will require an application for planning permission.
(e) the height of the building, enclosure or container would exceed -
(i) 4 metres in the case of a building with a dual-pitched roof,
(ii) 2.5 metres in the case of a building, enclosure or container within 2 metres of the boundary of the curtilage of the dwellinghouse, or
(iii) 3 metres in any other case
The height of the building, enclosure or container should be measured from the highest ground level immediately adjacent to the building, enclosure, or container to its highest point.
The height limit on a ‘dual-pitched roof’ of four metres should also be applied to buildings that have ‘hipped’ roofs (slopes on all four sides).
If any part of the building, container or enclosure is within two metres of the boundary of the curtilage of the house, then the height limit for the total development is restricted to 2.5 metres if it is to be permitted development.

As I am within 2m of the boundary I am in the 2.5m max height but as I am below 15m2 building regs do not apply. I made sure to use the non combustible bats in that area and I am looking for fire resistant cladding for the outside.

I feel I should explain that as I suffer from complex regional pain syndrome ie pain 24, 7 my pain is affected by stress. As soon as I started stressing over this issue my pain spiked and I was unable to sleep and function.
Now I have sorted this matter in my head and had a chat with my neighbour who is quite happy I am hopeful that my pain will decrease and I can finish the bloody roof.

Thanks to those who offered support very much appreciated.
 
Back
Top