• Hi all and welcome to TheWoodHaven2 brought into the 21st Century, kicking and screaming! We all have Alasdair to thank for the vast bulk of the heavy lifting to get us here, no more so than me because he's taken away a huge burden of responsibility from my shoulders and brought us to this new shiny home, with all your previous content (hopefully) still intact! Please peruse and feed back. There is still plenty to do, like changing the colour scheme, adding the banner graphic, tweaking the odd setting here and there so I have added a new thread in the 'Technical Issues, Bugs and Feature Requests' forum for you to add any issues you find, any missing settings or just anything you'd like to see added/removed from the feature set that Xenforo offers. We will get to everything over the coming weeks so please be patient, but add anything at all to the thread I mention above and we promise to get to them over the next few days/weeks/months. In the meantime, please enjoy!

Small workshop

Malc2098":3cx6gqrq said:
You know that blind man my old dad used to talk about, he'd be pleased to see that! :)

Hah - my father used to say 'A blind man would like to see it' whenever he made a less than perfect attempt at anything ;)
 
MY63":1xbd627p said:
.......Mike would you suggest a different type of locking mechanism.

Portcullis with chain winch and ratchet, of course. ;)
 
9fingers":1iemwp5p said:
Maye you could fit a three point locking mechanism and so just have a single lock?

Save time and getting wet fiddling with multiple locks/keys. Just my 2p

Bob
Thanks Bob tried googling but all I can see is complex upvc type locks or is that what you meant.

Hey Mike definitely out of the budget.
 
MY63":2f9p5xnw said:
. . . .Clearly when I let the hinges into the frame and the door the gap will grow to 15 to 20 mm is it ok to glue and screw a strip to each door?

That's simple - don't let the hinges in - there's no need as your internal stops will cover the gap.
 
MY63":3a0pz8o9 said:
. . . . My plan is to use bolts for the left door and two mortise locks for the right hand door. . . .

Why two motise locks? If someone wants to break in then they will just pull the feather edge off, or am I missing something?
 
Moteyi":noky8xx6 said:
MY63":noky8xx6 said:
. . . . My plan is to use bolts for the left door and two mortise locks for the right hand door. . . .

Why two motise locks? If someone wants to break in then they will just pull the feather edge off, or am I missing something?

Hi Moteyi the inside walls are lined with OSB3
 
MY63":199webay said:
9fingers":199webay said:
Maye you could fit a three point locking mechanism and so just have a single lock?

Save time and getting wet fiddling with multiple locks/keys. Just my 2p

Bob
Thanks Bob tried googling but all I can see is complex upvc type locks or is that what you meant.

Yes that is the type. Quite easy to use in a wooden door too.

Bob
 
Thanks Bob I am concerned that fitting them might be a little out of my skill set but I will have another look.

I have to confess I could not live with the gap between the doors here is part of my solution.

2019-03-13_07-05-02 by my0771, on Flickr

I know it is not ideal but I am happy with it.
 
Thanks Malcolm Moyeti and Andy I appreciate your comments.
Now I can breathe a little doors are lined with OSB3 with some membrane to help to keep them dry for now.
I still need to fit some timber inside the door frame for the doors to close against but that can wait for another day.
The wind is really picking up now so ladder work is out.

2019-03-13_02-39-37 by my0771, on Flickr
 
My feather edge board is here and waiting to be stained as I needed 2.6m lengths for the back I had to buy 3m lengths and I was thinking rather than make wedges would it be possible to cut strips of F E B and use the upside down to kick out the bottom board ?
There may be a delay in ordering the EDPM for the roof as I have used all available money on timber and hinges.
 
That sounds like that could work. I made a 2" cross section model of mine, mainly to work out how the corner would work. You could try something similar.
 
I think you'll need to use relatively long lengths of FE board for the wedges, as the grain will run in the wrong direction and they'll thus have a tendency to split/ break in half when nailed or screwed.
 
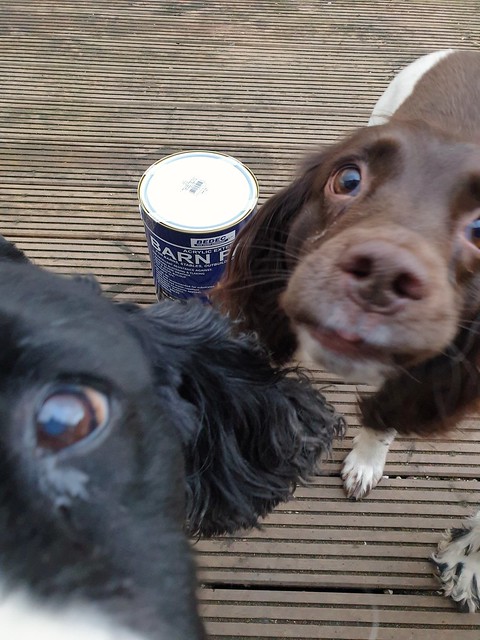
My original plan was to stain the cladding black however I was unable to get pressure treated feather edge boards so I have decided to go with the barn paint others have used.
I though I would be clever and post a picture of the tin. As soon as I bent down I was mugged.

2019-03-16_05-03-19 by my0771, on Flickr

At 5.45 am this morning there was a blizzard now we have sunshine and heavy rain again, tomorrow is forecast for sunshine all day so I will be painting.
 
I found the F/E benefitted from a watered down first coat of barn paint on all six faces. The cut end really drank it in. I then did a second coat all round only slightly thinned and didn't do an unthinned coat until the cladding was fixed in place.
 
Thanks Malcolm I will do that. Not being much of a painter I read the instructions on the tin it clearly states that it should not be used when the temperature is below 10 degrees. Surely the cannot be serious it could be months before it reaches 10 degrees up here on the North East coast.

While I am here I have been trying to work out how MikeG’s crucifixes are made and how they work I think the nail makes a mark on the board where the nail should go but the only picture I can find shows the supporting a board without any means of being supported themselves. I do know they are spacers for the boards which I will need as I will likely be fitting them on my own.
 
I had trouble getting my head round the crucifixes, too.

So I made one that hung down from above.IMG_1412.JPG
 
Yesterday I started painting the cladding I really don't like painting but it has to be done. It rained heavily in the afternoon so I had to get all of the painted wood into the workshop.

I started again this morning and set up a drying rack using two step ladders I am pulling one set at a time onto the bench painting them and sliding them back onto the rack.

2019-03-18_03-50-13 by my0771, on Flickr

As suggested I have diluted the paint it is a bit like dying leather I always dilute the dye it gives a much more even finish in the end.
 
Yesterday I managed to get one coat on one side of each board trying to avoid getting paint everywhere.
I had a rethink today first coating the other side and second coating the other.

Once the paint has dried I will have a look and see what the coverage is like. The side with two coats will be the inside as I wont be seeing it again if it needs more coats then I will apply them before I start fitting them.
 
Sounds like you're doing OK. I'm sure the backs don't need more that two coats, even thinned.

But don't forget the ends!!!!
 
Thanks Malcolm I won’t forget the ends I plan to do them altogether once the sizes are confirmed and I need to sort the corner detail to get that..
 
Mike G":3b572pn5 said:
I think you'll need to use relatively long lengths of FE board for the wedges, as the grain will run in the wrong direction and they'll thus have a tendency to split/ break in half when nailed or screwed.

Mike is there anything stopping me fitting a full length of F E board upside down as I don't have any brickwork under it? I don't think it will affect the airflow
 
Michael,

I hope I'm not teaching grandmother, sucking eggs and all that, but the F/E starts at the bottom and is fitted fat edge downwards and the next fat edge above overlaps the thin edge you've just fixed on, and so on.

So if you were to use a length of F/E for wedging, it would be normal way up, i.e. thin up/thick down.

I think I've got that right.
 
Wow I really got that wrong in a big way for some reason I thought the thin edge went down and the thick edge was at the top. That is a relief as my thin edge is really thin.
I am so pleased I asked the question now, I think I have always been looking at other details when reading threads and have misunderstood.
 
Thanks Malcolm I looked at that picture when you posted it earlier about the crucifixes and can’t believe I did not notice that I was planning on fitting my boards upside down.
At least I have not fitted any yet.
 
Having a break from painting today I have made and fitted the pieces that cap the ends of the feather edge boards. Insect mesh also fitted.
I put one board on to allow me to position the end pieces I am also unsure where the boards should start any thoughts would be appreciated.

2019-03-20_05-38-15 by my0771, on Flickr

I have also fitted the wood inside the doors for them to close against I am sure it has a name :)
 
MY63":2enuhaa1 said:
........I have also fitted the wood inside the doors for them to close against I am sure it has a name :)

Door stop. ;)
 
MY63":1eubgum7 said:
.......I am also unsure where the boards should start any thoughts would be appreciated.......

Do you mean vertically? Are you asking where the bottom edge of the bottom board should be?

If so, then it should have it's bottom edge below the level of the plinth and DPC such that water dripping off the bottom can't be blown up and onto the top of the plinth. This is a bit of a judgement call, and it depends on how far away the board is from the plinth. If it is quite close, then 5 or 10mm below the top of the plinth might be OK. If it is further away, then it might need to be lower than that.
 
Door stop will do :) Yes I meant where the bottom should start.
The air gap is 25mm I cut the laths just above the bottom sole plate so as not to get too close to the DPC.
I think I would like the cladding to start a little lower maybe 25mm.
Cutting wedges from feather edge board worked out fine I predrilled a hole and screwed them in place.
I still don’t understand how your crucifixes work Mike.

The first piece is only a trial fit as the edges need painting as do the vertical end pieces. I have to say that Bedec paint is fantastic
 
They set the overlap on the cladding, once you have a board fitted, they are hooked against the lower edge and pinned to the batten above. Then the next board is slid into place, resting on the upper cross. Nail it in place and move them up, repeating all the way up the wall. It gives even spacing without having to measure every board position.
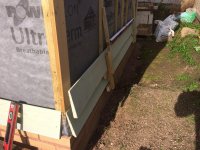
 
The other important thing to be aware of is only one nail per board vertically.
Nail through the thicker part of the board just ABOVE the top edge of the board below. This has the following advantages
1) The board may still expand/contract without any of the movement causing splits
2) Each board pinches the top of the board below reducing the tendency to curl whilst still letting it move vertically.

Bob
 
DaveL":ui6w452y said:
They set the overlap on the cladding, once you have a board fitted, they are hooked against the lower edge and pinned to the batten above. Then the next board is slid into place, resting on the upper cross. Nail it in place and move them up, repeating all the way up the wall. It gives even spacing without having to measure every board position.

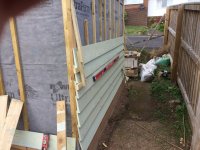
Thanks Dave I get it now they are supported from above.

Bob sound advice as ever it will have to be screws for me I am afraid holding a nail in one hand and a hammer in the other is one of those things I am unable to do.
 
What's all this about supporting from above? Some of you may be over-complicating things.

The crucifix is so simple. You have a cross-piece which locates the thing hard up under the edge of the board below, and the vertical element. The cross piece is 6 inches below the top of the vertical piece. You simply pin this in place to board below, and rest the next board on the top of the vertical element.

I only use those on a bigger building, where there are joins in the middle of the walls (ie the walls are longer than the length of the boards). Otherwise, simply mark the spacings on your corner pieces, and use a temporary nail to support the under edge of the loose board at one end whilst you secure the other end. The only minor difficulty here is starting off with all 4 (or more) corners at the same level.
 
Back
Top