• Hi all and welcome to TheWoodHaven2 brought into the 21st Century, kicking and screaming! We all have Alasdair to thank for the vast bulk of the heavy lifting to get us here, no more so than me because he's taken away a huge burden of responsibility from my shoulders and brought us to this new shiny home, with all your previous content (hopefully) still intact! Please peruse and feed back. There is still plenty to do, like changing the colour scheme, adding the banner graphic, tweaking the odd setting here and there so I have added a new thread in the 'Technical Issues, Bugs and Feature Requests' forum for you to add any issues you find, any missing settings or just anything you'd like to see added/removed from the feature set that Xenforo offers. We will get to everything over the coming weeks so please be patient, but add anything at all to the thread I mention above and we promise to get to them over the next few days/weeks/months. In the meantime, please enjoy!

The Orangerie - duff glass-fibre-coating REPAIRED

RogerS

Moderator
Staff member
Joined
Jul 21, 2014
Messages
15,231
Reaction score
971
Location
And off to pastures new
Well, we're off. This is the basic design ...well, up to the top of the walls as the lead was so damn expensive...see t'other thread.

orangerie%20draft%201.png

And arrived today, 2 cu m of 9 x 2 unsorted redwood. Superb quality.


Some of the pieces are so damn long (4m +) that if I want to take advantage of them I'm going to have to shift the Hammer over. :(

The cills I settled on to outsource and made out of Sapele...Accoya was eye-wateringly expensive. Someone else can do the moulding of the slope on the cills and the drip groove !
 
I think you made a good decision having sapele cills [emoji6] Nice pile of timber !

Sent from my SM-G900F using Tapatalk
 
Roger, nice load of timber.

This will be an interesting project.

Were you not going to move South again or are you getting used to the rain?
Please load some pics of feet and hands to show they are not webbed. :lol:
 
I hope you've got that covered up, or moved. The sun on that timber could wreck it. I left a beautiful straight piece of timber on my roofrack yesterday for 3 or 4 hours, and am now dealing with a propeller.
 
Mike G":em0ksqrp said:
I hope you've got that covered up, or moved. The sun on that timber could wreck it. I left a beautiful straight piece of timber on my roofrack yesterday for 3 or 4 hours, and am now dealing with a propeller.

I covered it with old white sheets. Tomorrow it goes into the workshop. If I can lift some of those longer lengths, that is.
 
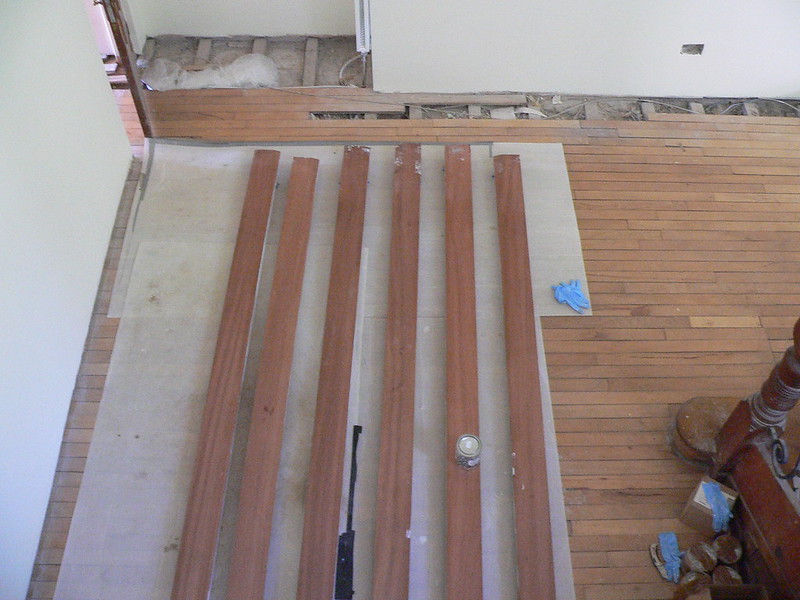
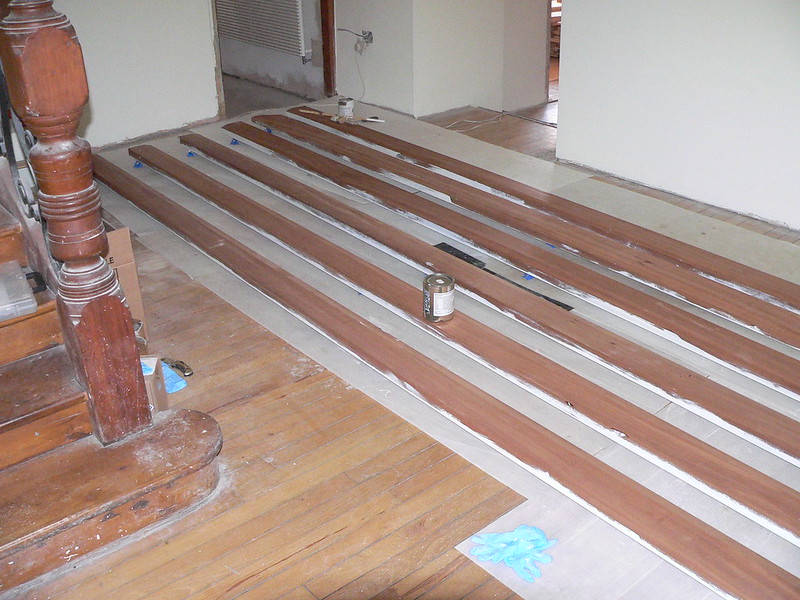
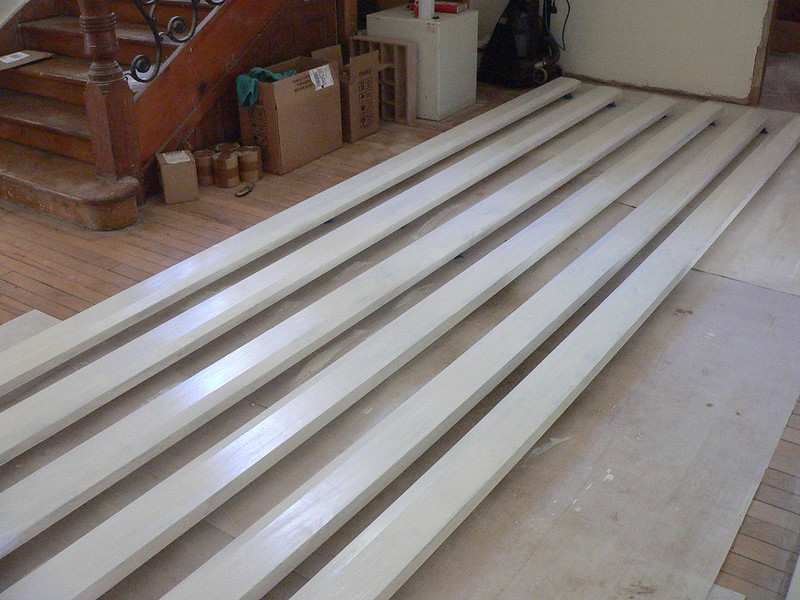
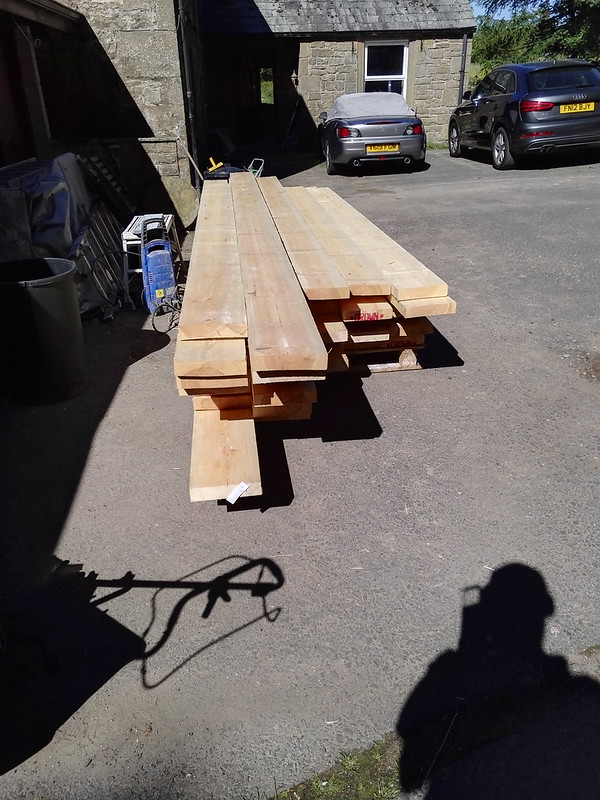
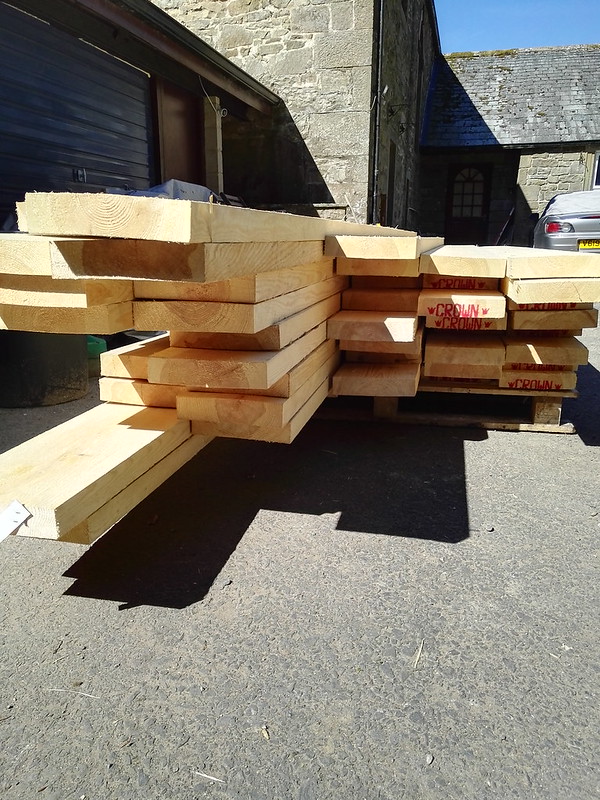
All the wood carried by hand into the workshop. The sapele cills have been moulded for me by a local joinery shop. TBH I'd rather pay them to handle those 4.5m long lengths...compared to buying in the wood myself or getting them to supply and mould...it worked out about a tenner a length for them to do the graft. Well worth it IMO.

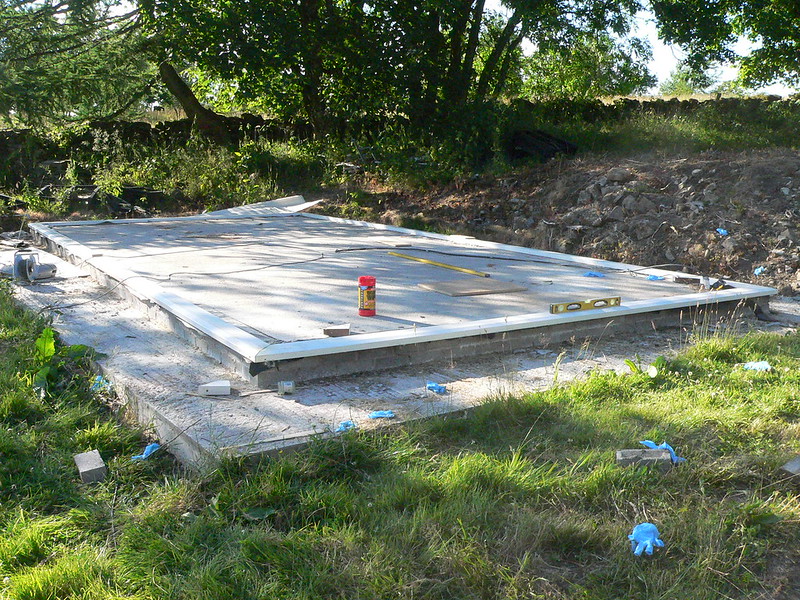
And therein lies the rub. Here is the basic design - roof still TBD. Internal area just within the limits to avoid Building Control.

orangerie 1.png

The design is "windows - doors - windows - doors - windows" down the long 8m front. All window and door elements are essentially identical to aid prefabrication by me - sort of batch production. The ovals and glazing bars will be plant-ons. The ends have had a slightly different smaller window panel added but otherwise same criteria.

The idea was then to make a frame

orangerie cill and frame 1.jpg

into which the prefabricated window and door elements will slide in. The first design was to have the frame stiles this way round - (A) - stiles 100mm x 50mm.

orangerie cill and frame.jpg

But then I realised that the timber I have is only 60mm or so sawn and so after planing etc chances are it might not make the 50mm. So I redesigned it - (B). 110mm x 40mm. And that also let me do away with the filler used in (A) to get the stiles to the correct width. I'd also do away with the need for sub-frames.

Then I realised that that gave me a problem trying to build the frame in-situ as I wanted to minimise the joins in the cills. I could have had a bash at making each side by lying it on its side as I made it up but then trying to manhandle a heavy 8m x 2.3m high frame to the vertical by myself and without twisting and breaking it would be nigh on impossible. Not a chance of making them in the workshop and carrying them out either.

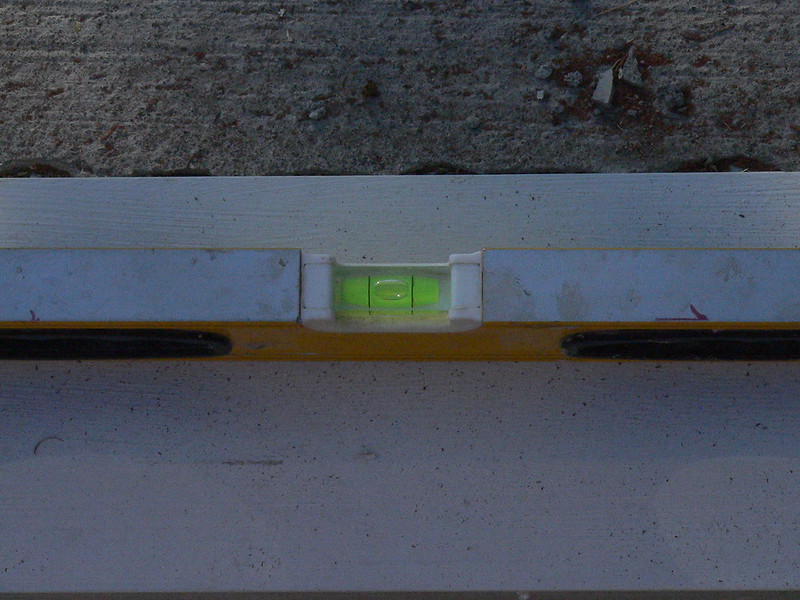
Back to the drawing board. The other question also was how level was the plinth.

P1130236.JPG

So I've decided to go full-circle and back to making sub-frames. The cills will be fixed and levelled and made as co-planar as possible to the plinth. (C)

Then I'll make sub-frames in the workshop, carry out and fix to each other using a filler piece to get the spacing between them right and provide for final tweaking to get it all to fit. (D)

orangerie cill and frame 2.jpg

Potential problems are :

1) how do I keep that plinth from filling up with water and making a bath ? I think the best way is to leave the undersides of the cills clear so that there will be the inevitable gap between that and the DPM. That way surplus water can escape. Once the building has been made watertight then I can seal them. The cills will have been painted using linseed oil paint underneath.
 
To try and stop my plinth filling up, I made a sort of ridge tent arrangement with timber and tarps, but that worked only for the time I wasn't working on the site.
 
Leave the mortar out of the brickwork sides in the low spots then point up afterwards. The water should drain through.

Rod
 
Rod":bxhdd1ix said:
Leave the mortar out of the brickwork sides in the low spots then point up afterwards. The water should drain through.

Rod

It's not the traditional plinth, Rod. Originally there were to be small dwarf walls and so my builder made a short retaining wall of double skin with pier supports on each side of where the doors would go.

The a DPM was put on the inside and it was then filled with concrete. So basically I have a concrete slab but with a DPM underneath and then up and over the sides.

P1130237.JPG

P1130238.JPG

Then LOML changed her mind :evil: No dwarf walls and so my cills go straight onto the DPM/slab.

Thinking it through, where the doors originally were planned to go, the cavity also goes so I could remove a brick from the outside skin and gently remove the edge off the internal concrete corner.

P1130239.JPG
Then there might be a gentler bit of slope I can finesse in the DPM so that I have an exit channel underneath the cill to sweep the water away. Having said that a large tarpaulin and a siphon will do but a pain to keep emptying.
 
The underside of the cills had two coats of linseed oil paint applied and attracted a fair bit of insect and plant life while drying outside. So for the top surfaces I came indoors. Nothing like having a 5m square hall as a painting area :)


And it means that I can make sawdust in the workshop while this lot are drying.


I'm really taken by this linseed oil paint. Brilliant stuff.

I've not yet told SWMBO that the hall is going to be my assembly and glue-up area ! :eusa-whistle:
 
Nice big work area ! [emoji38] how long has it been since you applied it ? Is it patchy like myself and a few others had on the ukw thread ?

Sent from my SM-G900F using Tapatalk
 
Coley":21klx1vr said:
Nice big work area ! [emoji38] how long has it been since you applied it ? Is it patchy like myself and a few others had on the ukw thread ?

Sent from my SM-G900F using Tapatalk

No it isn't. You need three coats to do a proper job.

Coat 1 - seeps into the wood and seals it

Coat 2 - starts to cover with the colour

Coat 3 - really finishes it off

It also depends on the manufacturer, I think. I've been using Allback

Goes off pretty much in 24 hours.

I'm sold on it.
 
That's the same stuff I used. It must have something to do with me wrongly degreasing the wood first with meths. Just a bit odd that the other guy had similar blotchyness.....Did you use the zinc additive for the first coat or perhaps follow Jacobs recommendation and prime first with linseed oil ?
A few close up pics would be good if you get chance, apologies for the slight hijack [emoji6]
I've still got a few different colours and another linseed brand to try sometime. It's finding the enthusiasm though....[emoji38]

Sent from my SM-G900F using Tapatalk
 
I didn't degrease the wood nor did I apply linseed oil by itself.

Here are a few photos after two coats. My only criticism is that you can see brush marks but that might just be me.

P1130255.JPG

P1130254.JPG
 
That looks superb Roger ! No wonder you're pleased with it [emoji41] Thanks for the extra pictures [emoji6] Did you clean the brush out in between coats or let it soak in a pot of linseed oil ? That finish I'd be more than happy to put my name to, my slightly blotchy effort though didn't leave me 100% happy.

Sent from my SM-G900F using Tapatalk
 
Thanks, Coley. I just hung the brush in raw linseed oil as recommended. Bought a special brush from Oricalcum..maybe the brush makes a difference ?

What wood did you use ? Mine is sapele.
 
Mine was sapele as well Roger. I made many many errors by the sound of it. Degreasing the wood= bad, washing out the brush between coats with white spirit, also bad. I used a bog standard paint brush, but also used the zinc additive on the first coat- whether that makes a difference.
Sounds like I tried to hard and should just brush it on and keep the brush in linseed paint between coats [emoji38]
Full thread with pictures can be seen here https://www.ukworkshop.co.uk/forums/try ... 07300.html
I reckon a few people over there would be interested to see your finished paint !!


Sent from my SM-G900F using Tapatalk
 
Roger,

Would you mind telling me which supplier you bought the paint from? We have a wooden back door which faces almost due south that I need to refinish and I think I might be interested in using that paint.
 
Coley":212e09qq said:
Mine was sapele as well Roger. I made many many errors by the sound of it. Degreasing the wood= bad, washing out the brush between coats with white spirit, also bad. I used a bog standard paint brush, but also used the zinc additive on the first coat- whether that makes a difference.
Sounds like I tried to hard and should just brush it on and keep the brush in linseed paint between coats [emoji38]
Full thread with pictures can be seen here https://www.ukworkshop.co.uk/forums/try ... 07300.html
I reckon a few people over there would be interested to see your finished paint !!


Sent from my SM-G900F using Tapatalk

Had a quick look at that very long thread! Confirmed my views about taking everything that certain person says with a huge pinch of salt. Gareth Harvey seems to know what he istalking about, on the other hand.

My second coat is taking a bit longer to dry possibly due to too thick a coat. It is quite hard to get a thin coat on as the paint is so 'rich' as it were. Not like 'making love in a canoe' Farrow & Ball paint.
 
Despite that thread being so long there's only a couple people that have posted any pictures of the paint in use. Yours is the only one I've read about and seen that has a consistent colour- you must be doing something right [emoji41] [emoji38]

Sent from my SM-G900F using Tapatalk
Ahhh...just reread some of the comments on tuther place to see which garethharvey comments you were talking about. He mentions patchyness but only when it's applied in winter months. Further up the page someone else mentions that colours are always patchy, but whites are ok.....
 
Well I made a complete Horlicks of things. We carried the cills outside so that I could start working on fixing them down. That's when I discovered that in painting the tops, a lot of paint had run down and pooled on the underside even though I had tried to brush off an excess. This, of course, was very thick in places and not dry at all. Fortunately we were wearing disposable gloves but we both got covered in paint :(

Then by dint of moving and working the cills a lot of the soft paint got really grotty and picked up all kinds of rubbish, scraped off in areas and basically got trashed ! And even the tops got trashed. I'll be experimenting sanding down using the paint as a sanding medium...I think that's what I'm supposed to do. Almost like a slurry, I guess. We shall see.


But I got the bolts in place. The cut faces were coated in epoxy first. Whether or not I will do the corners is a moot point.


Why did I do things this way. I keep asking myself that question. My initial reasoning was that the weather here being predominantly wet I wanted to have the cills painted up before they went outside and cut them to size. Of course, we all know what a heatwave we've had.

The other thing that I have learned with linseed oil paint is that the first coat dries very well and quickly as the oil is absorbed into the wood. But the second and any subsequent coats must be applied ultra thinly which is easier said than done. I'm going to experiment with two brushes in future. One with the paint on and the second a 'dry' brush with no paint. After laying on the second coat with the first, I will brush the surplus off with the second.

Meanwhile inside the workshop I've been prepping the wood for the sub-frames. I'll not bore you with photos of thicknessed wood. I'd forgotten just how mind-numbingly boring this is !
 
Roger have you got any thing else going on with the joint or is it just butt joint and worktop clamp? Watch they don't go boomerang in this heat [emoji6]

Sent from my SM-G900F using Tapatalk
 
Coley":2idh3v3b said:
Roger have you got any thing else going on with the joint or is it just butt joint and worktop clamp? Watch they don't go boomerang in this heat [emoji6]
...

They're being screwed down into the concrete brick base today.

Rod":2idh3v3b said:
Perhaps you should have tried this method?

https://youtu.be/GKm460QWupM

Rod

If I wasn't pre-painting then maybe. I did consider that sort of thing at the beginning. Then reality hit. Trying to handle 4.5m lengths of sapele by myself didn't appeal.
 
I wonder if some gurt big screws angled through the bottom into the other piece may also help stop the joint from twisting ? A nice big loose tenon would really help increase the glue area. I wouldn't worry about the paint too much. Now it's in the fresh air that'll help speed up the drying process.

Sent from my SM-G900F using Tapatalk
 
I may well use large dominos at the corner connections. My biggest problem at the moment is getting the two long cills coplanar and level with each other. I don't have a 4m spirit level !
 
Malc2098":2gsuuzu1 said:
Could winding sticks be an option?

Yes, I'll definitely be using those at some point. Not sure about the water level. I have two but rarely use them and not sure I have the vertical space or easy way of using them.
 
Well, we have some sort of progress. Nearly all my tools now have a coating of linseed oil paint despite copious use of Wonder Wipes and a seemingly never ending supply and replacement of gloves.

Wasn't helped by not planning ahead properly. If I had done then I would have had the front long cill near the front while the epoxy was going off overnight. Managed to slide it bit by bit using bearers and some offcuts of DPM to reduce friction The actual joint was temporarily reinforced with 22mm ply.

Of more note was that if I had done then I wouldn't have had the rear cill 180 degrees out !

Still - they are all joined up but not screwed down. I used some small Dominos to keep the joints aligned otherwise they'd have slid all over the place.

P1130263 by countryman69, on Flickr

and just for fun I went round all four sides with the spirit level to see how much I had to do tomorrow and was pleasantly surprised that they all looked like this.


which ain't bad. The diagonals are within a couple of mm as well. Time for a gin and tonic.
 
Double g & t by the looks of things! You did well getting them in place on your tod [emoji6]

Sent from my SM-G900F using Tapatalk
 
Cor blimey!

Took out a couple of winding sticks early this morning just to see how much work is needed to get it all plumb, level and square.

I'll need to have a second closer look but at first pass, the answer is none :o

It's a credit to my builders brick-laying skills, I think.
 
Back
Top