StevieB
Nordic Pine
So you know how it goes - the workshop is always the last place to get a bit of a make-over when doing up the house. Those old kitchen cabinets that SWMBO didn't want in the kitchen anymore make it out to the garage/shed/workshop and you put up with the warped shelves, wonky doors and mismatched handles because, well, its only the workshop isn't it. The only exception to this seems to be Americans with large triple car garages who are all over youtube spending a good 4 figures on Baltic birch ply to make cabinets. Do a quick search for 'workshop cabinets' and you will see what I mean.
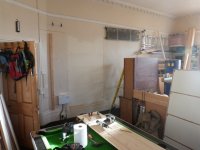
I fancy a bit of that thinks I, just without spending the 4 figures on birch ply or having a triple car garage to play in. I do have mismatched storage currently though, and a bit of spare timber from various projects, pulled out of a skip at work (*ahem* - we all do it don't we?!) so time to put my Christmas holidays to good use and get cracking on some 'cost free but incredibly useful storage'. What I currently have and need to replace is a fixed white shelving unit in MDF left over from the previous owner (note the dead space below the bottom shelf in image 1 - I was hoping for a stash of cash or at least a safe in there, but sadly only a spider remained) and a chipboard veneered dining room drinks cabinet from one of SWMBOs friends who bless her thought it was solid cherry and would I like it as they were going to skip it.
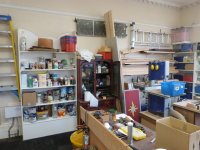
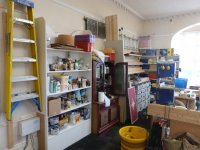
The observant among you may also spot a Roman Shield for youngest son's school project, lots of CLS left over from an over order on a previous project and a couple of Ikea Billy bookcases at the other end of the workshop I am hoping to get the contents of into my new construction. Now my grand plan was to go 3m wide, 2.4m tall and 60cm deep for this, to maximise the space I had. I then realised that anything on a shelf above 1.5m tall I was never going to reach the back of, so compromised on a 40cm deep top half and a 60cm deep bottom half.
I should point out at this point that my plan was 'in my head' - since I do not smoke I had no back of a fag packet to sketch on, so this was a dynamic project. Step 1 was clear out some space and remove the existing units, then begin to construct on the fly:
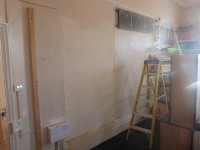
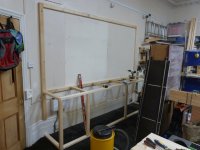
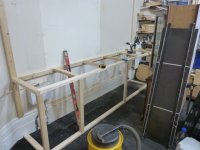
Once the base was set out, with notching for electric cables and trying to ensure the fuse box was still accessible, things became a little easier. Again, the 'deliberate' mistake was building outside the two double plug sockets on the skirting board so I later had to extend both of these to make them accessible again
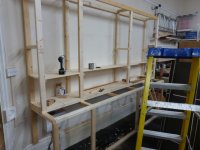
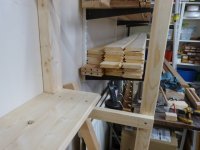
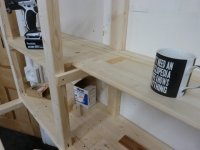
On to the top half though, and I was getting a second wind now. After a long internal discussion with myself over whether shelves should be fixed or re-positionable, I came down on the side of 'fixed' simply due to the weight that I wanted to put on them. I might well regret that later but ho hum, decision is now made. As I was building these from what I had to hand, I was short on sheet materials but did have some T+G flooring from a shed I ordered for work that was surplus to requirements. Seems a shame to use it for shelving as I did have in mind to use it for doors, but it was warped, twisted and I didn't have enough of it for all the doors so in the end I used it for shelving with many crews to pull it flat:
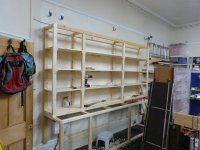
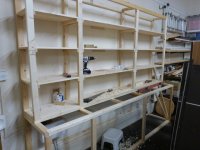
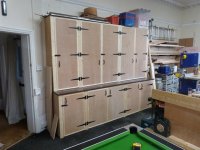
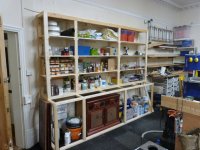
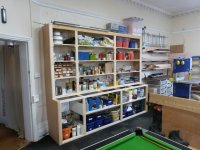
Looking good, so time to fill it up - mainly because I was tripping over everything that had come off the original shelving units. The first picture below shows a partial fill, where I had to keep the original cherry/chipboard cabinet base and no shelves in the base unit, the second is a couple of days later with sides added, electrics moved, shelving added to the base unit and a bit more organisation (plus the Billy bookcases are now gone!). It is still in need of tidying (ie I just piled in everything I could without really sorting out some of the junk) but I am so far rather pleased with progress. Total cost so far - £3 for a box of screws I ran out of!
The next big decision is on doors. I wanted to go fancy and have some oak veneered or maple veneered doors. Too expensive and I cannot for the life of me find anyone to deliver veneered sheets at a reasonable cost. I also wanted 'flat' doors rather than dust traps, so in the end I have simply ordered 3 sheets of 18mm hardwood ply and if I am feeling brave I will lip them with something before making doors. Those are arriving Thursday but I am back at work Monday 7th and have loads of work to do before then plus a couple of visits to SWMBO's relatives (you know - the type of visit where you sit in the corner and try in vain to get a word in edgeways, or try desperately to work out who is not talking to who due to whatever the latest spat is - SWMBO has a large family which seems to be in a constant state of war with itself but nobody tells me the rules or who is on which side. I generally try to take a book and hide!). That is a long winded way of saying 'doors will follow at some point, but it may be Easter!'.
So what have I learnt from this project?
1) Don't start hammering and sawing before SWMBO is fully awake, even if it is 10:30am and you have been up for hours.
2) Pocket hole screws are phenomenal, especially when you inadvertently need to join to a piece of timber you have already screwed to the wall
3) No amount of screws will truly bring back flat a warped piece of timber, but you can hide the worst pieces on the top rather than using them on a shelf at eye level
4) A pub pool table makes an excellent workbench, but would be much better without the lip round the outside
5) It doesn't have to be birch ply, but if you are doing it on the fly with available materials then you will have to make compromises somewhere
If you enjoyed this WIP then don't hold your breath for installment 2, I tend to only get significant workshop time between Christmas and New Year......
I fancy a bit of that thinks I, just without spending the 4 figures on birch ply or having a triple car garage to play in. I do have mismatched storage currently though, and a bit of spare timber from various projects, pulled out of a skip at work (*ahem* - we all do it don't we?!) so time to put my Christmas holidays to good use and get cracking on some 'cost free but incredibly useful storage'. What I currently have and need to replace is a fixed white shelving unit in MDF left over from the previous owner (note the dead space below the bottom shelf in image 1 - I was hoping for a stash of cash or at least a safe in there, but sadly only a spider remained) and a chipboard veneered dining room drinks cabinet from one of SWMBOs friends who bless her thought it was solid cherry and would I like it as they were going to skip it.
The observant among you may also spot a Roman Shield for youngest son's school project, lots of CLS left over from an over order on a previous project and a couple of Ikea Billy bookcases at the other end of the workshop I am hoping to get the contents of into my new construction. Now my grand plan was to go 3m wide, 2.4m tall and 60cm deep for this, to maximise the space I had. I then realised that anything on a shelf above 1.5m tall I was never going to reach the back of, so compromised on a 40cm deep top half and a 60cm deep bottom half.
I should point out at this point that my plan was 'in my head' - since I do not smoke I had no back of a fag packet to sketch on, so this was a dynamic project. Step 1 was clear out some space and remove the existing units, then begin to construct on the fly:
Once the base was set out, with notching for electric cables and trying to ensure the fuse box was still accessible, things became a little easier. Again, the 'deliberate' mistake was building outside the two double plug sockets on the skirting board so I later had to extend both of these to make them accessible again
On to the top half though, and I was getting a second wind now. After a long internal discussion with myself over whether shelves should be fixed or re-positionable, I came down on the side of 'fixed' simply due to the weight that I wanted to put on them. I might well regret that later but ho hum, decision is now made. As I was building these from what I had to hand, I was short on sheet materials but did have some T+G flooring from a shed I ordered for work that was surplus to requirements. Seems a shame to use it for shelving as I did have in mind to use it for doors, but it was warped, twisted and I didn't have enough of it for all the doors so in the end I used it for shelving with many crews to pull it flat:
Looking good, so time to fill it up - mainly because I was tripping over everything that had come off the original shelving units. The first picture below shows a partial fill, where I had to keep the original cherry/chipboard cabinet base and no shelves in the base unit, the second is a couple of days later with sides added, electrics moved, shelving added to the base unit and a bit more organisation (plus the Billy bookcases are now gone!). It is still in need of tidying (ie I just piled in everything I could without really sorting out some of the junk) but I am so far rather pleased with progress. Total cost so far - £3 for a box of screws I ran out of!
The next big decision is on doors. I wanted to go fancy and have some oak veneered or maple veneered doors. Too expensive and I cannot for the life of me find anyone to deliver veneered sheets at a reasonable cost. I also wanted 'flat' doors rather than dust traps, so in the end I have simply ordered 3 sheets of 18mm hardwood ply and if I am feeling brave I will lip them with something before making doors. Those are arriving Thursday but I am back at work Monday 7th and have loads of work to do before then plus a couple of visits to SWMBO's relatives (you know - the type of visit where you sit in the corner and try in vain to get a word in edgeways, or try desperately to work out who is not talking to who due to whatever the latest spat is - SWMBO has a large family which seems to be in a constant state of war with itself but nobody tells me the rules or who is on which side. I generally try to take a book and hide!). That is a long winded way of saying 'doors will follow at some point, but it may be Easter!'.
So what have I learnt from this project?
1) Don't start hammering and sawing before SWMBO is fully awake, even if it is 10:30am and you have been up for hours.
2) Pocket hole screws are phenomenal, especially when you inadvertently need to join to a piece of timber you have already screwed to the wall
3) No amount of screws will truly bring back flat a warped piece of timber, but you can hide the worst pieces on the top rather than using them on a shelf at eye level
4) A pub pool table makes an excellent workbench, but would be much better without the lip round the outside
5) It doesn't have to be birch ply, but if you are doing it on the fly with available materials then you will have to make compromises somewhere
If you enjoyed this WIP then don't hold your breath for installment 2, I tend to only get significant workshop time between Christmas and New Year......