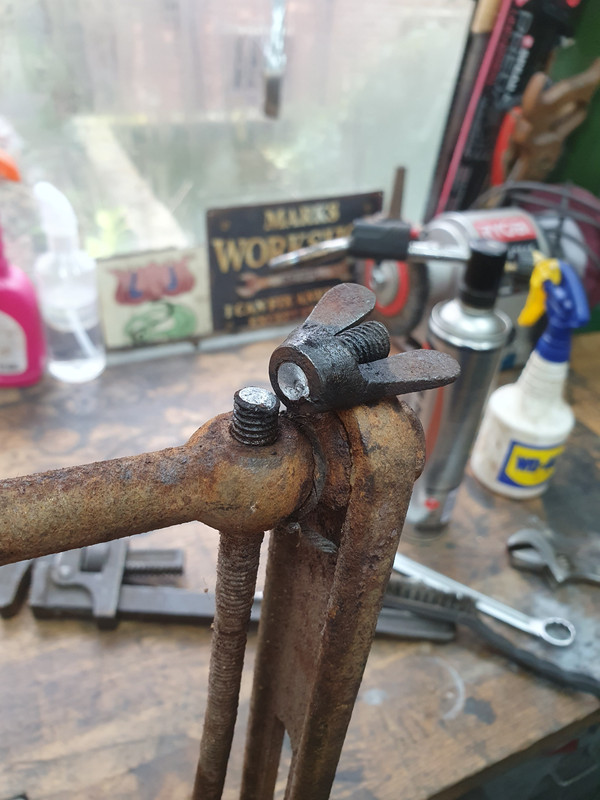
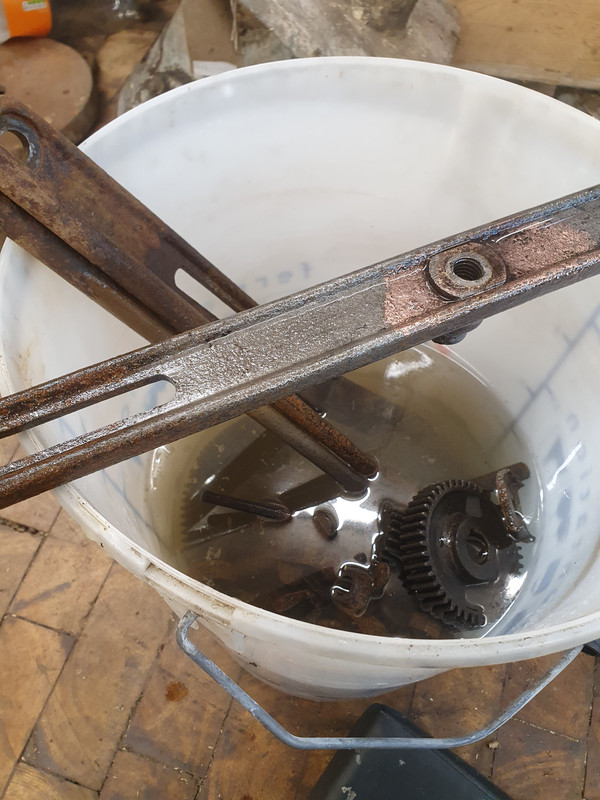
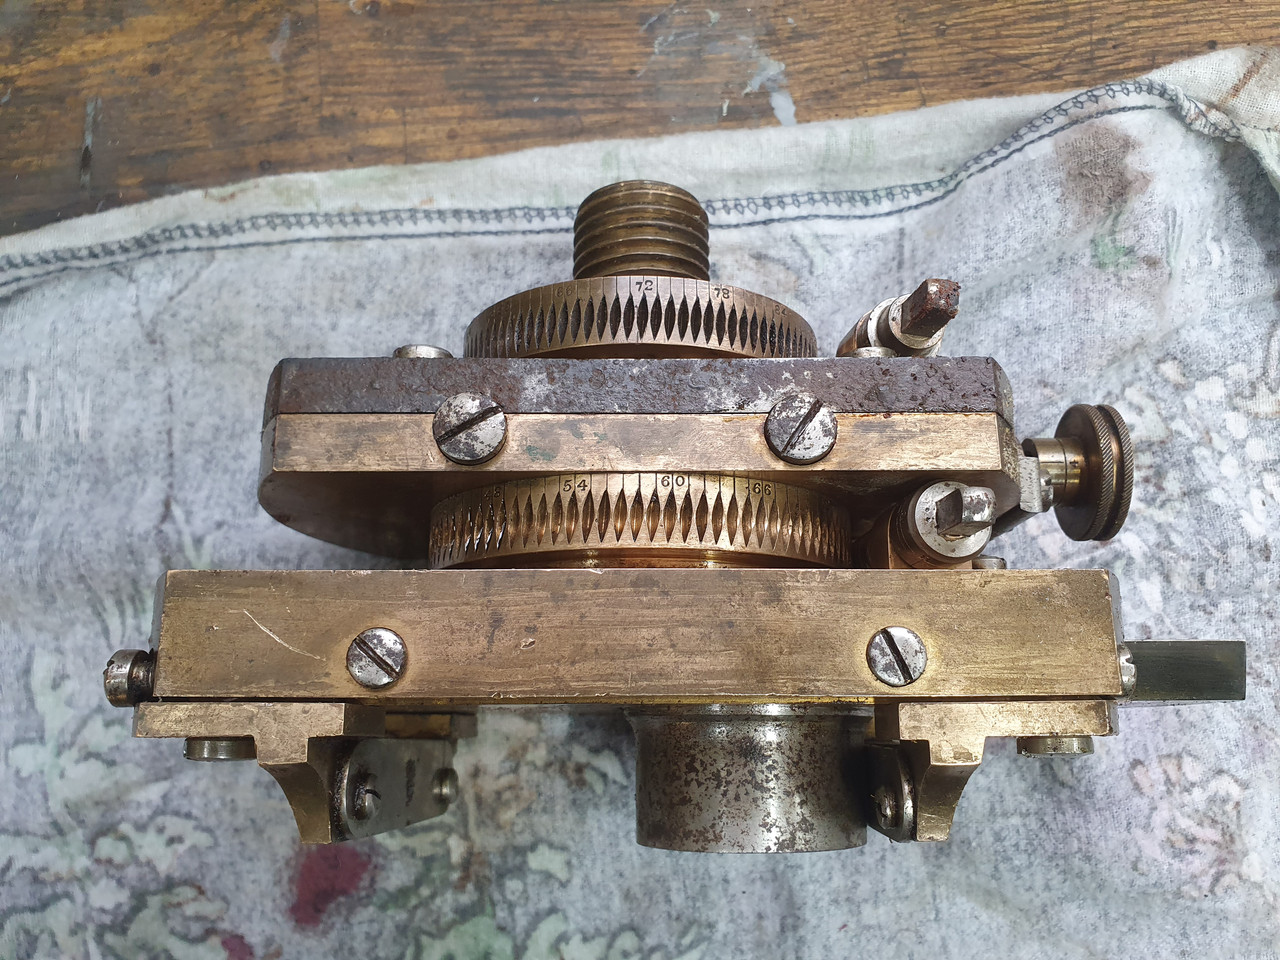
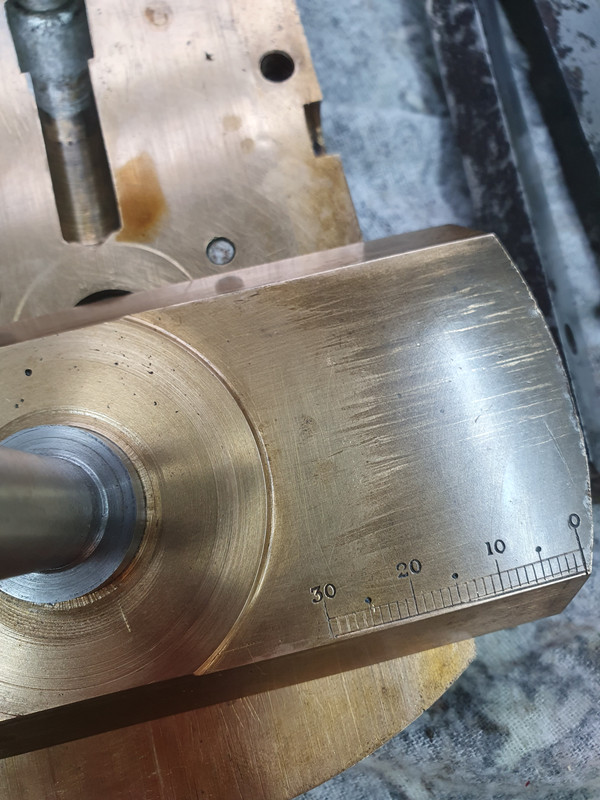
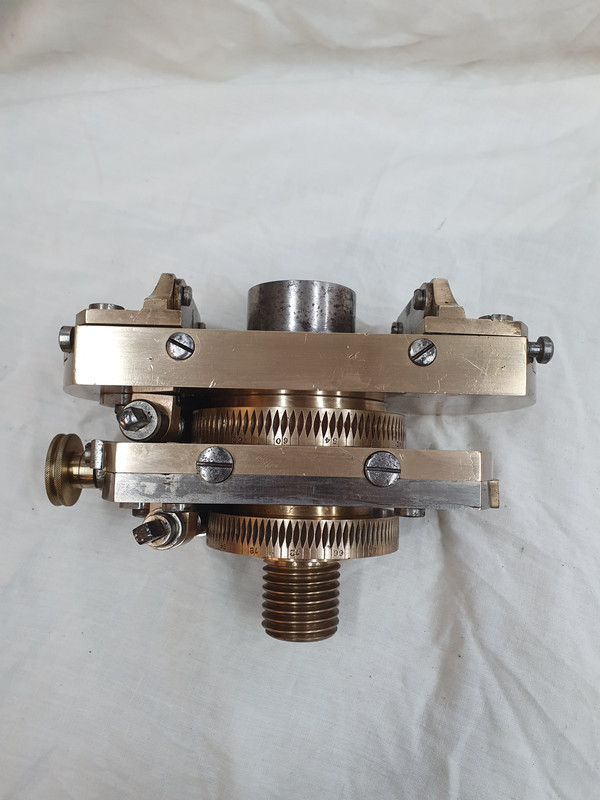
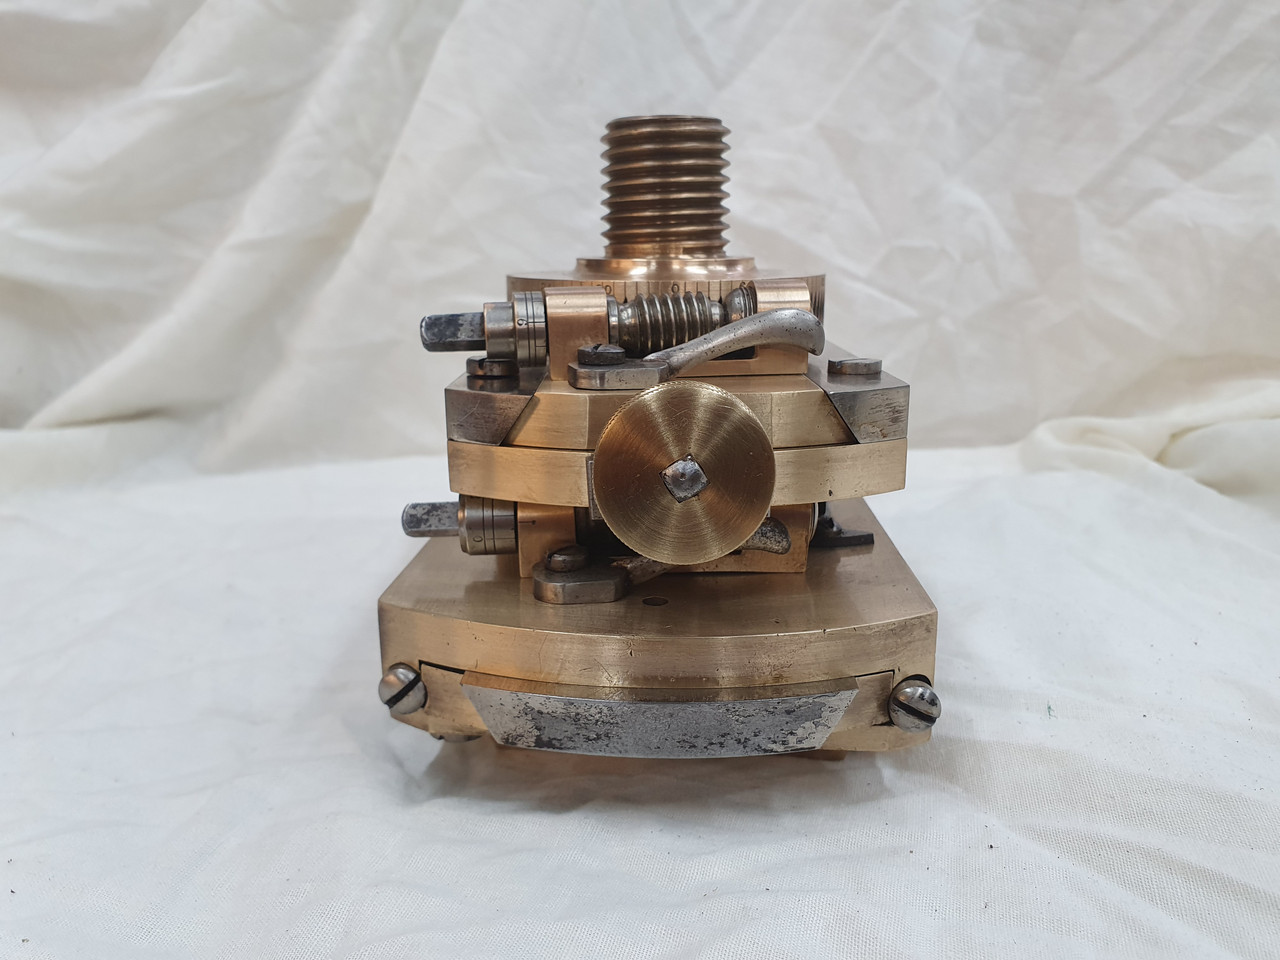
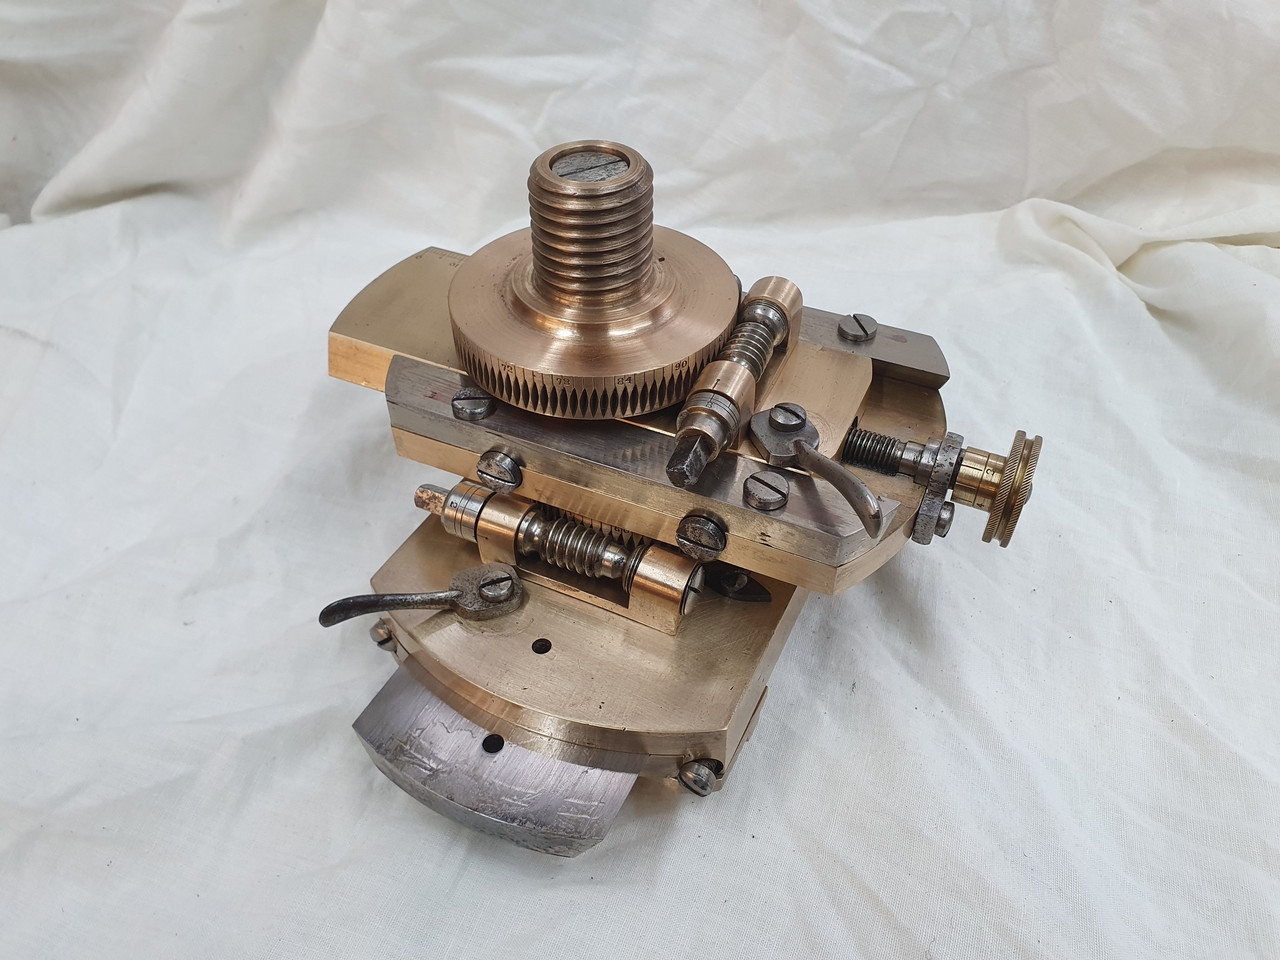
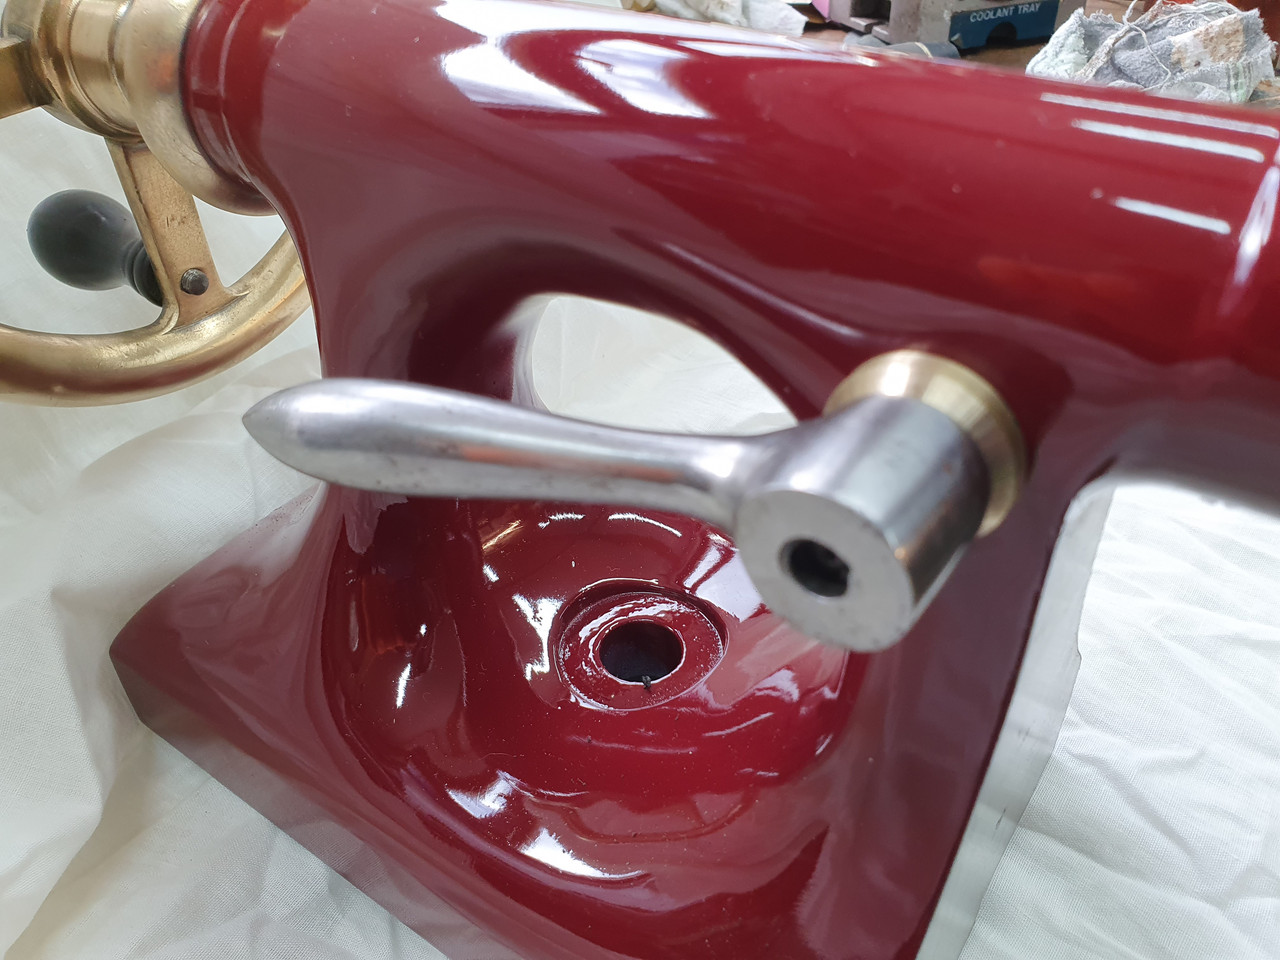
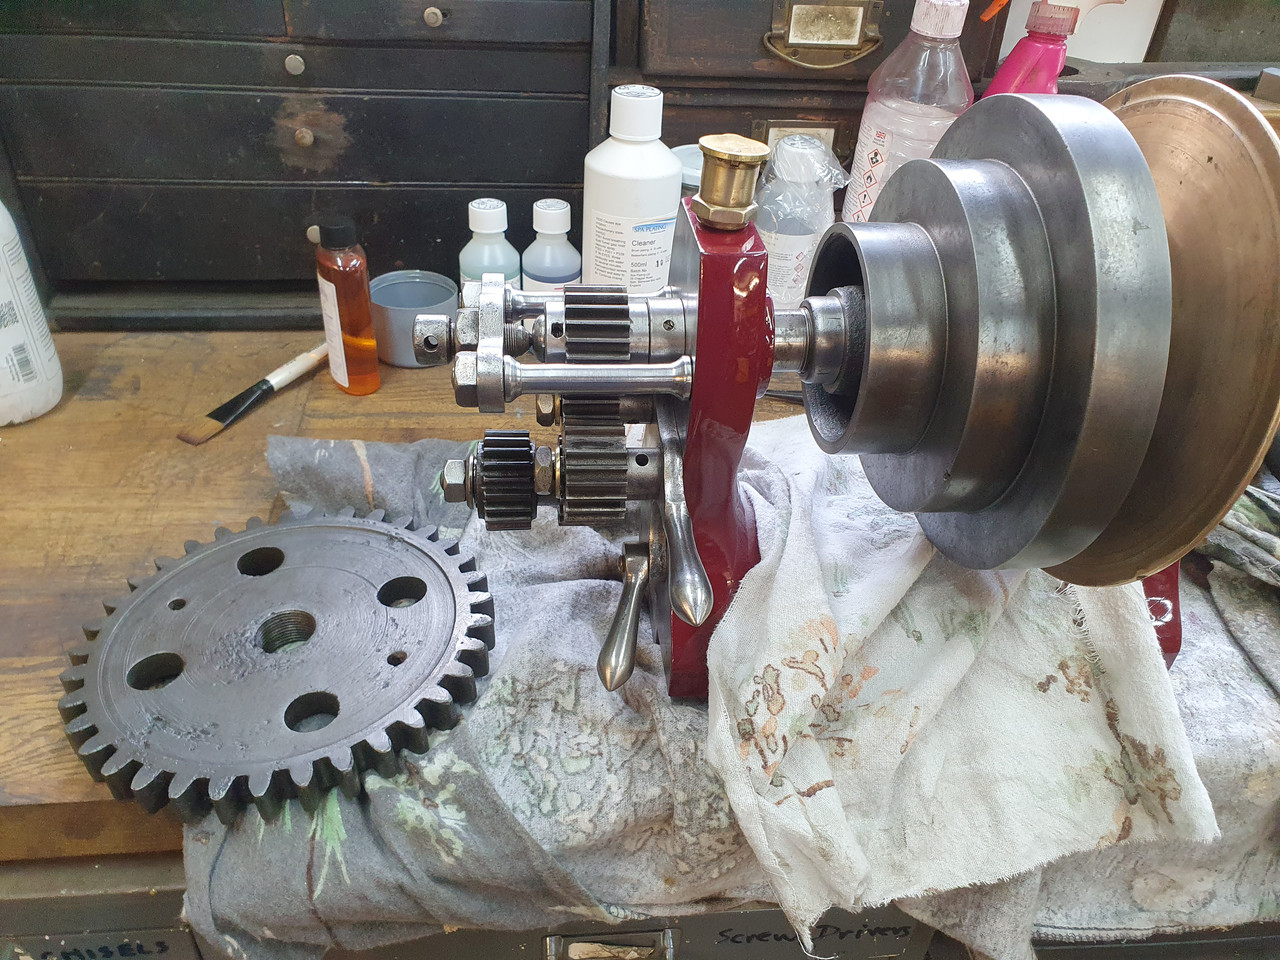
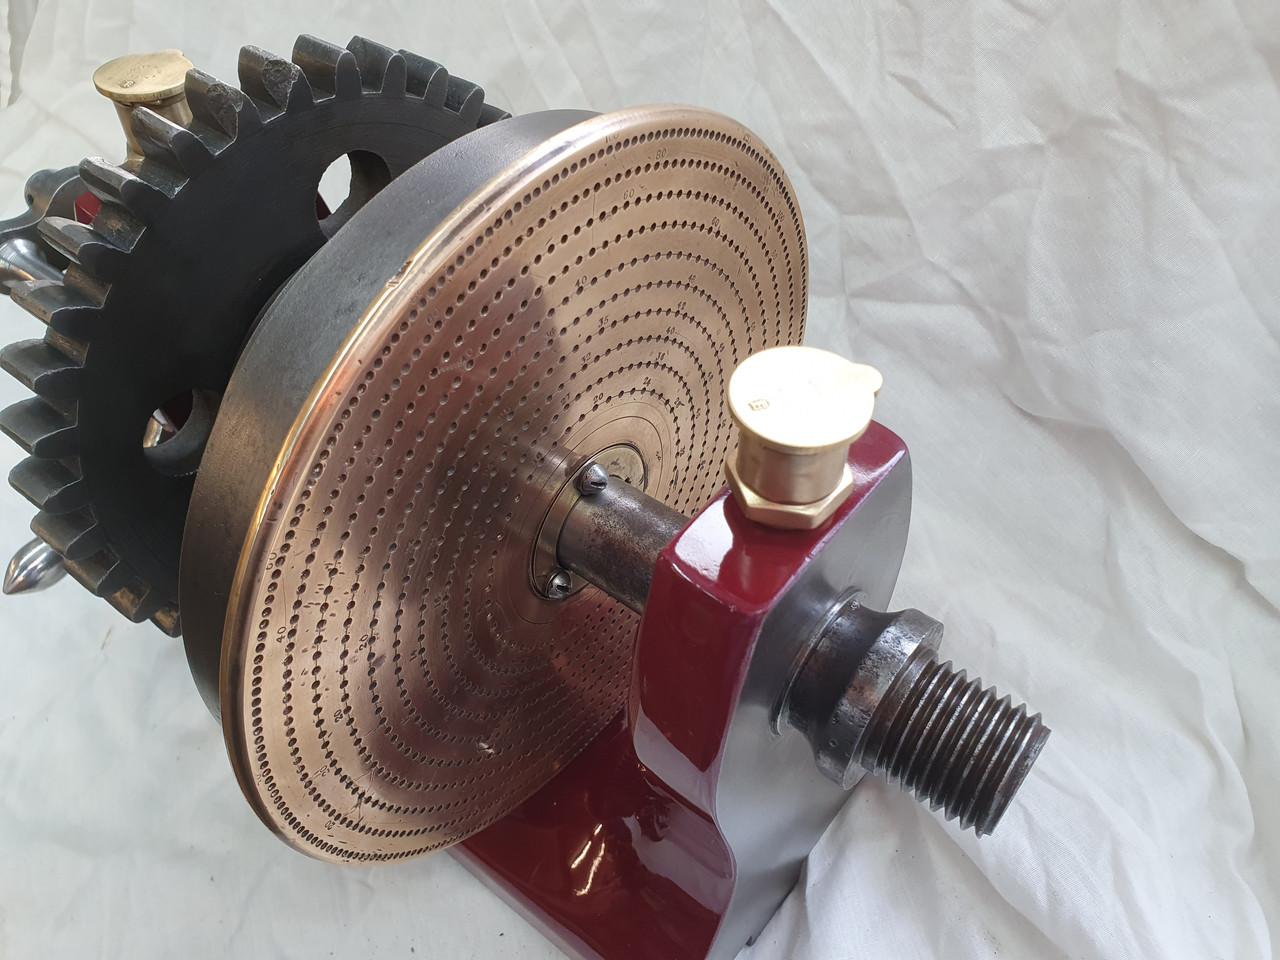
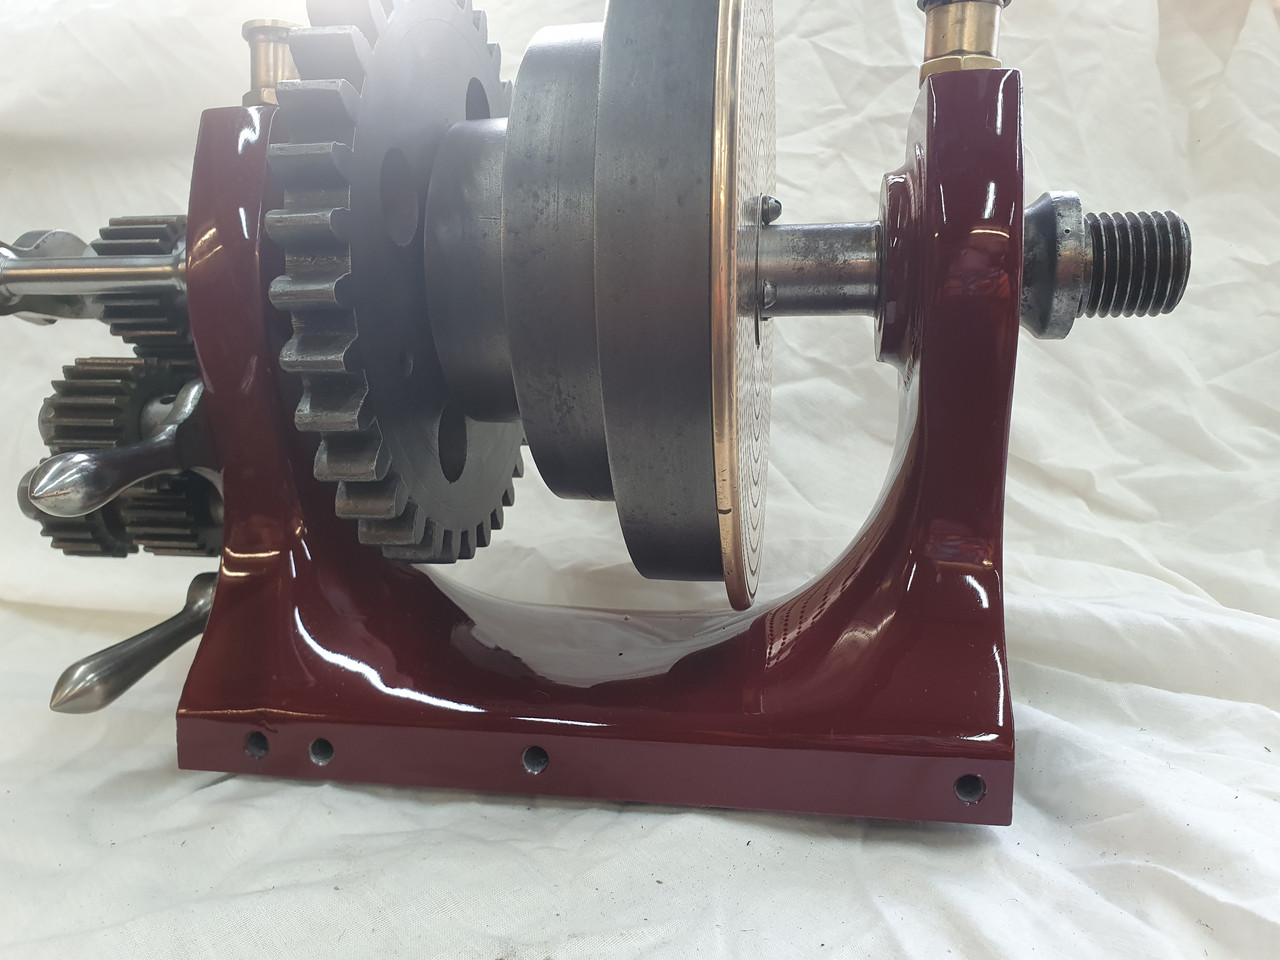
I'm just looking again at the details of the worm gear in this photo
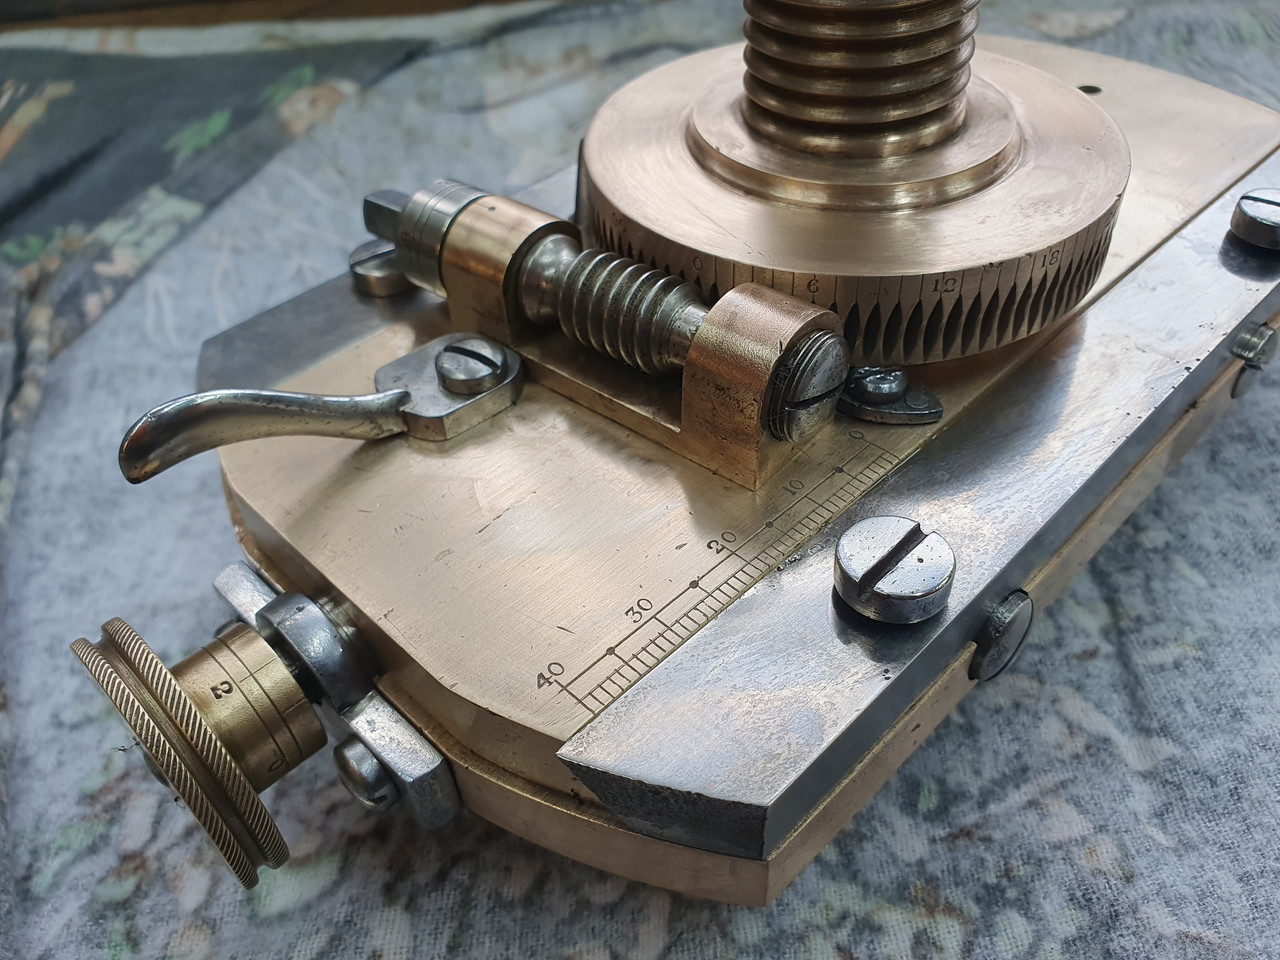
Am I right in thinking that the big screw in line with the worm works on a cone, to adjust/minimise end float on the worm gear itself?
And that the elegant little curved lever lets you swivel a cam, to make the worm mesh more or less tightly against the big brass gear?
And that the cam has a flat on it to provide a 'normal' position?
It does look like a lot of expensive, fiddly detail - which is what you expect on a lathe like this and a lot of the pleasure in having one, I imagine. Once you get it operational, I predict that you'll be spending much more time carefully adjusting all the options than cutting any metal!
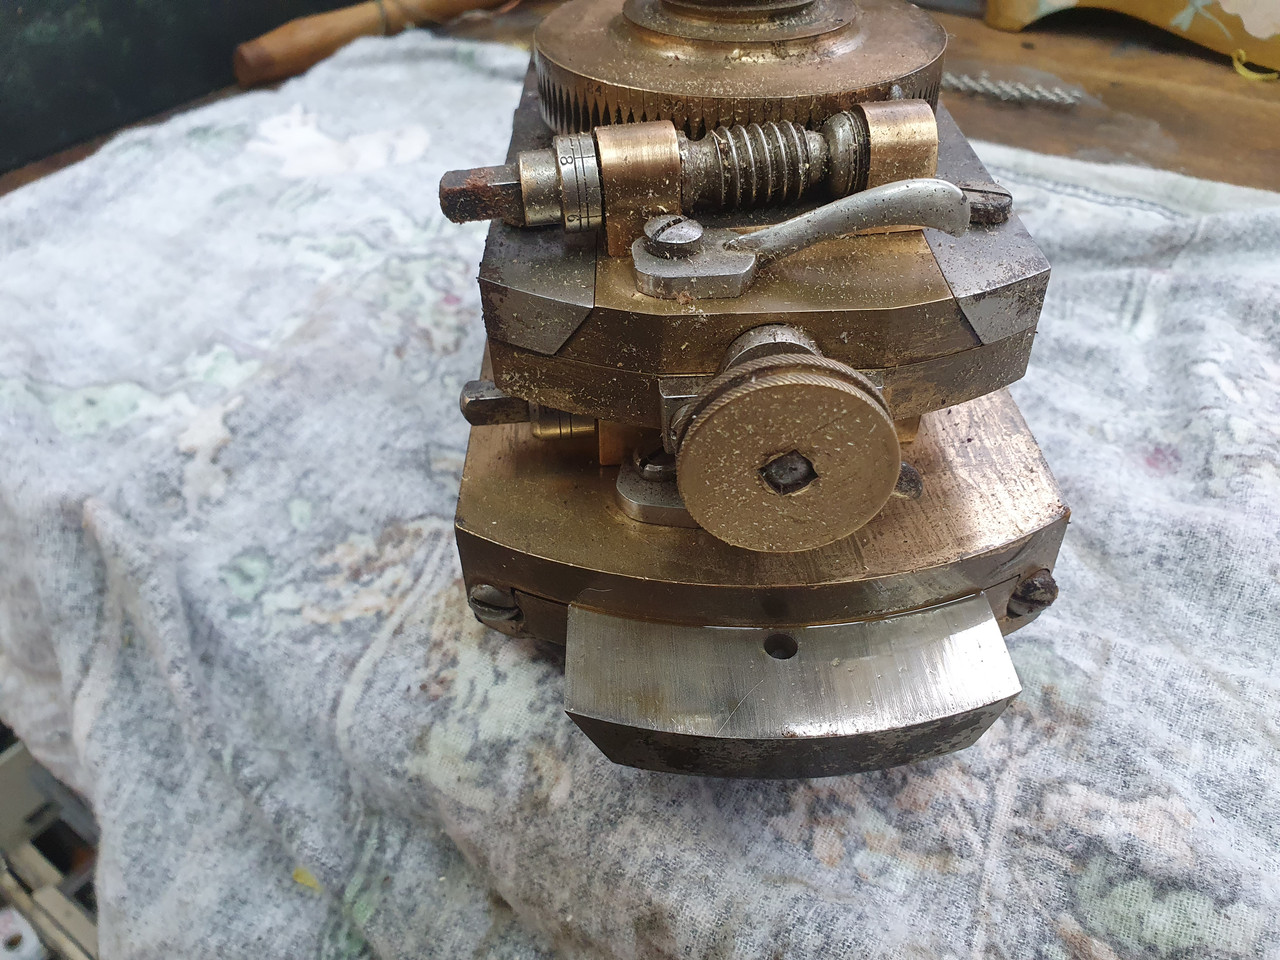
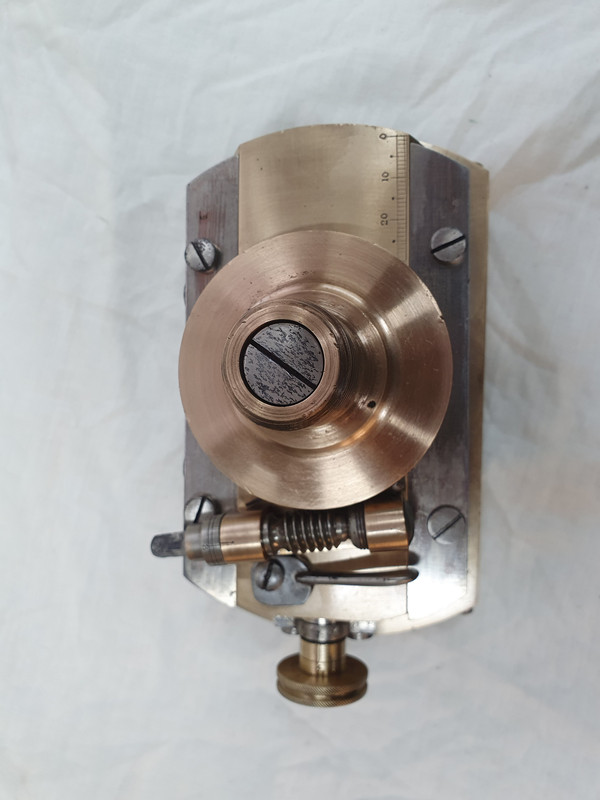
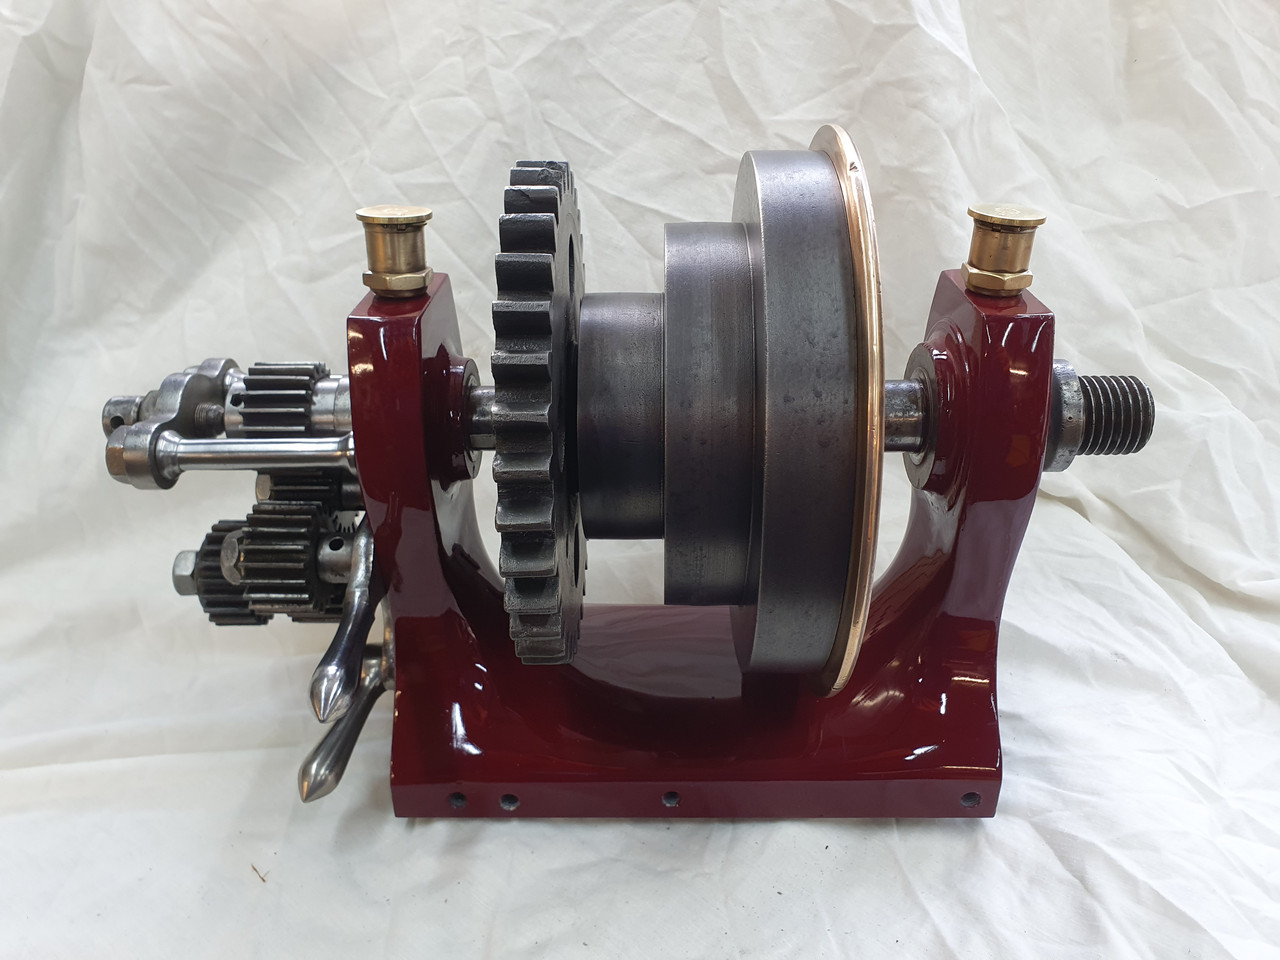
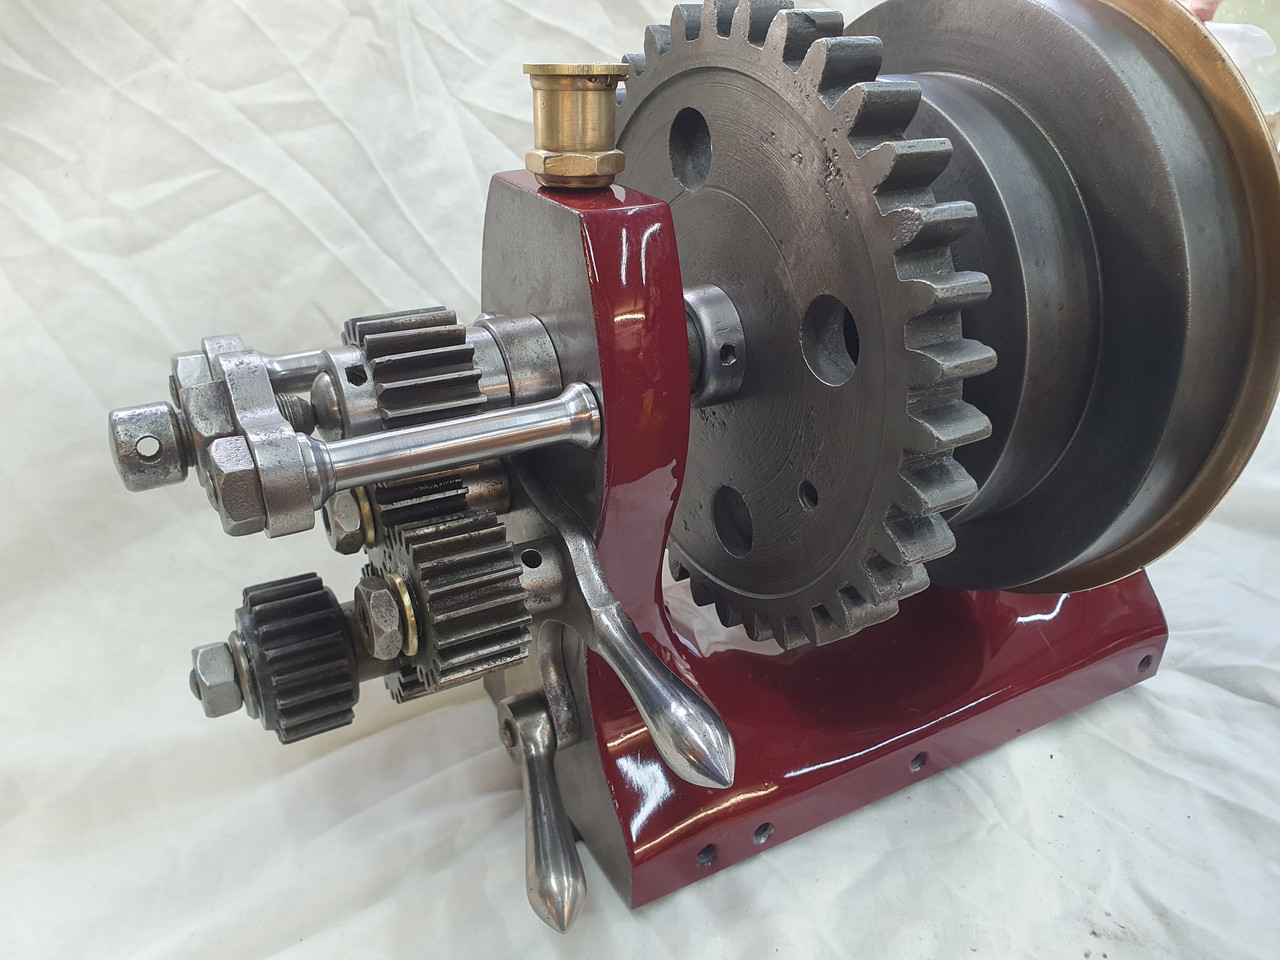
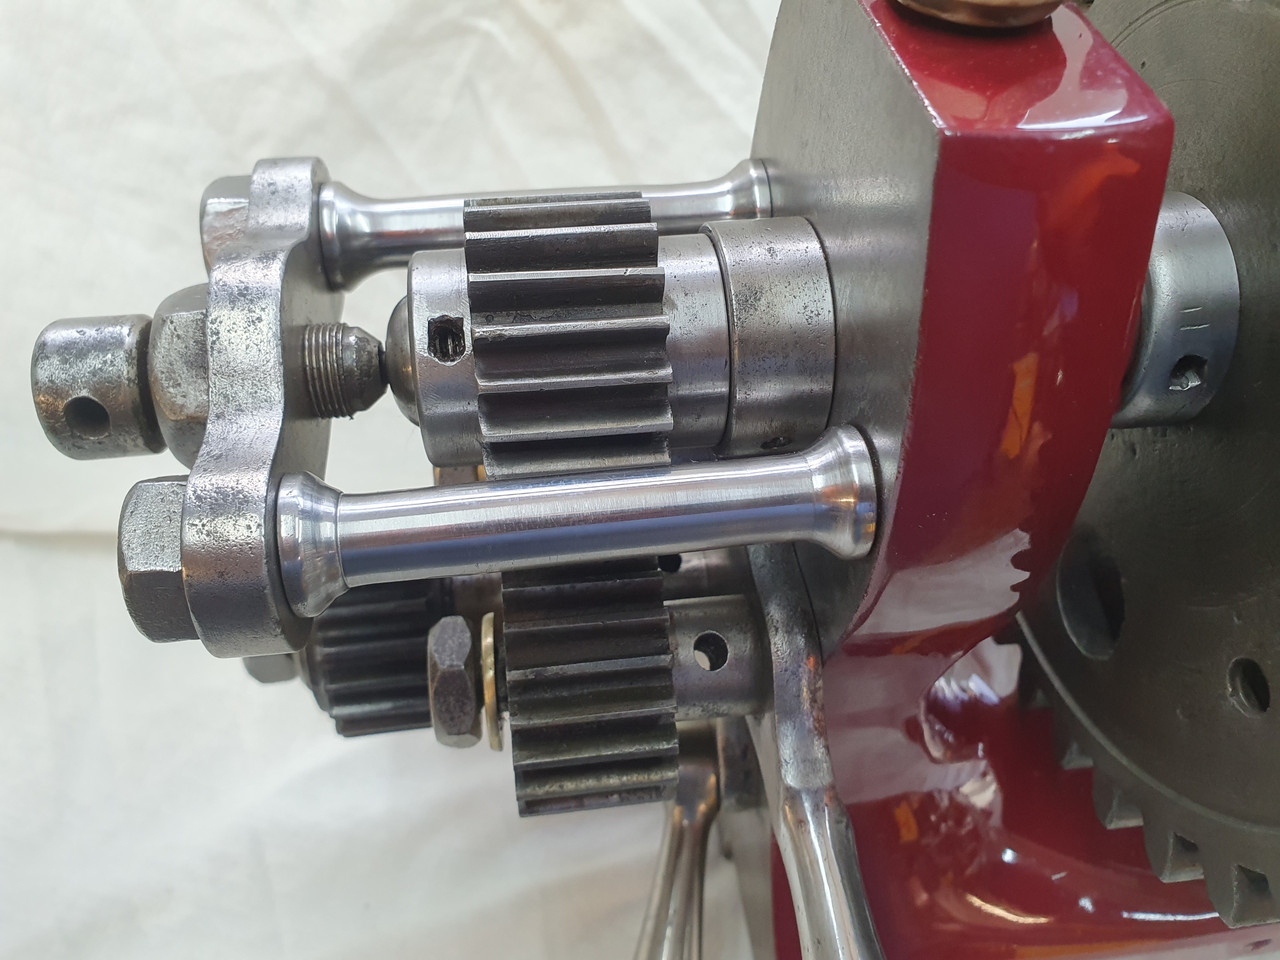
Last edited:
")


")
")

 There is an Australian that is 3D printing a three stage geometric chuck and once he has the bugs worked out it might be within my reach. 3D printing might be the answer for some of the OT chucks as they don't need to spin fast. Not as pretty as brass and steel but functional for some playtime with the hobby.