GaryR
Nordic Pine
My Japanese garden shed WIP thread is up to date so I thought I would show a very much smaller project that got me started with Japanese joinery.
About six years ago I was looking for instruction on how to do more precise joinery and stumbled upon the late Chris Hall's personal forum on Japanese woodworking.
https://craftsmanshipinwood.org/
Unfortunately his forum never attracted much interest and is no longer active. But at that time it changed my woodworking life. Registrants had access to a few project tutorials, one of which was for this andon. If you did the build you got help and advice from Chris. Great fun and I'm proud to say that mine is one of four in existence.
Here is the finished andon. Siamese cat added for scale.

A few features that make this lantern unusual: there are, as I recall, something like 114 pieces of wood in the build. I noted that to Chris during my effort and he replied, "Yeah, that is kind of the point."
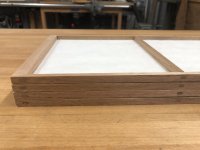
The only glue used was to attach the washi paper to the four removable frames, and some dabs of glue on through tenons of those frames. The rest is held together entirely with interlocking wood joints.
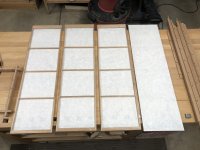
The wood is mostly American black cherry (Prunus serotina, some red oak for internal lamp electrical pedestal, butternut (Juglans alba for the paper diffuser panels, and bits of ebony for tiny wedges.Here are most of the parts except for the butternut frames.

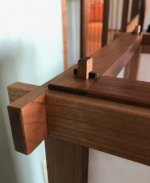
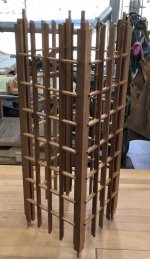
Conceptually the lantern is built from a joined rigid base and top plate that capture four posts. The kumiko lattice are mortice and tenoned into the base, top and posts. Removable diffuser screens slip into grooves in the posts. The electrical pedestal is captured within the lower base and a handle is captured within the removable insert in the top plate.
I saved a few pictures of the joinery as I went along.
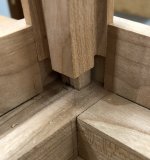
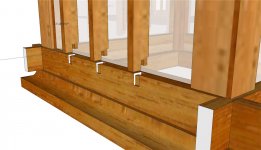
On the square base, the four corner joints are mitred, through morticed and tenoned, and have an additional internal dovetail to resist twisting. The joint is based on one designed as a mud cill/sill foundation for a temple. Far more complex than needed for this structure but it was included as a joinery exercise. A wonderful challenge to get right, especially making both halves of the internal dovetail. I now see it was probably far beyond my skills at the time but that's why I signed up for the job. t

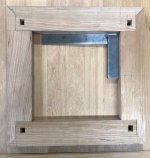
The empty mortices are for post tenons. And then it gets complicated. More on that tomorrow.
About six years ago I was looking for instruction on how to do more precise joinery and stumbled upon the late Chris Hall's personal forum on Japanese woodworking.
https://craftsmanshipinwood.org/
Unfortunately his forum never attracted much interest and is no longer active. But at that time it changed my woodworking life. Registrants had access to a few project tutorials, one of which was for this andon. If you did the build you got help and advice from Chris. Great fun and I'm proud to say that mine is one of four in existence.
Here is the finished andon. Siamese cat added for scale.
A few features that make this lantern unusual: there are, as I recall, something like 114 pieces of wood in the build. I noted that to Chris during my effort and he replied, "Yeah, that is kind of the point."
The only glue used was to attach the washi paper to the four removable frames, and some dabs of glue on through tenons of those frames. The rest is held together entirely with interlocking wood joints.
The wood is mostly American black cherry (Prunus serotina, some red oak for internal lamp electrical pedestal, butternut (Juglans alba for the paper diffuser panels, and bits of ebony for tiny wedges.Here are most of the parts except for the butternut frames.
Conceptually the lantern is built from a joined rigid base and top plate that capture four posts. The kumiko lattice are mortice and tenoned into the base, top and posts. Removable diffuser screens slip into grooves in the posts. The electrical pedestal is captured within the lower base and a handle is captured within the removable insert in the top plate.
I saved a few pictures of the joinery as I went along.
On the square base, the four corner joints are mitred, through morticed and tenoned, and have an additional internal dovetail to resist twisting. The joint is based on one designed as a mud cill/sill foundation for a temple. Far more complex than needed for this structure but it was included as a joinery exercise. A wonderful challenge to get right, especially making both halves of the internal dovetail. I now see it was probably far beyond my skills at the time but that's why I signed up for the job. t
The empty mortices are for post tenons. And then it gets complicated. More on that tomorrow.


 )