• Hi all and welcome to TheWoodHaven2 brought into the 21st Century, kicking and screaming! We all have Alasdair to thank for the vast bulk of the heavy lifting to get us here, no more so than me because he's taken away a huge burden of responsibility from my shoulders and brought us to this new shiny home, with all your previous content (hopefully) still intact! Please peruse and feed back. There is still plenty to do, like changing the colour scheme, adding the banner graphic, tweaking the odd setting here and there so I have added a new thread in the 'Technical Issues, Bugs and Feature Requests' forum for you to add any issues you find, any missing settings or just anything you'd like to see added/removed from the feature set that Xenforo offers. We will get to everything over the coming weeks so please be patient, but add anything at all to the thread I mention above and we promise to get to them over the next few days/weeks/months. In the meantime, please enjoy!

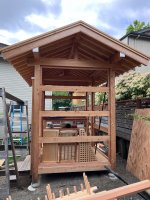
A Japanese style garden shed

I couldn't stay away. I mounted some flashing along the floor beams. To be followed by a weather barrier wrap before the serious rains come. The flashing took a little bending and folding and soldering since it has to have dams and diverters on the ends and fit into grooves in the posts. The first ones were pretty ugly but I did get better by the end.
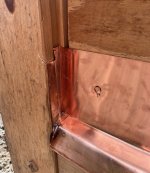
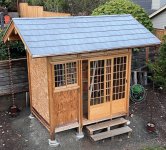
901CF573-FBA1-4DDB-BA9F-E2A5800900D4_1_105_c.jpegA2374692-D34F-41E0-A3B5-02B78A3F279A_1_201_a.jpeg


And I also got the second rain chain for the back gutter. It is a close but not exact match for the one in the front.
 
That’s going to keep the rain out. Did you form it in place or preform it? What tools did you use? I’ve got some flashing to do soon and thinking of getting a set of those custom tools for working lead (dressing stick, chasing wedge, bossing stick, etc) to make things easier although I guess a mallet and a board might be sufficient for the small amount I’d be doing.
 
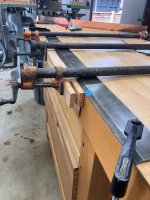
I preformed it. I don't have a brake for the long bends and could not find one locally to rent so I cobbled together a work-around using a straight edge and the side of my work bench. 9E45504E-87BD-4704-908F-8E9250827585_1_105_c.jpeg

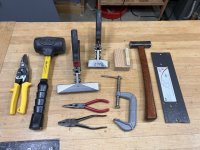
And for the dams on the ends I used some sheet metal bending pliers and whatever else I had around. A wood mould was useful for hammering the edges flat.

FC7A482F-D01C-4BC8-9DFC-0922ACEDBAAC_1_201_a.jpeg


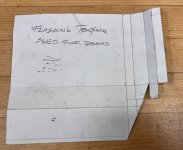
I worked out a template in paper for the cuts and folds.


FC832740-9780-42D1-8943-24C15BC4AEC8_1_201_a.jpeg
 
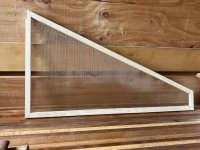
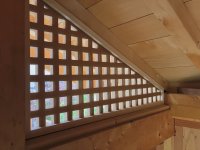
One other small project is to make a set of removable screens for the gable end lattices to keep flying critters out. A friend donated some nice bronze mesh and mailed it to me with a bit of flair. 40 postage stamps with a picture of skateboards.

ABE0FFF0-E557-4A10-9491-2ABC0304859F_1_105_c.jpeg

The frames are POC with glued bridle joints at the corners. I have one done and should get the other three finished today or tomorrow.

CC8E859F-7F2A-49BC-BD58-09CD09E84804_1_105_c.jpegEBA32C7D-EC5E-4D27-96BC-C21CEB6DF823_1_105_c.jpeg
 
Well that was a new one on me (poc) so I looked it up and it’s newly developed to biodegrade in the body, hmmm.
Also don’t like to be picky but would they have been better on the outside? Bugwise I mean.
 
Well that was a new one on me (poc) so I looked it up and it’s newly developed to biodegrade in the body, hmmm.
Also don’t like to be picky but would they have been better on the outside? Bugwise I mean.
POC=Port Orford Cedar.

Outside or in? I think both ways would keep the bugs out and I imagined them looking better on the inside so as not to hide the lattices from the exterior view. I suppose bugs and dirt might accumulate between the lattice bars and screen this way, but then the screens are removable for cleaning if that becomes an issue.
 
POC=Port Orford Cedar.

Outside or in? I think both ways would keep the bugs out and I imagined them looking better on the inside so as not to hide the lattices from the exterior view. I suppose bugs and dirt might accumulate between the lattice bars and screen this way, but then the screens are removable for cleaning if that becomes an issue.
Haha, sorry at first glance I thought it was plastic, I should have known better.And yes you’re right it wouldn’t look right on the outside obscuring those lovely lattices.
 
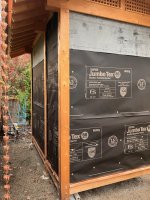
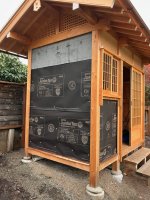
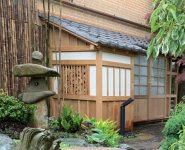
I had the local sheet metal shop bend some copper to form a weep screed and I installed that over the flashing. Then I installed a weather resistant barrier over the plywood sheathing. The WRB tucks into grooves in the posts. I ran out of the Jumbo Tex so finished off with some barrier left over from the roof. Plastic capped nails hold it on. Cement board will cover over all of this later.

I feel a little more secure about the rainy season now. It is forecast to rain every day next week, and this is just the start.

C45959D1-41FC-464D-A85B-6900E3CAE257_1_105_c.jpeg3C54EE2E-7677-4A2A-81C7-4B0B34E2CE7D_1_105_c.jpeg
 
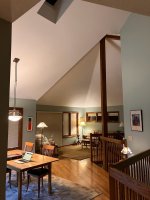
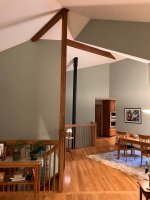
Yes, it's oddly shaped but it we love it. It is a split level with kitchen, dining and living room above. Difficult to photograph with a phone camera but here is the view from the kitchen into the living/dining area. Angles everywhere. The photo distorts the ceiling proportion. It isn't really that tall or disorienting.
F5A6BBEF-C04D-43B8-AAC8-B339EE10F610.jpeg
And from the living area back toward the kitchen. Below the dining area is a family room with a gas fireplace, hence the flue.

58B4E548-47E3-457D-8C42-E91F87B32E96.jpeg

We had it painted last year. The painters had a lot of fun.
 
Cement board walls? What is that going to look like?
 
Yes plaster over cement board was my original plan. I say "was" because my life has suddenly changed. My wife and have decided to move 2400 miles away, relocating to Bloomington, Indiana. It's a long story that I won't bother you with. But we have purchased a new home there and will be putting our current home on the market the first week of April. We expect it will sell quickly and that we will move the first week of June.

The fate of the shed is an issue. In theory, it can be disassembled and taken with us. That is what our real estate agent advised, reasoning that the shed is worth much more to me than it would be to almost every potential home buyer. Especially because it isn't complete. However, dismantling it seems daunting to me with all the other preparations for the move, including moving all of my shop tools and machines. So I'm inclined to leave it for the future owners. But it will bother me forever to leave the walls unfinished. I don't have the time or will to plaster them so I'm looking for other options that fit the style but will go faster and with less labour.

One ideas is something like this general scheme: a white panel above of some kind (painted plywood?) with unfinished board and batten below:

Board and batten.jpg
I like the look and it would help moderate visually the rather tall aspect of the gable end walls. And not too expensive.

I'd leave the floor unfinished for the new owners since the subflooring works fine as is and they could finish that as they like.

Thoughts?
 
Such a shame to leave your lovely work behind Gary. Lucky person who inherits it!
Just looked and you are moving more towards me, but still 14 hours away, I just can’t seem to get my head around just how big the US is!
Ian
 
That seems such a shame but lets try and put a positive spin on things. You’ve learnt a lot building that shed and we have all enjoyed following along. Now you will have chance to do it again.
Hope the move goes well.
Hiring a crane and lifting the shed up and over the house is out of the question?
 
Oh my goodness! That's a pity.
Well, the latest is that the shed may get a reprieve. We talked with a moving company yesterday and was told that given the weight and volume of our household goods and the shop, there would still be space on the moving van if the shed was disassembled into pieces small enough for three men to carry. That seems less daunting with fewer joints to take apart. And I would have until June 1 to get it done. My wife has agreed with this plan so as of today that looks like the path forward.
 
That seems such a shame but lets try and put a positive spin on things. You’ve learnt a lot building that shed and we have all enjoyed following along. Now you will have chance to do it again.
Hope the move goes well.
Hiring a crane and lifting the shed up and over the house is out of the question?
Several of my friends have suggested that as well. Certainly doable but the costs add up since I would need to hire a crane on both ends of the move and pay for transport 2400 miles separately from our already expensive moving costs. Also, I'm not confident that the shed would survive such a move intact. That is a lot of bouncing and wind forces.
 
Gary, I don’t often comment but have followed this fascinating build from the beginning. If you where to leave the shed when you move I think I would shed a tear for you, so I can’t imagine how difficult it would be for you to say goodbye. I sincerely hope we see it follow you on your new chapter in life.
 
An update. We have finished all the paperwork and now own our new home in Bloomington. Our house here in Corvallis found a buyer three days after it was listed (and for a bit over our asking price, which was nice). The sale seems be going through without a hitch and should be final on May 16. As part of the deal the new owners will allow us to continue to live here until we move on June 4.

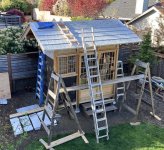
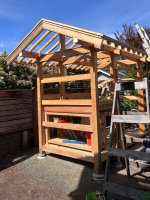
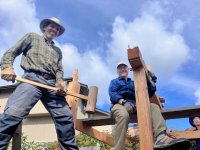
My shop is nearly completely packed up, except for some tools I need to disassemble the shed. My neigbour and I officially started dismantling today by removing the gutters and about 2/3 of the roof panels. The panels are coming right off without any damage so no worries about re-using them. I'm labeling as they come down so I can re-install them in the same positions.

A0AB54B1-A119-4971-B883-4B4FFF2E0DFC_1_201_a.jpeg
 
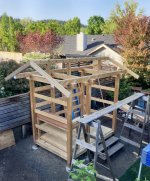
More progress de-building. Everything is coming apart nicely. I'm labeling parts as I go. The only minor glitch is that about 10% of the screw heads holding down the roof decking twisted off on removal. Just a cheaply made brand that I won't use again. I've also removed most of the wedges and pegs. That went better than I expected. All that was needed was to a 4 inch screw into the end grain and then a pry bar and blocking to lever them out. Less than a minute per wedge or peg. And the frame is still solid enough to walk on so it is still safe for the next steps.

Here it is at the end of the day today.

7EEBC064-894E-4A83-8400-044BD7384BBF.JPG
 
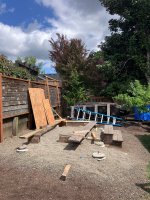
The frame is now stripped of everything except the plywood subfloor and joists, which I'm leaving as a platform for ladders when we remove the top plates and roof beams. I loosened the wedges holding the barge rafters in place but did not detach the rafters since they are too heavy and awkward for me to remove by myself.

Ready for taking the frame apart on Saturday morning.

546C9496-0A23-45C2-BDFA-E8EAC21E5F27_1_201_a.jpeg
 
The second coming of the shed begins.

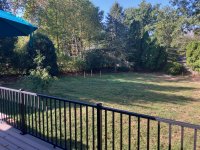
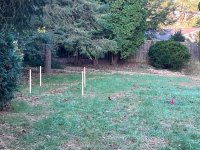
After a miserable summer of heat, humidity, and setting up my new shop, I can now think about re-raising the shed. I have a spot picked out:
9272157B-5049-4B87-8857-EE126619BDCF.JPG


And I held a modest jinchinsai ceremony to pacify the local spirits and thank them for allowing my build. Sourdough bread, salt, and vodka (I didn't have any sake around). The little green and red stool was made for me by my grandfather almost 70 years ago.

C370E21B-1454-4DFE-B5AA-EDAEA3558238.JPG
 
Very cute stool. Nice to do the ceremony.

Is it a bit close to the trees? Some of our sheds get covered in needle fall. If you plan to do a Japanese garden, then the position of the shed might drive the design.
 
Maybe a bit close, yes. Thanks for noticing that. In fact two of the trees that aren't quite overhanging the site are young walnuts. They aren't fruiting yet but when they get older I'm sure they will drop some heavy nuts onto the metal roof. Don't want that.

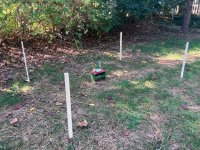
I can't move the shed too far from the edge because there is a buried power line and a buried gutter/downspout drain on the front side. The red flags mark the power line. E9219BE9-C7F5-49A3-9A34-41ECB694E96E.JPGI might angle the shed, though. That would give me a better view of the facade from the house.
 
My thought was the site looks ideal for a Japanese zen garden or small stroll water garden, featuring the superb building as a centrepiece. With a dry garden and at least one pond. No symmetry of course, being Japanese. Japanese gardens must have a pine and you already have a fine specimen. You have a golden opportunity here. Sight lines and hidden views can be worked in.
 
My immediate thought on seeing the first photo showing its position was that it should be further round to the right with its back to the evergreens and facing the camera in that sort of recessed corner. But it’s just a photo and probably different in the flesh.
I always wanted to build a little Tea House with all the garden trimmings but I doubt it will happen now.
 
My immediate thought on seeing the first photo showing its position was that it should be further round to the right with its back to the evergreens and facing the camera in that sort of recessed corner.
That was my first thought, too. The problem is the slope there goes from left to right while the shed feet were cut for a slope from the back of the shed to the front. Of course I can change the grade if necessary.

My thought was the site looks ideal for a Japanese zen garden or small stroll water garden, featuring the superb building as a centrepiece. With a dry garden and at least one pond. No symmetry of course, being Japanese. Japanese gardens must have a pine and you already have a fine specimen. You have a golden opportunity here. Sight lines and hidden views can be worked in.
I like Japanese gardens but I'm afraid I'm not up for designing or maintaining one. I lean more toward using native trees and shrubs to make a semi-natural woodland edge garden. But I have a more or less blank slate and I plan to live here a year before launching into anything major.
 
I decided Cabinetman was right about the location. I moved it a few feet and changed the orientation a bit for a better view of the front from the house. That also lets me avoid falling nuts from a walnut tree that partially overhangs my first location.

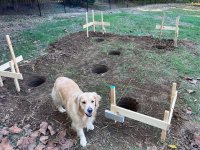
Then I hired a couple of guys to dig out holes for the piers. 1 ft diameter and 3 ft deep. With their machine it was done in less than half an hour. Money well spent. Willa approves.

990126CC-5FAD-4194-B580-77DC024E1426.JPG
 
Back
Top