• Hi all and welcome to TheWoodHaven2 brought into the 21st Century, kicking and screaming! We all have Alasdair to thank for the vast bulk of the heavy lifting to get us here, no more so than me because he's taken away a huge burden of responsibility from my shoulders and brought us to this new shiny home, with all your previous content (hopefully) still intact! Please peruse and feed back. There is still plenty to do, like changing the colour scheme, adding the banner graphic, tweaking the odd setting here and there so I have added a new thread in the 'Technical Issues, Bugs and Feature Requests' forum for you to add any issues you find, any missing settings or just anything you'd like to see added/removed from the feature set that Xenforo offers. We will get to everything over the coming weeks so please be patient, but add anything at all to the thread I mention above and we promise to get to them over the next few days/weeks/months. In the meantime, please enjoy!

Cutting big coarse threads in wood

AndyT

Old Oak
Joined
Nov 23, 2020
Messages
3,877
Reaction score
1,799
Location
Bristol
Name
Andy
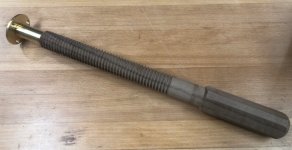
From time to time, the question of how to cut big coarse threads in wood comes up in discussion. People want to make "Moxon" vices, or special clamps, or an all-wooden bench vice, or an end vice. Over a decade ago, I did some experiments and wrote them up on a forum, but my pictures aren't there any more, so I thought I would revive the topic on here. I'm pretty sure the subject came up within the last few months, but can't find where at present. Anyway, this is what I did back then.

I'd already played about cutting wooden threads with the sort of generic Taiwan-made thread cutting tool that Axminster still sell here. (Those tools are ok, but not generally available in the larger sizes that people need for bench vice screws and the like. And big antique ones tend to cost quite a lot, especially the rather nice metal sort made by Peugeot and others. )

First off, I turned a tidy cylinder of nice, fine grained hardwood on my woodturning lathe. I was lucky enough to have got some holly when the neighbours cut a tree down, which is as good as boxwood for this sort of thing. My trial piece was about 1¾" in diameter. I transferred it to my old treadle driven Barnes metalworking lathe, which copes with thread cutting down to 5 threads per inch. I held the wood in a three jaw chuck at one end and a revolving centre at the other. The screw was a stop against a marked jaw, to make sure that everything stayed in the same positions when taking successive threading cuts. The photo below shows how I set up a conventional single point tool, such as you'd use on steel. squared against the stock.
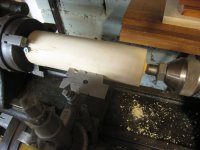
IMG_2965.JPG

With back gears on and the right combination of change gears in place, I tried cutting a thread with that metalworking tool.
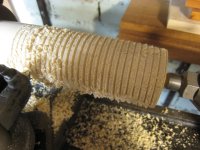

IMG_2968.JPG

Hopeless!

Cutting this with the metal tool was not a good idea. Even on nice hard dry wood like the holly, and taking a very shallow cut, the result was a fuzzy mess of broken fibres. I took my blank back to the wood lathe and turned away the mess, leaving it at about 1½" diameter, to try again.

Luckily I had a better idea. The tool holder I was using takes 3/16" square HSS blanks. By one of those rare bits of good luck the cutting tool inside my cheap ¾" thread cutter is on a 3/16" square body. It was pretty simple to remove it, clamp it in the tool holder and shim it up with some bits of steel so it hits the work at something like the right angle. Success!
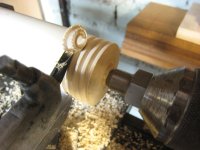
IMG_2969.JPG

A nice clean cut, which I could deepen with successive cuts until the threads were fully formed. (Here I had set the cross slide at 30 degrees, which meant I could advance the cutter on one side of the thread only. This is easier than cutting the full depth on both sides at once and is a normal technique. You can see that the shaving is only coming off the left hand side.
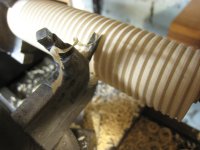
IMG_2971.JPG

To make a matching female thread, I used an expansive bit to bore a suitably sized hole in a bit of beech:
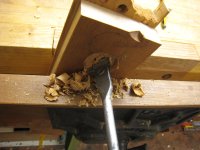
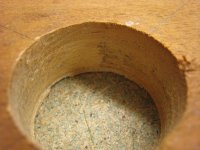
IMG_2972.JPG


IMG_2987.JPG

Experiments and discussion at the time led me to harden the inside of the hole with some poundshop CA glue
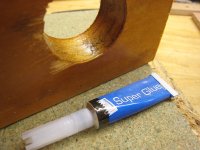
IMG_2988.JPG

Here's the single point cutter that I used:
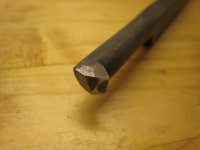
IMG_2977.JPG

and here it is disappearing into the beech making an acceptable cut on the CA-reinforced side grain (apologies for poorly focused picture).
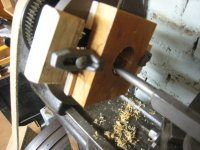
IMG_2989.JPG

By this time I had managed to find some old coarse thread chasing tools in my chosen 6 tpi; with a fresh dose of CA on the initial surface, I was able to use one of these to slightly enlarge the internal thread, so that I got an easy, running fit, rather than one which needed two hands to turn it.
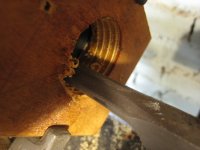
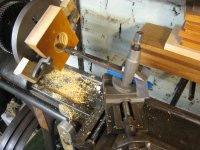
IMG_2990.JPG

IMG_2993.JPG

And here's my finished experimental piece, which I was quite pleased with at the time.
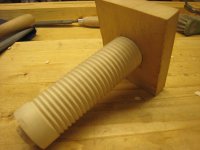
IMG_2976.JPG


Now, I know that not everyone has a century old treadle lathe to play with, but I want to stress that what I did here doesn't need one. I wasn't using the treadle; i just pulled the work round by hand - the cut doesn't need to be made quickly. So I would think that anyone with a lathe with a leadscrew on would be able to do something similar, as long as you have the right change gears.

You don't need to buy a threading kit to get the cutter - you could also use a carver's V-tool which has exactly the same cutting action - but you would need to work out some suitable way of holding the cutter tangential to the wooden cylinder.

I'd be interested to see other people's approaches and experiments.
 
That's really interesting, thanks for sharing Andy.

I'm quite keen on the idea of playing with threading in wood at some point. I'd thought about having a go at a threaded box (which would be a much, much shorter thread and I think the traditional way would be with a thread chaser and just doing it by feel). I can definitely see that longer threads would need a leadscrew (and I'm sure my Harrison would cope admirably if I could bear to cover the ways in sawdust!).
 
I love the idea of cutting a large wooden thread, in the future, for a leg vice on the bench I plan to build. Now if only I knew whether my lathe had a leadscrew (or indeed what one is...), which I don't think it does...
 
I love the idea of cutting a large wooden thread, in the future, for a leg vice on the bench I plan to build. Now if only I knew whether my lathe had a leadscrew (or indeed what one is...), which I don't think it does...
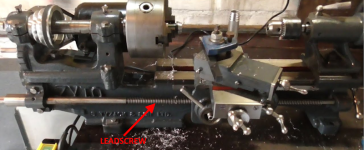
If it's designed for metal cutting, it probably (but not certainly) has a leadscrew. If it's designed for wood, it almost certainly doesn't.

They're usually tucked under the bed "ways" at the front, sometimes covered in a protective cover. Example photo from the internet:

1751888124000.png
 
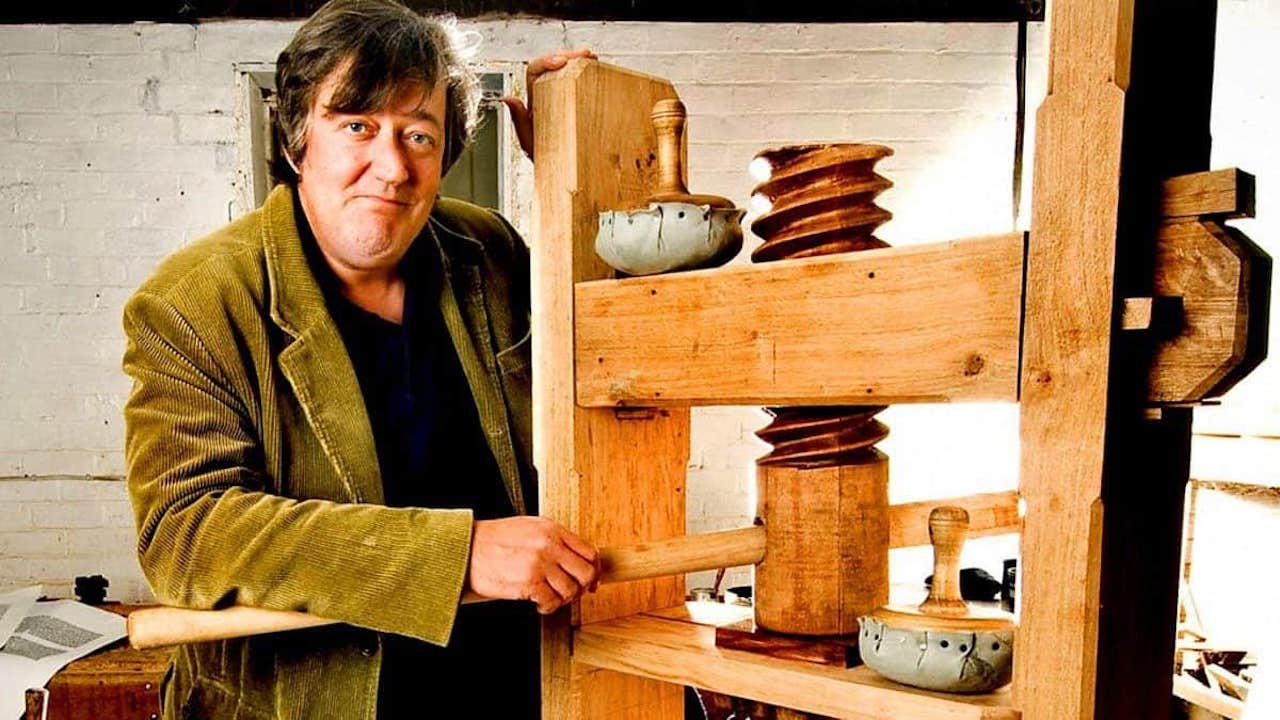
On screw-cutting, Stephen Fry did a documentary a few years ago about Gutenberg. As part of that, he showed the process of cutting a wooden thread as used in the press (done without a leadscrew). I seem to remember it was well presented and interesting, but it was a quite few years ago I watched it and my memory's terrible.

I think (but haven't rewatched to confirm) that it was probably this one (seems to be watchable on the linked website):

 
If it's designed for metal cutting, it probably (but not certainly) has a leadscrew. If it's designed for wood, it almost certainly doesn't.

They're usually tucked under the bed "ways" at the front, sometimes covered in a protective cover. Example photo from the internet:

View attachment 34328
Yep mine's a wood lathe so doesn't have one.
 
On screw-cutting, Stephen Fry did a documentary a few years ago about Gutenberg. As part of that, he showed the process of cutting a wooden thread as used in the press (done without a leadscrew). I seem to remember it was well presented and interesting, but it was a quite few years ago I watched it and my memory's terrible.

I think (but haven't rewatched to confirm) that it was probably this one (seems to be watchable on the linked website):

Yeah this is what piqued my interest initially, good programme and he goes into a decent level of detail on how to do it. Still a lot of work though.
 
Following with interest Andy.

I have a box full of those thread chasers ( like the one you used to clean up the internal thread ) but have never got around to trying them out, Must give it a go and get rid of those surplus. I've had them for so long I can't remember where I got the from. :unsure:
 
There was an article in FWW, many, many years ago on how to make screw-top boxes. The screw was cut with a V-cutter in a "die cutter" whatever one of those is. Today I dare say we would use a trim router. I can't remember how the travel was controlled, but I remember thiinking at the time that it was very neat way of doing it.
S
 
It's a fascinating topic and there are so many directions to go in... I couldn't hope to describe all the information that's available, even if I could find it. (Frankly, finding the stuff I was reading ten years ago is hard enough.) But I'll mention a few key pointers.

A good starting point is to look in detail about how the long-established wooden thread boxes are made and I'd recommend letting Roy Underhill be your guide. In Season 27, Episode 4 of the Woodwright's Shop, he demonstrates how to make the wooden part and also the V-cutter. The episode is still available, here on the PBS website:


However, in that video he uses a ready-made metal tap, from the Beall Tool Company to tap the essential guide hole you need. Unfortunately, the Beall company closed at the end of 2023. Lee Valley still carry their kits, which include their excellent taps, but they are pricey. (See https://www.leevalley.com/en-gb/tools/beall-tools/beall-wood-threaders) And they don't list the taps on their own.

However, PBS used to maintain a website for the Woodwright's Shop, with program notes and instructions. It's no longer live, but the content is available through the Internet Archive's Wayback Machine. Here you can find detail on how to make the external cutter box and also how to file your own metal tap. Roy naturally goes back to the best historic sources for this sort of thing and the notes include the relevant illustrations from books by Roubo.


There's also a chapter on Screwboxes and Taps in Roy's 1986 "The Woodwright's Workbook" (ISBN 978-0-8078-4157-0) but as far as I can see you'll need to buy this or find it in a library. (It's a fine book, well worth having.) It includes a description of how to tap a large hole. The method is that you make a wooden cylinder, mark out a helix on the surface, then saw a shallow groove along the line that you have marked. You don't need to chisel this into a complete, properly shaped thread. Instead, you arrange a thin strip of steel at the right angle to engage with the groove, so that when the wood is rotated it will move along, guided by the groove. A cutting tooth protrudes through the side of the cylinder and will cut a thread in a hole, just like my single tooth cutter did in the lathe. That's probably not a very clear description, but I expect someone will find a nice illustration.

There's probably a lot more about this sort of thing scattered in blog posts, forum threads and books by people like Chris Schwarz, but I'll stop there for now.
 
That's probably not a very clear description, but I expect someone will find a nice illustration.

There's a full set of engravings and a detailed description in the second part of Roy Underhill's project guide, The Carpenter's Tap, at the link I gave previously.
 
There was an article in FWW, many, many years ago on how to make screw-top boxes. The screw was cut with a V-cutter in a "die cutter" whatever one of those is. Today I dare say we would use a trim router. I can't remember how the travel was controlled, but I remember thiinking at the time that it was very neat way of doing it.
S
I'd be interested to see that. I don't know what a die cutter would be in that context either!
 
Following with interest Andy.

I have a box full of those thread chasers ( like the one you used to clean up the internal thread ) but have never got around to trying them out, Must give it a go and get rid of those surplus. I've had them for so long I can't remember where I got the from. :unsure:
Maybe I've spurred you on. I was able to find some nice coarse ones to give me 6tpi and a metric one close enough to 5tpi, if I remember right.
 
Maybe I've spurred you on. I was able to find some nice coarse ones to give me 6tpi and a metric one close enough to 5tpi, if I remember right.
Hopefully Andy. The mind is always active and motivated but the body often lags way behind. :ROFLMAO:
There are matched sets of internal/external in lots of sizes, from memory including course ones. I'll dig them out and post up a photo.
 
Lons, I reckon you're well equipped there!

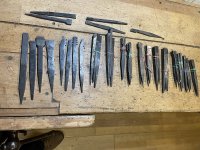
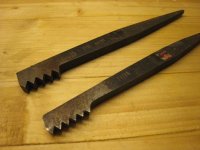
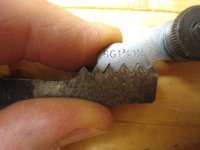
Here are the ones I have played with. They are actually metric sizes, but that's ok.

IMG_2978.JPG

5.25mm pitch is nearly the same as 5 tpi - 5x5.25 = 26.25mm ≈ 25.4mm.

And 4mm pitch is nearly the same as 6 tpi - 6x4 =24mm ≈ 25.4mm

IMG_2979.JPG

After all, some sloppiness is essential unless you want to risk the wood changing size and seizing up. Also, as these two are for metric threads, they have a 60° angle, rather than the Whitworth standard of 55°.

But don't let me put you off using what you have!

And thinking about it more, although in the metalwork world these chasers were apparently intended for giving the final shape to threads cut with a single point tool, I do think that when working on wood you could use one to do the whole job, as long as it was advancing at the right feed rate.

The descriptions I have read of them being used freehand on wood lathes all say that you should use something much finer than these - 14-18tpi - but I guess that's mostly to do with the difficulty of holding them in a set position to make a much deeper thread, which the cross slide solves.
 

Attachments

  • IMG_2980.JPG
    IMG_2980.JPG
    141 KB · Views: 0
Thanks Andy, interesting, I don't have a gizmo to measure the pitch (at least I don't think I have - must look).

I'll have a closer look at the markings on mine later as I have no idea wheter imperial or metric. I sorted them out a while ago as there are duplicates but then they got stuffed in a drawer as is usual.

I'll definitely have a go as I have boxwood and lignum vitae both of which will take a thread.
 
so out of interest is it a good idea to use superglue once the thread is cut? I'm making some wooden guitar knobs right now out of pear, and have a small M4 thread inside them, much smaller scale than this.
 
so out of interest is it a good idea to use superglue once the thread is cut? I'm making some wooden guitar knobs right now out of pear, and have a small M4 thread inside them, much smaller scale than this.
I've not done enough experiments to say for sure, but on porous or soft woods, superglue does seem to soak in and have a strengthening effect. I don't imagine it could hurt - plenty of people use it as a nice tough finish on small turned items such as pens.
 
When I looked into thread cutting in wood a while ago the advice was to soak the wood in oil sorry can’t remember but it may have been Olive oil to help prevent splintering, obviously this would affect you using superglue afterwards.
 
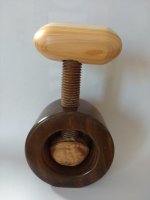
The nut cracker I showed above has had no oil during the thread cutting and no surface finish on the male nor female thread afterwards. The “screw” part is lignum vitae (a naturally oily wood) the female thread is in walnut. So wood type is key I guess
 
I have the same Beall kit. It clearly does produce good clean threads. But if anyone else wants to go down that route, you need to decide now and buy while stock is available. As I mentioned in post #11, the Beall company closed in 2023. As far as I can see, once retailers have sold their stock, that's it.
Also, their products are quite expensive, especially in the larger sizes.
 
Just a quick footnote to this story.

I never said that my idea was original, which is just as well. Tonight I watched an old 2017 video from Paul Hamler, who is famous for making miniature models of woodworking tools. One of his specialties is screw arm plow planes, and he has also restored many old antique examples.

In doing those things, he found that he needed to make accurate threads that don't conform to any standard, but do need to match a surviving fragment. He explains how to do that, with plenty more practical detail.

And along the way, at about 45 minutes into the video, he shows how he also uses a v-cutter mounted on the toolpost of his lathe, set to cut a nice coarse thread in wood.

His method of holding the cutter is much better than mine and is shown clearly in the YT thumbnail:


I'd been thinking of how to mount the cutter in my old American style toolpost, when I would have been better off with my slightly newer tool holder and a bit of steel bar. Next time...

He also mentioned that he had read about the method in a 1960s issue of Popular Mechanics.
 
Back
Top