• Hi all and welcome to TheWoodHaven2 brought into the 21st Century, kicking and screaming! We all have Alasdair to thank for the vast bulk of the heavy lifting to get us here, no more so than me because he's taken away a huge burden of responsibility from my shoulders and brought us to this new shiny home, with all your previous content (hopefully) still intact! Please peruse and feed back. There is still plenty to do, like changing the colour scheme, adding the banner graphic, tweaking the odd setting here and there so I have added a new thread in the 'Technical Issues, Bugs and Feature Requests' forum for you to add any issues you find, any missing settings or just anything you'd like to see added/removed from the feature set that Xenforo offers. We will get to everything over the coming weeks so please be patient, but add anything at all to the thread I mention above and we promise to get to them over the next few days/weeks/months. In the meantime, please enjoy!

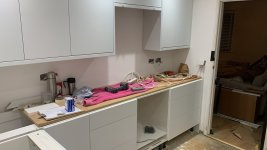
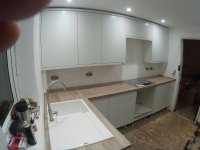
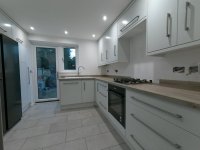
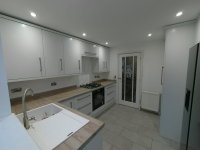
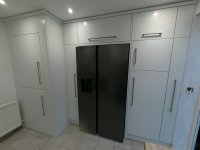
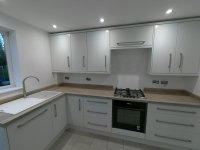
Daughters Kitchen final stages Handles and floor now done.

meccarroll

Nordic Pine
Joined
May 12, 2016
Messages
815
Reaction score
180
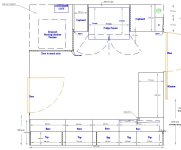
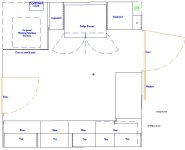
Hi all I have started drawing the basic layout of my daughters proposed kitchen using TurboCad Delux.

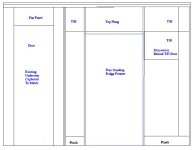
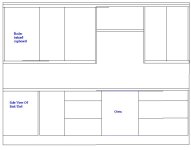
The drawings are not the clearest to read but I need the dimensions for when I upload them the the Blum cabinet configurator.

Please take a look and if you feel there is anything worth discussing or that I may have missed please do comment.

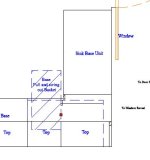
Plan View:

Kitchen Plan Snip.JPG


Note: The 1000 x 570mm Unit is a sink base unit.


Kitchen Plan No Dom.JPG


Party Wall Elevation.JPG


Internal Wall Elavation.JPG
 
Last edited:
Wondering about the best use of the blind base cabinet, lower right on drawing . It is difficult getting stuff out if it's a full width.
I do understand that storage space is at a premium and the more the better.
Unless you already have a cunning plan. :)
 
Wondering about the best use of the blind base cabinet, lower right on drawing . It is difficult getting stuff out if it's a full width.
I do understand that storage space is at a premium and the more the better.
Unless you already have a cunning plan. :)


Swing out basket.JPG
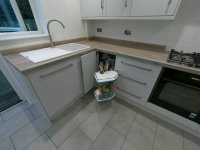
Yes the unit is 900mm into the corner and the opening corner door is 400mm so I can fit a pull out corner basket on the door. When the door is shut the basket swings back into the 900mm unit.

The basket is in two parts one fixes onto the door and the other part swings back into the 900mm rear section.

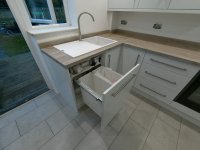
I think they want a pull out bin under the sink too.
 
Is there enough room to stack a dishwasher or tumble dryer on top of the washing machine (or beneath)? At the very least I would try to fit a narrow dishwasher in somewhere, as that is a major contributor to keeping a kitchen clean and free of clutter.
 
Is there enough room to stack a dishwasher or tumble dryer on top of the washing machine (or beneath)? At the very least I would try to fit a narrow dishwasher in somewhere, as that is a major contributor to keeping a kitchen clean and free of clutter.
God thinking there!

Yes there is enough room to stack above the proposed washing machine location should they decide to purchase one at a later date.
 
Could the washing machine go in the SVP corner allowing better use of the space behind the left hand door with base /wall units?

We did look into that already and found:-

The Fridge Freezer needs a minimim clearance either side of 260mm for the doors to open enough so the bottom shelving/box cabinets can be fully removed for cleaning etc (A noted factor).

So if I give this allowance on the left hand side of the Fridge Freezer there is not enough room on the right hand side for the washing machine.

Good point to raise though. Thank you.
 
Hi all, I have made some progress on refining the proposed kitchen design and selecting hardware.

I finished all of the outline design in CAD then went on to use the outline dimensions in the Blum online Cabinet configurator. Some examples of the process are below:


This is a simple 500 wide wall unit.
The basic cabinet design is set up using the right "Basic Settings" for height, width. rear panel set back etc.
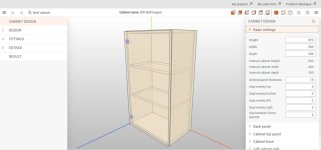
Cab1.JPG

Once you have the basic cabinet design put together you switch to the left colum to add the design elements such as shelving, doors, hinges etc.
This cabinet just has a couple of adjustable shelves a door and a door wirh hinges.
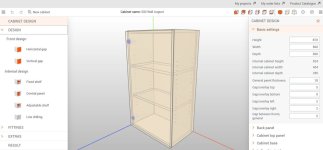
Cab2.JPG


If you look on the left you can see below "Internal Design" the adjustable shelf tab and when you highlight this you can then drag over to the cabinet in the picture to add the shelves. The right bring up a menu for placing the exact shelf dimensions including adjusting any front cabinet set back, additional holes above and below etc.
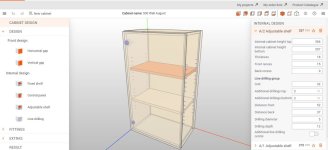
Cab1.1.JPG


I then moved onto the "Fittings" which is adding items of blum like hinges, lift systems or could be draws if you want to fit some.
For this cabinet I am fitting hinges on the left of the door.
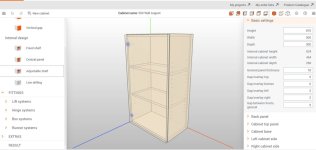
Cab3.JPG


When you select the hinge section you are taken to a new view and go through a process of selecting the type of hinge, how far it will open the door the type of fixing for the hinge etc.
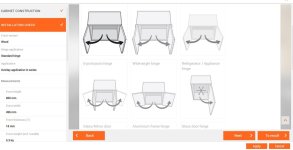
Cab Hinge.JPG

Some pictures of the new view showing just some of the selections you have for fixing the hinge and brackets.
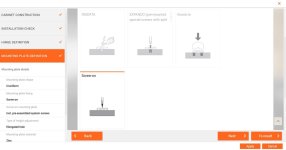
Cab Hinge Fix.JPG
Next add any "Extras" such as fixing blocks, dowels for holding the cabinet together etc. I am using my own system of fixings etc so left out this section but it's worth looking at if you are set up to use it.
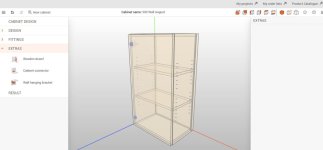
Cab4.JPG


When I have finished building the cabinet and added all the fittings, shelves, doors etc I go to see the results .

The results section gives a break down of all the parts required including Fittings, Cabinet size and component sizes with cutting lists which you can download in PDF format. You can also download the component sizes in a file format for use on a cnc.
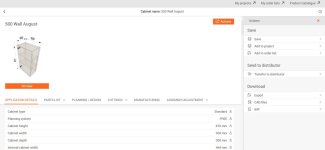
Cab 5.JPG
 
Once you hage designed and built the cabinet including adding all the fittings you click on the result. The result section gives a brekdown on all of the parts in the cabinet:

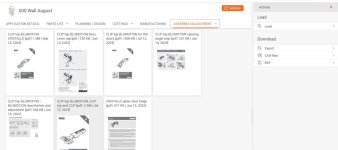
The above picture shows a 3D view view of the cabinet and the first colum "APPLICATION DETAILS" this gives information about the cabinet and an overview of the dimensions and relative positions of the cabinet components.


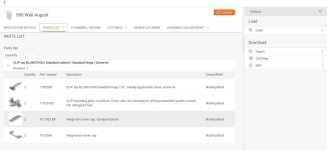
The next is the "PARTS LIST". This gives a picture of the part, Part number and a description of the part.

Parts List.JPG


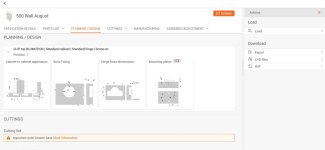
The next section is "PLANNING / DESIGN" this is where you can see the fitting dimensions of the components.

Planning and Design.JPG


In the "CUTTINGS" section is a cutting list of the components, so if you are looking to order sheet materials then this is a very handy section to have and use.
Cutting List 8.JPG


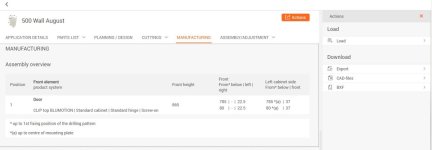
Manufacturing gives the relative position of Blum Components in the cabinet.
Manufacturing.JPG


The last section is "ASSEMBLY / ADJUSTMENT". If you want detailed assembly information on how to fit together and place the components of the Blum Components just click on one of the boxes and you are taken to the relevant online section which gives a detaile overview.
Assebbly and adjustment.JPG


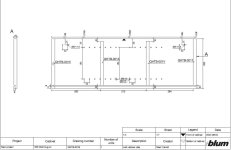
If you want all of the above information printed out you can download it in PDF format. The added advantage of downloading the PDF is you also get working drawings showing each component of the cabinet including the sizes and detailed drawings showing all the information of drill positions, groove positions hinge poasitions etc so they are a complete set of working drawings ready to work from in the workshop.
 
Blum have nailed this and it is one of the reasons why I chose Blum for our new kitchen. The big handbook has QR codes too that take you to a video of how to install and set up components. And their templates and jigs are well thought out.
 
Blum have nailed this and it is one of the reasons why I chose Blum for our new kitchen. The big handbook has QR codes too that take you to a video of how to install and set up components. And their templates and jigs are well thought out.
I originally wanted to use Blum but was not sure if it was affordable on this project fortunatly as I am in the trade I managed to obtain a trade account from one of Blums designated suppliers LDL Components https://www.ldlonline.co.uk/ they are very helpful and give next day delivery on most stock items.

Did you by any chance use the free online cabnet configurator for your new kitchen?
 
Just showing a few example pages of the 500 wall unit which I downloaded as a PDF file.


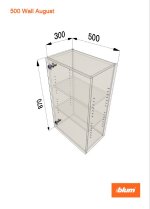
Below is the first page of a Blum PDF. It's a 3D example of the full cabinet.

PDF 1 Cab full.JPG


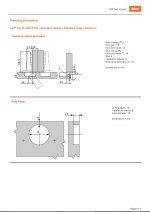
Another page showing the hinge setup and drilling positions which is very useful for planning and workshop use.
PDF Hinge Position.JPG


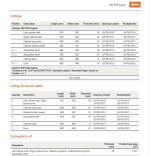
The cutting list is very detailed and you even get the finished size area in M squared.

PDF Cutting List.JPG


The drawings are also very detailed showing all of the drilling positions the size of drill holes etc.

PDF Side Panel.JPG
 
That’s really good and so useful, I get so frustrated looking at things online and I wonder about the lack of brain cells of the person describing it when they miss off the bit of information that everyone needs.
 
"Did you by any chance use the free online cabnet configurator for your new kitchen?"

No I didn't use the cabinet configurator very much though I did use it to make three eye level oven cabinets. Apart from that I was not interested in standard sizes as I made all the framework and quite a large island out of solid oak and I had particular requirements. Everything was bespoke and mainly very large and deep drawers 1.2 m wide that pull out fully and will take heavy loads. What I was mainly interested in was the drawer fitting system, as I wanted soft close and push to open, with the rod system to synchronise the sides. I also fitted an extra wide rotisserie oven which is capable of being pulled out on a tray system (to give access to under floor venting extraction behind it) and is ludicrously heavy. Blum had the components to deal with this. I like the quality of their clip on cupboard door hinges too.

I also bought all the parts on a trade account via a supplier in North London who were very helpful and avoided me making some ordering mistakes, as I found the synchro kits a bit confusing.
 
"Did you by any chance use the free online cabnet configurator for your new kitchen?"

No I didn't use the cabinet configurator very much though I did use it to make three eye level oven cabinets. Apart from that I was not interested in standard sizes as I made all the framework and quite a large island out of solid oak and I had particular requirements. Everything was bespoke and mainly very large and deep drawers 1.2 m wide that pull out fully and will take heavy loads. What I was mainly interested in was the drawer fitting system, as I wanted soft close and push to open, with the rod system to synchronise the sides. I also fitted an extra wide rotisserie oven which is capable of being pulled out on a tray system (to give access to under floor venting extraction behind it) and is ludicrously heavy. Blum had the components to deal with this. I like the quality of their clip on cupboard door hinges too.

I also bought all the parts on a trade account via a supplier in North London who were very helpful and avoided me making some ordering mistakes, as I found the synchro kits a bit confusing.
Some of the cabinets I have put together are none standard the configurator allows you to make up your own sizes but I think it works on the presumption that sheet materials are being used.

They also do a "PRODUCT COFIGURATOR" so you can tap in your own dimensions for a product to fit in. It will build the entire draw and give all the components needed to make it. I don't know if you have used or seen it but that too is helpful.
 
After a bit of a delay I have started to make a bit of progress on my daughters kitchen:


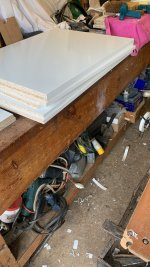
All together the kitchen has a mix of sheets MR MDF for doors and trim and MFC for doors draws and panels.

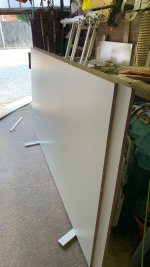
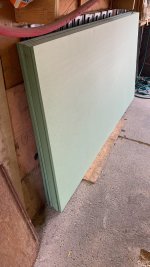
14 Sheets all together 8 MFC and 6 MR MDF, by the time I took this picture I had already cut down 4 sheets of MFC.

MFC Sheets.JPG

MDF Sheets.JPG

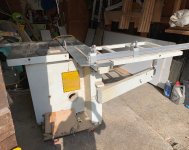
I did try cutting on my CNC but as it's max cutting area is 700mm wide by 1500mm long so I reverted to sizing the sheet material on my panel saw.

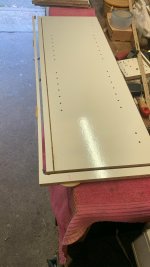
Wall cabinet side panel cut on CNC holes drilled too.
CNC Panel cut.jpg

The edge is a very clean cut on the CNC (I wish now I had a bigger CNC)
CNC Panel cut close up.jpg


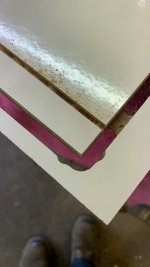
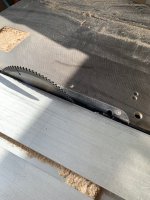
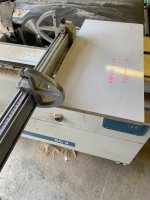
To speed things up and also so I could make better use of my sheet material I reverted to setting up the panel saw. The panel saw has a scoring blade in front of the main saw blade which first makes an undercut. It allowed me to cut the MFC without any noticable chipping on the underside of the sheet .

Panel Saw Blade.jpg

Panel Saw.jpg

Sheet Cut Panel Saw.jpg


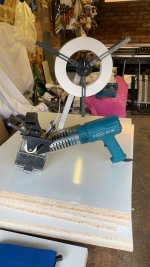
Once I had a pile of MFC cut I had to edge it with melamine tape so purchased the below hand held edge bander. It works by heating the pre glued edging and then running backward along the edge of the MFC, a roller holds the melamine down while the glue sets. It's not a perfect solution but a lot quicker and better than ironing on the edging.

WhatsApp Image 2024-09-04 at 13.42.48_02d299fc.jpg


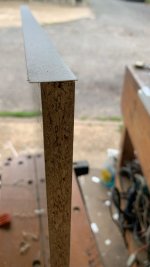
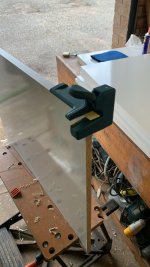
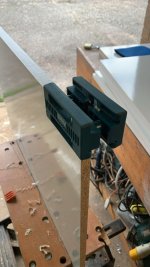
Once applied I needed to trim the edging.

WhatsApp Image 2024-09-04 at 13.48.58_9c81e654.jpg


This little tool is very handy and quick for cutting the ends off.

WhatsApp Image 2024-09-04 at 13.48.19_946b1bbf.jpg

And this is quick at trimming the edges.

WhatsApp Image 2024-09-04 at 13.49.05_6d32de78.jpg

WhatsApp Image 2024-09-04 at 13.49.24_a1af0074.jpg

Some of the partly finished panels edged banded.

WhatsApp Image 2024-09-04 at 13.42.25_8f3c1a21.jpg

And yes my work area is very cluttered but still workable.
 

Attachments

  • WhatsApp Image 2024-09-04 at 13.49.05_6d32de78.jpg
    WhatsApp Image 2024-09-04 at 13.49.05_6d32de78.jpg
    113 KB · Views: 1
Last edited:
Looking good, I like the edge bander and trim cutter.
The edge bander is very handy and a lot quicker than using an Iron but because it's not got a long lead in or out the front and end edging sometimes lift a bit so needs a firm press with an Iron after but otherwise very useful. The cutters are really good for thin melamine edging and a doddle to use...so quick too.
 
Dealing with that type of faced board without the right equipment is a nightmare so brill that you have it. Nice saw btw, I’m a firm convert to SCM equipment.
Yes done a fair bit of cutting with MFC and find it a real pain with power tools but the CNC with the right cutter gives perfect results. The SCM panel saw with scoring blade is a god send once set up too. SCM are one of the best machine manufacturers of woodworking machinery I know, I'd love one of their CNC machines but don't have the space to put one ☹️. Thank you for your comment.
 
Last edited:
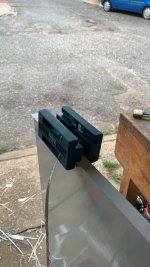
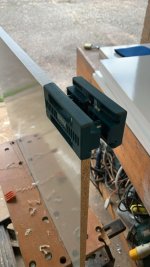
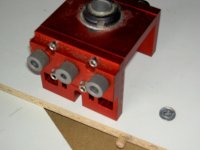
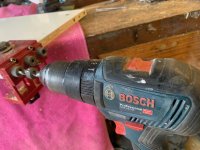
Started putting some of the cabinets together and decided to use cam fixings so purchased the below jig to see how well it worked. With 14 cabinets to construct I thought it might be a good investment.

Dowel Jig.jpg

the jig cost me £30 from Alixpress and it is very good and fast once you get used to using it.

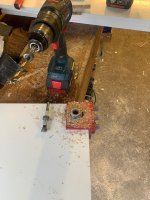
Cam Dowel Drill.jpg

It's very slightly fiddly to get it lined up in the right place for the thickness of material but once it's set you are away. Just line the edge of the jig with the end of the material and drill. You can do all the four corners of a cabinet in about 10 minutes.

I did not dive staight into drilling the actual cabinets, I made several tests in scrap offcuts to make sure everthing lined up as it should. Then proceeded with my first test cabinet.

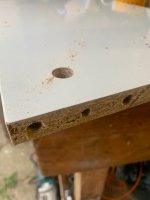
Drill Cam.jpg


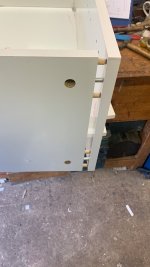
Holes drilled on Top and Bottom of cabinet.
Cam Drilled.jpg


For the sides of the cabinet you have to re-position one piece of the jig. If I had another kitchen or set of bedroom cabinets I'd think about buying a second Jig to save the time of re-positioning one side of the jig.

WhatsApp Image 2024-06-20 at 13.24.27_a0164c02.jpg


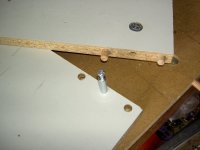
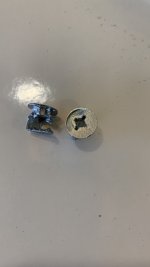
One of the cam nuts used.
Cam Nuts.JPG


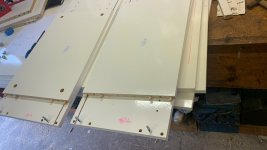
I used this method of construction so I can flat pack the cabinets and take them to the job otherwis 14 kitchen cabinets would fill all of my work area.

Cam Joints all done.JPG


The jig does a good job of lining up the cabinet panels, so very pleased with it.
Cam Joint open.JPG


There is still some glue on the cabinets from edge banding but once the cabinets are put together I will clean down the edges etc.

Corner lined up.jpg


Below and above was my first test cabinet (still needs the bottom groove but easily done as I could knock down the unit).

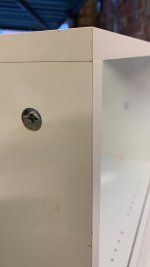
I have ordered some cam nut covers so if anyone wants to stretch their neck and peep under the top hung cabinets they won't be greeted by a bare cam nut.

I have one shorter cabinet placed over the grill/cooker unit (that would be easy to see the cam covers on that unit) and so that will be fixed using confirmat screws in the sides of the cabinet so there will be no sign of any fixings from the underside.


Cam joint.JPG

Thanks for looking, more machining today.
 
Last edited:
Money well spent, even a small error would mess things up completely without that.
Yes it's not expensive for what it does. I have lined cam fixings with a pre marked rod before but the jig is so much faster and super easy to use.
 
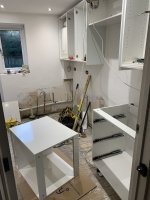
Been busy so not had the time to post updates but here are a few pics of the kitchen I've been working on:

IMG_4863.jpg

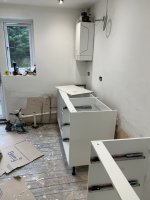
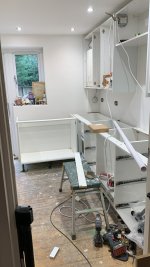
Initial setting up of the units.
IMG_4871.jpg

One side of the kitchen set up in position.
CBE02920-9632-457A-B970-D094E82A5FD7.JPG

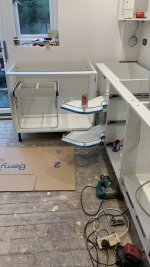
The kitchen has 14 units which makes it a medium size kitchen but we fit a lot in and it was very tight. Below is the corner pull out unit and beside it is the sink unit with double pull out bin.
E6E3AE89-5B5F-4852-B6B7-8051E57A172A.JPG

The finish is Renner Water Based, sprayed on.
920B668B-A565-4305-8B38-1C66C9AB4F7B.JPG

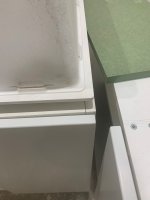
One corner between the sink unit and corner pull out was a bit tight, I should have allowed another 20mm on each side of the corner for the handles, it works but it could have been better.

IMG_4880.jpg

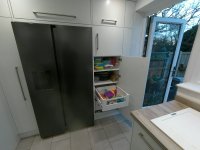
This is one side of the kitchen just about finished, flooring, oven, handles yet to finish but it's nearly there.
10490007.JPG
 
Last edited:
I'm never going to need to build a fitted kitchen, but it's fascinating to see how makers like Blum have invested in supporting professionals, making their complicated products intelligible. I can see now that once you get used to working with their system you won't want to change to anything else.
Thanks for taking the time to share all these clever details.
 
I'm never going to need to build a fitted kitchen, but it's fascinating to see how makers like Blum have invested in supporting professionals, making their complicated products intelligible. I can see now that once you get used to working with their system you won't want to change to anything else.
Thanks for taking the time to share all these clever details.
Yes Blum not only produce an excellent product, they also provide first class support.
 
Great work, the upper cabinet build must have made you a little nervous what with getting everything square.
Obviously years of experience behind you.
I will third that Blum provides a good product. That is one robust set of hinges for the door above the stove top?
My wife would like me to change our kitchen counters tops with Maple, what finish will you use on your counter tops?
 
Great work, the upper cabinet build must have made you a little nervous what with getting everything square.
Obviously years of experience behind you.
I will third that Blum provides a good product. That is one robust set of hinges for the door above the stove top?
My wife would like me to change our kitchen counters tops with Maple, what finish will you use on your counter tops?
Thank you I have a few photos of the opposite side to post later.

The upper cabinets were fixed together using cam dowels and stayed fairly square but the walls behind were out quite a lot which made lining up the cabinets a bit difficult. I did an initial fit then a final batten down once I knew the doors would all line up.

Hinges were only about £30 ish a set, they have soft close and are adjustable for door weight so very reasonable. If you adjust them correctly they will stay in place at several positions (not just fully open). 75 deg Restrictors were used to stop them form opening and hitting the ceiling.
Blum HK-S.jpg

Counters are wood effect laminate so no need for a finish (it's what they wanted). Maple sounds nice.
 
Last edited:
Nice. It's always a challenge working with chipboard. I've missed most of the thread in real time as I'm away. Kitchens always involve compromises somewhere so I wouldn't dwell on that. Fully agree that Blum are very well designed and engineered, especially when you invest in their templates.
 
Nice. It's always a challenge working with chipboard. I've missed most of the thread in real time as I'm away. Kitchens always involve compromises somewhere so I wouldn't dwell on that. Fully agree that Blum are very well designed and engineered, especially when you invest in their templates.
Thank you Adrian, I thought I had allowed enough and it does work ok but I should have known and done better... another lesson learnt! I'm also pretty sold on Blum too.
 
I think you did a great job. We all want to do our very best for our children and I think you should be proud. I am sure she is proud of her dad. This is what life is about in my opinion. I'm certain others here will agree with me.
 
Just a few more pictures of the opposite side of the kitchen:


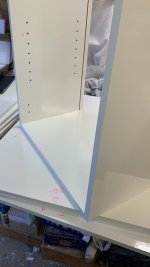
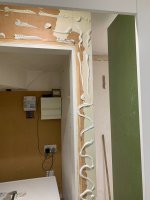
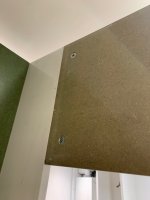
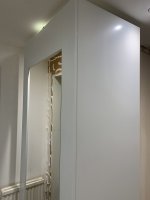
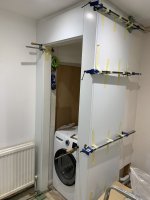
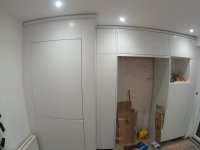
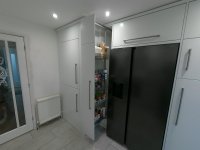
A corner understair cupboard which my daughter wanted to blend in with the kitchen, it has white solvent free gripfix applied to the walls which then had panels applied. Both the walls and back of the panels had wood pva applied to assist with adhesion.
IMG_4892.jpg

I used can dowels to attach the panels together as a framework before I moved it all in one to stick to the walls.
IMG_4891.jpg


You can see the panels are assembled and free standing with cam dowels ready to be stuck to the walls.
IMG_4896.jpg

I used lightweight cramps to hold everthing in place while the adhesive set. In the past I have had the odd cramp become loose overnight so used masking tape to ensure the cramps could not fall and damage the panels, just a safety net.
IMG_4897.JPG


The cupboard blended in quite well in the end.
09140008.JPG

I'll do a few final pictures with the handles on etc after I have finished laying the tile floor.

Thank you to everyone for all the constructive comments/advice.
 
It's bound to happen Andy so I'd start accepting the inevitable. I have 2 kids and have fitted 3 kitchens for them, so far but I'd doubt that's the last.
On reflection I’d happily invest in all the Blum kit if meant they would leave home. :)So far all I have ever had to do is loose fit a few IKEA cupboards and a short worktop in a rented flat.
 
^^ Indeed Lons. Never ends. I've just replaced two ovens for my son and re-trimmed around them. Currently waiting for parts to arrive for a leaky outside tap of a type I have never encountered before. Uses a cartridge system that pushes in from the back of the tap. To do that you need a special tool to get the tap off the wall. That job was sprung on me. In the meantime working my way around replacing light fittings in the 4m high ceilings. Precarious.
 
Back
Top