• Hi all and welcome to TheWoodHaven2 brought into the 21st Century, kicking and screaming! We all have Alasdair to thank for the vast bulk of the heavy lifting to get us here, no more so than me because he's taken away a huge burden of responsibility from my shoulders and brought us to this new shiny home, with all your previous content (hopefully) still intact! Please peruse and feed back. There is still plenty to do, like changing the colour scheme, adding the banner graphic, tweaking the odd setting here and there so I have added a new thread in the 'Technical Issues, Bugs and Feature Requests' forum for you to add any issues you find, any missing settings or just anything you'd like to see added/removed from the feature set that Xenforo offers. We will get to everything over the coming weeks so please be patient, but add anything at all to the thread I mention above and we promise to get to them over the next few days/weeks/months. In the meantime, please enjoy!

Do you use a sticking board for drawer bottoms?

SteveMP

New Shoots
Joined
Jun 18, 2026
Messages
121
Reaction score
171
Name
Steve
LOCATION
San Diego
I need to make a sticking board for ploughing these drawer grooves. I have my eye on making Derek Cohen’s version but thats a project in itself. Looking to see what others use that can be knocked up fairly quick
 
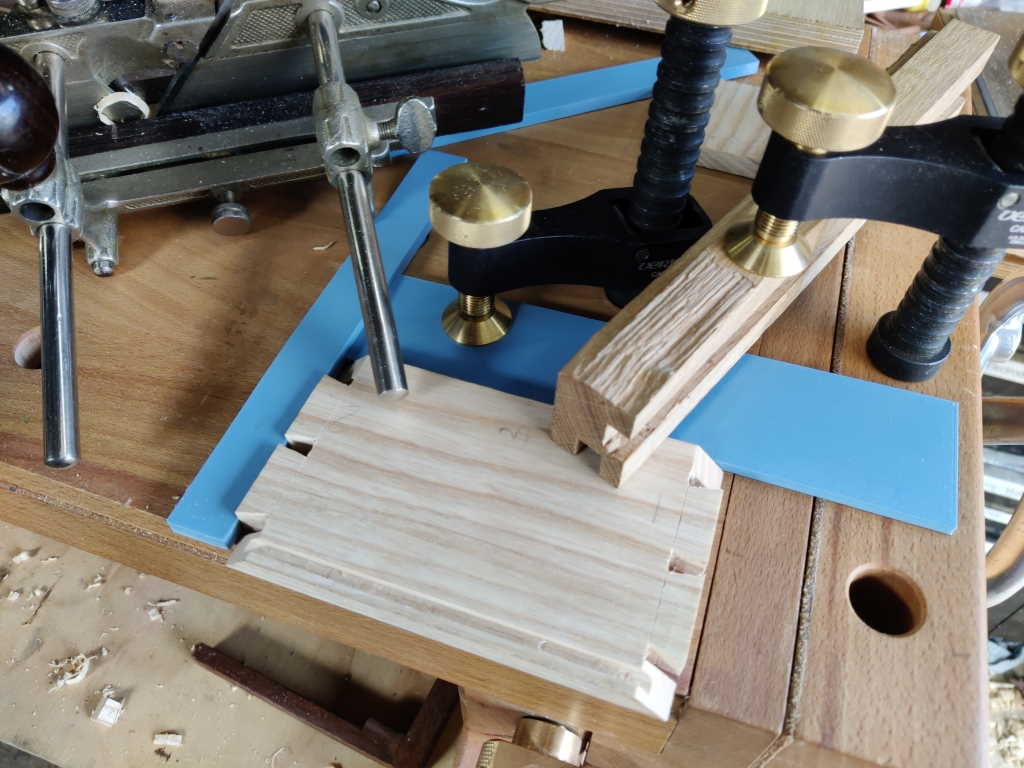
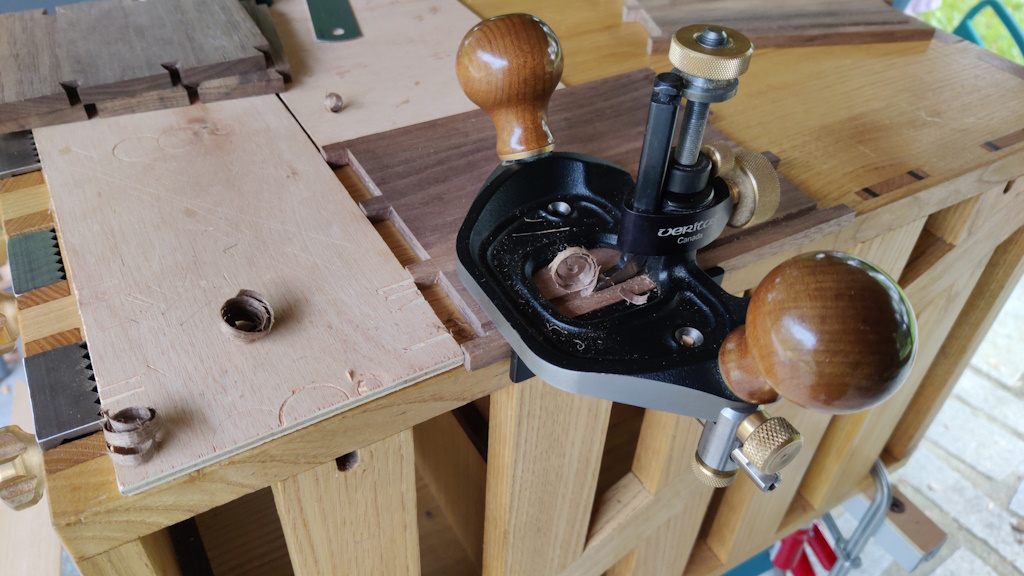
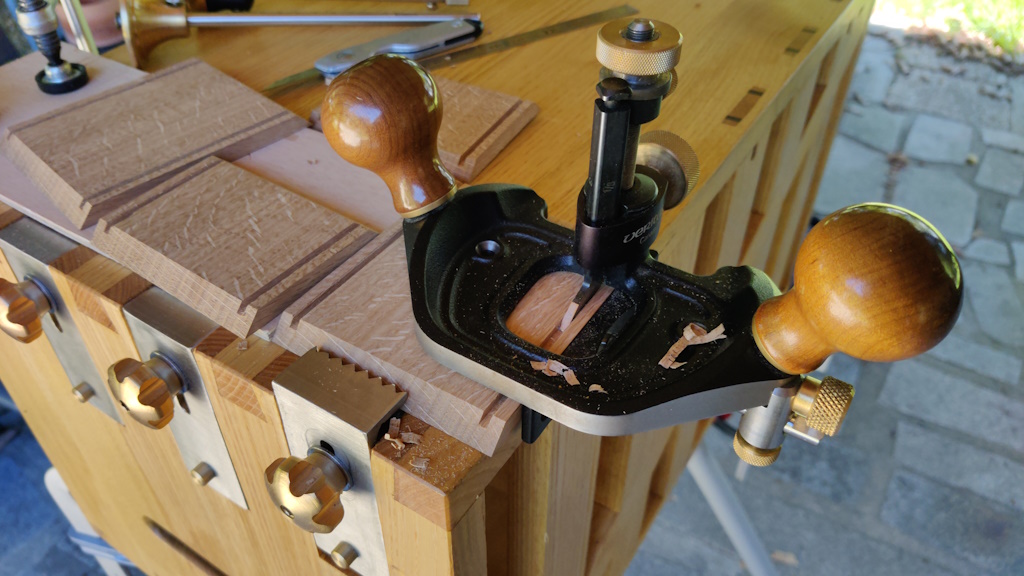
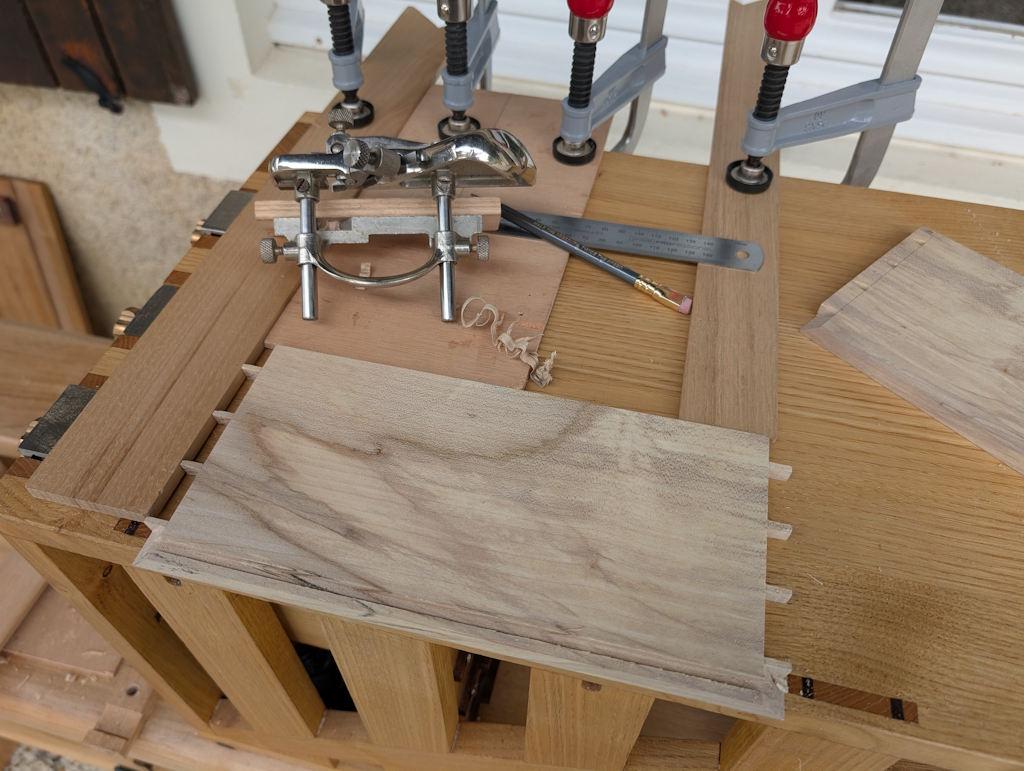
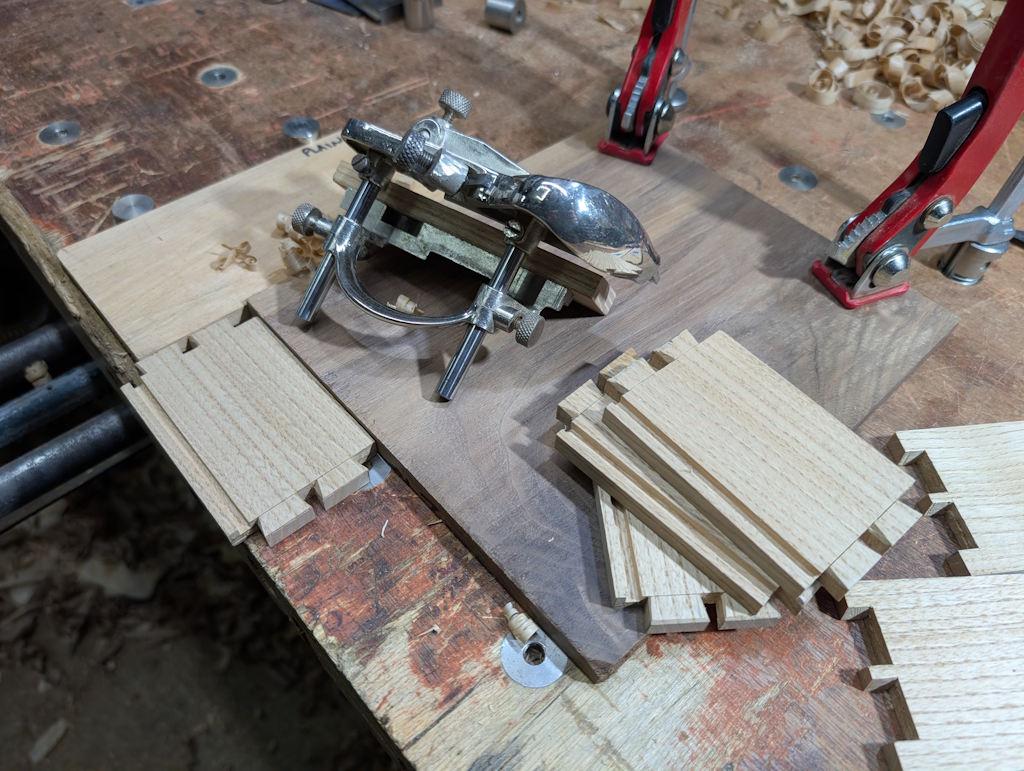
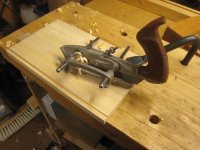
I tend to just clamp off-cuts or bits of plywood to the bench and use those. A few photos I found on a quick search (most from when I've used my travel toolchest but a few from the other benches):

37_ploughing_4mm_grooves.jpg


The next two were from before I'd found a place for the plough plane in the toolchest so I used the router plane instead:

2024-09-16-20-ploughing.jpg


2024-09-14-11-ploughing-grooves-2.jpg


Back to the plough plane:

2025-09-13-06-ploughing-grooves.jpg


2025-13-12-07-ploughing-easy-grooves.jpg


This one was a bit complicated because of the angled ends:

2025-09-18-15-first-groove-ploughed.jpg
 
I'd advise against making a sticking board for drawer bottoms. A sticking board is for holding long thin mouldings, not wider boards.

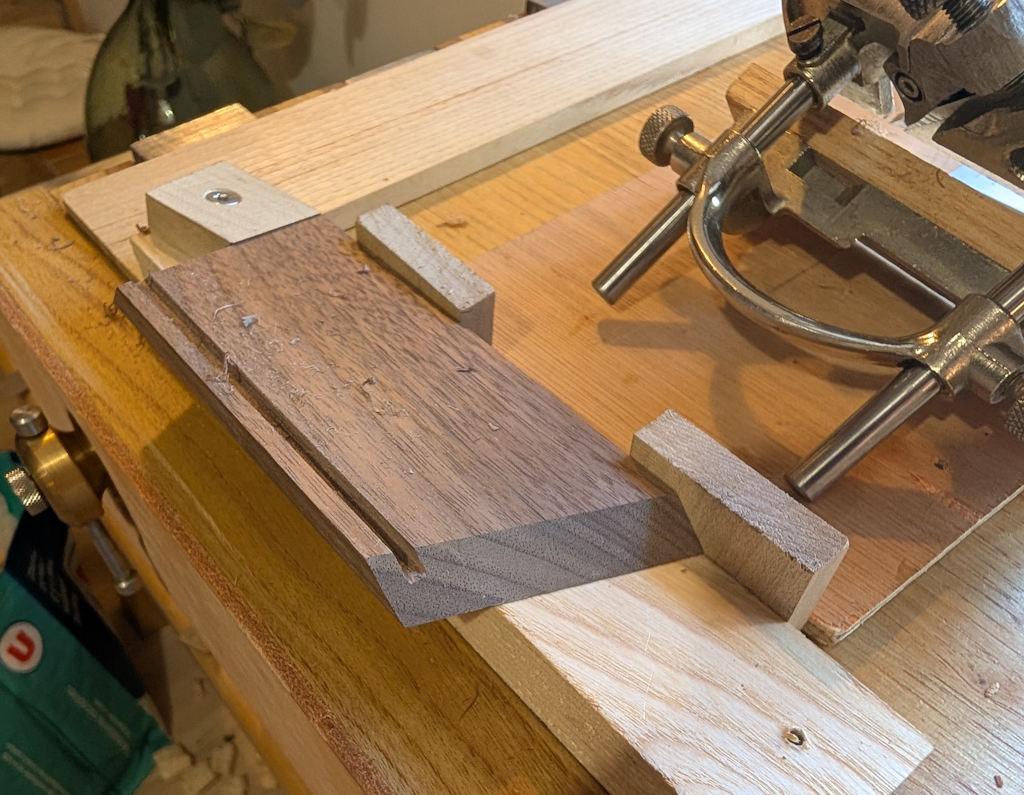
I've found that I like the flexibility of an assortment of scraps and offcuts of various sizes for the sort of job you have in mind. Here are some examples. They turn out to be from box making, as I seem to only have photos of drawers with slips to hold the bottoms.

Here I was grooving a thin strip of pale mahogany-type wood to make a box.
A piece of thinner plywood, which just happened to have a notch cut at one end, is up against a bench stop, held down by a couple of holdfasts. The workpiece rests on the bench, with its near edge just off the edge of it. It's held down and in by the plough plane and its fence. I grooved it in one piece before cutting it into four pieces.

img_6450.jpgimg_6454.jpgimg_6455.jpg

Here I was making some bigger boxes and had the sides all cut to length first so had to groove them one by one. Again, there's a bench stop and a holdfast and the work is just off the edge of the bench. This time it's wide enough for there to be room between the holdfast and the plough without needing an intermediate bit of thin ply.

IMG_5666.JPG

If you don't yet have a bench stop or holdfasts, you could plough your drawer sides by putting two or three strategically placed screws (or nails) into your bench, in equivalent positions, ahead of the work and off to the far side, so it won't slide. Screws can be much easier to avoid than bulky clamps are and can be positioned exactly where they are needed.
 
I'd advise against making a sticking board for drawer bottoms. A sticking board is for holding long thin mouldings, not wider boards.

I've found that I like the flexibility of an assortment of scraps and offcuts of various sizes for the sort of job you have in mind. Here are some examples. They turn out to be from box making, as I seem to only have photos of drawers with slips to hold the bottoms.

Here I was grooving a thin strip of pale mahogany-type wood to make a box.
A piece of thinner plywood, which just happened to have a notch cut at one end, is up against a bench stop, held down by a couple of holdfasts. The workpiece rests on the bench, with its near edge just off the edge of it. It's held down and in by the plough plane and its fence. I grooved it in one piece before cutting it into four pieces.

View attachment 57040View attachment 57041View attachment 57042

Here I was making some bigger boxes and had the sides all cut to length first so had to groove them one by one. Again, there's a bench stop and a holdfast and the work is just off the edge of the bench. This time it's wide enough for there to be room between the holdfast and the plough without needing an intermediate bit of thin ply.

View attachment 57043

If you don't yet have a bench stop or holdfasts, you could plough your drawer sides by putting two or three strategically placed screws (or nails) into your bench, in equivalent positions, ahead of the work and off to the far side, so it won't slide. Screws can be much easier to avoid than bulky clamps are and can be positioned exactly where they are needed.
Yeah i think i may need to drill more holes for holdfasts.. I don’t have a way to clamp these narrow drawer sides down without my clamps getting in the way.
 
..... I don’t have a way to clamp these narrow drawer sides down....

Each to their own, but I look to avoid clamping down if I can help it. Stops and a doe's foot is plenty enough for me. If you clamp down, you still need the same stops, but you add in the schlep of undoing and then re-doing the clamping to do the next piece.

Edit:
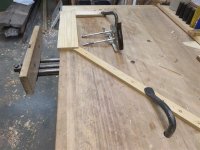
I couldn't find any suitable photos, so I went out and set this up quickly:

IMG_0449.jpg

IMG_0450.jpg
 
Last edited:
Each to their own, but I look to avoid clamping down if I can help it. Stops and a doe's foot is plenty enough for me. If you clamp down, you still need the same stops, but you add in the schlep of undoing and then re-doing the clamping to do the next piece.
I was watching this video yesterday and I think I am going to make up one of his t-square stops, looks really handy and i think it would help her ein conjunction with a doe's foot.

 
I was watching this video yesterday and I think I am going to make up one of his t-square stops, looks really handy and i think it would help her ein conjunction with a doe's foot.

I've edited to add a couple of photos. Again, do whatever works for you. Every bench needs a planing end stop of some description, but his way wouldn't be my favourite.
 
'T' stops work very well but they can be used in conjunction with the square dogs on a traditional European cabinet maker's bench with a rear 'L' shaped end vice. In fact if you have a bench with aforementioned square dogs you don't actually need a 'T' stop but it's a handy thing to have just in case - Rob
 
I have never used a doe’s foot. I have seen plenty of others use it. I should give it a try.
I have a large tail vice in my bench so a planing stop is just a piece of wood clamped in the tail vice.
 
Back
Top