Thank you, Duke. No old school. Hot iron and hide glue.Very nice veneering Roger and with a finish it will look fantastic!
Did use a vacuum bag system ?

Thank you, Duke. No old school. Hot iron and hide glue.Very nice veneering Roger and with a finish it will look fantastic!
Did use a vacuum bag system ?
LOL....too late...they're fixed. I agree it's going to be tricky getting under the handles and which is why I'm toying with the idea of good old Microcrystalline wax.If you are going to be using a finishing resin, Roger, then I'd do it, and sand it, before fixing the handles in place.

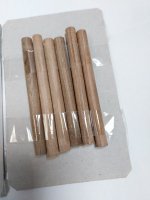
Nominal 8mm (+/- 5mm )Postie finally deigned to deliver today the package that Lons sent me.
8mm walnut - handles for the fixing of.
View attachment 31315
You're a star, Sir!


 www.toolsandtimber.co.uk

I use them for 19mm maple dowels for the shafts of my marking gauges, very good quality.Anyone wanting dowels in all sorts of timber and of varying sizes can find them here
Wooden Dowels | Hardwood Dowels & Timber Dowel Rods
Find great deals on wooden dowels with G&S Specialist Timber. We offer free delivery on UK orders over £45 as well as high levels of customer satisfaction.


 . Actually it was good to have them slightly oversize as it let me stick them in the drill chuck and gracefully sand them to a tight fit. Glued them all in place. I did intend to finesse them into the holes using a clamp but it was too tight and to a Mark 1 hammer was used.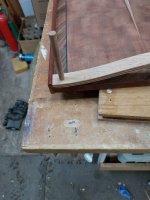
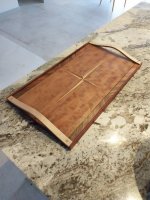
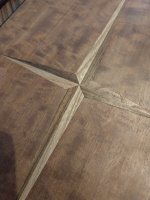

We have a set of walnut coffee tables in the lounge that were started in 1983 and finally finished at the millenium so 17 years - RobNo need to rush these things Roger, well worth the wait.
So adjusted Bob's dowels to the correct diameter
A one off, not another tray like it in the world!So I think I will put it on Etsy and donate the proceeds to charity
That's a great opening line for the ad !A one off, not another tray like it in the world!