• Hi all and welcome to TheWoodHaven2 brought into the 21st Century, kicking and screaming! We all have Alasdair to thank for the vast bulk of the heavy lifting to get us here, no more so than me because he's taken away a huge burden of responsibility from my shoulders and brought us to this new shiny home, with all your previous content (hopefully) still intact! Please peruse and feed back. There is still plenty to do, like changing the colour scheme, adding the banner graphic, tweaking the odd setting here and there so I have added a new thread in the 'Technical Issues, Bugs and Feature Requests' forum for you to add any issues you find, any missing settings or just anything you'd like to see added/removed from the feature set that Xenforo offers. We will get to everything over the coming weeks so please be patient, but add anything at all to the thread I mention above and we promise to get to them over the next few days/weeks/months. In the meantime, please enjoy!

Learning to use a Myford 7 lathe

Chris152

Sapling
Joined
May 2, 2021
Messages
452
Reaction score
64
I've been umming and ahhing about this for a couple of years, and finally went ahead and bought one. I was looking for a Super 7 but an ML7-R with clutch came up, and it turned out that the fella selling it was a former colleague who'd worked in the engineering department where I started working (not in the engineering dept) about 30 years ago, quite a coincidence. It'd had one previous owner who was also in that department, something about the coincidence made me feel comfortable with the purchase.

We're delighted with the lathe - I bought it for my lad to learn on, but since we picked it up I've become pretty well obsessed with trying to clean and figure things out myself, so it's become a joint project. He's looking to make a career of classic car restoration/ rebuilding/ whatever and I'm doing what I can to help him.

Soooo, a question - is anyone on here particularly familiar with Myford 7s? I'm not sure just what questions we might want to ask, but they'll range from 'what's this tool for?" to 'How do we set up an Electronic Lead Screw for the lathe?' and lots in between. I guess much of what we need to learn is about working with metal and metal lathes in general.

We've got the original Myford instruction booklet, Ian Bradley's Myford Series 7 Manual, and I'm looking to get a few from the Workshop Practice Series. Doubleboost and Bloondiehacks have been great for getting us going on the really basic things - so far, we've managed to face and turn a random piece of steel and a piece of brass, and that's it! Yesterday I went to our local metal supplier and bought 1' x 3/4" lengths of mild steel (2 types), aluminium, brass and 1' x 1/2" length of tool steel - today will see us trying each out to see how they feel/ look.

Anyway, I'm blathering on now, I just wanted to say we have a lathe and, if people have the inclination, would like to ask for advice as and when on the forum. All the silly mistakes are and will be ours, but I wanted to thank Trevanion for all his help and patience in our decision making process - I'm not sure we came up with what he would have come up with, but his help made a huge difference. Thanks Dan!
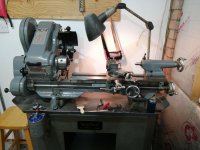
IMG_20230317_082930.jpg


Cheers, C
 
If, like me, you like old fashioned reading matter, then I wholeheartedly recommend buying a couple of books:


The second one is generally well thought of and very Myford focused. The first one is by far the best model engineering book (as long as you're not into milling machines!) I've read and I learnt far more from this than any of the myriad other books I've got. I found the Amateur's Lathe less helpful partly because at the time I had a small Chinese lathe and it was much less capable than the Myford that was assumed for that book. In your case it's probably more valuable than it was to me. I think I've got two copies of the Amateur's Lathe as I bought a paperback and then found a hardback in a charity shop and couldn't resist. You're welcome to the paperback if you want it (but I'd still recommend getting Peter Wright's book).

I've never used a Myford, so I can't offer much help / guidance with the Myford-specific stuff, but I've done a lot of lathery with both a small lathe (Sieg SC2 - photos on my website here) and a bigger one (Harrison M250 - photos on my website here).

Harold Hall's website and books are very good, although the website isn't the easiest to navigate / read (although it's easier on the eyes than Gadget Builder's website, which is also good if you can cope with the colour scheme). In particular, Harold Hall's Lathework: A Complete Course is (while definitely not a "complete course" :) ) very good indeed.

Feel free to shout (either here or by PM) if you've got any specific questions and I'll try my best to help.
 
I have had an ML7R from new in 1979. Ive added a clutch, gearbox 3phase motor and VFD since then.

Id be more than happy to help. I also endorse LH Sparey’s the amateurs lathe as an excellent primer for lathe work.
Follow the manual and make sure the spindle bearings are correctly adjusted. Keep it oiled. No need for the expensive myford oil. Any 32 grade hydraulic oil will be fine as used in trolley jacks etc.

Bob
 
3 votes for that book, it's oft considered the bible in some circles and my copy is well thumbed.
 
Thanks all - that's great.

I've just ordered the Sparey, Hall and Bright and will start making my way through Hall's website this evening, Dr Al. I'd already found your site, and will continue to refer to it as we go. And thanks for the offer of a copy of Sparey - as I was buying the others I decided to just go ahead and click 'buy' on that one, too, delivery included and it means we can start reading tomorrow! I really appreciate the kind offer.

I've not checked the spindle bearings adjustment, 9fingers, that'll be another to look into this evening. Oiling's been a bit of a palaver - the push/ telescopic gun that came with the lathe is the original and leaks dreadfully - oil everywhere and I'm not sure any went into the nipples. I since bought a different gun that's supposed to work with oil as well as grease, that went back in the post today following more leakages! The Wanner one that Myford sell sounds good, but at £80 for such a simple thing it should be. I may have to bite the bullet. The countershaft oil cups just need a regular oil can, so I think we're fine there. In both cases tho, I don't really know if the oil is getting where it needs to be.

I've no doubt if your copy's well-thumbed Dave, ours will be too; and thanks Ian, no doubt I shall be perusing that site among others as we go.

We didn't get around to starting on our metal supplies earlier, I'll post our efforts as we go in the hope people might see them and offer advice accordingly!

Thanks again all, Chris
 
Any lathe is better than no lathe, and that looks like a nice example of a ML7-R. As you say, I personally would've gone for something heavier like a Colchester Chipmaster but there's nothing wrong with the Myford at all.

You'll find quite a difference between metals and even the grades of the metal itself, each requiring a different cutting geometry to the tool, feed rate, and spindle speed to achieve an optimal cut and finish. I have some unknown aluminium which is an absolute pig to turn as it's stringy and sticks to the cutting edge which then marrs the surface being turned as it gouges as it goes, and then I have some 2011-T6 aluminium which by comparison is a dream to turn with the exact same tools as it just creates little chips that fall right off the tool and you get a brilliant surface finish with just a rudimentary HSS tool.

Rorschach over on UKW used a Super 7 professionally daily from what I remember him saying, but I don't think he's around to ask any questions anymore as I believe he was banned? I'm not sure.
 
Another good option is the mig-welding.co.uk forum. While the name makes it sound like it's MIG welding biased, there's probably more machining on there than there is welding. Very knowledgeable bunch.
 
We've looked at the MIG forum before, the lad's doing a welding course and the site's been useful but I'd not noticed machining (I wasn't looking for it) - we'll revisit that Dr Al.

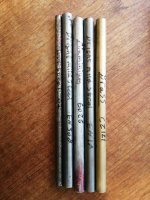
We had a go at one of the mild steel samples yesterday, the fella at the supplier kindly wrote the metal grades on each for us so we could compare
IMG_20230316_154002.jpg
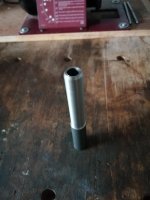
- this was with EN1A:
IMG_20230319_062842.jpg
Once we'd faced it, we used the centre drill and tailstock to support the piece, then drilled the hole and put on the chamfer. You wouldn't imagine the excitement and how proud we are! Every step of the way is new to us... The steel cut well I think, Dan, we'll try the other mild steel bar next. We need to test the bed is completely true, so may use that bar to do it (it's been mounted on the stand using a machinist's level, but I understand that's just approximate compared to doing a test bar).

A few questions:

1. Is a Sorby Proedge any good for making and sharpening cutting tools for the lathe? I made the right hand knife tool of HSS that we used yesterday but that's a relatively simple shape, I'm thinking that a bench grinder with decent wheels and guide might be what's needed?

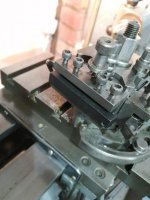
2. We wanted to try some of the carbide tip tools (the screw on sort) yesterday but the 10mm tools wouldn't quite adjust to centre height, so we had to try to mill a bit off the bottom of the tool. We don't have a vise to put on the vertical slide that came with the lathe yet, so we mounted the tool to be ground on the tool holder with an allen key to hold it forward for milling.
IMG_20230316_092642.jpg
The first tool milled fine (I'd bought a really cheap set of milling bits online to have a go) but something moved on the second tool, I'm not sure what happened but knew that the milling cutter mounted into a regular 3 point chuck wasn't the best - so I think we'd do well to get hold of a collet holder and some collets for this kind of work. The original Myford holder looks great, but that seems dedicated to the myford collets which are now extraordinarily expensive. So I was thinking to get one of these from Chronos:
https://www.chronos.ltd.uk/product/shob ... it-myford/
and a set of collets that work with that chuck instead.
The question is, does that look like the tool for the job of holding the milling bit for milling on our lathe?
I'm aware that any points of flex/ movement are the enemy of accurate milling/ turning, and there's definitely a tiny bit of for/ aft play in the cross slide which we need to address, but it felt like something moved yesterday on the second cut and the chuck/ bit seem most likely to me. Which means very little!

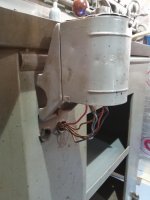
3. The wiring on the lathe is original from what I can see, and it feels kind of brittle. There's no emergency shut off switch. How hard is it for a complete novice to rewire the Dewhurst switch and install a new emergency switch?
IMG_20230319_080459.jpg
I'd be happy to pay someone to do the job for us if it's at all complex, and reading around online I see people getting into a pickle over forward and reverse wiring!

4. Finally for today - you said about checking adjustment of spindle bearings, 9fingers - I've read and re-read the manual, searched online and still don't feel 100% confident about making the adjustment - but feel I must as I think rotating the spindle by hand is perhaps tighter than it should be and we don't want the bearings wearing unnecessarily. The handbook left me uncertain so I've been reading around the web. I think I have most of the process clear, but have one question - in the following account of 'how to', I'm unclear on point 13 - assuming you recognise what's written as accurate, in what direction are we hitting the C wrench? And why is there no mention of this hit with a hammer in the official handbook?!
Here's the process described (on model engineer forums) - does it look right to you?:

"1. Power Down

2. Remove all belt tension.

3. Remove Chuck

4. Rotate RH collar one complete turn. (top towards you).

5. Rotate LH collar one complete turn. (top towards you).

Spindle should be completely free of front bush.

6.Loosen allen screw on collar at end of spindle.

7. Using the Allen key tighten collar as tight at it will go by hand.

Inner tapered roller races are now locked together with correct pre-load.

8. Back off LH collar one complete turn + a bit (top away from you)

9. Rocking the spindle by holding the spindle nose tighten the RH collar by hand (top away from you).

10. When you feel resistance to movement stop.

11. Collar should be just tight enough that spindle can just be moved by hand holding the nose.

12. Do up the LH collar by hand (top towards you).

You should still feel resistance when turning the spindle by the nose.

13. With the crescent wrench on the LH collar tap the end smartly with a 12oz hammer.

The spindle should move forwards by a couple of tenths and be completely free running.

14. With the lathe running slowly (lowest direct speed) put the oil gun in the front oil cup and pump until oil issues from the front bearing."

The Myford handbook speaks of moving the locking rings forward (to loosen the spindle cone) through a 1/4" rotation (15 degrees), but doesn't mention hitting anything. Assuming the instruction is none the less correct, in what direction should we be tapping the C wrench?
I've searched high and low, and only found one video where someone's actually trying to adjust the spindle bearings, and I'm not sure what he says matches exactly what the handbook says, either: https://www.youtube.com/watch?v=9ueZlxlfFqk
Edit to add: do you think the hit with the 12 oz hammer is supposed to be the same thing as the 15 degree rotation described in the Myford handbook? Maybe that's the answer to my question!?

Sorry to bombard you all with so many questions, I've tried to be as succinct as possible but not sure I've achieved on clarity! Forgive me if not, this is all very new. Hopefully questions will become less vague and more focused as we progress!

Thanks for any thoughts on any of the above, Chris
 
Chris152":fetukn41 said:
1. Is a Sorby Proedge any good for making and sharpening cutting tools for the lathe? I made the right hand knife tool of HSS that we used yesterday but that's a relatively simple shape, I'm thinking that a bench grinder with decent wheels and guide might be what's needed?

Anything that grinds will shape cutting tools, but I imagine (I don't know for certain) a Sorby Proedge is intended to help keep things relatively cool when grinding carbon steel. When there's a lot of material to shift (which is sometimes the case when grinding, e.g. boring bars), a bench grinder is great as it shifts material very quickly. HSS can take a lot of punishment without losing its temper so you can get quite aggressive with a bench grinder, just dipping the tool in water every now and again.

Bench grinders are cheap second hand, so its worth looking around and being patient for a good deal to come up. Look at a few photos online of bench grinders: you'll see they tend to cluster into two different body diameters. Although it's not guaranteed, the ones with the wider bodies tend to me much better (more powerful motor). I've got four bench grinders I think now: one that I bought from Machine Mart early in my metalworking days, then a Parkside one that I thought might be useful so I could have different wheels on it (it was rubbish and I think it's in bits in the shed now), a very good Wickes one I bought on ebay for 99p and a very good old one that I later inherited from my father-in-law. I definitely don't need four (or even the three that are actually any good), but it's definitely worth getting a decent one.

Chris152":fetukn41 said:
2. We wanted to try some of the carbide tip tools (the screw on sort) yesterday but the 10mm tools wouldn't quite adjust to centre height, so we had to try to mill a bit off the bottom of the tool. We don't have a vise to put on the vertical slide that came with the lathe yet, so we mounted the tool to be ground on the tool holder with an allen key to hold it forward for milling.
View attachment 1
The first tool milled fine (I'd bought a really cheap set of milling bits online to have a go) but something moved on the second tool, I'm not sure what happened but knew that the milling cutter mounted into a regular 3 point chuck wasn't the best - so I think we'd do well to get hold of a collet holder and some collets for this kind of work. The original Myford holder looks great, but that seems dedicated to the myford collets which are now extraordinarily expensive. So I was thinking to get one of these from Chronos:
https://www.chronos.ltd.uk/product/shob ... it-myford/
and a set of collets that work with that chuck instead.
The question is, does that look like the tool for the job of holding the milling bit for milling on our lathe?
I'm aware that any points of flex/ movement are the enemy of accurate milling/ turning, and there's definitely a tiny bit of for/ aft play in the cross slide which we need to address, but it felt like something moved yesterday on the second cut and the chuck/ bit seem most likely to me. Which means very little!

As you say, anything moving in a milling operation (apart from the stuff you want to move :) ) is a bad thing. 3-jaw chucks aren't great for holding hard tools (drill bits often have soft shanks to allow them to be better gripped by hard jaws, but end mills are usually hard through). Getting the play out of your slides is pretty essential too.

I hated milling in the lathe and was very pleased to get a baby milling machine so that I didn't have to do it any more. Having said that, my lathe at the time was smaller than yours and the Myfords are supposed to be okay at it.

ER collets are a very good option for holding tools as well as for some turning tasks (holding stuff concentric after you've done a first operation or holding stuff without risking marring the surface from the chuck jaws). When I had my mini-lathe I used an ER32 collet chuck for lots of things. I use ER40 collets on the mill and have an ER40 collet chuck for the lathe as well, but I still use ER32 quite a bit. ER25 is slightly more restrictive in size for the workholding tasks (only up to about 16 mm vs 20 mm for ER32 and 26 mm for ER40, although there are some oversize collets for some of those ranges so you can possibly go a bit bigger - I've got 30 mm ER40 collets).

However, if ER25 is easy to get something that fits your lathe then it's probably a great idea. Also cheaper to buy the collets as there are fewer of them than the ER32 set :lol:
 
Thanks Dr Al, I'll keep an eye out for a decent grinder and give it a go - looking at the way some of the old tools that came with the lathe are ground, I stand no chance of replicating the shapes (assuming I ever need to) on the proedge. And I think it has to be worth going down the alternative collet route, the lathe's definitely a keeper as far as we're concerned and any investment now will be worth it in the future.

We went out today but on my return, it was straight to the lathe to try to crack the spindle adjustment. It wasn't a total success! First, I thought I'd loosened the inner locking ring as it suddenly 'went', but after a few more goes to get it going a full rotation, I realised it was just shuffling as the C wrench wasn't engaging fully with the castellated ring - so now I'd no idea how far I'd rotated that ring. Off to the grinder to narrow the C wrench, then back to do more rotating on the inner ring before having a go at the outer one (on the left). All a bit vague, but time to move on to loosening the screw on the adjusting collar - fine, but then the collar wouldn't shift til I put a screwdriver in the split that the screw closes and hit it with a hammer a few times. Finally that moved properly, but when I tried to tighten it up to remove the slack I must've created between the spindle cone and the bearing, it didn't seem to rotate any further than it had been before. Anyway, I decided to keep going as per the instructions, and ended up with a spindle that turns more freely - tho I've no idea if that means it's adjusted properly.

With a chuck back on the spindle, there's no movement up and down/ side to side that I can feel, but there is a slight rotational play - turn the chuck clockwise, tiny bit of backlash; anti-clockwise, the same thing. I don't know if it was like that before my 'adjustments'. :-) Very slight, but is that an issue? Under load I'm assuming it's not, but is it a sign something else needs adjusting properly?

Thanks for any thoughts.
 
Since having a belt grinder I don’t use my bench grinder very much but it does come in handy for some jobs. Get a 60g ceramic belt for the Pro Edge and it’ll do nicely. Also, have a look at one of these.

https://www.eccentricengineering.com.au ... ool-holder

You can use square and round HSS in them and I’ve even loaded old broken carbide milling cutters (suitably ground) into mine to take the hard skin off cast iron.
 
Thanks Woodster - I have a 60 grit for the proedge and it's ok for now, once I struggle with shapes I'll take the plunge on a grinder. I'd seen those tangential holders and wondered about trying it, tho they're quite expensive - I see some make their own, but they have the skills to do so!

Since making my adjustments on the spindle bearings, we have 0.02 - 0.03mm of runout on the threaded end of the spindle, and if I place a length of wood under the threaded end I can lift the spindle (with a fair bit of effort) about .04 mm. Is that a sign that the spindle adjustment wasn't successful? We also have a tiny bit of rotational backlash with the chuck, as noted before.
 
Chris152":2jde9au5 said:
I'd seen those tangential holders and wondered about trying it, tho they're quite expensive - I see some make their own, but they have the skills to do so!

I made my own. It wasn't that hard with access to a milling machine, but I'm not sure I'd want to do it with just a lathe.
 
You might be able to improve on the bearing adjustment but I'd leave for now and get some experience with basic operations with hss tools a) to learn about grinding the tools and relief angles, top rake, getting tools on centre height etc and b) technique of speeds, feeds and surface finish.
Hss is much more forgiving whilst learning then maybe trying tipped tools where one c0ck up can break an expensive tip.
When reading sparey ignore bits on spring or swan neck tools. These really belong to the earlier era of carbon steel tools and dont apply to hss or carbide.

Have fun
Bob
 
Chris152":2zc99jvp said:
I'd seen those tangential holders and wondered about trying it, tho they're quite expensive - I see some make their own, but they have the skills to do so!

They are cheap to use though, just small bits of HSS. They are the easiest tool to grind and it has built in height adjustment so need need for expensive tool holders or messing about with shims. ;) I’ve made a few of my own but admittedly I’ve got a mill.
 
Speaking of tool holders and small lathes, I can wholeheartedly recommend Harold Hall's tool post and holders. Most of the instructions assume the availability of a milling machine (I made mine using a milling machine - if you look on the linked page you'll see one of my tangential tool holders), but he does discuss (both on the first page and on a dedicated later page) how to make the post and holders in a lathe-only workshop.

I'd really recommend it as a great project to use as a learning exercise if nothing else, but you'll also end up with a really useful quick-change tool post in the process.
 
Thanks fellas, really helpful. Glad to read your advice, 9fingers - I was starting to feel like we couldn't proceed til I knew where we stood and really want to get on with playing! Spring and swan neck tools shall be ignored :-) Very quick question on the motor - the drive shaft has in/ out play - is that normal for a motor, or should we adjust it? It runs nicely, but I noticed this and thought I should ask.

Dr Al and Woodster, I'll take another look at the how-tos and see if the tangential holder is beyond us. We picked up one of the fixed (as opposed to rotating) vertical slides and vises today so maybe we could give it a go. They certainly look to remove some of the complexity of grinding tools, if I'm understanding them correctly.

Milling machines, eh? The lad's on about them and how much more we'd be able to do... :eusa-think:

Oh, and Dr Al, when we collected the vertical milling attachment, the chap had a Soba collet holder and a 15 piece collet set that he was thinking to sell, we paid £45 for the lot which we're really pleased with - fits perfectly, next time milling goes wrong I can blame something else. :-)
 
I reckon I spend more time on my mill than the lathe. Milling stuff on a lathe is very limiting.

Tangential tool holders are easy to make once you realise the bit is inclined 12° to the left and 12° forward.
Do a Google to see what I mean. You then need to make a simple grinding jig for the tool bit.
 
Chris152":171ljenm said:
Very quick question on the motor - the drive shaft has in/ out play - is that normal for a motor, or should we adjust it? It runs nicely, but I noticed this and thought I should ask.

There should not be much end to end play but what end clearance there is is normally taken up by belleville
washers but the bearings should be tight in the bore. so it seems to me the outer races are loose in the bell ends. If they turn the housings will fret and become oversize and wreck the motor.
Sooner rather than later when perhaps you cant do any turning, set aside a few hours to strip the motor and see why/if the bearings are slipping in the bell ends.
Use something like Loctite 641 to hold the bearings and yet still allow disassembly if needed later on.

Bob
 
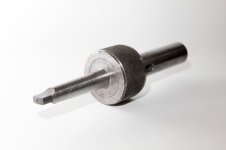
Any ideas what this might be? Each end is MT2, male near camera, female the other end; it unscrews to reveal two lines of ball bearings each side of a plate, and there's a grub screw which I suppose stops the ends rotating in relation to each other; and it's marked A.H. Ltd - would that be Alfred Herbert? It's 8" long.

_MG_1002.jpg
 
Bit of a mystery to me. Could be some sort of finger torque control for light drilling/ tapping.
Use from tail stock for support and alignment and drill or tap fitted in the other end.
hand grip the knurled part to hold the drill/tap fixed or release to allow it to rotat in the event of a jam?

All guess work on my part
Bob
 
As it’s a Morse taper two I suspect it’s been made with the ML7 specifically in mind? I say this as all the lathes at work didn’t have a Morse Taper smaller than a three, even in the tail stock.
 
We're looking to do some tap and die work, and I've seen an HSS set at Warco that looks ok. The thing is, I can't find a set of drills to work with/ the right sizes for the taps - I've searched 'tap drill bit' and various other ways of saying it, but nothing seems to come up except in larger sets, some of which include drills, taps and dies. Can anyone point us to a source of reasonably priced drills for this purpose?
Thanks
 
Chris152":qi11poqq said:
We're looking to do some tap and die work, and I've seen an HSS set at Warco that looks ok. The thing is, I can't find a set of drills to work with/ the right sizes for the taps - I've searched 'tap drill bit' and various other ways of saying it, but nothing seems to come up except in larger sets, some of which include drills, taps and dies. Can anyone point us to a source of reasonably priced drills for this purpose?
Thanks
Consider if you really need a full set of sizes and whether a set gets you the best quality?
Buy drills separately and go for stub drills. Correct diameter for metric threads is diameter minus pitch

Eg m6x 1.0 use 5mm tapping drill
Bob
 
Chris152":3142r01f said:
We're looking to do some tap and die work, and I've seen an HSS set at Warco that looks ok. The thing is, I can't find a set of drills to work with/ the right sizes for the taps - I've searched 'tap drill bit' and various other ways of saying it, but nothing seems to come up except in larger sets, some of which include drills, taps and dies. Can anyone point us to a source of reasonably priced drills for this purpose?
Thanks

I've got an overkill set of drill bits (1-10 mm in 0.1mm increments), but for tapping I'd recommend just buying the sizes you need. I'd also recommend buying taps / dies as needed rather than getting a set: you won't use everything in a set & the quality is likely to be lower. You may also find you want different types of tap in due course & there won't be space in the set for extra ones (e.g. for M6, the thread I use most often, I have a taper tap, a second (aka plug) tap, a bottoming (aka plug) tap, a fluteless tap, a spiral flute tap, a spiral point tap, a long series tap & a set of serial taps!)

Tracy Tools is a good option for taps, dies & drill bits.
 
9fingers":hfv55vk0 said:
Correct diameter for metric threads is diameter minus pitch

Eg m6x 1.0 use 5mm tapping drill
Bob

Just as an aside, thanks for that useful comment Bob. It's obvious when you know it (the thread in cross-section is an equilateral triangle!) but I'd not made the mental jump from looking up sizes in a thread chart.
 
AndyT":2bpufqrv said:
9fingers":2bpufqrv said:
Correct diameter for metric threads is diameter minus pitch

Eg m6x 1.0 use 5mm tapping drill
Bob

Thanks Andy, its nice to pass on these little wrinkles once learned never forgotten.

Not just an equilateral triangle but a thread angle of 60 degrees that allows the rule to work.
Also works for Merkin threads (UNF, UNC & UNS) as they are all 60 degree too.
Should not be used however for British Whitworth form threads with 55 degree angles or British Association threads with 47.5 degree threads (even though the latter are Metric!).

Bob
 
As the others have said, just buy singles of the sizes you need. Like Dr.Al, M6 is also probably my most used tap and the tapping drill is a simple 5mm bit.

I'd just get a handful of 3.3mm (M4), 4.2mm (M5), 6.8mm (M8) and 10.2mm (M12) bits for now as they're the most commonly used sizes that require a drill bit that isn't in the usual 0.5mm increment drill sets. That said, I've used a 4mm bit for M5, a 6.5mm for M8, and a 10mm for M12 in the past with no noticeable issues, possibly over time it might wear the taps out quicker, especially in harder materials like stainless steel.
 
For anyone who really wants to go down the rabbit hole, the tapping drill size of OD minus pitch gives a 75% thread engagement between the two threaded parts. For most purposes that's perfect and will give a good strong joint, hence being the basis for the "standard" tap drill sizes.

However, for most practical purposes, any thread engagement over 60% (or possibly even 50%) is plenty, so in horrible materials like stainless steel, there's a definite benefit in using a bigger drill bit. It'll still hold perfectly well, but will be much easier to tap. Going to smaller drill bits is generally inadvisable as there's more chance of tap breakage but little strength benefit above 75% engagement.

Harold Hall has some useful notes on this topic on his website and I made a calculator on my website for working out tap drill sizes for different thread engagements. My website also has a fairly comprehensive table of threads with metric tap drill sizes at 75% engagement for all of them.
 
Thanks all, that's really helpful, especially the relationship between the tap and the drill size and suggested sizes to get. He's/ we're working on a couple different vehicles that could need a variety of thread types (one's a Bantam from 1953 and the other a midget from the mid-70s - neither seems to have any one type of thread) so just buying essential sizes makes financial sense, for sure.

How do I know which HSS taps/ dies are good? Is there specific content to the steel we should look for, or do we just reply on the name of the maker/ supplier? Tracy looks do-able, and a really wide range, tho deffo more expensive than the Warco set I'd been looking at... :-)
 
I don't think it's easy to say really. Most of my decent taps are tracy or europa brand I think (but that's from memory).

If you've only got one or two threads to cut in a relatively obscure size, consider the tracy carbon steel taps. They're very cheap (circa £2) and the thread form seems good (traditionally, carbon steel taps were turned whereas HSS ones were ground, so the thread form was much better on HSS). Carbon steel is plenty hard enough for tapping soft steel or aluminium (depending on heat treatment it can be harder than HSS, just not as temperature resilient, which isn't an issue for a tap). The main issue with decent carbon steel taps is that they can be a little more brittle so need care in use.

For common sizes like M6, it's probably worth investing in HSS for peace of mind & longevity.
 
Thanks Dr Al - I guess the best way forward is to get a few of each (carbon/ HSS) and try them out; as you say, the carbon ones are cheap enough. I'll order some up and we'll give them a go.

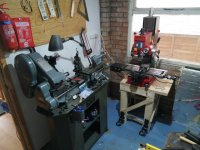
ps At the risk of side-tracking my own thread, the 'machine shop' is expanding! It'll allow us to learn another set of skills, and it's gentler on the toes than yours, Dan. I've been reading through your comments and mods on the machine, Dr Al, really useful.
IMG_20230411_090909.jpg
 
I think yours must be a very early ML7R Chris being in grey paint.
They started making them in 1977 I think and I bought mine new in 1979 and it was painted green.
Since then I added a clutch and a gear box so it has mutated into a ML7RB.

One of the most useful additions to your mill will be a digital readout. Make far less errors counting wheel turns especially on the X axis.

Bob
 
Is that a Sieg SX3 mill? It looks the same as mine. I agree with Bob: get yourself a DRO. It looks like it already has a powered X-axis feed and those two upgrades are probably the most useful things you can add to the SX3 in my opinion.

Does it still have the rather naff pin spanner thing for holding the spindle when fitting tools (this thing)? If so and you'd like a copy of the details of the improved spindle lock to Paula Stephens' design, let me know. It doesn't look like I've got proper CAD drawings of my version, but I've got all the drawings of Paula's versions (which is all imperial) and a FreeCAD model of the parts that I made.
 
Looks like a nice little machine! Good thing to learn the ropes on. What is the spindle on one of those, R8 or 3MT?

Chris152":3n4l10nm said:
It's gentler on the toes than yours, Dan.

I will admit that there were a couple of moments when moving my mill into place using scaffold tubes where I thought “This could go quite wrong quite quickly” but fortunately all went well. At ~500kg it’s not very heavy and it can be levered with a bar without much effort.
 
Bob - when we got the lathe I checked the date and think it was 77 or maybe 78, but I can't find the serial years now for the R model - our no is KR135267, in case anyone has it to hand? Ours came with the clutch fitted form new it seems, but unfortunately no gear box - tho I guess that's what kept the price down. I'd really like to try fitting an electronic lead screw but the technology's beyond me, so I've just started learning (ie watching youtube vids!) on arduino. But that's a way off and I don't know if arduino is the way to go, we'll see :-)

There is a DRO for x and y axis on the mill, but the chap we bought the mill from said it wasn't much good.
IMG_20230411_160908.jpg
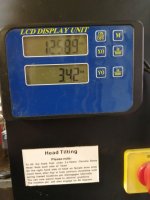
We've had no problems so far but then it's hardly had a chance. And the Z axis readout seems to be working ok, tho it's hard to see as it has no dedicated light. Again, time will tell. I looked into buying 3-axis DRO but it's about £450 as far as I can tell? Before I go into spending that kind of money I think we need to be clear what the final ambition for the mill is - the lad's been talking about cnc, and I'd be happy to help with that in time (if it turns out to be appropriate) as he's really interested in combining older technology with new technology in so far as the latter doesn't entirely disrupt the former. For the moment we're happy getting a feel for the mill and the lathe by hand and eye, really enjoying it.

Yes, the mill's a Sieg SX3, Dr Al - I read your comments along with a few others and it helped make the decision. We're ok with the pin spanner for the moment, in fact I'm relieved I have it - I didn't see the two holes in the bottom of the spindle to hold on to, so was desperately trying to hang on to it with one of those rubber boa spanner things - it worked ok, but hardly a long-term plan! So for now the pin thing is great in comparison, but I can see it'll get annoying in time and would appreciate details of your spindle lock. (Truth is, I was put off by your description of the process as 'slightly scary' - we'll hold off til we get a bit more confident! :) ).

The way I figure it Dan, these are lovely machines for us to learn on and for him to develop skills, and if in time machining becomes a significant part of what he does, he can upgrade accordingly - both the garage/ workshop size and the kit! And I'll be sure to advise on steel toecaps etc. Yours is looking awesome in your latest pic and I can't help confess to feeling mill envy!

Thanks all, C
 
Back
Top