• Hi all and welcome to TheWoodHaven2 brought into the 21st Century, kicking and screaming! We all have Alasdair to thank for the vast bulk of the heavy lifting to get us here, no more so than me because he's taken away a huge burden of responsibility from my shoulders and brought us to this new shiny home, with all your previous content (hopefully) still intact! Please peruse and feed back. There is still plenty to do, like changing the colour scheme, adding the banner graphic, tweaking the odd setting here and there so I have added a new thread in the 'Technical Issues, Bugs and Feature Requests' forum for you to add any issues you find, any missing settings or just anything you'd like to see added/removed from the feature set that Xenforo offers. We will get to everything over the coming weeks so please be patient, but add anything at all to the thread I mention above and we promise to get to them over the next few days/weeks/months. In the meantime, please enjoy!

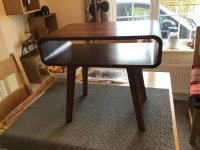
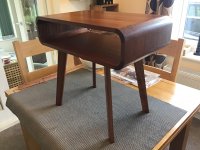
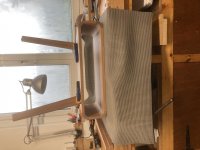
'Nook" Table - finished

Stuart":1ois7nnx said:
Overall I’m not massively unhappy but a bit pee’d off at the cock ups that resulted in less than perfect joinery.

Looks to me like a pretty nice job. I doubt that even the best made pieces of work are completely perfick regarding the joinery; if you were to examine it closely enough, there would be faults...even filler! I know that for a fact, 'cos we used it on work made for Linely.

Were it me, I would have done an 'Alan Peters' and made the infill strips a contrasting material, so that a cock-up becomes a feature of the job - Rob
 
Looking good Stuart although the cross grain worries me including the end view.
I think I'd have gone for a grain wrap around on the corners by whatever means.
Still easy for me to say - at least you went ahead and made something :lol:

Bob
 
Woodbloke":1z3nap2j said:
Were it me, I would have done an 'Alan Peters' and made the infill strips a contrasting material, so that a cock-up becomes a feature of the job - Rob
That was an option but given that the final finish is going to be quite dark I couldn’t think of anything to give me the right sort of contrast.

I still have some wenge that I could use but not convinced it would look right.

9fingers":1z3nap2j said:
Looking good Stuart although the cross grain worries me including the end view.
I think I'd have gone for a grain wrap around on the corners by whatever means.
Still easy for me to say - at least you went ahead and made something :lol:

Bob
Really not sure that it would have been possible to wrap that tight a radius, certainly not with my diy gear and skill level! Even if you could you’d still have ‘visual’ issues with grain direction.

Again, I’m hoping that the dark finish will help hide some of that difference, we’ll see soon.
 
Stuart":13vdnu50 said:
9fingers":13vdnu50 said:
Looking good Stuart although the cross grain worries me including the end view.
I think I'd have gone for a grain wrap around on the corners by whatever means.
Still easy for me to say - at least you went ahead and made something :lol:

Bob
Really not sure that it would have been possible to wrap that tight a radius, certainly not with my diy gear and skill level! Even if you could you’d still have ‘visual’ issues with grain direction.

Again, I’m hoping that the dark finish will help hide some of that difference, we’ll see soon.

My bad. I meant wrap as in the grain following around the box rather than as a constructional technique from veneers etc. It still would be made from 8 pieces glued together.

Bob
 
Bob, - I gave it lots of thought and garnered opinions from here and I certainly don’t think it would be an easy task to make it that way although I would like to try at some stage. I suspect plenty of material for the offcuts box!

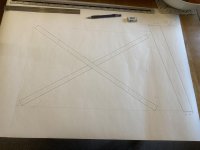
The remaining woodworking is fairly straightforward (he says with fingers crossed!). I’ve redesigned the legs and now have a ‘crossed’ setup
20F38BAE-9035-47CF-A32F-358D08FECE6C.jpeg
My usual lining paper and pencil approach, gives me a much better idea of the final product than any computer package (and I like sketchup quite a lot for initial modelling). The intention is for the legs to sit within the footprint of the flat base section.
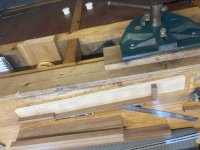
Simple leg jig made from scraps
89EAE93D-0A0B-48E9-8CA5-49CCD0542F55.jpeg
I’ve never been a fan of superglue in woodworking but for making jigs with a squirt of activator it’s really simple and quick.

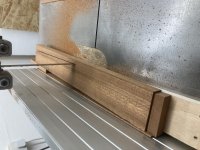
I was initially going to use the table saw but then I’d have to incorporate serious work holding so I decided the bandsaw was a much better option (using the table saw less and less these days).
C9213AD9-87D6-40D5-A459-6F9D7B858BA9.jpeg
After that the jig went back where it came from!
342E3F9F-5AE2-4A93-833E-B5418642B293.jpeg
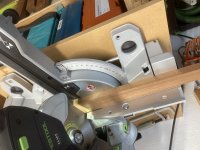
Cut a 10 degree slope on the top of the legs
4F369923-8F3E-4D69-BFD8-A3B46DC2F908.jpeg
Then a bit of a trial fit to see how it appears
4D453DC6-8DBE-4527-B353-D5ABE58B008B.jpeg
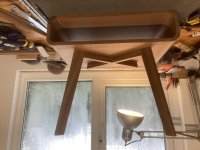
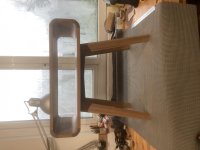
I haven’t edited this one so hopefully the forum software will turn it upside down for a better indication of how it will look.

I’m wondering if the legs are to ‘chunky’? Currently running from 50mm at the top to 35mm at the bottom over a distance of 360mm. To be linked with a 35mm rail.

Any thoughts please?
 
Maybe they could be a tad more slender to be in proportion with the thickness of the box.
 
Decided to thin the legs and rails down by 5mm, - sometimes surprised by how much difference such a small adjustment can make.

So, some simple joinery for the rails having knocked up a trial set first
137F1C39-DAE8-4DA9-9911-D163AEB5F181.jpeg
Then the real thing
C547A298-8D7C-4A6E-8389-56F1D4B64709.jpeg
I decided on domino’s a while ago so that made life much simpler
31CF705E-400C-4AD8-B3A7-3F5B7F533B1B.jpeg
A quick glus up with custom clamping blocks
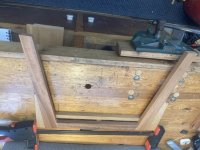
1484E70D-D7F3-41C0-B3B8-86733B7BA30B.jpeg
Buttons had previously been produced and slots cut
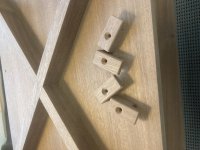
B4C11994-2930-4644-A21D-2FCB05A6EB36.jpeg
Then a trail fit prior to finishing
FF59D9F4-1E3A-45BA-ADB0-37D867E034EB.jpeg
I’d always intended to use a dark stain on this to match an existing piece. I bought this years ago in the States and love it. It’s a thick gel stain that provides a deep, lustrous finish and is an absolute doddle to use
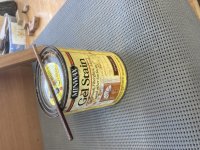
DFF85C22-3923-490A-B097-62F6F6F102FB.jpeg
A499DD22-D21D-4728-909E-1C0665EB788E.jpeg
B5B74988-7CD6-459C-B32A-0EE72D35CB98.jpeg
I think it gives the sapele a nice deep finish. Then it was into the finishing room (also known as the dining room!) for a couple of coats of Osmo
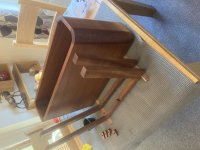
D3658871-3851-4BA5-A44B-011A38E7F43D.jpeg
I ended up using door oil as that was all I had in stock. Nice satin finish and I know from using on our doors it’s hard wearing.
A couple of days to harden off and then on with the teak wax which is another of my favourite finishing products. Again, I think a nice satin lustre.
FB5D8F9F-7D4B-478E-9984-3BF1194FDFFD.jpeg
CE618AEC-42CA-462E-9996-4111FEDE8249.jpeg
873BC65A-37C4-4430-A634-8F6FA8B9CC74.jpeg
Again I’ll wait a couple of days before it goes into final position to allow the wax to harden of.

Overall I’m quite pleased as this was outside my comfort zone and the final product is pretty close to what we wanted. Interestingly, there’s already sign of movement at the rear as the top, bottom and sides shink slightly. Still, that was always going to happen and planned for.

Edit, - sorry about photo rotation. I did edit to try and stop it happening but this doesn’t seem to work on the ipad.
 
Well that turned out rather well. Great to see people tackle tough builds like this, especially if they've never done anything like it before.
 
It's too late to be any help but I expect you'd be interested in an alternative approach to making a similar sort of piece, with rounded corners. Neil Pask on YouTube:

[youtubessl]0JRzxgKHLyY[/youtubessl]

https://youtu.be/0JRzxgKHLyY
 
Thanks for posting that Andy, - interesting approach and, with hindsight, probably a better way of doing it.

I might make another at some point and would certainly give this corner methodology a go.
 
Back
Top