• Hi all and welcome to TheWoodHaven2 brought into the 21st Century, kicking and screaming! We all have Alasdair to thank for the vast bulk of the heavy lifting to get us here, no more so than me because he's taken away a huge burden of responsibility from my shoulders and brought us to this new shiny home, with all your previous content (hopefully) still intact! Please peruse and feed back. There is still plenty to do, like changing the colour scheme, adding the banner graphic, tweaking the odd setting here and there so I have added a new thread in the 'Technical Issues, Bugs and Feature Requests' forum for you to add any issues you find, any missing settings or just anything you'd like to see added/removed from the feature set that Xenforo offers. We will get to everything over the coming weeks so please be patient, but add anything at all to the thread I mention above and we promise to get to them over the next few days/weeks/months. In the meantime, please enjoy!

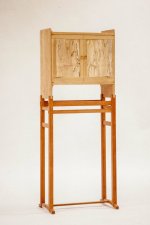
'Owl' Cabinet....Dun

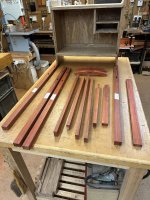
Thanks chaps. I've just sawn up some lumps of bright vermillion Paduk for the frame which are now resting under the bench for a while. Even after a few minutes, the stresses released have caused them to bow slightly but I've left plenty of 'meat' on them so they should be able to be machined in a couple of weeks - Rob
 
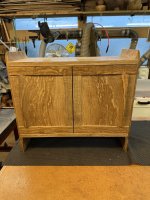
Fitting the doors yesterday went pear shaped, fubar'd, TU whatever you want to call it as I made them a fraction too small and have been left with a 3mm gap between them, which ain't acceptable or fixable:

IMG_4333.jpeg

The late and very great Alan Peters said more than once that if you make a mistake, turn it into a feature. This error though, is beyond redemption and can't be fixed (I thought long and hard about it) but fortunately:

IMG_4335.jpeg

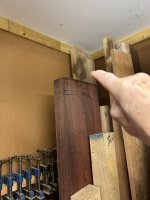
...I've got a couple of superb Olive Ash boards that I used to make my blanket chest:


IMG_4336.jpeg

...and the doors are a pretty good colour match.

IMG_4337.jpeg

It's an easy enough job to rescue the panels and make some new frames, this time the right bloody size - Rob
 
It’s a shame about that gap Rob.
Can’t remember now why you didn’t have the railes between the stiles as is more traditional, that would have been relatively simple to fix.
The only other thing I can think of but it’s a bit hokey, would be to put a piece of wood on the front of one door which would cover the gap and signify that that door should be opened first.
 
I know you are more of a perfectionist than I will ever be, so although you have my sympathy, I feel obliged to offer a suggestion, however silly it is.

Looking at the photo, the black gap between the doors looks quite striking.

How about trimming a little off all the other edges, and adding a thin sliver of black wood onto each one, so that the visual framing effect looks more like part of the overall design? It would give you a chance to recover the work you've already done and save you from having to find another cabinet sized space in your house.
 
I know you are more of a perfectionist than I will ever be, so although you have my sympathy, I feel obliged to offer a suggestion, however silly it is.

Looking at the photo, the black gap between the doors looks quite striking.

How about trimming a little off all the other edges, and adding a thin sliver of black wood onto each one, so that the visual framing effect looks more like part of the overall design? It would give you a chance to recover the work you've already done and save you from having to find another cabinet sized space in your house.
That’s a much better suggestion.
 
Thanks for your suggestions chaps, but if you have another look at the overall concept again:

web-jk-1994-pieces-spalted_owl-1-scaled.jpg

...any of those ideas would, to my eyes at least, look distinctly 'odd' and not something I'd be comfortable with over a prolonged time. If it 'niggled' I'd be duty bound to eventually fiddle with it which would probably mean the whole project being consumed by the bandsaw - Rob
 
Weeeell. Not so sure. You are not trying to do a slavish copy? The original design has a base support structure that is in a different colour. So the idea of contrast is already embedded. There is quite busy grain in the doors as currently made and a shadow line type separator may well look very good, especially if it is raised, rather like a slender mast between the sails.
 
Why don’t you remake the whole cabinet? Rather than just scrap it I’ll take the old one off your hands and make a feature of the gap as per AndyT’s suggestion. Then we can compare the two to see which one looks best.;);)

Gutted for you Rob but the man who never made a mistake never made anything. Most of us would be happy with that level of fubar.
 
Weeeell. Not so sure. You are not trying to do a slavish copy? The original design has a base support structure that is in a different colour. So the idea of contrast is already embedded. There is quite busy grain in the doors as currently made and a shadow line type separator may well look very good, especially if it is raised, rather like a slender mast between the sails.
Nope, it's not a slavish copy down to the last detail, but there will be distinctive elements that are different; f'instance, the stand will be in Paduk with differences in construction and style (the curved 'foot' is laminated in the original, mine may be in the solid') but the idea of a raised separator has merit and is worth considering except installing one (1mm thick) on each door would be exceptionally tricky as the meeting stiles are 'stepped' as in JK's original.

Why don’t you remake the whole cabinet? Rather than just scrap it I’ll take the old one off your hands and make a feature of the gap as per AndyT’s suggestion. Then we can compare the two to see which one looks best.;);)

Gutted for you Rob but the man who never made a mistake never made anything. Most of us would be happy with that level of fubar.
There's been too much time and effort Andy put into this one Andy and I thick the new door rails n'stiles are easily doable; it's just going to take quite a lot of extra time and effort. Once I roughly cut the new ash components to size I'll set them aside to adjust for a while and meanwhile crack on with the stand - Rob
 
And maybe not do the rails and stiles his strange way this time?
The reason that JK does them that way is that the curved grain (deliberately chosen) in the horizontal stiles runs continuously right the way through to the outside rather than stopping abruptly at vertical rails. Whether that's desirable or normal is a moot point :ROFLMAO: I just hoiked out that large lump of Olive Ash pictured above and had a look at the grain and I think I can almost replicate what JK's done. If you look at the image above the horizontal stiles in his door frame are book matched; the plank I'm now using is 55mm thick whereas the original boards I used where a scant 25mm so it was impossible to book match them but now I can.:D

I think the reason that it all went pear shaped is that I made the doors first and the cabinet second, which is probably the wrong way round. I then didn't pay sufficient attention to making the cabinet slightly smaller than the doors (to allow for eventual fitting) and have subsequently paid the price. There may be a silver lining though in that the new doors might be more attractive than the old ones. We shall see🤞- Rob
 
“ There may be a silver lining though in that the new doors might be more attractive than the old ones. We shall see🤞- Rob “
Knowing you Rob that should have read - even more attractive.
Forgot about the sail design of the doors, that would probably explain it.
 
I know you're set on remaking, but what about making the gap bigger and inserting strips which can work as sculpted handles?
 
I know you're set on remaking, but what about making the gap bigger and inserting strips which can work as sculpted handles?
That probably wouldn't work because there's a 'step' between the door stiles and rails as they're not the same thickness - Rob
 
A little swifty update on progress thus far:

IMG_4446.jpeg

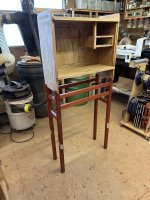
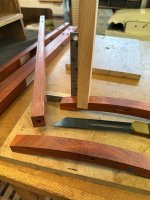
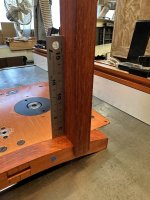
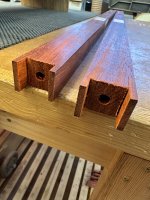
The mortices have been cut in the legs; a long and tortuous process. The 8mm slots were routed out, then the round ends were squared up and finally one side was made a gnats wotnot bigger to accommodate the wedges. The outside faces are marked with a spotty dot so I know which bit faces out. Paduk is a great timber but much, much harder that Oak and interlocked to boot, so there was a lot of work done with the small LN scraper plane to clean up the grain. If you're fortunate enough to come across a bit that planes well it's a real treat, but any sort of chiseling is also an effort and not recommended. That said, it looks great but will eventually darken from a vibrant vermillion to a deep burgundy red colour.

A pair of legs can be seen fitted to the cabinet and the long skinny bits in the middle are the horizontal rails, finished to size but yet to be cut to length.

IMG_4447.jpeg

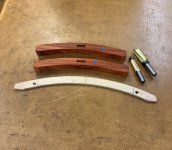
The curved feet were also made this afternoon. A full scale, 1;1 'old skool' drawing was made to determine the curvature and the 6mm mortices were cut before template machining on the router table, using top and bottom bearing cutters to do each half, swopping between the two as needed. Paduk is not, say again, not a timber that I'd ever want to tackle with a spokeshave.

Next job is to mark out and cut the rails to length, then machine the tenons on the router table - Rob
 
Not a timber I’ve ever tried Rob, and thanks for the warning I shall now avoid it.
Following with interest as always thank you.
No problem Ian. Bit of a relief to see:

27FCB8D9-C431-4187-B0CB-3AD55001E941.jpg

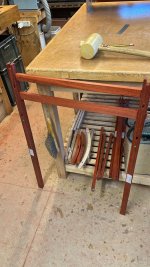
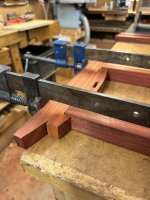
...the first bit of the frame go together 'dry' (needed a bit of maul work :ROFLMAO: ) Shoulders on the rails yet to cut but it looks like, fingers crossed, it should all fit - Rob
 
Hope the twist on that frame is all down to the camera Rob. (I’m sure it will be)
It is Ian; no wind or twist anywhere. The tenons were straight off the router table, so they're dead square and the mortices were cut with a router, so I know everything's tickyityboo :ROFLMAO: In theory😁 - Rob
 
What type of glue will you use for the assembly?
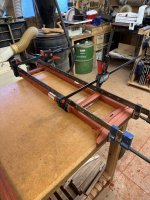
I've been pondering on that one. Titebond 3 is the preferred option but there are four wedged m/t joints on each side which are difficult to assemble in a rush before the glue starts to go 'off', so I'm coming round to the idea of a slower setting (30min) epoxy. I intend to break down the gluing process into as many separate parts as is feasible, but the exact sequence of gluing is one that I haven't yet considered. It will probably go along the lines of glue the front frame, then the rear frame. Next would be the four short side rails. The foot assembly (curved rails and stretcher) would be glued separately and finally that would be glued onto the main stand. For the latter stages I might even use a very slow setting epoxy such as the original Araldite - Rob
 
I have never used an epoxy glue, does it clean up well. The only two part epoxy mix I have used is for anchoring metal into concrete. Excuse my ignorance.
 
I have never used an epoxy glue, does it clean up well. The only two part epoxy mix I have used is for anchoring metal into concrete. Excuse my ignorance.
Yep, it cleans up well with methylated spirits if you scrub off the excess with something like an old toothbrush. Once it's set though, it's very difficult to remove - Rob
 
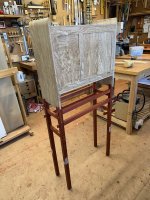
After a lot of huffing n'puffing, the cabinet 'sans ports' dropped onto the stand this morning for the first time. It's something of a minor miracle that I had to make no adjustments to either the frame or the cabinet to get it to fit:

IMG_4471.jpeg

IMG_4472.jpeg

IMG_4473.jpeg

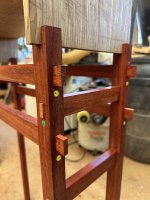
Paduk is lovely stuff but just too plain bloody hard and difficult to work for this type of joinery; this will be the first and last time I'll use it for this type of job! Mortices were cut using the OF1400 router, tenons cut entirely on the router table and then shoulder cut in the conventional way with a chisel (very sharp) and maul; still some adjustments to make for the wedges.

IMG_4474.jpeg

The next task is to make the joints for the two curved, bearing cut machined feet to fit onto the bottom of the legs; 6mm mortices for the stretcher rail already cut prior to machining - Rob
 
So assuming you are M&T-ing them to the legs, do you shape the end of the legs or cut back a level section into the feet for them to stand on? Would match the flat spot on the bottom of the feet where they touch the floor.
Addendum, looks a good match with the cabinet Rob
 
So assuming you are M&T-ing them to the legs, do you shape the end of the legs or cut back a level section into the feet for them to stand on? Would match the flat spot on the bottom of the feet where they touch the floor.
Addendum, looks a good match with the cabinet Rob
The legs are bridle jointed onto the curved feet, with an 8mm internal dowel locating the two bits together. I've just drilled the 'oles in the legs with my Dowelax jig. I'm not going to cut a flat spot as it would be nigh on impossible to get a really tight line between the vertical leg and the curve of the foot - Rob
 
Fitting these two curvaceous feet was a wee thing that was causing me to go into Meldrew Mode (cheers Trim!) as I was wasn't 100% sure on how to go about it so firstly:

IMG_4476.jpeg

...I used a sliding bevel to find out the approximate angle and then cut a test piece in some yucky pine which seemed to fit quite well. I then girded the lions and cut the first leg and fitted it to a foot:

IMG_4477.jpeg

...which went together squarely with both edges of the bridle touching the curve, which was the crucial element. I drilled some dowel 'oles with my 'Dowelmax' a day or two ago:

IMG_4478.jpeg

...and the interior of the joint is chiseled so it undercuts the curve of the foot; only the edges make contact. Having chopped out the second leg, I cramped a side together dry and then cramped the foot to it in about the right place:

IMG_4480.jpeg

...and once I'd obtained equal cramping pressure on each side:

IMG_4479.jpeg

...I was relieved and somewhat chuffed to see that there were no gaps anywhere on the joint between the foot and legs - Rob...Meldrew Mode now 'off'

Edit - note the pencil scribbling in the tear out above. One of Sir David of Charlesworth's little tips; once all the pencil has disappeared cleaning up, so has the tear out.
 
Apart from some final titivating on the joints and arises etc:

IMG_4561.jpeg

IMG_4563.jpeg

IMG_4562.jpeg

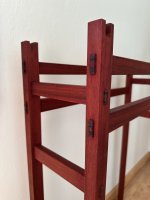
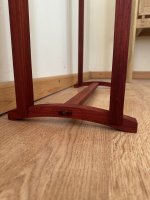
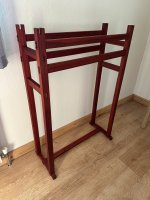
...the stand has been pretty much competed. Once it's completely sorted a final coat of Rubio followed by some wax will be applied to it; the curved foot was doweled in place ( a tricky application on the leg end grain using my 'Dowelmax' jig) and if memory serves, the whole stand was glued together in four separate 'hits'. Now working on the doors MkII - Rob
 
Woodworkers appreciate the challenge of getting that all square and matching so it doesn't wobble on a flat floor and the skill level required.

Ordinary people will probably just look at the cabinet and not see the stand at all!
 
Woodworkers appreciate the challenge of getting that all square and matching so it doesn't wobble on a flat floor and the skill level required.

Ordinary people will probably just look at the cabinet and not see the stand at all!
Yeah, but how many people have a flat floor in their house.:)

Hasn’t someone around here even made a shoe cupboard to sit level on their uneven floor?

Not to detract from the quality of Rob’s work though. Always a delight to see.
 
The doors have been provisionally fitted and they went together, miraculously first time; a matched pair like this is not easy as the grain needs to line up on each door (or as near as dammit) so what's done on one must be replicated on the other; they can't be fitted individually.

Not withstanding today's efforts, yesterday was a disaster as I machined all the hinge recesses in the doors in the wrong corners!! (the ones in the centre stiles) so they had to be machined off and new slithers of matching ash:

IMG_4579.jpeg

...glued on and then cleaned up last night. Stuff went swimmingly today and both doors were fitted to plan; it's almost impossible to see the bits that were glued on as I was very careful to match the grain as far as possible:

IMG_4580.jpeg

....bearing in mind that the lower section of each door isn't polished yet. When it is, the 'fix' will be nigh on invisible. The closing corners of each door were binding:

IMG_4581.jpeg

...and needed to be 'eased' so they could close snugly into the rebate. The drawer is shown with Paduk sides and through shovetails; it'll probably be finished with Odie's Oil 😁 The main job for tomorrow is to very carefully plane the two centre stiles to leave a gnats worth of clearance - Rob
 
Last edited:
Lovely work as expected Rob, wonder what it was about yesterday that made you mess it up? I find the older I get the more I notice that some days are more fulfilling than others. Quality of sleep?
A classic case of ‘measure twice, cut once’. The job was trundling along smoothly and I simply didn’t check where the recesses needed to be cut on the router table. It wasn’t until the following day that I realised what I’d done and by then it was too late to attempt a bodged ‘fix’, so I planed off all the timber containing the faulty recesses. At that point, the doors very nearly ended up as bandsaw fodder! Luckily I had a big chunk of the original Ash that the rails and stiles came from so I was able cut some slices off that were a pretty good match. It’s not perfect but unless it was pointed out, I think you’d be hard pressed to spot the ‘fix’- Rob
 
Back
Top