• Hi all and welcome to TheWoodHaven2 brought into the 21st Century, kicking and screaming! We all have Alasdair to thank for the vast bulk of the heavy lifting to get us here, no more so than me because he's taken away a huge burden of responsibility from my shoulders and brought us to this new shiny home, with all your previous content (hopefully) still intact! Please peruse and feed back. There is still plenty to do, like changing the colour scheme, adding the banner graphic, tweaking the odd setting here and there so I have added a new thread in the 'Technical Issues, Bugs and Feature Requests' forum for you to add any issues you find, any missing settings or just anything you'd like to see added/removed from the feature set that Xenforo offers. We will get to everything over the coming weeks so please be patient, but add anything at all to the thread I mention above and we promise to get to them over the next few days/weeks/months. In the meantime, please enjoy!

'Owl' Cabinet....Dun

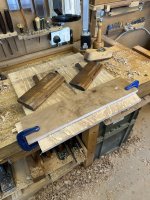
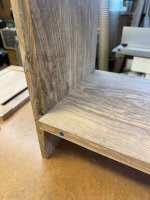
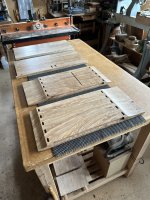
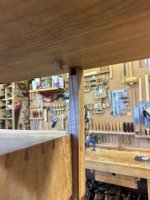
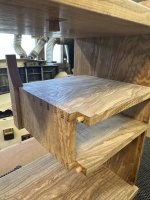
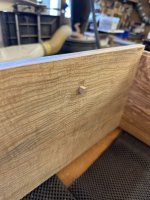
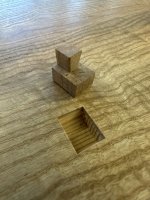
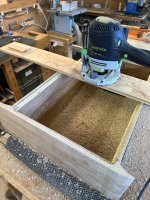
Nick, if you're referring to the Dom slots already machined in the vertical end boards, you can see from the image above (^) that I've used a home brewed plywood square made exactly that purpose. If fact I made two of them, one left and one right handed and they've been in pretty constant use for this sort of application. You definitely won't regret getting hold of machine! - Rob
Thanks Rob. I hadn't spotted that.
 
I started to do some gouge work yesterday on the shaped sections of the vertical ends. All was progressing reasonably smoothly until I came across an awkward, reversing bit of grain (on one of the lower bits that fit into the stand,) resulting in a jagged lump being removed rather than a controlled chip. It would have been difficult, if not impossible to achieve a gouged finish so I had no alternative but to go for a smooth one, which surprisingly wasn't too onerous to do:

IMG_3490.jpeg

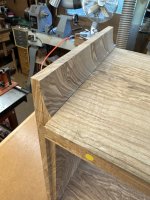
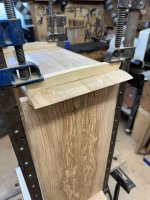
I clamped both bits together and used my little maple convex soled plane to shape the larger ends and then a couple of 'rounds' to shape the 'horns'. By running the moulding plane against a fence it was a doddle to plane the curve right up to a straight line:

IMG_3491.jpeg

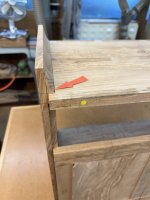
I've left the profile 3mm clear of the top surface (arrowed) of the cabinet but in cleaning up I'll probably take this distance a little closer. This is the first time I've used these rounds in anger and were bought a few years ago from Bristol Design when I visited Andy T for the day. If you haven't been to Bristol Design or inflicted yourself on Andy T, both are very highly recommended :ROFLMAO: - Rob
 
Last edited:
I know I've said it before, but one of the things I love about woodworking is how many different ways there are to achieve a similar end. I don't think I'd personally enjoy all the dominos and routing that this cabinet will need, but I do like the skill in getting it to look exactly as intended.

The rounds are fun to use, aren't they? And I've noted with approval the amount of proper shavings on the floor. :)
 
The rounds are fun to use, aren't they? And I've noted with approval the amount of proper shavings on the floor. :)
They are indeed Andy. Once I'd got the hang of using them they were delightful and much easier to control than I initially thought. In order not to alter the profile shape of the blades, I honed them on the big leather wheel of the Tormek; the edges came up very sharp! - Rob
 
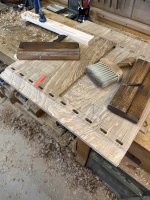
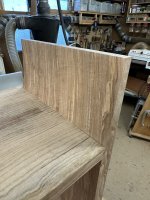
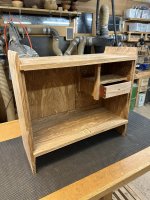
Thus far, it all appears to have gone tolerably well, with no major catastrophes apart from my inability to do 'riffmatic. Marking out and cutting the Dom slots went well as did the shaping and sanding of the 'horns' and longer bits at the other end of the vertical panels:

IMG_3499.jpeg

IMG_3501.jpeg

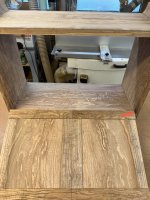
Upside down view. Inside of the cabinet:

IMG_3502.jpeg

...showing the rebate wot the doors fit into, except that owing to a lack of brain cells (it's an age thing) I can no longer do proper 'riffmatic and both the top and lower horizontal panels:


IMG_3500.jpeg

...are too long! Tomorrow's job is to work out the proper length, chop the panels to size and re-cut the dom slots. I hate sums! - Rob
 
Better too long than too short!

That grain pattern is looking amazing.
 
Better too long than too short!

That grain pattern is looking amazing.
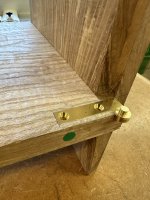
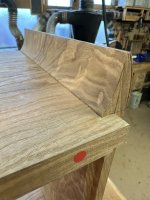
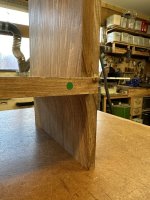
'Cos I'm a fully paid up, card carrying member of the Hon. Order of Numpties (First Class) what I neglected to do was to chop out (arrowed) the section at each end to obtain the 'wrap around' feature, so once done roughly:

IMG_3504.jpeg

IMG_3505.jpeg

...the doors now fit. Once the horizontal top n'bottom have been machined accurately tomorrow, the doors ought to fit snuggly with a mm or two excess in their length for the eventual final fitting. 'Riffmetic was fine, brain fade was the problem - Rob
 
Stuff has gone reasonably well and it's sort of coming together. The rebates for the doors have been cleaned out and made square so that the hinges align correctly; all interior surfaces were cleaned up with a very finely set plane and lightly scraped:

IMG_3508.jpeg

The shaping has been completed, except for the exterior of the 'horns' which have just been roughly planed to the line:

IMG_3507.jpeg

...and the underside shaping has also been finished:

IMG_3510.jpeg

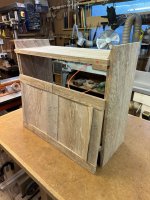
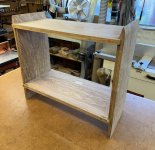
This is as far as I've got:

IMG_3509.jpeg

Still lots of cleaning up to do and titivating which includes the recess for the JK sprung loaded door catches; then it's time to polish the interior surfaces (satin and matt Polyvine acrylic) before thinking about the glue up - Rob
 
Are you going to glue this up before making the back?
 
Are you going to glue this up before making the back?
That's the idea Andy. I always do the backs the same way, so once the cabinet is glued the back is planed level and out of wind, then I rout a rebate all the way round, square out the corners and then make up the back panel separately, which is then polished and glued in place - Rob

Edit - what I have to do though, is to figure out a way of attaching the little drawer assembly to the inside of the cabinet and the back panel. That's currently making the little grey cells work overtime at the moment.
 
Last edited:
That's the idea Andy. I always do the backs the same way, so once the cabinet is glued the back is planed level and out of wind, then I rout a rebate all the way round, square out the corners and then make up the back panel separately, which is then polished and glued in place - Rob

Edit - what I have to do though, is to figure out a way of attaching the little drawer assembly to the inside of the cabinet and the back panel. That's currently making the little grey cells work overtime at the moment.
Ah yes, of course that makes perfect sense. It would be different if you were going to plane those rebates, which would be easier done on the separate pieces, before they were glued together.
Quite a game changer, these electric routers :)
 
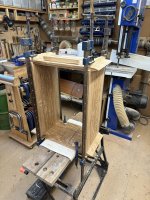
A wee bit more has been done in that the main cabinet has been glued this morning. As per normal, all the interior surfaces have been pre-polished:

IMG_3518.jpeg

...with severial coats of polyvine acrylic (three satin and a couple of matt) As it's Ash I didn't want to take a chance and use an oil based product; each coat was rubbed down with 1000g w/d before re-applying another. The beauty of this stuff is that it's quick to apply, drying within 30mins although I left an hour 'twixt each coat.

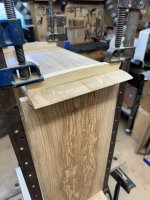
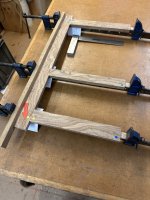
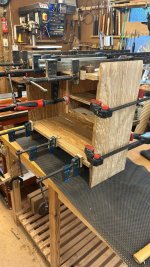
Gluing up is irksome enough at the best of times, but with a largish cabinet it's even more stressful, so I've broken the process down into three stages. Each top and bottom were glued separately to a side against one of my two:


IMG_3525.jpeg

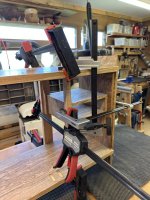
...assembly squares which I know are as square as a square thing, so good enough! With each side glued and square, the assembly was then cramped to my old Workmate, which is very handy from time to time. The last side was then glued in place:

IMG_3523.jpeg

In order to get cramping pressure in the middle of the side, I've used a couple of my ash 'banana' bars, one of which is shown on the side between the sash cramps. A 'banana' bar deforms under pressure but as it's ash, it won't break (pine ones will, I know!):

IMG_3524.jpeg

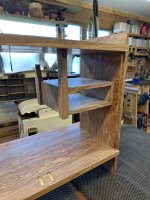
When the cabinet comes out of the cramps, there's a quite a bit of titivating, which is mainly taking off the sharp arris(s) to leave smooth, rounded edges - Rob
 

Attachments

  • IMG_3524.jpeg
    IMG_3524.jpeg
    172.2 KB · Views: 1
Last edited:
I may have missed this Rob, but a quick Q on your domino method. You mentioned somewhere that you use the wiggle room feature on the domino machine as that helps with alignment. Presumably you only do this at its narrowest setting (as we know you can measure)? My question is do you do it on both sides or do you tight fit the tenon and only have the wiggle room on the mortice side?

I used to do the latter (simpler work - I'm not as skilled as you) but of late I have started to try to do exact fit on both sides and do a test placement. I only do a wiggle room cut if the test placement is not spot on.

The domino makes me feel a but guilty compared with traditional hand cut jointing, but it is so fast and accurate that I've become a bit addicted.
 
I may have missed this Rob, but a quick Q on your domino method. You mentioned somewhere that you use the wiggle room feature on the domino machine as that helps with alignment. Presumably you only do this at its narrowest setting (as we know you can measure)? My question is do you do it on both sides or do you tight fit the tenon and only have the wiggle room on the mortice side?

I used to do the latter (simpler work - I'm not as skilled as you) but of late I have started to try to do exact fit on both sides and do a test placement. I only do a wiggle room cut if the test placement is not spot on.

The domino makes me feel a but guilty compared with traditional hand cut jointing, but it is so fast and accurate that I've become a bit addicted.
Adrian, as you're aware there are three width settings on the machine (they need to be adjusted with the motor running) The narrowest setting (ie the dom fits tightly into the machined slot) is used on the vertical sides of the cabinet (see pic above) The horizontal top and bottom of the cabinet have corresponding slots but machined with the widest setting (not shown in any pic). If I tried to do a tight fit for both horizontal and vertical parts of the cabinet, it would be almost impossible to obtain an exact fit, bearing in mind there are 20 dominos in total!
This extra wide slot gives some 'wiggle room' so that the top and bottom can be slid exactly into the correct position when the cramps are then applied - Rob
 
Thanks for replying. Interesting. I'm surprised you used the widest setting. On the offspring table build we did, we used dominos align and strengthen the plank joints and we made an alignment template so that we could avoid issues. Obviously that is simpler than right angle joints. Additionally offspring wanted to try to get it as accurate as possible. It did work but also slowed us down, and for (I hear you say ;) ) no benefit.
 
Thanks for replying. Interesting. I'm surprised you used the widest setting. On the offspring table build we did, we used dominos align and strengthen the plank joints and we made an alignment template so that we could avoid issues. Obviously that is simpler than right angle joints. Additionally offspring wanted to try to get it as accurate as possible. It did work but also slowed us down, and for (I hear you say ;) ) no benefit.
I thought about using the middle setting which would probably have provided enough 'wriggle room' but the safer option was to use the widest slot. As it happens, there's very little difference between the two so it didn't really make a lot of difference. In your project with No.1 son, I would have made all the slots on one plank using the tightest, close fitting slot and all the slots on the mating plank with a wider slot except the first one; this would then have given you an exact match where needed (say to align the grain) and all the subsequent doms would have engaged without any issues. It would have also have saved a shed load of time! :ROFLMAO: - Rob

Edit - what happened to the WIP and the pics huh?? 😁
 
They will emerge. :cool: However, it is No 1 Sons project with me as amateur woodwork teacher, and.....it is not finished. It goes in fits and starts with months between segments, as he is embroiled in PhD supervision stuff and work projects. We still need to get the cased up top to Den Hague, fit the legs and pads, and do a final wax and polish of the top. I doubt that will happen before the second week of December. I'm a bit wary of taking tools over there (Mirka etc) as they have a tendency to become permanently relocated. 🤣
 
A bit more's been done on this, first and foremost the rebate for the back was machined this morning:
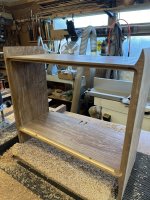
IMG_3543.jpeg

IMG_3544.jpeg

Second and foremost, what's been occupying me over the last few weeks is pondering about the drawer assembly and how it fits into the cabinet:
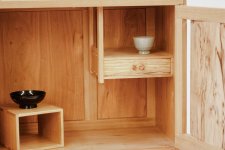
web-jk-1994-pieces-spalted_owl-3.jpg

It looks on the face of it relatively straight forward, but if you'd care to try and work out how JK made it and then fitted it into the cabinet, you'll soon come to the conclusion, as I did, that it's 'ard! After the extinction of a few brain cells I've worked out a way of doing something similar which was glued up this morning:
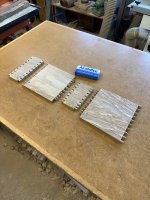
IMG_3545.jpeg

...which is a dovetailed 'box'. If you look carefully at the pic, the pins are all the same size, but the tails gradually increase in width towards the middle. (The ones at the cabinet end are conventional) Cunning n'est pas?

I also decided to glue them with proper, 'old school' slow setting Araldite which takes all the stress out of the process. It's messy, icky stuff so you need to get prepared:
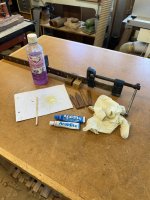
IMG_3547.jpeg

...but the box has gone together without any difficulties and took approx just over an hour to get together. Had I used TB3 or even a 30min epoxy the glue would have gone off a long time before. The final, glued up drawer box assembly:
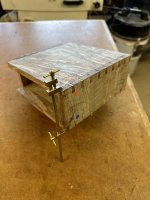
IMG_3546.jpeg

...is now residing in the airing cupboard to get the epoxy fully set by tomorrow morning. Note the excellent little Japanese sash cramp to pull up an errant gap on the shoulder - Rob
 
I couldn't resist some of those little cramps either and they were very cheap.

Nice work. I don't know much about this "JK". James Krenov isn't it? US version of Arts & Crafts judging by pictures of his work in Pinterest. Clearly skilled workmanship.
 
All very nice Rob, but have you worked out how to fix the other dovetailed drawer box? JK seems to have forgotten about it and left it for another day! :)
 
All very nice Rob, but have you worked out how to fix the other dovetailed drawer box? JK seems to have forgotten about it and left it for another day! :)
Thanks chaps. There's another free standing box on the lhs (if this is the one you mean) Andy, which I may or may not run up; depends. The next job is to clean up the drawer box and then carefully fit it into the cabinet. I haven't quite worked out the sequence of events yet, so some more brain cells need to be put to work - Rob
 
I know you don’t just copy what he did Rob but I do quite like the end hanger arrangement, I imagined that the end with pins protruding from it was one end of the box you’ve just made, or does your box fasten inside that one? In which case how and what are those pins adoing?
 
I couldn't resist some of those little cramps either and they were very cheap.

Nice work. I don't know much about this "JK". James Krenov isn't it? US version of Arts & Crafts judging by pictures of his work in Pinterest. Clearly skilled workmanship.
Indeed Jim Krenov, but definitely not American A&C. He's was a Russian by birth (his parents were aristos), trained in Sweden during the late 50's and worked there until the late 80's or early 90's (I think) so there's far more Scandinavian influence in his work than 'murrican - Rob
 
I know you don’t just copy what he did Rob but I do quite like the end hanger arrangement, I imagined that the end with pins protruding from it was one end of the box you’ve just made, or does your box fasten inside that one? In which case how and what are those pins adoing?
So you've got the brain cells working Ian :ROFLMAO: It's difficult init to work out how to fix the 'hangers' into the box and cabinet, but that feature will be incorporated into my interpretation. Once I've worked out how to do it!:ROFLMAO: - Rob

Edit - ....which I now have! The 'pins' in JK's original aren't pins at all but the rounded ends of through tenons.
 
Last edited:
You’ve disappointed me Rob, as soon as I saw it I assume the were through tenons from the top/bottom of the box, which confused me as to why you’d not incorporated the same.

Shame you’ll have to remake that lovely dovetailed box… 👀😉
 
Going back to the construction details, I like the way you keep us guessing as to how Krenov did it and how you're doing it.
I'd say that your choice depends on how fiddly you want to make it, given that the loads imposed on the structure could be very small...

Picking up on your hint that your picture shows through tenons from the top and bottom of the drawer box, they go through a side piece of the box.

I think Krenov could have given that piece a broad tenon at each end/made it over length, to fit into a pair of vertical stopped grooves in the hangers. That would give a construction that didn't rely on the glue.

I think what you are doing is probably similar to the way that you might fit the undershelf of a coffee table into the legs - cut little notches into the legs and make the box top and bottom correspondingly oversized to fit them.

Other methods could include just glue, glue with a couple of concealed double headed pins, or his favourite, little dowels.
 
Going back to the construction details, I like the way you keep us guessing as to how Krenov did it and how you're doing it.
I'd say that your choice depends on how fiddly you want to make it, given that the loads imposed on the structure could be very small...

Picking up on your hint that your picture shows through tenons from the top and bottom of the drawer box, they go through a side piece of the box.

I think Krenov could have given that piece a broad tenon at each end/made it over length, to fit into a pair of vertical stopped grooves in the hangers. That would give a construction that didn't rely on the glue.

I think what you are doing is probably similar to the way that you might fit the undershelf of a coffee table into the legs - cut little notches into the legs and make the box top and bottom correspondingly oversized to fit them.

Other methods could include just glue, glue with a couple of concealed double headed pins, or his favourite, little dowels.
Getting close Andy but if you follow the post below you'll see how I've done it, starting with the drawer unit and hangers in place but held by cramps; no glue at this stage:

IMG_3551.jpeg

With the cramps removed it becomes a little clearer:

IMG_3552.jpeg

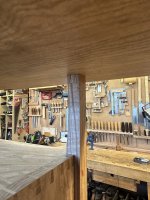
The drawer box is held onto the cabinet side by a long groove, into which slides a length of 6mm ply, so the whole thing will slide in and out. The rear shortened hanger will be slotted into a groove in the back panel when it's constructed, but I hear you quite naturally say...'how has this ejeet joined the front hanger?' The following sequence explains all:

IMG_3553.jpeg

Looking at it from behind, there's a small lapped shovetail at the back, so that when the drawer unit is slid forward towards the bench....

IMG_3554.jpeg

...the dovetail and it's socket are revealed. The front and rear hangers are held in place with 6mm dowels:

IMG_3555.jpeg

...and turning the cabinet on it's side shows the dovetail insert:

IMG_3556.jpeg

...which has now been glued into it's rectangular hole:

IMG_3557.jpeg

Deuced cunning or what? - Rob
 
Last edited:
There's been a bit of a hiatus on this one as I've been away and have had 'stuff' to do once we were home. Today though, I got started on the back panel with rails n'stiles having been machined to size and and skimmed with a LA jack. Doms used for the jointing (it's bloody quick, easy and accurate) with the rail mortices being made longer to allow for adjustment (not the centre one though):

IMG_4131.jpeg

The pencil line (arrowed) shows the exact width of the rebate so the stiles have been set just a gnats outside on the waste side to allow for eventual fitting. Thick cartridge paper under each of the joint lines prevents glue staining. It's crucial at this stage that all the stiles are dead square to the rail as it allows for greater accuracy and much easier fitting of the panels. Once the panels fit, the other rail is glued in place - Rob
 
Last edited:
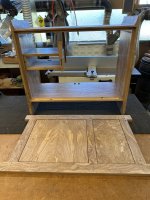
Back panels fitted into the framework, interior figuring shown:

IMG_4140.jpeg

IMG_4139.jpeg

It's all gone together dry at the moment; the top (spotty dotted stile) hasn't yet been glued in place. Next job is to polish the panels, glue it together, trim off the 'horns' and fit it snuggly into the rebate. Then I have to mark out the mortice in the middle rail and machine it, so quite a bit of work yet to do - Rob
 
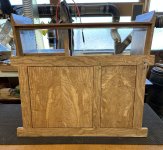
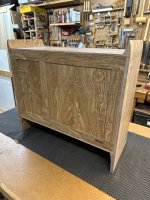
Back panel glued in this afternoon:

FB3AE26A-B797-41CC-BD11-6D919A5A079C.jpg

...and the cramps came off after a couple of hours:

IMG_4273.jpeg

IMG_4274.jpeg

Next job:

IMG_4275.jpeg

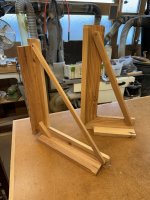
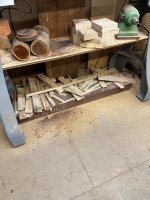
...is to hack up some Paduk for the stand from the baulk under the lathe - Rob
 
Next job:

View attachment 31267

...is to hack up some Paduk from the baulk under the lathe - Rob

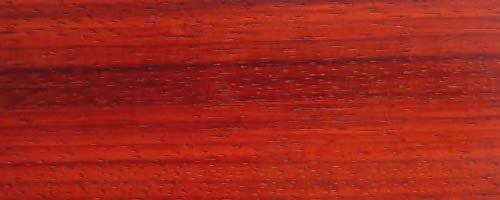
Assuming it's the long plank marked Yandle, how long have you had it? I know most wood goes brown with time but I was surprised how different it looks to the (bright red) Padauk I've got. The piece I've got looks fairly similar to this photo wot I found on t'web (from https://exotichardwoods.co.uk/Woods_List/African_Padauk.asp):

african-padauk.jpg
 
Assuming it's the long plank marked Yandle, how long have you had it? I know most wood goes brown with time but I was surprised how different it looks to the (bright red) Padauk I've got. The piece I've got looks fairly similar to this photo wot I found on t'web (from https://exotichardwoods.co.uk/Woods_List/African_Padauk.asp):

african-padauk.jpg
I've had it a couple of years and it's the same colour as yours when freshly sawn or planed. Over time it tends to turn to a deep, but not unpleasant Burgundy colour rather than a mahogany sort of brown - Rob
 
Have really enjoyed the WIP so far Rob though the style of cabinet isn't too my taste I can only as always, marvel at your skill. I'm one of those who rarely contributes to projects mostly because I don't want to reveal I'm an idiot by asking stupid questions. :)

Looking forward to seeing the completed project.
 
I agree with Lons / Bob. This has been a fascinating WIP and you show a significant amount of care and thought in what you do. The more I see of work like this, the more it makes me feel like a bodging DIYer though :cry:
 
As always Rob I am super impressed, love the grain, I can’t wait and am itching to do some proper woodwork. But the next few months won’t allow me to do any unfortunately - just lots of rough stuff, can’t see me even getting much done on my new bench grrrrr.
 
I agree with Lons / Bob. This has been a fascinating WIP and you show a significant amount of care and thought in what you do. The more I see of work like this, the more it makes me feel like a bodging DIYer though :cry:
Which puts me in the bash it and bodge it category. Doesn't stop us enjoying watching and reading the WIP nor drooling over the finished product.
Is there room left in the house for this one Rob?
 
Back
Top