Dr.Al
Old Oak
If I had to pick the tools that I enjoy using the most, it would be a dead heat between five: the metalworking lathe, my home-made block plane, a Stanley #4, a Veritas router plane and the humble chisel (probably the curvaceous Ashley Iles 12 mm dovetail chisel if I had to pick one). If I had to pick just one then the block plane would probably win over-all for the simple reason that I like using home-made tools.
If, on the other hand, I had to characterise the sort of project I would put at the top of the list, I think I would describe it as "using tools that I've made to make more tools". This project fits into that category and in fact goes a little further in that I used several home-made tools (including soft jaws, motorised axes on both the lathe and mill as well as some others) to make the tool that I'm using to make this tool!
The project, which I expect to have a few goes at before I'm completely happy with it, is to make a mallet. I've never used a cylindrical mallet (I usually use one of these Thor ones) so I don't know how much it'll get used in the end. However, my other half would also like one for leather-work projects (she currently uses an identical Thor one) so inevitably I'll make a few as we both figure out what sort of weight and handle shape works for each of us.
Like many others before me, I'm starting with a Lignum Vitae Crown Green bowling ball. My other half bought four of them. One had an enormous chunk missing from it so has been turned into a small bowl. The other three are for two mallets (with a spare for when I make mistakes).
The first job (which I'd do differently next time) was to drill a 30 mm hole in the end of the ball with a Forstner bit. I did this in a slightly iffy fashion:
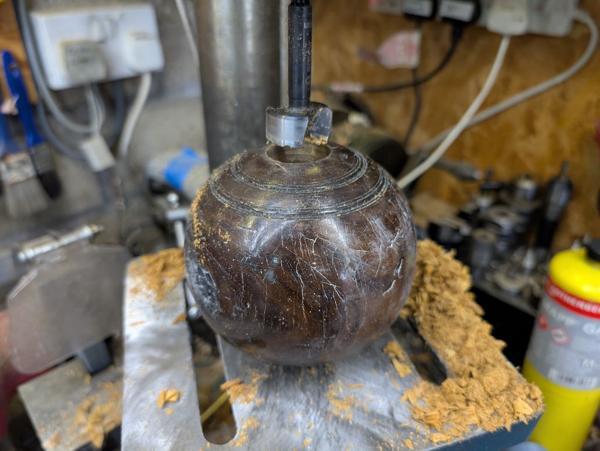
I was being lazy and it went fine, but when I do the next one I'll make a simple fixture to hold the ball a bit more rigidly rather than just relying on hand strength (and the fact it's round so won't do much damage if it catches). I'd also try to drill all the way through rather than about two thirds of the way as that would improve the chances of a good concentric hole (although in practice it was fine).
I wasn't sure how I would find the mother-of-pearl inlay to drill but the Forstner bit didn't seem to struggle at all (it just covered the pillar drill in white dust).
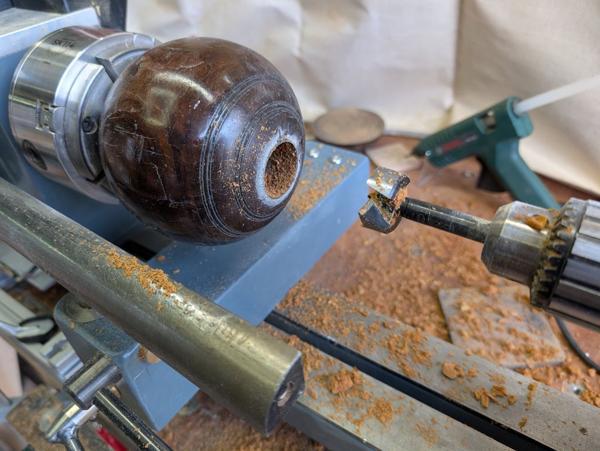
With the hole drilled, I could mount the bowling ball on the lathe using some pin chuck jaws (which are designed to grip a 30 mm hole) and then drill in from the other end until I met the first hole:
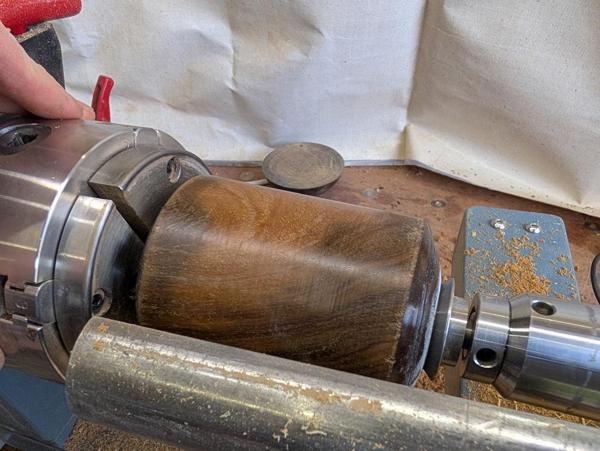
There was then nothing for it but to start to turn. I started with a carbide insert tool to rough it to a concentric round (the hole through the middle wasn't exactly centred). That made a lot of fine dust but coped wth the hard wood just fine:
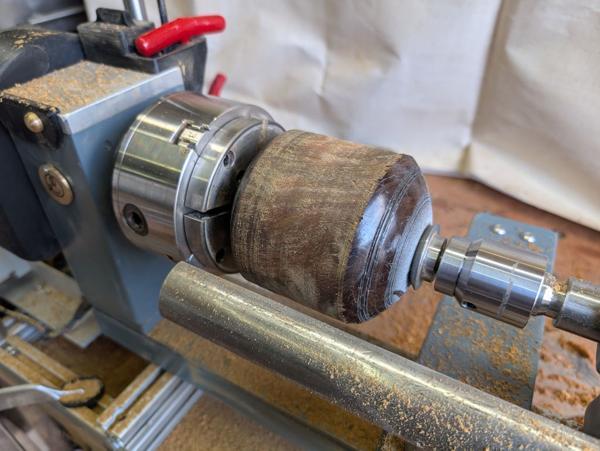
The carbide tool leaves a rather rough finish:
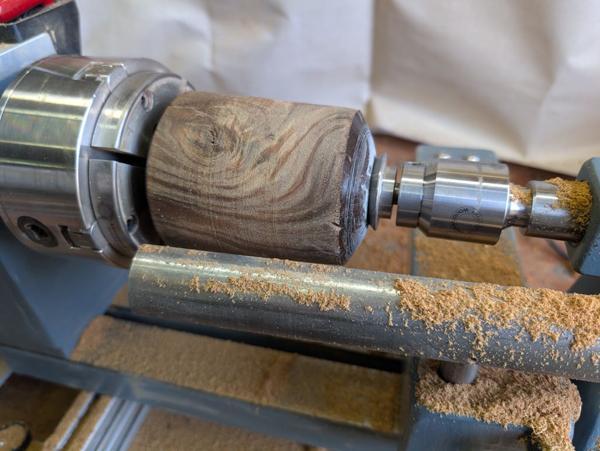
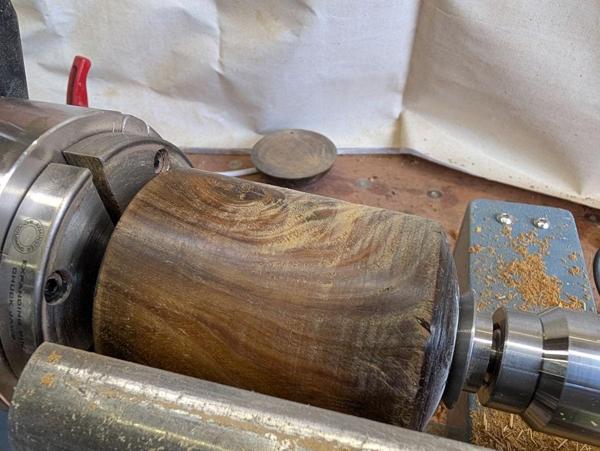
I can't remember what tool I switched to next but judging by the photo of the tool finish it might have been a skew chisel (or perhaps a spindle gouge):
The finish wasn't quite as good in the area around the knot:
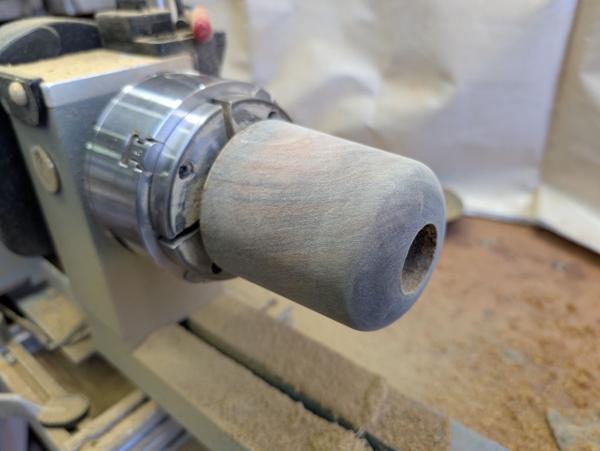
I used the spindle gouge to shape the end and then did some sanding:
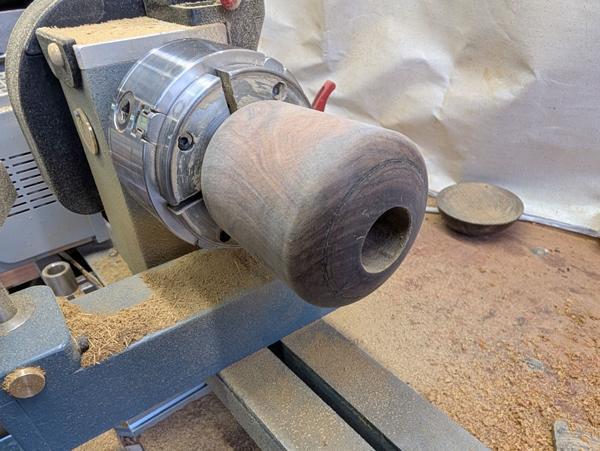
It got flipped around and I did a little bit of work on the wider end but not too much as I wanted to leave the rings (from the original bowling ball finish) in place if possible:
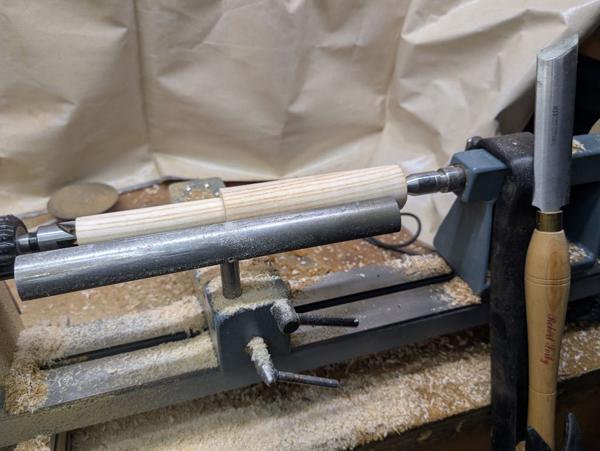
Next up was the handle. This started out as a cuboid stick of Ash. I turned it round with a roughing gouge then did the rest of the shaping of the 30 mm section with the big skew chisel:
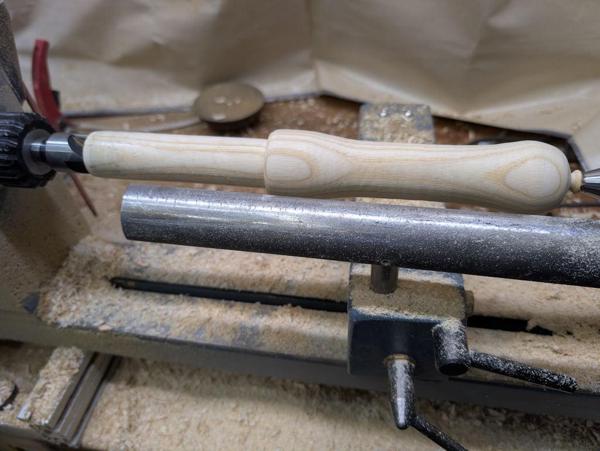
The handle got shaped with the spindle gouge:
That's the bit I expect to be most different between my mallet and my other half's one. I also wouldn't be surprised if I decide that this first attempt isn't quite the right shape, but I won't know that until I try to use it.
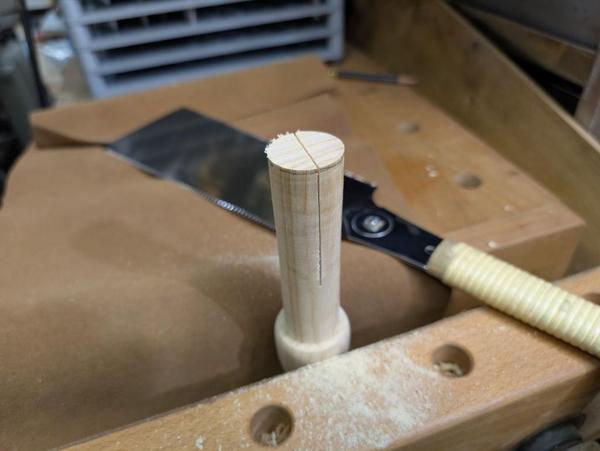
With the basic shape of the handle turned, I cut a long slit in the end, using one of the vices in my portable workbench as I couldn't use the main bench due to the lathe being in the way:
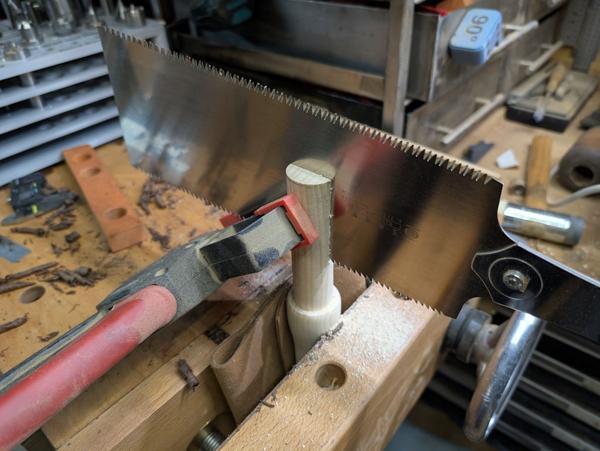
A bit later I decided that slit was a bit narrow so I widened it by clamping it mostly shut and using the bigger Ryoba (which has a thicker plate):
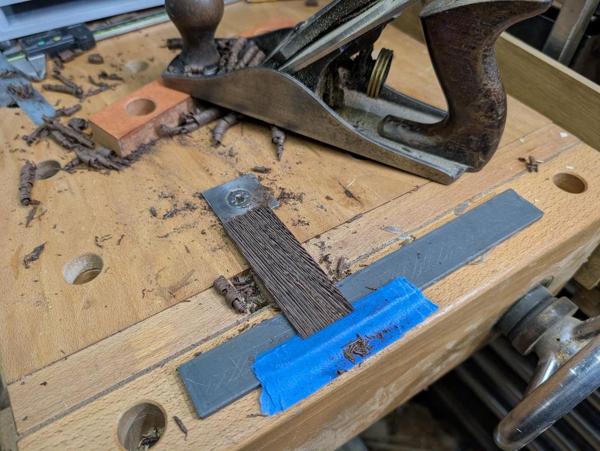
To make a wedge, any sensible person would probably start with a bandsaw or perhaps table saw. I don't have a table saw and my bandsaw table is currently piled high with clutter that I need to tidy up. If I were sensible, I would have tidied up the bandsaw and then used it for the wedges. Instead I decided to just have a go at making a wedge with a #4 and a slightly fiddly set-up on the portable workbench:
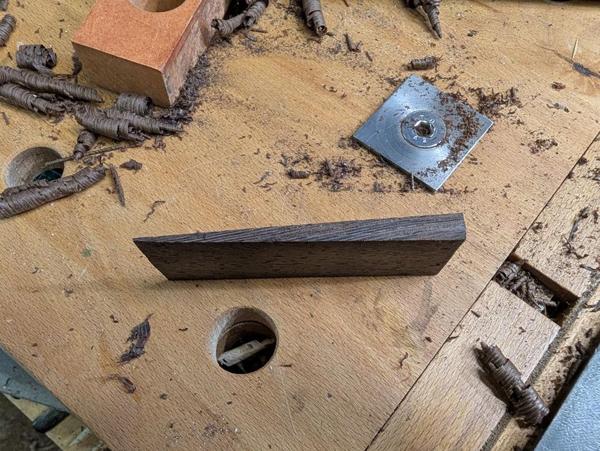
The resulting Wenge wedge:
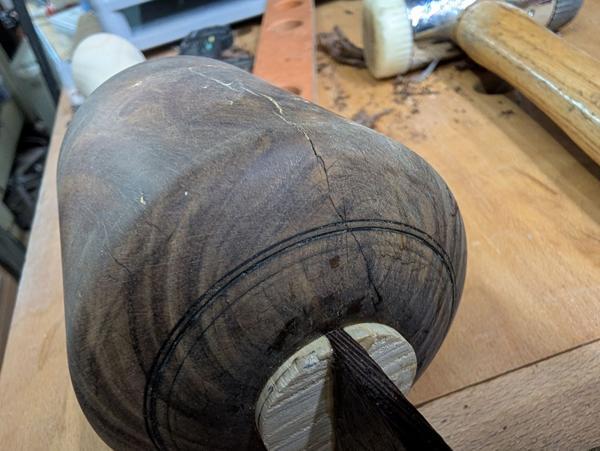
I slathered the wedge in liquid fish glue and tapped it in. It didn't go very far in!

I hadn't been that sure of which orientation to put the wedge in (the grain direction on the Lignum Vitae wasn't especially clear-cut). Although I hadn't hit it very hard, I noticed that a slight crack had appeared in the head:
I'm a bit concerned that the result of that crack might be a mallet that breaks apart in use, but only time will tell. Worst-case, I've got two more Crown Green balls to play with! To mitigate the risk a bit, I poured some thin superglue into the crack and left it overnight for both glue types to set. Interestingly, when I came back in the morning it was really quite difficult to spot where that crack had been so I guess it had closed up quite a bit.
After carefully sanding off the superglue overspill, I sawed off the excess wedge and then cleaned up the two ends of the mallet using my recently-made lathe mounted sanding disc:
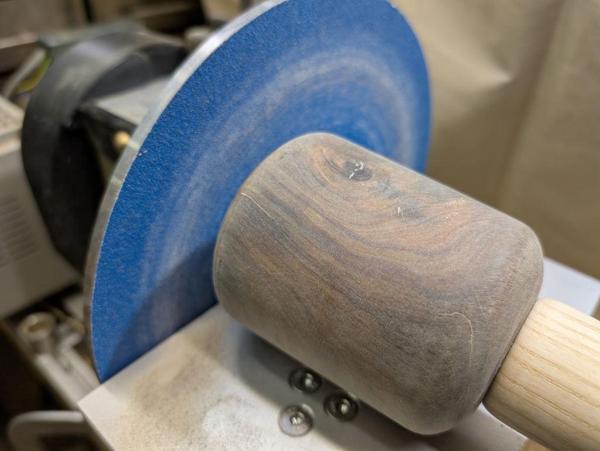
You can just about see the path of the crack in that photo if you look closely: it's much fainter than it was in the previous picture.
That (being 80 grit) left a rough finish but it was quite quick to sand it smoother by hand. I was going to finish it in the usual Mike's Magic Mix but couldn't find it (as I said earlier, the workshop needs a tidy up) so I used hard wax oil instead. The finished mallet:
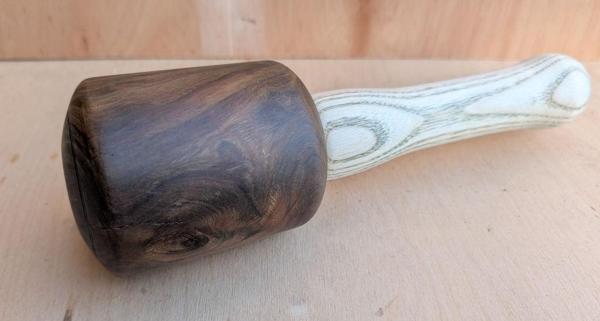
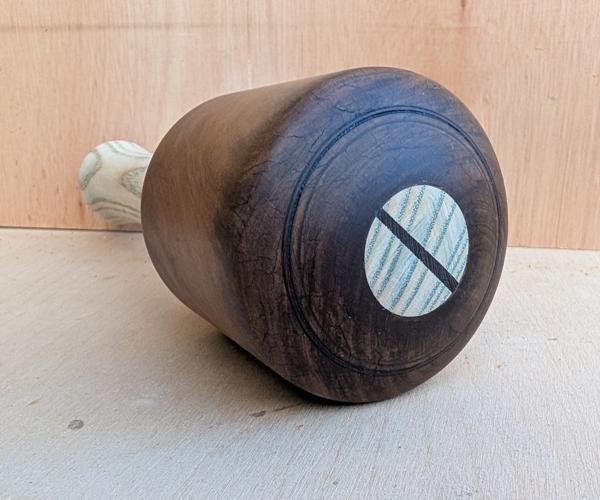
I'm not sure what caused that green colour in the Ash grain; that's real, not just a photographic oddity. End view:
If, on the other hand, I had to characterise the sort of project I would put at the top of the list, I think I would describe it as "using tools that I've made to make more tools". This project fits into that category and in fact goes a little further in that I used several home-made tools (including soft jaws, motorised axes on both the lathe and mill as well as some others) to make the tool that I'm using to make this tool!
The project, which I expect to have a few goes at before I'm completely happy with it, is to make a mallet. I've never used a cylindrical mallet (I usually use one of these Thor ones) so I don't know how much it'll get used in the end. However, my other half would also like one for leather-work projects (she currently uses an identical Thor one) so inevitably I'll make a few as we both figure out what sort of weight and handle shape works for each of us.
Like many others before me, I'm starting with a Lignum Vitae Crown Green bowling ball. My other half bought four of them. One had an enormous chunk missing from it so has been turned into a small bowl. The other three are for two mallets (with a spare for when I make mistakes).
The first job (which I'd do differently next time) was to drill a 30 mm hole in the end of the ball with a Forstner bit. I did this in a slightly iffy fashion:
I was being lazy and it went fine, but when I do the next one I'll make a simple fixture to hold the ball a bit more rigidly rather than just relying on hand strength (and the fact it's round so won't do much damage if it catches). I'd also try to drill all the way through rather than about two thirds of the way as that would improve the chances of a good concentric hole (although in practice it was fine).
I wasn't sure how I would find the mother-of-pearl inlay to drill but the Forstner bit didn't seem to struggle at all (it just covered the pillar drill in white dust).
With the hole drilled, I could mount the bowling ball on the lathe using some pin chuck jaws (which are designed to grip a 30 mm hole) and then drill in from the other end until I met the first hole:
There was then nothing for it but to start to turn. I started with a carbide insert tool to rough it to a concentric round (the hole through the middle wasn't exactly centred). That made a lot of fine dust but coped wth the hard wood just fine:
The carbide tool leaves a rather rough finish:
I can't remember what tool I switched to next but judging by the photo of the tool finish it might have been a skew chisel (or perhaps a spindle gouge):
The finish wasn't quite as good in the area around the knot:
I used the spindle gouge to shape the end and then did some sanding:
It got flipped around and I did a little bit of work on the wider end but not too much as I wanted to leave the rings (from the original bowling ball finish) in place if possible:
Next up was the handle. This started out as a cuboid stick of Ash. I turned it round with a roughing gouge then did the rest of the shaping of the 30 mm section with the big skew chisel:
The handle got shaped with the spindle gouge:
That's the bit I expect to be most different between my mallet and my other half's one. I also wouldn't be surprised if I decide that this first attempt isn't quite the right shape, but I won't know that until I try to use it.
With the basic shape of the handle turned, I cut a long slit in the end, using one of the vices in my portable workbench as I couldn't use the main bench due to the lathe being in the way:
A bit later I decided that slit was a bit narrow so I widened it by clamping it mostly shut and using the bigger Ryoba (which has a thicker plate):
To make a wedge, any sensible person would probably start with a bandsaw or perhaps table saw. I don't have a table saw and my bandsaw table is currently piled high with clutter that I need to tidy up. If I were sensible, I would have tidied up the bandsaw and then used it for the wedges. Instead I decided to just have a go at making a wedge with a #4 and a slightly fiddly set-up on the portable workbench:
The resulting Wenge wedge:
I slathered the wedge in liquid fish glue and tapped it in. It didn't go very far in!
I hadn't been that sure of which orientation to put the wedge in (the grain direction on the Lignum Vitae wasn't especially clear-cut). Although I hadn't hit it very hard, I noticed that a slight crack had appeared in the head:
I'm a bit concerned that the result of that crack might be a mallet that breaks apart in use, but only time will tell. Worst-case, I've got two more Crown Green balls to play with! To mitigate the risk a bit, I poured some thin superglue into the crack and left it overnight for both glue types to set. Interestingly, when I came back in the morning it was really quite difficult to spot where that crack had been so I guess it had closed up quite a bit.
After carefully sanding off the superglue overspill, I sawed off the excess wedge and then cleaned up the two ends of the mallet using my recently-made lathe mounted sanding disc:
You can just about see the path of the crack in that photo if you look closely: it's much fainter than it was in the previous picture.
That (being 80 grit) left a rough finish but it was quite quick to sand it smoother by hand. I was going to finish it in the usual Mike's Magic Mix but couldn't find it (as I said earlier, the workshop needs a tidy up) so I used hard wax oil instead. The finished mallet:
I'm not sure what caused that green colour in the Ash grain; that's real, not just a photographic oddity. End view:
 . I've got a couple (with cracks) and one without... I did had eight but sold the other five. So... I've got three to turn into mallets - at some point.
 - Rob
- Rob