Dr.Al
Old Oak
My other half's birthday is coming up in a few weeks. She's a keen artist and I thought I'd have a go at making something for her birthday. I'm fairly sure she doesn't check this forum so it should be safe to post this!
The idea for this wasshamelessly plagiarised from inspired by this GR Woodworking youtube video.
Carolyn had mentioned that she struggles with small paintings, finding it much easier to work on A4 size or bigger. Although in the past she's used acrylic paints a lot, at the moment she uses mostly watercolours. With all that in mind, I bought some tiny 100 × 100 mm canvases, perfectly suited to oils or acrylics . In all seriousness though, I thought the pack of 10 small canvases would give her some opportunities to practise small paintings and she has mentioned that she's got some stuff that can be painted on any surface to turn it into a good watercolour medium (so I do listen a bit, really!)
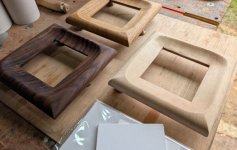
Anyway, here are the three picture frames I've made (having just had their first coat of finish - Polyvine Wax Finish Varnish Satin for the Sycamore one and Mike's Magic Mix for the oak one and the ABW one):

A couple of other photos showing the shape:
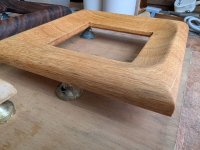
I didn't take any photos of the backs but they're flat and fairly featureless. There's a keyhole slot (made with a screaming monster) for hanging and that's it. The canvases are a snug fit in the pocket so I was planning to hold them in place with a combination of friction and a bit of sticky tape.
I also didn't take many photos of the process of making them but a few teaser shots follow:
Roughing out the inside curve with a gouge (I enjoyed this a lot, especially on the Sycamore, which was lovely to work with):
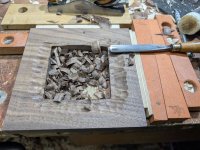
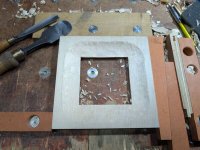
Refining the shape with the gouge and a big flat-faced chisel with a curvy end (all the MFT-style dog-holes in my bench are really useful for holding stuff like this):
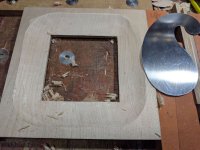
Scraping (this the first time I've ever used that curly card scraper):
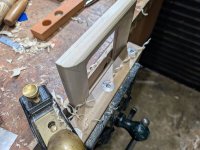
Starting to round over the edge in the vice:
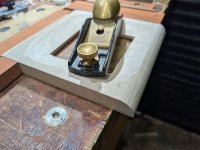
Finishing the first edge shape with the frame clamped on the bench:
Unusually for me, the frames got a lot of sanding (150 grit, 180 grit and 240 grit). I usually try to leave a planed finish and skip the whole sanding malarky but I'm not quite as confident with curvy surfaces (especially the inside curves on something like these frames) - there were a few blemishes left after card scraping for which sanding seemed the easiest option.
The idea for this was
Carolyn had mentioned that she struggles with small paintings, finding it much easier to work on A4 size or bigger. Although in the past she's used acrylic paints a lot, at the moment she uses mostly watercolours. With all that in mind, I bought some tiny 100 × 100 mm canvases, perfectly suited to oils or acrylics
. In all seriousness though, I thought the pack of 10 small canvases would give her some opportunities to practise small paintings and she has mentioned that she's got some stuff that can be painted on any surface to turn it into a good watercolour medium (so I do listen a bit, really!)Anyway, here are the three picture frames I've made (having just had their first coat of finish - Polyvine Wax Finish Varnish Satin for the Sycamore one and Mike's Magic Mix for the oak one and the ABW one):
A couple of other photos showing the shape:
I didn't take any photos of the backs but they're flat and fairly featureless. There's a keyhole slot (made with a screaming monster) for hanging and that's it. The canvases are a snug fit in the pocket so I was planning to hold them in place with a combination of friction and a bit of sticky tape.
I also didn't take many photos of the process of making them but a few teaser shots follow:
Roughing out the inside curve with a gouge (I enjoyed this a lot, especially on the Sycamore, which was lovely to work with):
Refining the shape with the gouge and a big flat-faced chisel with a curvy end (all the MFT-style dog-holes in my bench are really useful for holding stuff like this):
Scraping (this the first time I've ever used that curly card scraper):
Starting to round over the edge in the vice:
Finishing the first edge shape with the frame clamped on the bench:
Unusually for me, the frames got a lot of sanding (150 grit, 180 grit and 240 grit). I usually try to leave a planed finish and skip the whole sanding malarky but I'm not quite as confident with curvy surfaces (especially the inside curves on something like these frames) - there were a few blemishes left after card scraping for which sanding seemed the easiest option.