• Hi all and welcome to TheWoodHaven2 brought into the 21st Century, kicking and screaming! We all have Alasdair to thank for the vast bulk of the heavy lifting to get us here, no more so than me because he's taken away a huge burden of responsibility from my shoulders and brought us to this new shiny home, with all your previous content (hopefully) still intact! Please peruse and feed back. There is still plenty to do, like changing the colour scheme, adding the banner graphic, tweaking the odd setting here and there so I have added a new thread in the 'Technical Issues, Bugs and Feature Requests' forum for you to add any issues you find, any missing settings or just anything you'd like to see added/removed from the feature set that Xenforo offers. We will get to everything over the coming weeks so please be patient, but add anything at all to the thread I mention above and we promise to get to them over the next few days/weeks/months. In the meantime, please enjoy!

Post a photo of the last thing you made...

Doug":tc8fo37g said:
Mike G":tc8fo37g said:
Doug":tc8fo37g said:
.......I like to coat the match boarding before I finally assemble the gate.

That's a good tip. It's really difficult to ensure you get paint down into the gaps otherwise. I should know. I've just discovered the issue AFTER gluing up some gates I made for a friend. In the end, I drowned the gaps in paint and blew it down with an air line. Nightmare!

It does make it a longer job but well worth it, I made two ledge & brace gates last month all the 19mm match board was given two coats of Zinsser as were the mating surfaces of the braces


The screws that hold it together were plugged which is why I’d only painted the mating surfaces of the braces.

Doug, I'm never sure if the braces should be let into the ledges or not? I've seen both methods but usually where nails have been used rather than screws
Not try to criticise your method but instead to learn the pros and cons.
Bob
 
I used to make them set in Bob but with having a domino it’s easier to put a couple of loose tenons in usually made from the same timber as the gate so they are not going anywhere
 
I was asked if I could make some stands for Mahjong tiles. A bought one was shown to me as an example of what was required, here is the result.
37c1c649ba0b71652bd1b1bf1a47cc20.jpg

They had one coat of hard wax oil.
 
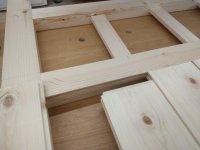
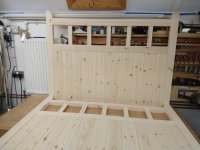
Managed some progress on the gates, routed a groove for the match boarding to fit into then cut a tongue on the top edge of the board & did a dry fit.

BC4DE6B6-F654-4D09-BEF0-18DD305AEB5B.jpeg

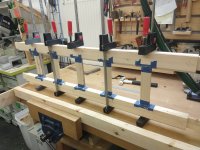
After which it was glue up time, I did the ladder bit first taping the joints to minimise the clean up of the PU glue.

DEAB15B0-220F-4547-BA13-D7FF3128FD3D.jpeg

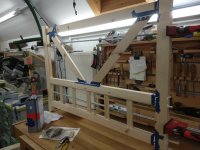
Then I glued each end individually as with the braces I doubted I’d have enough time with the PU glue, this was the first glue up which was bad enough so I’m glad I glued up as I did.

8BEB0D91-D248-4DBE-8793-619FBCD0B8EC.jpeg

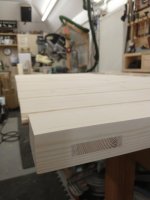
Happy with how the joints came out.

79A6C83D-51FC-44B2-B17A-160661352B6C.jpeg

Gates sanded & ready for staining I’ll remove the match boarding & stain it prior to fixing it in place.

08BED55D-5730-42CE-94D1-61FFCE174361.jpeg

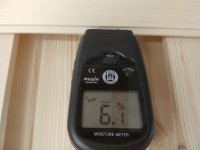
I’ve left decent gaps in the boarding as I doubt it will be this dry again, that’s what happens when it’s stored on the very top shelf :shock:

8310A6D8-2200-48FD-94C4-39189F7C72FF.jpeg
 
Gates looking good Doug,

Doug":1m332dv4 said:
taping the joints to minimise the clean up of the PU glue

Wish I had done that when i was gluing up my windows, anyway a quick wipe with acetone soon sorted that, plus a bit of scraping...
 
Nice gates, Doug. I don't think I've seen white PU glue before. The only PU I've ever used was yellow, but I'ven ot bought the stuff for years now so haven't kept up with develoments.

That's about the lowest reading I've ever seen from a moisture meter.
 
HOJ":j59cpbb0 said:
Gates looking good Doug,

Doug":j59cpbb0 said:
taping the joints to minimise the clean up of the PU glue

Wish I had done that when i was gluing up my windows, anyway a quick wipe with acetone soon sorted that, plus a bit of scraping...

Thanks Paul, the taping does seem a faff to start with but for me it saves so much time in the long run


Mike G":j59cpbb0 said:
Nice gates, Doug. I don't think I've seen white PU glue before. The only PU I've ever used was yellow, but I'ven ot bought the stuff for years now so haven't kept up with develoments.
Thanks Mike, this is the lightest drying coloured PU I’ve ever used the last lot I had was grey for flooring :?

Mike G":j59cpbb0 said:
That's about the lowest reading I've ever seen from a moisture meter.
I got some Olive ash down to 3% storing it in a bedroom prior to use but certainly this is the lowest direct from the yard though as I said it was on the top of the rack, probably 6-7m up near the roof of the unit so I imagine pretty hot up there this last month.
 
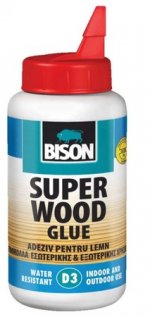
I use Bison D3 PU, its pure white when liquid, sets clear though.
In the summer it sets like superglue so then I use Titebond 3, which is pale yellow and sets dark brown, but I get a few minutes to adjust if its a complicated glue up.
 
sunnybob":22so40o9 said:
I use Bison D3 PU, its pure white when liquid, sets clear though.
In the summer it sets like superglue so then I use Titebond 3, which is pale yellow and sets dark brown, but I get a few minutes to adjust if its a complicated glue up.


Are you sure that Bison D3 is PU? looks like a PVA variant to me not likely to last outdoors in our weather although you might get away with it in Cyprus.

bison.jpg

Bob
 
Its says on the container "indoor and outdoor" and "water resistant"
Not getting into chemistry :eusa-naughty: :lol:
I've used it for 9 years now, indoor and outdoor, all manner of hard and soft woods and nothing has failed so far. :eusa-clap: :eusa-dance:
 
Bob, apart from looking on the container, you can tell if it is PU glue quite easily. PU glues expand slightly, foaming out of the joints to form a hard raised sausage. They also turn your hands black if you get it on your skin. You really do know if it's PU rather than PVA (or similar) as the differences are so stark.
 
Mike, I have used a "foaming" glue. Evostick if i recall, in a tube like silicone. It got everywhere I didnt want it to go. Threw the rest of the tube away. Is there a time I should use PU instead of my usual? As I say, no failures yet.
 
I'll bear D4 in mind if I get another big outdoor project, but the D3 is standing up to our 40c summers and monsoon springs without a problem so far.
 
Well, two, actually.

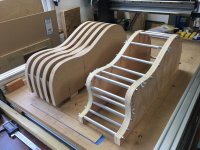
The forms for the side bending machine for the two Dreadnought SS acoustic guitars I'm embarking on.

8EFBF264-429B-4E5B-9A93-B7992B180151.jpeg

The nearer one is considerably lighter than the other!

I know. :oops: I missed one of the tubes at the tip of the horn. I'll sort it tomorrow.
 
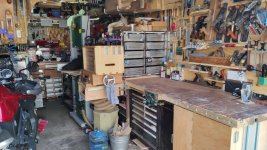
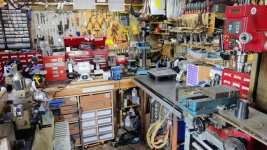
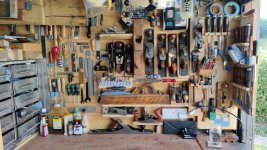
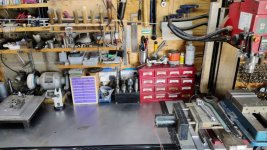
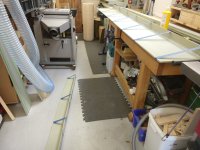
The last thing I made? A tidy garage.

It's taken me all weekend and involved emptying a lot of stuff out of both the garage and the shed, but it's nice to have a fairly clear place to go now. It's probably the tidiest is has been in about a decade :)

tidy_1.jpg

I even emptied the bin after taking that photo :)

tidy_2.jpg

tidy_3.jpg

tidy_4.jpg
 
No wonder you thought that I had more space to move.

I reckon that you could make and sell jigsaw puzzles of that tool wall.
 
There's lots n' lots of luverly tools there, both for wood and metal mangling. Were it my 'shop though, the problem I'd face is that there's nowhere near enough space to build anything of a half respectable size. In my view, it's the space you've got to play in that largely determines what size project you can take on board - Rob
 
Woodbloke":1s9obcik said:
There's lots n' lots of luverly tools there, both for wood and metal mangling. Were it my 'shop though, the problem I'd face is that there's nowhere near enough space to build anything of a half respectable size. In my view, it's the space you've got to play in that largely determines what size project you can take on board - Rob

That's definitely true. For a long time I thought the workshop would never be big enough for any woodworking at all (metalworking projects tend to be smaller), but I sold a motorbike and thought what the heck, let's try. Space is definitely an issue and if I ever get round to moving house then more clear room in the workshop is an essential.

Building the tool chest has been a bit of a challenge space-wise, but it's been okay. I don't think I'd want to try anything much bigger. Boxes are fine!
 
I haven't been around much lately--it's amazing how busy you can be after you retire. But I'll post this here, with a promise of a full thread on it later.
IMG_013623a.jpg


A daytime shot:
IMG_013627a.jpg

And yes, it does work. Not as well as I'd like (yet), but it does work.
IMG_013648a.jpg

Kirk
 
Wow, I love windmills, there is one near me in Lincolnshire a very rare Post mill.- the post is fixed in the ground and the whole mill turns into the wind so pretty much the same as yours. It’s the cogs and gearing in wood that I find fascinating.
Lovely little hand cart for the bags of grain as well.
Ian
 
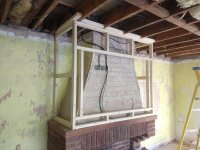
A few recent odds & sods first up a chimney breast that for some reason the folks wanted a stupidly big tv on, first up studded out

D8A46139-F0A4-4C8D-B923-62945E7C2995.jpeg

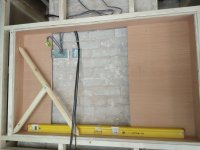
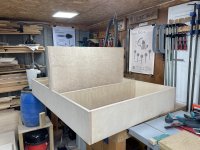
Then a plywood box to house the tv once boarded & plastered, made a square of Thales curtesy of Mr Maskery to ensure everything was square

AA6294BD-C7B3-462A-920D-34AC9986C51A.jpeg

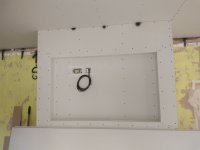
Ready for the plasterer after which I’ve got to install a new oak mantle shelf

E873BB37-85B0-4550-BFEF-8DC4AF549107.jpeg


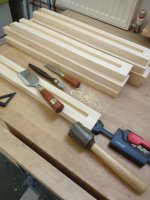
Some routing & chiselling

1D6E40A9-5FD6-4B22-B1B6-AC70163817DA.jpeg


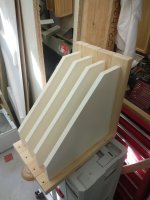
To make brackets

8B81F428-FEF3-4F1A-AFBB-8EE2924CA170.jpeg


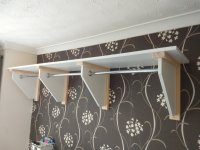
These were fitted to give substantial hanging rail & shelf

9EC503CC-5113-4AF3-820E-B4B980A27601.jpeg

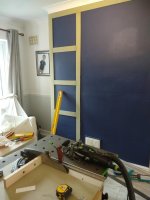
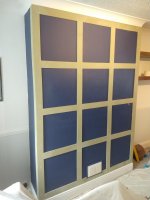
One of the stranger ones was a lady who wanted mock panelling on her chimney breast, just 9mm MDF domino’d & glued to the wall

F9D27596-05CB-49F4-B3D2-B0B783E7412C.jpeg


The corners pieces were to wrap around the external corners so we’re mitred & glued up in the workshop then cut to size

28015071-427B-4B59-A636-44A0BC574858.jpeg

Finished job

4F9EFAC7-E982-4230-AAAE-DE266C03B1EC.jpeg


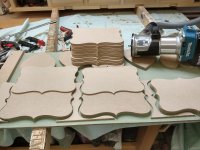
Finally a load more 4mm MDF plaques

D04E8A54-488B-4A2C-BF81-8240D61A8E70.jpeg

In between these jobs I’ve been staining the gates I posted previously, I’m hoping to get them fitted this coming week
 
Pete Maddex":u0oyoviq said:
I made a thin carving knife for spoon catving etc.

Carving knife by Pete Maddex, on Flickr

I bought a Robin Wood carving axe, its very nice and makes carving much easer, I knocked uo a sheath from some leather as its very sharpe.

ita a fantastic axe for the price which is around a 5th of the price of a hand forged one.

Robin Wood carving axe and wood carving knife I made by Pete Maddex, on Flickr

Pete

Knife seems to work well.

Spoon carving in the shade by Pete Maddex, on Flickr

Pete
 
Those your Kevlar shorts Pete ?

What happened to that axe. Does it come with those tempering colours (the RW ones I've seen don't IIRC), has it been re-treated, or was someone overzealous with the grinder ?
 
If you look on the Wood Tools website that is how they come now I think, I have a pretty old Wood tools axe and there is quite a few small differences between mine and what they sell now.
 
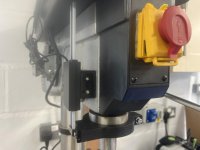
Finished this today. Digital read out for the pillar drill. Wooden collar for the shaft, metal and wood mount on the side of the body, carefully aligned and fastened together. It allows me to very quickly know how far I’m plunging by setting zero when the drill touches the work. I don’t have a depth stop Although not mechanically stopped from plunging too deep it means I can quickly drill accurate depth with no measuring or reading off a scale.

Mark
 

Attachments

  • A4F0A195-DDF9-424E-B202-4F060E502E4F.jpeg
    A4F0A195-DDF9-424E-B202-4F060E502E4F.jpeg
    187.2 KB · Views: 63,174
  • 10F57B42-1C1D-4CC8-BA24-8E823048ACAC.jpeg
    10F57B42-1C1D-4CC8-BA24-8E823048ACAC.jpeg
    190 KB · Views: 63,174
the bear":1yxhk441 said:
I don’t have a depth stop
Does your handle not have the knob on the shroud for setting the depth stop, I can spy something in your 1st picture that looks like the one I have on mine.
 
Sheffield Tony":1prsbkin said:
Those your Kevlar shorts Pete ?

What happened to that axe. Does it come with those tempering colours (the RW ones I've seen don't IIRC), has it been re-treated, or was someone overzealous with the grinder ?
Hi Tony

Maybe they are skipping a clean-up grind after heat treating, but at that price I don't mind.

Pete
 
Not done a lot of woodworking recently, bathroom has taken what spare time I had! However, I have kept up a bit of green woodworking, the odd spoon and spatula here and there. Here are a selection from recently, in order of production. Middle one was made at the Bodgers Ball on a course and last was a quick experiment to see how the heavily spalted wood worked.

IMG_7665.jpeg

At the other end of the spectrum, previously made a cabin bed for daughter number 1, second for daughter number 2 now underway. This is the desk end, fun in a small workshop!

IMG_8239.jpeg
 
Cabinetman":18b6kmjh said:
How are you fastening those corners together Matt? Just wondered if you had a secret fixing I don’t know about?
Ian

Lucky enough to have a Domino, each shelf has a couple of dominos in it. Whole structure once together is tied to the wall.
 
Back
Top