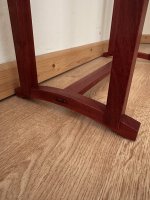
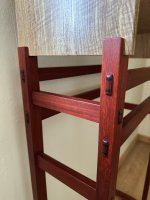
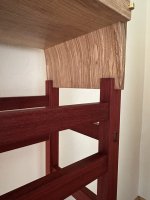
• Hi all and welcome to TheWoodHaven2 brought into the 21st Century, kicking and screaming! We all have Alasdair to thank for the vast bulk of the heavy lifting to get us here, no more so than me because he's taken away a huge burden of responsibility from my shoulders and brought us to this new shiny home, with all your previous content (hopefully) still intact! Please peruse and feed back. There is still plenty to do, like changing the colour scheme, adding the banner graphic, tweaking the odd setting here and there so I have added a new thread in the 'Technical Issues, Bugs and Feature Requests' forum for you to add any issues you find, any missing settings or just anything you'd like to see added/removed from the feature set that Xenforo offers. We will get to everything over the coming weeks so please be patient, but add anything at all to the thread I mention above and we promise to get to them over the next few days/weeks/months. In the meantime, please enjoy!

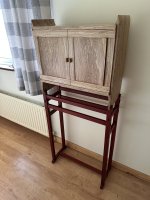
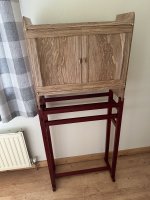
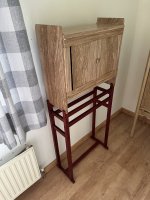
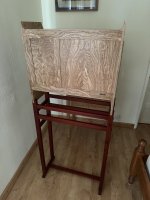
'Owl' Cabinet....Dun

Nice work. When I was at college learning carpentry and joinery I used to go to the library and read some of the cabinet makers books, James Krenov was one that I always found very interesting: https://thekrenovarchive.org/

His style looks simple but requires a great deal of skill to pull off as you have found. Your piece is very nice, well done so far.
 
Nice work. When I was at college learning carpentry and joinery I used to go to the library and read some of the cabinet makers books, James Krenov was one that I always found very interesting: https://thekrenovarchive.org/

His style looks simple but requires a great deal of skill to pull off as you have found. Your piece is very nice, well done so far.
Thanks, I'm pretty much on the home straight with this one so it shouldn't be too long until it's finished. I agree about JK's work though; his stuff looks deceptively easy until you try and make one! I've yet to 'gird the lions' and make a piece with his signature tapered legs that go the wrong way :ROFLMAO: Many folk have tried but they usually make the sweep of the leg/foot too pronounced so I reckon 'less is more'. I'd love to have a go at:
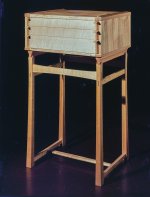
web-jk-1961-pieces-silver_chests-4.jpg

...one of these but whether or not I've got the 'bottle' to try is a moot point as they're insanely difficult! - Rob

Edit - apparently he made several of them
 
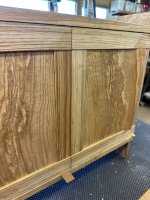
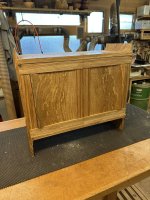
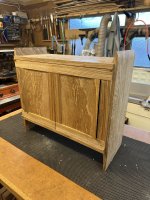
Today was spent carefully planing in the centre stiles so that the doors close:

IMG_4583.jpeg

IMG_4584.jpeg

Although the doors are dead flat with no 'wind', there's a slight 'step' in the middle which means that one of the hinge recesses is slightly out of kilter and the error is then magnified in the middle. Lots of fiddling, faffing and general head scratching to work out how to improve the fit, but thus far they don't look too shabby - Rob
 
Today was spent carefully planing in the centre stiles so that the doors close:

View attachment 32456

View attachment 32457

Although the doors are dead flat with no 'wind', there's a slight 'step' in the middle which means that one of the hinge recesses is slightly out of kilter and the error is then magnified in the middle. Lots of fiddling, faffing and general head scratching to work out how to improve the fit, but thus far they don't look too shabby - Rob
Looking absolutly fab so far, I think even Mr Krenov would be impressed.
 
Looking absolutly fab so far, I think even Mr Krenov would be impressed.
Thanks; I need to leave it alone for a while and really think through a 'plan of attack'. There's no point in going at it headlong at this late stage without due consideration of what's happening, so it's little steps and then evaluate progress - Rob
 
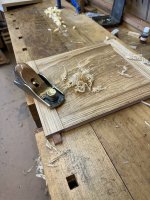
After a fraught and concentrated couple of hours at the bench, the 'step' in the rhs door has been removed. I had no option but to plane away the top rail and vertical centre stile, bearing in mind that there's a 2mm step between each one! Firstly, I screwed in a temporary 'stop' to give a closing reference surface:

IMG_4586.jpeg

Next, the offending rail was planed down with a Cliffie block plane until both rails left and right were level with each other:

IMG_4585.jpeg

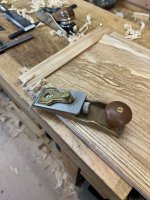
The really tricky and difficult bit was now to reduce the centre stile by 2mm; there's only one hand tool I'm aware of that will do the job:

IMG_4589.jpeg

...which is a chisel plane. These things are very difficult to use and most folk push them, which is wrong. They need to be used with a side to side swiping motion, or skew cut and a lot of pressure, coupled with an über sharp blade needs to be applied to take a shaving. Difficult though it is to use, it works and has enabled me to climb out of a pretty deep hole. Once the stile had been cleaned up with a cabinet scraper and the arrises restored:

IMG_4591.jpeg

...you can see that the out of kilter 'step' has now disappeared and all surfaces are in line and level - Rob (happy bunny 😁)
 
Last edited:
Dun. A few pics of it in location:

IMG_4640.jpeg

IMG_4641.jpeg

IMG_4642.jpeg


IMG_4652.jpeg

IMG_4648.jpeg

IMG_4647.jpeg

IMG_4650.jpeg

Finish with Rubio (one coat) on the stand and Polivine acrylic wax on the cabinet; Chestnut wax on over the top, buffed with some soft towelling supplied by Odie's Oil - Rob
 
Last edited:
Well done indeed! I really like the way that the very evident grain is mirrored in the panels and flows across the rails so perfectly. Especially so, having followed the tribulations of taming it into submission.
Thanks again for taking us with you on the journey.
 
Well done indeed! I really like the way that the very evident grain is mirrored in the panels and flows across the rails so perfectly. Especially so, having followed the tribulations of taming it into submission.
Thanks again for taking us with you on the journey.
Thanks chaps. The 'journey' was long and fraught (at times) with with many twists n'turns and even some doubling back along the way but I'm glad it's done. To be fair, the final polishing and assembly this morning was a little 'tense' as you never quite know if it's going to go together with all the hinges screwed down tight and the polish/wax applied. F'rexample, the drawer was a pretty respectable fit when unpolished, but a couple of coats of Polivine over the shovetails on the sides made it stick slightly, so it had to be rubbed back with some 2000g (you read it right) cutting back Abralon pad to return it to a finger pushing fit - Rob
 
I must admit it has worked out better aesthetically than I thought it would. This was not doubting your skills in any way, as you are much better than me, but I wondered if I would like the contrasts and grain patterns. These are subjective and personal things of course.

I'm envious of the lovely little chisel plane too. I have one - not LN - and although I agree it needs to be super sharp and used with a sideways slicing motion, for some reason I struggle to be really accurate with it and prefer to use an actual chisel when I can. You do keep your tools in lovely order.
 
I must admit it has worked out better aesthetically than I thought it would. This was not doubting your skills in any way, as you are much better than me, but I wondered if I would like the contrasts and grain patterns. These are subjective and personal things of course.
Always subjective of course, but the grain pattern and matching thereof, especially on the doors is one that JK paid particular attention to in that the rails and styles on the doors are book matched, as are the 'sail' panels. Each block of Ash for the door rails was chosen with a curved 'sweep' so that when sawn in half and opened up the pair formed that distinctive curve on the top and bottom. I really had no control over the rest of the Ash for the sides; I had a couple of exceptionally patterned slabs so I decided to try and get the best out of them that I could. On the original piece, JK used a contrasting timber for the stand and I decided to do the same, principally 'cos I didn't have anywhere near enough Ash, having only enough of that spectacular grained stuff for the cabinet - Rob
 
Excellent work as always Rob, but I am struggling with the “gap” down the sides of the doors. I know it is in the design but isn’t the reason we put doors on stuff to keep dust out? Odd to my ears but none the less beautiful.
 
Excellent work as always Rob, but I am struggling with the “gap” down the sides of the doors. I know it is in the design but isn’t the reason we put doors on stuff to keep dust out? Odd to my ears but none the less beautiful.
A simple explanation Andy. When JK was nowt but a callow yoof in Russia (he was born in the farthest East of the country on the shores of the Bearing Strait) he spent a vast amount of his time on the water sailing a small dinghy. He also used to carve model boats with a selection of small knives and much later on he continued to carve accent details (knobs, shelf supports etc) in his furniture by hand. The curved panels in his cabinets (and now this one) are reminiscent of a boat's sail and reminded him of his youth - Rob
 
Lovely work Rob, Pam sends her greetings and congratulations on a job well done btw. She loves the proportions!
Love the fit on that drawer, 2000? Was that wet and dry?
As I understand it drawers have to be a sloppy fit over here due to the humidity grrrr, it’s always been a thing of mine that drawers should be a lovely snug fit. I shall have to experiment with what one can get away with in my particular part of the States.
 
Lovely work Rob, Pam sends her greetings and congratulations on a job well done btw. She loves the proportions!
Love the fit on that drawer, 2000? Was that wet and dry?
As I understand it drawers have to be a sloppy fit over here due to the humidity grrrr, it’s always been a thing of mine that drawers should be a lovely snug fit. I shall have to experiment with what one can get away with in my particular part of the States.
Thanks Ian and please pass on my best to Pam. The abrasive I used was this stuff which is excellent for cutting down on a polished/lacquered surface but unfortunately it doesn't last very long and once the abrasive is worn the pad has to be binned - Rob
 
Thank you, looks good stuff, I’ve used their papers before and found them tb excellent.
You may be glad to hear that your old bunch are bang on the nail, I opened your link and it immediately sussed where I was and did I want pricing and costs in which monetary denomination. Must say a few years ago I got them to send me a bunch of hand tools over here and it wasn’t expensive and the service was brilliant.
Ian
 
Another proper job Rob, the details in that cabinet with the curved pieces are beautiful. Going back to an early comment, I'm not an experienced enough woodworker to know why is the reverse tapered leg going to be so challenging. Surely within the capabilities of your skill level??
 
Another proper job Rob, the details in that cabinet with the curved pieces are beautiful. Going back to an early comment, I'm not an experienced enough woodworker to know why is the reverse tapered leg going to be so challenging. Surely within the capabilities of your skill level??
Thanks Matt. One of the difficulties with JK's signature 'upside down' leg is that I could never see how a concave curve could be accurately hand planed with a small, flat bottomed plane; it didn't make sense to me. However looking at some of the images on The Krenov Archive, it's clear that the shaping is done on the two outside faces; the ones where the joints fit are straight. That means it should be relatively easy to make a template and bearing cut the curved leg on just two adjacent sides.....which is my next job on a bit of gash pine wot I prepared yesterday - Rob
 
That makes sense, the photo you dropped in this thread looks like the legs might curve near the bottom but it is most probably the camera creating an illusion. Be interesting to see the prototype!
 
That makes sense, the photo you dropped in this thread looks like the legs might curve near the bottom but it is most probably the camera creating an illusion. Be interesting to see the prototype!
It's an illusion Matt. If you do what I do, take small rule and hold it against the screen on the 'Silver Chest'; place the straight edge vertically on the corner of the leg facing directly inwards towards the centre of the piece. You'll see that it's dead straight with no curve; that's only on the surfaces that face 'out' - Rob
 
Back
Top