• Hi all and welcome to TheWoodHaven2 brought into the 21st Century, kicking and screaming! We all have Alasdair to thank for the vast bulk of the heavy lifting to get us here, no more so than me because he's taken away a huge burden of responsibility from my shoulders and brought us to this new shiny home, with all your previous content (hopefully) still intact! Please peruse and feed back. There is still plenty to do, like changing the colour scheme, adding the banner graphic, tweaking the odd setting here and there so I have added a new thread in the 'Technical Issues, Bugs and Feature Requests' forum for you to add any issues you find, any missing settings or just anything you'd like to see added/removed from the feature set that Xenforo offers. We will get to everything over the coming weeks so please be patient, but add anything at all to the thread I mention above and we promise to get to them over the next few days/weeks/months. In the meantime, please enjoy!

Dreadnought SS Guitar (Demo Time)

Thanks, Gents.

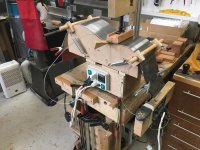
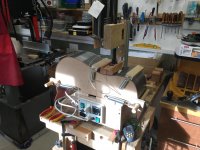
This bad boy! Upgraded to springs from shock cord.
9E58A3B0-E6CF-48CF-B352-539E72CA9672.jpeg
Switched off and set up as a dry run without the wood so I can be sure of the order of setting up.

DB7C4228-2C35-4935-84BB-284B32F85FF4.jpeg
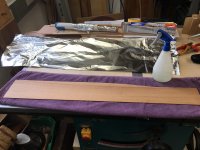
Spray the instrument side with just enough water to soak the surface.

5C7286F4-38BA-41DE-A8B8-E25DFC54D6A8.jpeg
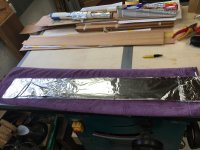
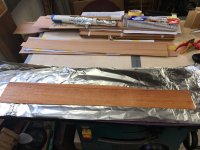
Prepare the kitchen foil.


EA3C493E-4989-4F25-A4A7-1A743AB53ED5.jpeg
Truss it up like the Christmas turkey, but neater. ;)
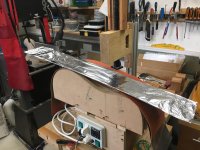

5572C7B4-3866-46F7-B4D1-F29DE3267179.jpeg
Prepare the sandwich. One spring steel outer leaf and the heating blanket first, then the instrument side.
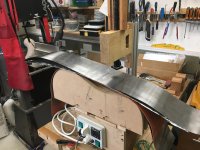

678D1D99-4D14-41E7-8A60-BD888F1C72EA.jpeg
Followed by the second outer spring steel leaf.
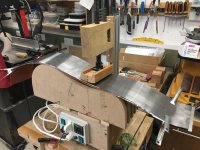

BEC45F5B-BDD1-4389-B784-57754480A782.jpeg
Then the waist caul and the the spring clips for the ends holding the sandwich together.
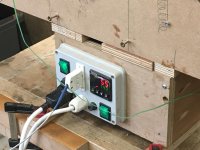

8544A002-67AE-47DC-BC23-7B2DB8BAC5B9.jpeg
Switch on and cook!


B3E77424-5119-4AA9-A4C4-E6D05CF733CF.jpeg
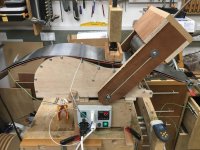
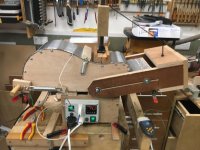
Up to temperature (140C) Wind the waist caul down and start bringing the upper and lower bout cauls around their curves.
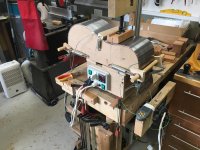

BFDC890A-C4EC-4D20-AA6A-1836F9CD7E4A.jpeg
Feel the resistance in the wood and as it gives, bring the sprung cauls down to the end of the sandwich.
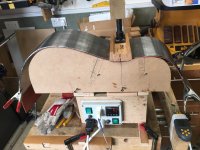

2D58AB4D-BF25-42D9-AE72-4BB8AAEB21B6.jpeg
Let the sandwich cool down and release the sprung cauls.
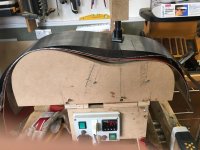

F5B6FEC6-01DF-4F6D-BE7A-B547B88CA2F6.jpeg
Then release the waist caul and slide the foil wrapped side out.
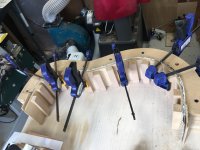

434C7106-DB1F-4367-9962-02791C8D9888.jpeg
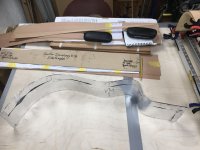
Remember me making this on the CNC machine earlier this year? Let the side cool, dry and relax in the eventual shape, even though there will be some spring back. The lamination method will remove most, if not all, spring back.


Rinse and repeat with the other instrument side and let is cool while clamped in the bender.

Lunchtime. Phew!
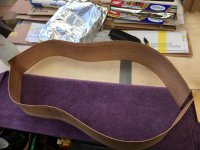
 
I was surprised, and pleased, that that process went as smoothly as it did.

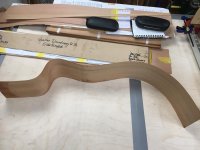
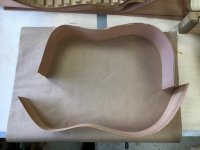
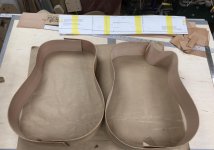
This is how they turned out. Quite a bit of spring back.

1FA6CDE6-0759-494B-AF68-430BA2DCB193.jpeg

So I got cocky and had a go at the Venetian cutaway.

A747DAD1-6257-4774-9085-84DEFC50C2B6.jpeg

If you can remember one of the ukuleles I made last year had a cutaway with a sharp horn, that was called a Florentine cutaway. The Venetian cutaway has a round horn.

BF46010E-C6F2-4E0A-A604-182885F7F7CA.jpeg

I took things slowly. First the waist. Then the lower bout. Then with the big doobry on the front I slowly lowered and wound it in at the same time.

9F35D2DB-04C1-4212-B18E-F124C966A346_1_201_a.jpeg

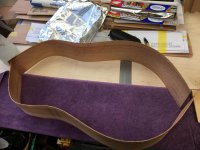
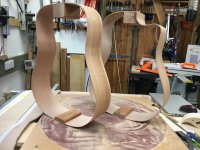
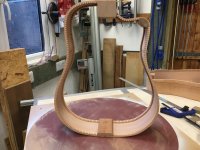
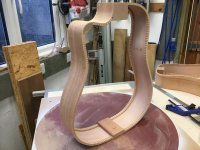
This is what came out.

E3FD43A8-0775-4525-9854-87D7D8E5419C.jpeg

Not bad, and with a bit of spring back.

C317DABF-6437-4058-9DCA-BF2BB77F23BC.jpeg

But It didn't fight when I eased it in the laminating press.

Laminating coming up. Advice is always leave it in the press for 24 hours. So all four are not going to be finished before the weekend.
 
That heating/bending machine* looks a bit Heath Robinson-ish but is obviously very effective.

* does it have a high tech name?
 
Ready to laminate the sides, one a day for the next four days.


015A9469-0871-427C-BA8A-7FB85DFABBFE.jpeg
Everything ready.


3DE8F997-63E7-4F54-9D8B-2952A1E8DEE8.jpeg
First leaf glued.


EB202CD8-7C89-425D-A44F-7506F626DE07.jpeg
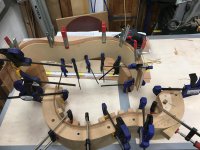
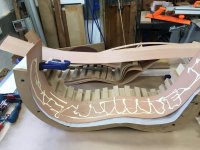
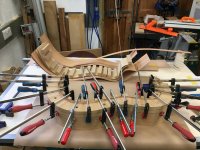
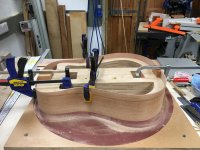
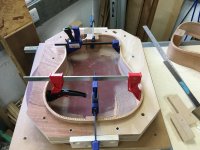
Starting the clamping with the mould and caul made on the first page of this thread.


83890FAA-D5C8-43DC-B83E-87506B82C341.jpeg
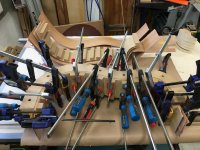
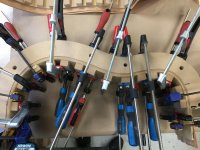
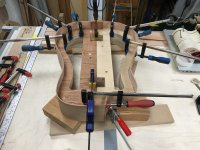
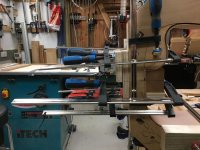
You can never have too many clamps.


BBCD92E0-8221-4EDC-8F35-75FFF7FBCC6F.jpeg
The leaves all look tight together.


Rinse and repeat x 3.
 
Time to take the clamps off.

3B45B91C-107A-49CE-8D1C-38CE48D83A3F.jpeg

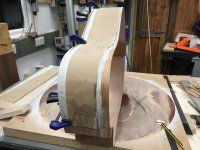
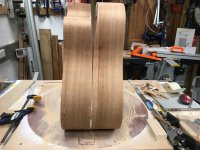
The ends look splayed out, but most of that is camera angle.

8BCACA36-9CF0-4049-B373-3EFE4A29E7E7.jpeg

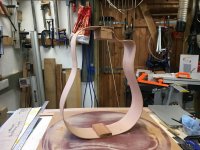
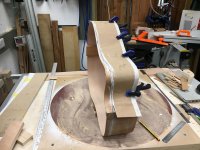
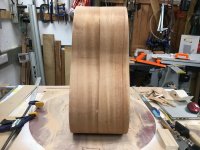
Remove the flexi-caul. No spring out.

D0217DAC-3425-46D3-B645-224D16BEFBAC.jpeg

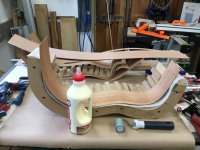
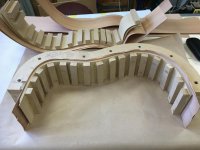
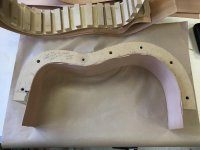
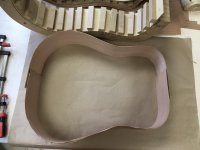
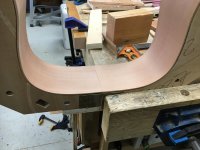
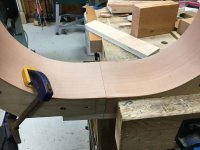
Comparison of laminated side with solid side heat bent. The laminating process vastly improves the stiffness of the side which reduces the potential for string vibration to be absorbed in the sides.

I'm told it's similar with a drum shell. Wooden shells are laminated to improve stiffness. If they were one leaf of bent wood, the skin vibration would not be so crisp or loud.
 
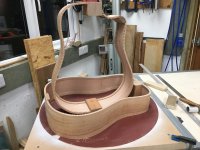
The difference between solid sides bent with heat and springback….and laminating after heat bending.

1FA6CDE6-0759-494B-AF68-430BA2DCB193.jpeg8B5A2DA2-512F-4077-BF99-BBA985583D5D_1_201_a.jpeg
 
Laminating the cutaway was interesting. It was like using just two hands to wrestle an octopus! :|
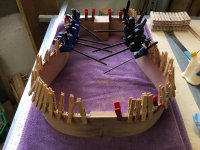
F0F3752C-94A3-430D-BB64-A229BC3FE658_1_201_a.jpeg
 
Well, it fits…..almost.

9A717E65-1AF5-433A-842D-C5AEBDE041BE.jpeg

It's going to be tricky where the cutaway side joins the other side at the neck. But everything else fits.

It seems the gluing of the veneers caused the outer leaf to curl inwards at the ends. I think I might have to try and coax it back flat with some steam and clamping.
 
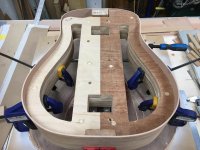
Steamed all four ends and clamped them and they're all almost straight again. The sides fit in the outside form too.

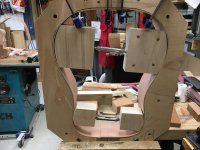
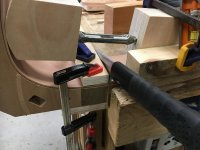
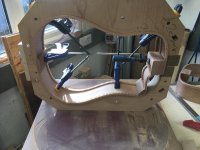
Still need this many clamps to get the slight twist out of the cutaway side to join at 90 degrees.

4A99974D-EB5B-43DD-8A7A-593CE92BBF38.jpeg
I'll leave them overnight like this so they might remember this shape tomorrow.

It think I might use epoxy for joining these sides to the neck block. I got a feeling Titebond being water based contributed to the curving of the laminations. And I'll only glue one side at a time because they are at 90 degrees to each other. The non cutaway side first, because that is the easiest to clamp square in the form. Then when that's cured, I can clamp the cutaway side to that.
 
I watched the Shadows Last Concert on Sky Arts last night. Hank Marvin was playing an acoustic guitar for some tunes. Made me think of yours.
 
Andyp":1yhnaubg said:
I watched the Shadows Last Concert on Sky Arts last night. Hank Marvin was playing an acoustic guitar for some tunes. Made me think of yours.


Thanks, Andy. Not sure why, though.

I saw a bit of it. Went to see them quite a few times in the 80s. The old band I was in did mainly Shadows covers.
 
I wonder if there is a discernible difference in sound between laminated sides and solid sides, everything else being equal. Once the back, top and neck are on, everything is pretty rigid. I don't have many acoustic guitars and they are all solid wood (BM, Maple, Rosewood). However, from a player perspective, I doubt that sound absorption by solid sides (as some luthiers state) makes any difference whatsoever. Practically all acoustic full size guitars used on stage or for recording, take a feed from the pickups (which are excellent these days) and maybe add a bit of ambient mic. What you hear out in the audience is very largely the amp / desk and probably a bit of added reverb.

It would be very interesting to compare. The marketing spiel has certainly shifted, as laminated guitars were always much cheaper than solid wood, but lamination is now apparently being marketed as a benefit. Eg I always thought that the higher end Ovation guitars which had extremely rigid bodies, sounded dire when played acoustically unamped, but generally OK when run through a desk.

Sporadically following your build trials and tribulations with interest Malc. Very good work and well documented as ever. Shall be fascinated to hear it played in due course.
 
Thanks, Adrain.

And if you refer to Police Officers as 'woodentops' again, I shall send the boys round!

I can only go by what modern single luthier businesses are demonstrating. It cannot be cheaper for them, because it takes longer and uses more material. So it might be a fashion, but could be sound, and possibly both.

I read somewhere, that top players' commissioned solid side acoustics for sound don't last very long because the structure fails with the frequency and duration of their performances. Maybe this is how the demand for laminated sides began.

But there can be no doubt that there is minimal springback with a laminated side compared to a solid. Stiffness and strength is what is required to make a body to complement a tuned soundboard.
 
I feel entirely vindicated because a) I used ** and b) my uncle was a police inspector and I have heard him refer to certain PCs as w**dentop numpties. ;)

The sides point could be chicken and egg. I remember some years ago when it became extremely difficult and expensive to get really good Brazilian Rosewood and Mahogany and lo and behold laminates started to appear, with really nice figured veneers on the pricier ones. The oldest jumbo I've got is about 55, which is a D45 from 1968 and I bought it for not a lot from a thrift shop when I was much younger. It's still fine, has been played for probably thousands of hours and I know of a few instruments from pre WWII war that have been in proper pro hands and are still good usable tools. But Martin made pretty chunky and solid guitars, very ribby and with thick kerfed joining blocks. The T814CE I have is much less sturdily made, but lives in a case when not in use and so not vulnerable to knocks. Don't you think that the biggest risk is knocking them and if hard enough that will damage the instrument whether it is laminated or not?

It may be that the proof in the pudding can be found in the classical instruments. Obviously they are smaller and tend to have cedar tops and nylons, but there are oodles around that have survived in very playable condition for well over a century. Never heard of side failings. You've got me interested now and shall have to research it a bit.
 
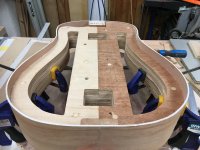
Sanding the top edges of the two halves of the symmetrical model before clamping into the outside form to glue the neck and tail blocks, using the flat side of the sanding dish.

5BF0DBBE-387E-475A-A103-2BDAC0CE9FE0.jpeg
 
AJB Temple":hl2gznur said:
I wonder if there is a discernible difference in sound between laminated sides and solid sides, everything else being equal. Once the back, top and neck are on, everything is pretty rigid. I don't have many acoustic guitars and they are all solid wood (BM, Maple, Rosewood). However, from a player perspective, I doubt that sound absorption by solid sides (as some luthiers state) makes any difference whatsoever. Practically all acoustic full size guitars used on stage or for recording, take a feed from the pickups (which are excellent these days) and maybe add a bit of ambient mic. What you hear out in the audience is very largely the amp / desk and probably a bit of added reverb.

It would be very interesting to compare. The marketing spiel has certainly shifted, as laminated guitars were always much cheaper than solid wood, but lamination is now apparently being marketed as a benefit. Eg I always thought that the higher end Ovation guitars which had extremely rigid bodies, sounded dire when played acoustically unamped, but generally OK when run through a desk.

Sporadically following your build trials and tribulations with interest Malc. Very good work and well documented as ever. Shall be fascinated to hear it played in due course.

the ES335 by gibson has laminated sides not solid and I know it's not a proper acoustic guitar but it works well and sounds great to me, maple/poplar/maple, I think that it'd be much harder as well to bend the thicker wood, I don't think one is better than the other though, it's all just preference.
 
Oh, yes!

FF825BF0-11AB-4515-AC85-3650AD635218.jpeg

That rim is so stiff compared to the others I've made with solid sides. I can barely press the neck end downwards. The previous 000 12 string I made would balloon out when pressed downwards.

I have found that there is there is scientific research that has shown that the stiffness and strength contribute to the sound, volume and sustain.

Next, the symmetrical. No taming needed.

511E9110-88ED-44E2-9AF4-B4466BB1FBA5.jpeg

Cutting through both halves of the rim for the join.

A27D1791-BAB4-41F2-8321-0B9CE281B51C.jpeg

That's the neck end join cut….

19D9E4DD-9B48-4796-902B-F684D5FE7006.jpeg

…and the tail end.

D683DEAE-4B43-43FF-9A70-B451E6404C44.jpeg
 
Ben Well, the ES335 takes us into the minefield. :lol: We have a 335 from the first year of production, with original US receipts. $287 inc case. :shock: Made in the old Kalamazoo factory. Left to me by a good friend but I helped him buy it from Flea at V&R when they were still in Denmark Street. I've got no idea how it is made but it is the case that Gibson carved some of the semis from the late 1950s.

AFAIK all Nashville made 335's have been laminate everything (inc top and back) for many years to stiffen them up. The earlier pre 1964/5 instruments (including mine - which is from 1958) are very prone to unwanted feedback and the solution was to laminate allegedly. The big brother 355 with the through mahogany may have been different for all I know, but I don't own one of those with the diamond head stocks, just a copy. I did own a quite nice 336 for a while (swapped it) and that was made of one piece mahogany routed out sides and back, with a maple lid that was I think a carved one piece. Clearly different manufacturing techniques in the were in use back in the day. 336's were not feedback prone, but as routed bodies I expect they were quite thick.

Not sure it is all that relevant to compare the semi acoustics or archtops / f holes with a full size acoustic as the semi variants are pretty much always amped and to my (biased) ear sound thin and middly without that, whereas a good acoustic will sound beautiful and project nicely whether plugged in or not.
 
You put more snaps up whilst I was replying to Ben in my lunchbreak. Very neat work. Looks top notch.

The whole laminate thing is a total sideshow to my mind. As a player my mindset these days is "just play the thing". In the piano fraternity people will argue endlessly about solid / block / laminate rims and swear blind that one is better than another. It's all tosh really. Personally I think that one of the biggest and best advantages of laminates is that you can employ some incredibly beautiful veneers that are simply impossible to find (or afford) in solid woods. Aesthetics always plays a big part.
 
Thank you, Adrian.

The research is there. It doesn't suggest it's a sideshow or tosh.

My face sides, aren't veneers as such. They are provided by luthier suppliers as sides, as a match with the bookmatched backs. I then thin them to my desired thickness, and then laminate with Swiss Pear. So I am still paying for solid sides, as are other luthiers, and then laminating with them.

As you suggest, some makers, maybe even the big sellers, are employing veneers throughout, and charging for solid sides laminated, but that is not the construction method that I am employing, nor other luthiers that I know of in the UK.
 
You misunderstand Malc. Not my intention. My "tosh" comment intends to suggest that it doesn't matter at all in the end. When you are sat on a stool playing a guitar to an audience, no one is making comparisons with other instruments. It either sounds good or doesn't. Hence the constructional (and brand for that matter) comparisons are insignificant in the end, as they are just tools for making music. Probably the only time we ever make comparisons is in the guitar shop. In a live environment the rest of the gear has a big impact on the sound as well.

Similarly If you get involved with pianists, some will argue endlessly if Steinway really is best, and if Chinese made pianos sound thin or Yamaha's too bright. Or if the Boesendorfers with the solid block rims (like lego) have the best sustain. But you only get one piano home and in no time you forget what everything else sounds like. It's the same with guitars for most of us.

Incidentally at no time did I ever suggest that anyone is using veneers and charging a "solid" premium price in some dishonest fashion. Plywood is cheaper. In some cases it is better. Control of feedback in amplified situations being one reason, and the ability to apply fancy veneers like fiddleback is another.
 
The cousins with their topsides sanded flat all round on the flat side of the sanding dish.

8C28C6B8-C2BB-412D-9FB6-6E9061A91B11.jpeg

Turn the sanding dish over to the 24' radius side (remember me milling this on the CNC?) and chalk the back edge of the symmetrical rim. The rim halves were cut to shape from the template provided with the plans before bending.
2A2EC1AD-0E05-4B2C-B998-42FD33576947.jpeg

Then turning it over and rotate, push backwards and forwards and side to side in the sanding dish. Then turn over to see where chalk has not been sanded off. Then keep going till all the chalk has gone. That's now finished sanding to shape until the kerfed linings have been glued on.
AE8F68E3-A823-4CD0-BA40-A7B1B8088C64.jpeg


Next, the cutaway model. I did not cut these sides before bending because the cutaway creates a different shape that the symmetrical. So I clamp the template to the sides and use chalk and lead to make the saw lines.
A9C0B5C6-F592-4DA3-8A5D-F6CCDC1B07D6.jpeg

And the other side.
5D5DA0BD-2C32-454D-985F-55DDFC0D96AA.jpeg

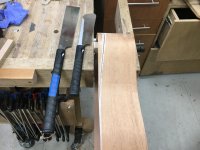
Into the vice and saw….carefully.
CFD07B80-D494-4F00-9AD0-5EF8F2A709BB.jpeg

Then rotate, back and forth and side to side sanding on the 24' radius sanding dish till there's not a gap between the rim and the dish.

Both done.

39782B42-3201-4FC5-AA24-825529FAD1F5.jpeg

49CB91FE-D69E-4956-90E6-D2C63A276571.jpeg
 
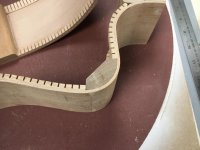
Gluing the kerfed linings using every squeezing thing know to man!

The linings provide a gluing surface for the soundboard and the instrument back in due course.

8355D9ED-D1E0-48B1-9322-859C87FD9B55.jpeg

The body's back edge is tricky to line because although the multiple kerfs allow the lining to bend, the back edge curves in two axes.
 
Both rims now lined, and back on to the sanding dish to sand down flat on the tops, and to the 24' radius on the backs. Chalk the surface to see where and how much needs to come off.

1D97B70E-2E5C-4CFC-98BC-D4AB1AC3717D.jpeg

Lift it off and have a look.

8F0F34AF-5CDF-45EF-827C-CE5E43799D69.jpeg

Blimey that was quite a workout twisting that lot just to get 0.5mm off till there's no chalk marks left.

7FAAF20E-A49D-4663-ADF9-D95AB3C9780E.jpeg

One done, both sides.

86C05FF4-3216-47F9-AE37-0D91F45F1C49.jpeg

Two done.

95889F2F-B58B-4293-BA88-651A98FD9DF1.jpeg

What I really like about the CAD/CAM software and the CNC machine is that I can import part of a drawing, in this case the Venetian horn, I can then offset it inwards by the thickness of the rim, then machine a perfect curve, not an arc, to make the horn reinforcement.

86DAAD54-EB35-41E0-8F60-A13BCBEFA942_1_201_a.jpeg

I've also scraped off every trace of glue on the insides of the rims and scraped and sanded them clean so they look as good inside as the outside will. I've seen online how some high end instruments still have glue squeezout inside the rims.
 
DaveL":un6s8dgg said:
Malc2098":un6s8dgg said:
I've seen online how some high end instruments still have glue squeezout inside the rims.

Is that done to prove they used enough glue? [emoji848]


You're too generous to them, Dave. :)
 
AJB Temple":2ah881x2 said:
Are you going to shellac the inside?

I thought about it, but, no. The Swiss Pear veneer is very tight grained, and there's also two layers of glue between the inside surface and the outer surfaces.
 
Just a little piece of information about the kerfed linings.

As far as I am aware, the kerfed linings are the only item in the timber line that I buy prefabricated for my instruments now. All other wood stuffs, I make from stock.
 
To keep to my desire to make all timber based parts from stock, I've started making my own purfling and binding again, instead of buying it in.

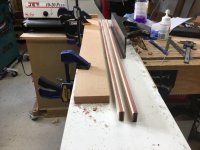
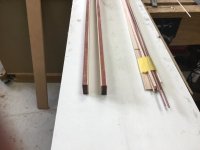
First I glued Maple strips to Purpleheart and then shot (shooted?!) their narrow sides.

48AB172A-5CC9-4975-8EA8-1F70B577283A.jpeg

The Maple and Purpleheart combination will reflect the design of the neck and the headstock.

The M/PH/M sandwich is for the centre graft on the African Mahogany back. The single M/PH is for binding around the guitar edges.

I then drum sand the Maple down to 1.55mm to match the individual maple puflings I made earlier. They should all end up about 1.5mm square on the instrument, so that I can mitre all the Maple joins.

41DE78B3-9107-46B0-A7CE-D80E8BF8F950.jpeg

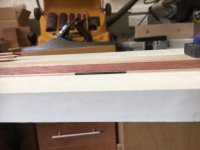
And using my latest accurate measuring instrument to confirm what my old eyes were trying to see with the Vernier and the Veritas marking gauge.

E58C74AA-6DE9-41DC-ACFB-8C53BE007210.jpeg

With just a bit of a margin for finish sanding.

Every day's a school day. I picked this up on my luthiery course of using twist drills to confirm measurements.
 
Then rip them into about 2.5mm strips on the BS.

CB6B80BD-6598-4C44-B8C5-CD76CE7CC4A5.jpeg


Then drum sand them, to just over 1.5mm thick.

38238DC2-9A5C-4312-AB44-9010605BD276.jpeg

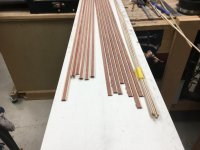
The strips on the left are for putting in the bending machine, and eventually will go round the outside of the instrument body. Each instrument needs 4 strips. I'm going to have to make some more.

The thin ones in the middle are for purfling on the front and backs of the instruments. This is the first time I've gone to this much detail. The 90 degree joints at the tail graft and at the end of the back centre graft will all have to be mitred.
 
fiveeyes":2btx5v4w said:
Malcolm..it is the, details, that count.
And thank you, for continuing to post your work. As I have no shop, at this location, I follow along always.

thanks..........bil


Thank you. You're welcome. I do what I can to try and make the WIP interesting that I would want to learn from it, as I have learned from other posts on this forum.
 
Nice!

Enjoy the detailed and accurate work that goes into producing the instrument and all the fotos.

Keep it up Malc! 8-)
 
Phil":2z1uu3r8 said:
Nice!

Enjoy the detailed and accurate work that goes into producing the instrument and all the fotos.

Keep it up Malc! 8-)


Thanks, Phil. Working on it! :)
 
Back
Top