• Hi all and welcome to TheWoodHaven2 brought into the 21st Century, kicking and screaming! We all have Alasdair to thank for the vast bulk of the heavy lifting to get us here, no more so than me because he's taken away a huge burden of responsibility from my shoulders and brought us to this new shiny home, with all your previous content (hopefully) still intact! Please peruse and feed back. There is still plenty to do, like changing the colour scheme, adding the banner graphic, tweaking the odd setting here and there so I have added a new thread in the 'Technical Issues, Bugs and Feature Requests' forum for you to add any issues you find, any missing settings or just anything you'd like to see added/removed from the feature set that Xenforo offers. We will get to everything over the coming weeks so please be patient, but add anything at all to the thread I mention above and we promise to get to them over the next few days/weeks/months. In the meantime, please enjoy!

Dreadnought SS Guitar (Demo Time)

Cabinetman":dea7424q said:
The attention to detail is most impressive. So many different skills involved and most are in addition to ordinary furniture making. Don’t think I’ll be starting any time soon haha.


Thanks Ian.
 
MattS":1q0yg7cz said:
They're looking so good, the back of that standard dreadnought looks like its going to be stunning with a bit of finish on it.
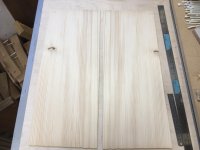
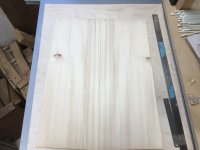
Thanks, Matt. African Mahogany and not the best grade. But it sands, scrapes and planes up well.

Shan't be getting any more. I can't justify the CITES licence now required for each purchase.
 
Apart from the MoP inlay on the headstock and the carbon fibre rods in the neck, everything else has been of wood.

The neck started out planing face side and face edge before thicknessing and 'widthing'. Then laminating the centre strips. Then a scarf joint, followed by laminating veneers. Then the CNC shape and inlay. Then the layered joints for the heel.

The sides were thicknesses and heat bent. Then they were laminated with veneers, cut to shape and had their kerfed linings glued on. Still all wood.

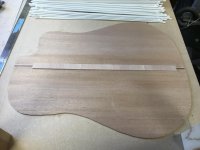
The backs' bookmatched halves have been drum sanded to thickness, then glued together with a centre decorative strip.

Still all wood and more to go!

Oh, and while the headstock was shaped and inlayed using the CNC machine, and while other machines like the Bandsaw, the drum sander and the cordless router have been used, I still consider the work to be hand crafted.

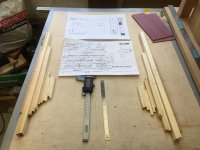
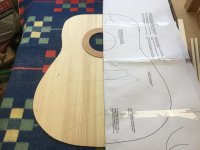
Oh, and before all that, the templates, moulds and forms have all been made out of pdf and plywood.
 
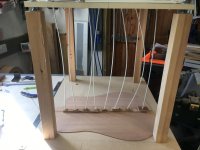
Out comes the Go-Bar Deck.

0F641F93-F606-4BCC-9D9B-77B9147F5BE5.jpeg

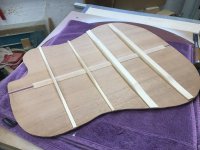
Reinforcement of the join by Spruce strips with their grain 90 degrees to the grain of the join.

96C60E06-D664-4DBD-ADDB-24D525D743B5_1_201_a.jpeg

Repeat for the other back.

C75F362B-044B-4D4E-940B-5079E6C7E2E1.jpeg

EAC544BD-5A49-4D10-B168-49D3E6187D89.jpeg
 
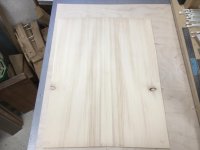
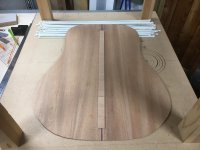
One of the pairs of book-matched Spruce has this beautiful creamy colour after drum sanding to thickness, which I don't think comes out so good in the photos. The grain is really straight, apart from around the knots, but the way it's been cut from the supplier the grain is angled when you offer them up to join.

5532D0CF-7A9A-477F-92A9-CC26B1C5C60C.jpeg

So I chose the inner most dark growth ring line, measured 20mm in on each half and pencilled a line parallel with that dark growth line. Then by laying one on the other, they looked parallel.

2092EF5B-5E5F-4DF7-9623-20F91F8FFDF1.jpeg

With a long rule and craft knife and I cut off the slight taper and offered the up to join.

2CA5BA59-7438-4D9B-9643-446B67939940_1_201_a.jpeg

Works for me.

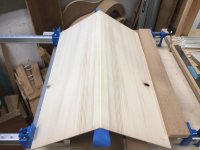
Time to join them. Masking tape at the back of the joint as a hinge, and open up to squeeze TBO glue along the vee.

33EDACD0-F1B5-432E-A09F-05B079FD117B.jpeg

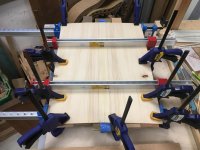
There are far more sophisticated and efficient jigs for clamping the halves together, but for once a year, this set up does me ok.

CA7F0503-6E49-4B31-B762-B434E2F24F97.jpeg

Rosette and purfling next.
 
Presumably the darkest annular ring area (seems more prominent at the knot end than the tail end) will be partially obscured by the fingerboard, and the soundhole and decoration (assuming not at offset design) will remove a chunk too. The knots are in the scrap area where the waisting occurs?

It's quite a marked change in grain pattern for soundboard spruce isn't it. I wonder if the annular ring darkness suggests wetter years at that time, though the annual growth seems pretty even based on the photos.

That's a brave glue up! Such a critical part of the job.
 
Thanks, Stephen.

Thanks, Adrian.

The darker lines are spread over the width. I am ok with uneven lining aesthetically, although many luthiers, or rather their clients, would prefer close, straight and even.

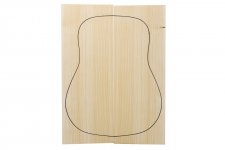
To illustrate that, these are the images available from my supplier in Spain of Engelmann Spruce which is the cheapest of the Spruces for soundboards that they have.

Please remember this is my hobby, I receive no income.

This a C grade which is what I bought. This is available on sale at £5.49 plus shipping.

abeto-engelmann-4-.jpg

This is a AAA grade also available on sale at £60.23 plus shipping.

aaa-engelmann-spruce-tops-550x215x45-mmx2.jpg

Engelmann Spruce is the cheapest soundboard pieces they sell, ideal for a hobbyist like me.

North American Sequoia tops are available from this supplier at £194 plus tax.
 
Thanks for the photos Malc. I fully get where you are coming from.

I used to be a guitar collector (decades of doing so) and so was ultra fussy and have traded on a lot of guitars. Some musicians and collectors will pay a significant premium for top grade wood and I suspect from a luthiers' perspective that the additional cost of the materials is relatively trivial if selling instruments is your business. I fully get too that in your case it is not.

That said the forward faces are what the audience sees and so aesthetics matter to some of us, when really all we should care about is the sound. A friend of mine deals in mainly classical vintage guitars (plus vintage Martins etc) and they vary hugely from very light coloured soundboards to almost tobacco coloured golden brown cedar with very prominent growth rings. So clearly fashions change. He can tell which instrument is which most of the time, even if blindfolded and the best sounding ones are not necessarily the prettiest.
 
Thanks, Nick and Adrian.

So…..lets see this process of making and fitting rosette and its purfling, like I practised last week.

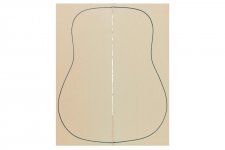
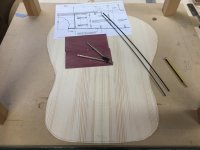
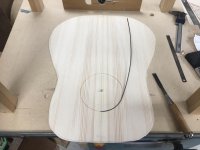
Having glued the bookmatched soundboard halves together and sanded to almost final thickness, I cut them over size on the bandsaw and prepared the materials for the rosette.

4093EB49-3093-487B-9FA9-64C1F2D67308.jpeg

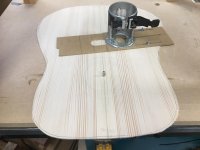
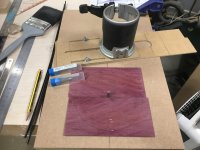
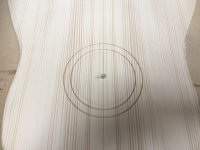
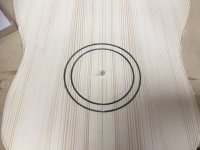
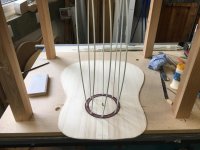
If you remember from my practice post, I need two work boards; one is the go-bar deck and the other is a simple work board. I drill a 6mm hole in the soundboard in the centre of the sound hole. The work board has a 6mm hole in it a 6mm rod fixes the soundboard to the work board.

B6499AE8-E526-4FFB-99AD-D85F91DF4CD9.jpeg

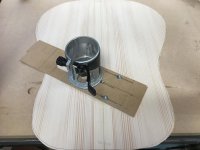
The home made circle cutting jig uses the 6mm rod to rotate around its axis.

FDFD3687-1372-4AD7-87B7-D86DC405E8E5.jpeg

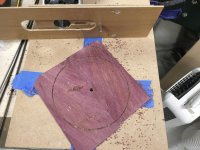
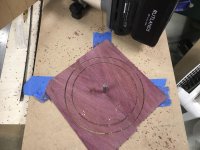
There's a similar work board setup for the rosette.

ED80F88E-695A-4697-8581-6612F47BA121.jpeg

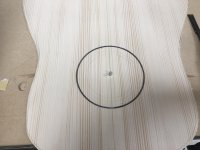
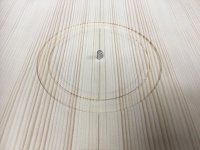
The instruction I had for fitting the purfling was that it should not be snug, but have room to expand from the water based glue. So for my 1,54mm purfling, I used a 2mm router cutter and rout the outer purfling circle.

31845F60-9B08-4D8C-81AF-7ED96393DA1C_1_201_a.jpeg

And fitted its purfling, B/W/B.

94250354-56DB-4643-844E-EF5373E3BFC5_1_201_a.jpeg

The without changing the radius on the circle cutting jig, I cut the outside of the rosette of strips of Purpleheart I joined and sanded to thickness a week or so ago.

D7B782F8-89AE-4B34-A2F1-89A01B8579FE_1_201_a.jpeg

Next, rout the inner purfling circle….

BBAA4A1C-A669-43E7-8583-DD8CA882EB48_1_201_a.jpeg

…and dry fit its purfling.

F3FBB98C-2F19-4A36-9D31-05928D5B42E9_1_201_a.jpeg

The without changing the radius of the jig, route the inside of the rosette.

FDB0C0E8-0923-490D-B017-2F874A273E7A_1_201_a.jpeg

Then changing to 1/4" cutter, I rout out the channel for the rosette, just a tad shallower than the thickness of the rosette.

6F4995A8-5A6F-4785-95F7-B6D99C90B49B_1_201_a.jpeg

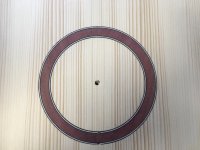
The dry fit the three components.

8FABFF31-25A5-4763-9458-982D599ED543_1_201_a.jpeg

Glue and clamp them.

EF94C32B-F472-482E-BE89-8F6C461FDE60.jpeg

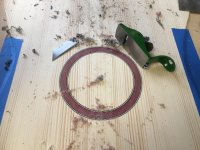
Remove excess material….

95B2FC77-2D09-4493-8DFB-D1711122870C.jpeg

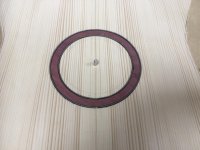
…and then find out that a 2mm cutter for a 1.54mm thick material will show up unsightly gaps.

292BB866-6974-4F71-91A1-9B42A8072A1F.jpeg

That's why as a hobby instrument maker/amateur luthier, I still but the cheaper tone wood materials for instrument tops.

Fear not, I have a plan! :)
 
Damn!

I'm surprised though that the advice given was to give such a big allowance for expansion when glueing. Are you going to widen the outer ring and let in another ring?
 
AJB Temple":3iid1p6s said:
Damn!

I'm surprised though that the advice given was to give such a big allowance for expansion when glueing. Are you going to widen the outer ring and let in another ring?

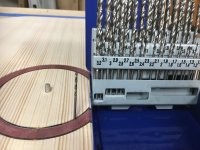
Actually, my words were 'dash it and blow it. Honest! :oops:

I've already routed out the purfling with a smaller cutter till all the black had gone, and using my set of 0.1mm increment drills I've been able to measure the resulting width of the channel; 2.2mm.

DFA5F376-9CDF-4B2B-885B-B417ADE6931C.jpeg

So, I have already glued up another veneer sandwich of B/W/W/B which should come out at about 2.4mm, and I can sand back till it fits the channel.
 
Now there's a solid advantage to making your own purfling. That'd be rather more hassle with premade stuff.
 
North American Sequoia tops are available from this supplier at £194 plus tax.

I ran that past a young, just-starting-out luthier up here; two VERY nice guitars under his belt - and sold. What he said about that price would make the devil blush. :shock:
 
Try buying premium wood (usually Sitka spruce) for a 9ft grand piano soundboard. It's truly eye watering now.

Might not be so bad in the US.
 
We have little if any suitable native tone wood in the UK; slow grown Spruce and Cedar being about the most suitable in strength and lightness. It is available in Europe from Alpine areas. Native hardwoods suitable for bodies are available. I like London Plane or Sycamore.

However, unlike in Canada, the US, and Europe, there appears to be few suppliers for the hobby luthier market in the UK. Tonewood is available from UK suppliers, but it is higher end for professional luthiers.

Like I said before, I can get Engelmann Spruce guitar tops from Spain for under £6, and they they sound great. However, the shipping is £30.

I only make 2 instruments a year.
 
they are not cheap but I really like david dyke, excellent supplier, it's worth the cost from my point of view, I'm done with trying to dry or source my own wood, I'd rather just pay more, the wood supplied was not only dry but extremely high quality and stable as well, is your spanish supplier matinder? apologies if you've already said this earlier.
 
Thanks, Ben. I have used DD years ago.

I have mostly bought from Maderas Barber. But since we left the EU, and with CITES licences now required for some species , I haven't used them.

But the point is, I'm still learning, and if I mess up a £64 bookmatched Alpine Spruce soundboard (DD's cheapest) it becomes a most expensive hobby for a pensioner.

So I try (not) to mess up on cheaper tone woods. ;)
 
Excellent work Malcolm and a superb thread. One day I would like to make a guitar and a violin and so threads like this are great to see.
 
PAC1":3juka3aw said:
Excellent work Malcolm and a superb thread. One day I would like to make a guitar and a violin and so threads like this are great to see.

Thanks, Peter.

Just go for it. If you play a guitar a bit, like I do, maybe a cheap kit to get the taste and then the buzz when you string it. (Pardon the pun)

Then if you've got the bug, buy some plans online, the ones I get are under £20 for 7 A0 pdfs. Then start sourcing your materials.
 
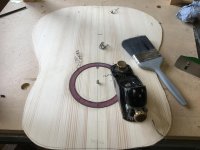
My favourite little plane and scraper.

0F21AEBB-4F75-43AA-A8BB-5B028FD15519.jpeg

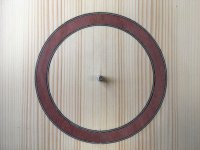
Having doubled the thickness of white in the purfling sandwich, I now prefer that to the earlier version.

44551CA4-4954-43BC-AB96-10161D6ABE4C_1_201_a.jpeg

Getting there.
 
Another A minus, this time with the cutaway model.

When I'm bending the purfling sandwich into the routed channel, I can't always tell if it's broken in the channel.

CE4EA0D3-BD92-4A27-A7E9-2276B39E3907_1_201_a.jpeg

I'll just have to rout it out and insert a new strip.
 
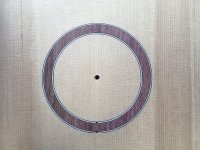
Been a bit of a journey, not least having to rout out that last purfling ring and fitting a new strip. It went in ok, but I damaged to soundboard surface setting the router up. You can see it a 3 o'clock.

F17562A4-D2E6-4997-B134-96B5A0C7497B_1_201_a.jpeg

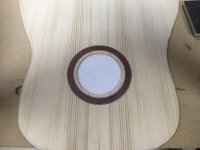
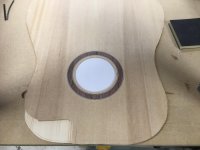
Anyway, both sound holes cut out.

ED56DE78-694A-49D5-9306-81951DF7A4EF_1_201_a.jpeg

I'd like to replicate that design on each instrument from now on, having learned how to do it.
 
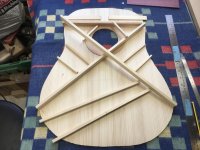
Both the soundboard and the back plate need to be braced to resist the forces applied by the tension of the stings and to assume the shape decided by the luthier. They also contribute to creating a rigid soundbox so less energy is absorbed by the vibration of the strings.

You may remember, I created a 24' radius sanding dish. The back of my guitars will have a 24' radius.

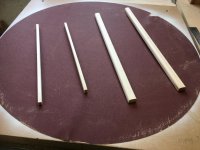
The braces are of spruce with vertical grain. I PAR'd them and rounded over the two rearmost braces.

D80A19F1-0287-496B-BAC4-DE8CB5B32D39.jpeg

Then using the 24' radius sanding dish, I sanded the curvature of the glued edge of a brace by back and forth and sideways sanding until all the pencil marks I had on the bottom had gone.

3D459321-F4A6-4160-B94D-FA68E8BB3DCE.jpeg

Rinse and repeat for all four.

E3CF6EE1-C0AF-471E-9D6A-880C1581081F.jpeg

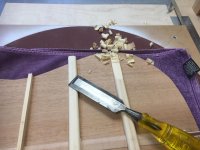
I then cut housings in the joint reinforcement of the back to receive the braces.

4B633477-E979-470F-8203-62C9B1D3AD52.jpeg

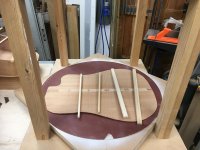
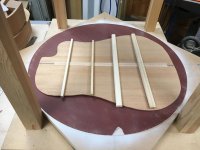
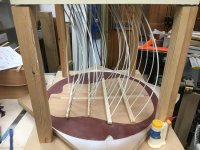
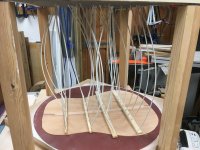
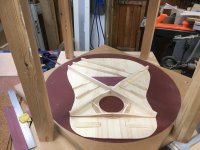
I've now placed the sanding dish inside the go-bar deck. You will notice the back plate is still flat, as evidence by the shadow around the waist on the dry fit.

3C0426EB-0EBC-40DD-94F9-A5C9C53C9A23.jpeg

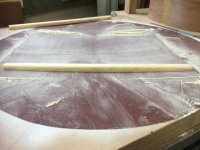
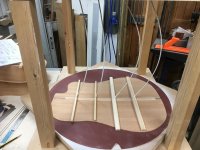
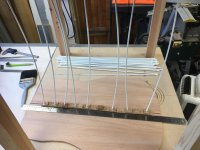
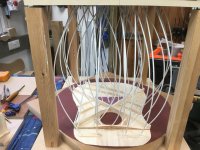
Then when I fit just 1 rod to each of the braces, the back plate assumes the dish shape of the sanding dish.

4D3F33BD-CF98-4ACE-A3CB-3AEFFD41D02E.jpeg

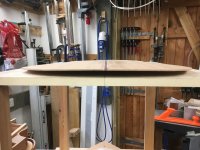
And from the end view, you can see their are no gaps under the braces, so the plate must be following the curve I sanded on to the braces and the curve of the sanding dish.

B8F90948-9648-4694-91A3-F134BAA8CD17.jpeg

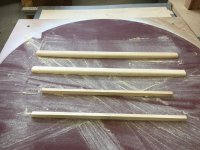
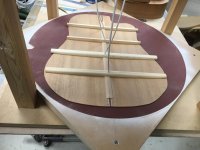
Time to glue up, using evenly spaced rods and clean the squeezout before it dries hard.

57F4A7CA-98F6-41BD-86A6-63F7981767DB.jpeg

Repeat for the next couple of days with the symmetrical model.
 
nice! I was wondering do you think it'd be possible to do it without the radius dish? as in just using a spokeshave? or is it essential?
 
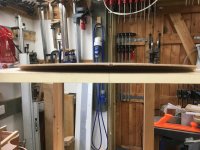
Just to show that this back has assumed a radius across its width.

22C743B6-1D34-4CE5-9AD0-678C52C660F1.jpeg

It will assume the radius along the length when it's glued to the body, which has been sanded all round to the radius.

CDF39A16-64A8-4E92-B69F-507423CB03E1.jpeg
 
Thanks, 5Es.

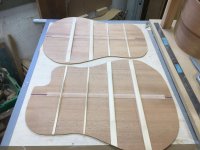
Rinse and repeat with the symmetrical model.

76AD06B4-78A4-4F11-B387-954545429158.jpeg

Do readers/viewers now understand how the go-bar deck works?
 
Carving the backs' braces to remove mass and sharp edges.

2FDE9327-0E89-4F9D-8791-8F1A2B47D23E.jpeg

One finished.

D511EABF-0F1B-4772-AE21-EED777D9BA09.jpeg

Both done.

0ED0ABC5-724E-43F1-8CB9-C0D8369D02FB.jpeg

On to PAR the soundboards' braces ready for gluing.
 
First I planed all round the Spruce braces using a temporary shooting board.

19CCD6ED-9CA6-4D53-A8F6-E1E6C8657BE8.jpeg

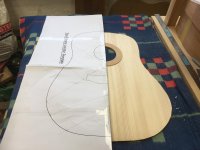
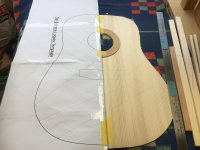
Then I folded in half a plot of the brace locations and taped the fold along the centreline of the Back of the soundboard.

5F4E2053-28C0-42A2-B13E-F338B74265B4.jpeg

Next, I project the centre lines of the braces, first to one side…..

D9A73199-BC24-4FE8-9D8A-4AD3FE026F48.jpeg

….them, flopping the plot over, to the other side.

D847428C-0CC7-490C-BB6F-17B2B39C43A6.jpeg

Then I lay out the start of the timber engineering on the inside of a guitar.

A18E4CF2-778F-4949-87D4-AAD5B5A2ADE3_1_201_a.jpeg

As you can see, it's not symmetrical. So I will check and recheck that I've got it correct for a right handed instrument before I glue any of them in place. :o
 
And nobody spotted my mistake!!! :oops:

All braces and tonebars cut to length, housed in soundhole reinforcement, and angles cut.

71FBCD29-F95B-4A8C-8F7A-B3BB1741B388.jpeg

Bridge reinforcement cut, B and C braces housed. C brace part carved to accept the housing.

4F28ADD1-2F7C-428A-880B-A9386A3A1C6E_1_201_a.jpeg

I will do some more of the carving before gluing, because there will be places difficult to access with tools once glued in place.

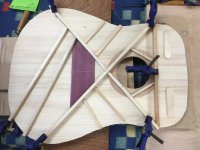
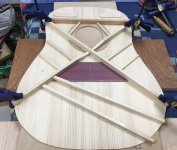
This is what I call timber engineering under the soundboard.

'The small bars or braces enhance the structural integrity of the guitar top as well as function to shape the behaviour of the top as it is in motion, thus setting the tonal parameters of the guitars voice by limiting certain frequencies and encouraging other frequencies to vibrate more easily.' (so says https://theartoflutherie.com/hand-split-tone-bars/ )
 
Malc, I've forgotten now what top thickness you went for. What type of player is the guitar aimed at? Flat picker or finger picker?

You've obviously swapped the button end bracing round. I've never got round to looking into proper research on bracing and it's probably a black art anyway & a compromise with top thickness among other things. I've even seen tops thinned on the light gauge side, and braces thinned similarly, which may well suit a finger picker especially. One maker I know of includes a brace pin for those of us who like to rest a pinky on the top. Probably an idea pinched from violins.
 
yes, Adrian, I read the drawings wrong and got the two lower bout tonebars the wrong way round, i.e. my mistake was for a left handed player.

The thickness of the top is 2.5mm across the whole width. You overestimate my abilities by thinking I'm choosing to build for a finger picker or flat picker. I am aiming for an instrument that I can play and sounds nice to my ear.

The url I posted explains better than I can what the braces and tonebars do and how they affect the performance of the instrument.

I suppose it could be considered a dark art, but I think it's more a mixture of physics and biology, both of which I gave up in school in favour of Latin and German. :)
 
Some of the braces part carved. On the deck ready for gluing.

9E86C99B-FB9C-4D67-B82D-BCC471539F27.jpeg

Blimey, that was complicated!

3F9CB43E-437C-47C1-8016-DDC2C81359CA.jpeg

Thank goodness none of them pinged!
 
Back
Top