• Hi all and welcome to TheWoodHaven2 brought into the 21st Century, kicking and screaming! We all have Alasdair to thank for the vast bulk of the heavy lifting to get us here, no more so than me because he's taken away a huge burden of responsibility from my shoulders and brought us to this new shiny home, with all your previous content (hopefully) still intact! Please peruse and feed back. There is still plenty to do, like changing the colour scheme, adding the banner graphic, tweaking the odd setting here and there so I have added a new thread in the 'Technical Issues, Bugs and Feature Requests' forum for you to add any issues you find, any missing settings or just anything you'd like to see added/removed from the feature set that Xenforo offers. We will get to everything over the coming weeks so please be patient, but add anything at all to the thread I mention above and we promise to get to them over the next few days/weeks/months. In the meantime, please enjoy!

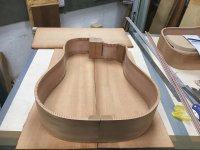
Dreadnought SS Guitar (Demo Time)

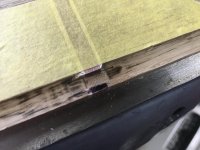
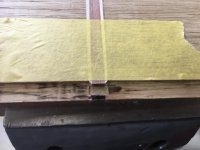
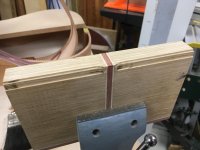
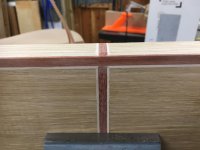
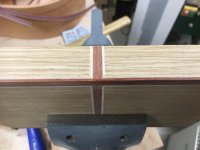
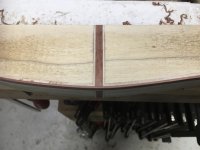
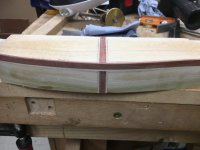
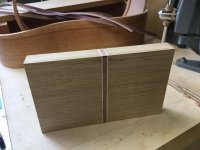
As I've not put binding and purfling together like this before, I've set up a practice run and scrap wood…that is straight and square, unlike what it will be like on the instrument body!

I routed channels to replicate the end graft (the vertical) and the back centre join graft (the horizontal in the image).
B424D113-05E7-45A1-A0F7-5E3BC103329F.jpeg

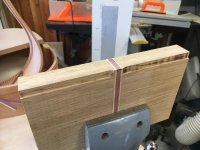
I then routed the binding channel using bearing guided rebate cutter, and avoided cutting through the area where the mitre will be, to leave material to create half the mitre.
CAAA3137-E50D-4966-BECB-0BA3FDD92768.jpeg

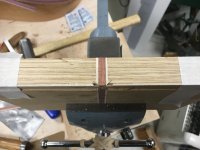
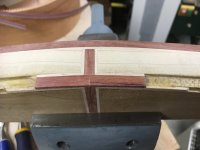
Then cut half mitre No 1….

58948CB1-931D-4A77-83F8-3170259CC9F8_1_201_a.jpeg

….and No 2.

4904A16B-2A05-428D-AD24-5D244CB47531_1_201_a.jpeg

Apologies for image focus. And I'm having to remove this material while using my double lens loupe to see what I'm doing! :shock:

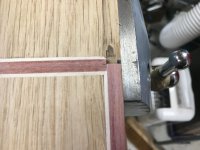
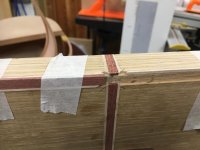
Then it's cut the other half to the joints. This one looks like it could be OK.
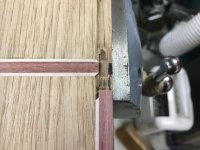
1ADFBB49-49A5-4159-8E23-A2A81585F4E8.jpeg

Not bad. Could have been better.

EE67BF37-328F-4A9D-9502-C04FDAA022E5.jpeg

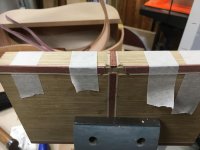
Then dry fit the other half.

D3941ADD-A74F-414C-9116-4C7258FD3F45.jpeg

It looks a bit rubbishy to me. I would have preferred to have got it to fit better. But at this size, it's amazing what the expansion qualities of a water-based glue can do to improve things.
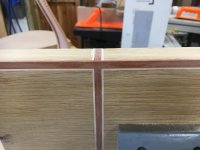
27AEF741-6E77-42E2-A135-84C8F68348BE.jpeg

But I must confess I let the CUF in the workshop and completely forgot to rebate the purfling channel on the top of the piece in my enthusiasm to glue together. Now I've got to do it all again on the other side of the practice piece.

I've put it down to this cough/flu bug going round disrupting my concentration.
 
IAFYDS…..

So this time I remembered to rout both the binding and the purfling rebates, and to leave a bit of material to be able to create half the mitre.

I'm dealing in tenths of a millimetre here, which is why I wanted a micro-adjust on the binding cutting jig that Dr Al helped me make. But I used the router in standard hand-held mode for this practice.

ACA5FEB0-0119-4932-A789-195176B16035.jpeg

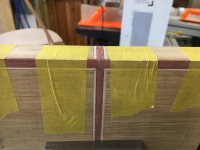
Offer up the mitre cut purfling. This is about 1.6mm, so has space to sand/plane/scrape down.

8BFB4413-125F-4D02-BC60-ADD43BCAA4FA.jpeg

Offer up one mitre cut binding….

1D89BDFF-D884-4892-A397-05D823262D51.jpeg

….and then the other.

F4C074F6-95BC-46DE-A010-75E753945B56.jpeg

Now let's see how it turns out after gluing and scraping.

F51C7FF3-3B3C-4A0D-8629-B87F0CE6BB9C.jpeg

Hmmm. Not my best work.

F80C58D9-E660-49F3-8C00-AE07243787E0.jpeg

On the guitar, this piece of work is on the tail and at the back. The player, nor his audience, would ever see it unless he held it up and turned it over, but if it's not right, I doubt if a player would buy the instrument.
 
'Ere we go again!

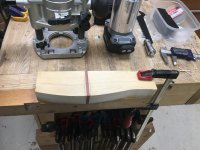
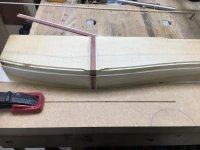
Set up a blank with the centre and tail grafts, this time on a similar curve to an instrument body.

F84C1292-F51D-48C6-A420-C157CC2A1C19.jpeg

Rout the binding and purfling channels, leaving a bit of material to create half of the mitre. (Spotted my deliberate mistake? :oops: )

9E819A6B-4628-493E-B900-F2632A566FB7.jpeg

Anyway, glue and clamp and see how one of them turns out.

3C2F8A81-005F-441F-8C72-4664DF06ABB3_1_201_a.jpeg

I use the reflection in the chisel steel to achieve the 45 degree cut.

BC875E90-0CFB-48DE-B48A-18E35C3711A0.jpeg

Although I think that's turned out the neatest of the three so far, it's not the design I'm after. I'm aiming for mitre on the top and on the face. I still put it down to the wicked bug going round messing with my concentration.
 
Last go! Turn the workpiece over, make another centre back graft and get it right this time!

E176B277-FE9D-4657-B98D-A976B83B6795.jpeg

That's the best I can do for now; four reasonable mitres and a butt. I must remember the processes behind the rebating, then using hand tools for the mitres.

The Maple is now looking out of proportion to the Purpelheart, but I can work on that.
 
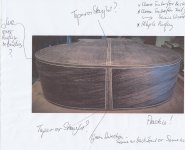
Malcolm, I hesitate to say this, especially as I am not at home and can't check the bindings on my own (commercial) guitars, but to my eye on an actual instrument, the joint placements look odd. Joining the two horizontal strips in the centre of the vertical strip looks wrong to my eye. Could just be me over thinking it.

I'm not at home and havn't been able to follow the whole thread lately. Just orienting it, are you doing the inlays where the two ends of the sides meet at the button point, and where the joint in the back segments meet up with it?

Kudos to you for having several goes to get the process right. It's a fiddly job. Not done it myself for years and years.
 
Thanks for your comments, Adrian. 60,000 views and few comments. I don't get it.

I am trying to come up with a 'simple' design that I can replicate on each instrument using only two timbers, the binding being used on the instrument elsewhere and the purfling providing a contrast between the bindings and the sides/back.

A bit like this…..

BEFC4E87-991B-478D-A49C-0D24BF17AE80_1_201_a.jpeg

…but none of my sides to backs will be that dark.

Personally, I'd prefer a tapered end graft, because it's easier to create, but a thin parallel back centre join graft. That's what my eye prefers.
 
Malc2098":1yyfcx9a said:
Thanks for your comments, Adrian. 60,000 views and few comments. I don't get it.

I think it's a common symptom of forum threads. I read all of your posts with interest, but I know nothing about purfling or musical instruments or anything else you're talking about so I don't really know what to say (apart from the occasional "Nice" of course!). I think I had the "if you've nothing interesting to say, say nothing" thing drilled into me from a young age & I possibly take it too far :)
 
Dr.Al":385ktx6j said:
Malc2098":385ktx6j said:
Thanks for your comments, Adrian. 60,000 views and few comments. I don't get it.

I think it's a common symptom of forum threads. I read all of your posts with interest, but I know nothing about purfling or musical instruments or anything else you're talking about so I don't really know what to say (apart from the occasional "Nice" of course!). I think I had the "if you've nothing interesting to say, say nothing" thing drilled into me from a young age & I possibly take it too far :)


:text-+1:

Malc2098":385ktx6j said:
Thanks for your comments, Adrian. 60,000 views and few comments. I don't get it.


Malc, it is the same in my forum, '000's of views with a hand full of comments. :?
 
Dr.Al":ncir02v0 said:
Malc2098":ncir02v0 said:
Thanks for your comments, Adrian. 60,000 views and few comments. I don't get it.

I think it's a common symptom of forum threads. I read all of your posts with interest, but I know nothing about purfling or musical instruments or anything else you're talking about so I don't really know what to say (apart from the occasional "Nice" of course!). I think I had the "if you've nothing interesting to say, say nothing" thing drilled into me from a young age & I possibly take it too far :)

+1

I've read all of this thread with great interest and also am in awe of your skills and workmanship which I couldn't possibly emulate so as well as being about as musical as a donkey I couldn;t add anything of value. The fact it's had 60000 views suggests it's of interest to many others in a similar situation.

Keep it coming Malc :eusa-clap:
 
Cheers, Gents. Good of you to comment.

There'll be a break while I work out a way to design and create and insert a rosette, to use across the range (Ha! Range - one style of guitar and one style of ukulele :D )
 
I've decided to make a solid rosette from bookmatched Purpleheart. I bought this lump, half a bowl round, from Yandles out of their oddments bin for a couple of quid, and I've sliced it up a few times now to make the headstock face veneer and a couple of rosette tryouts.

I've bookmatched and glued the slices, run it through the drum sander which is why you can see 80 grit marks, but I'll scrape them off later.

I want thin white/black purfling for the rosette, white against the Purpleheart and black against the spruce of the soundboard.

I failed to take photos of the the process, sorry, but I have of the outcome.

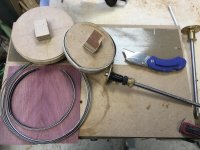
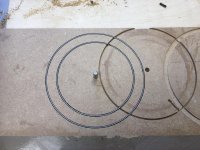
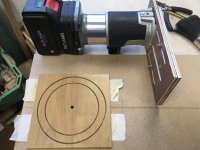
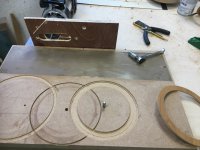
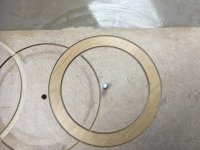
I don't have a lathe, so I cut discs of pdf using the router and circle cutting attachment. I cut two sizes, one to OD of the rosette and the other, the ID. I then glued a strip of white and black veneers to eachother and wrapped it round the disc and held the tight with cable ties. A couple of days later, so I could be sure the glue had set, Clear Gorilla, I removed the cable ties and taped the sandwich around the disc and made sure one edge was level with one side of the disc.

In the absence of a gramil to cut a strip all the way round the circumference, I used my Veritas wheel marking gauge and after about three to four passes, I ended up with a 4mm strip. Rinse and repeat and repeat for the smaller disc.

And here's the result.

84E48CC0-FE6C-4554-BCBC-09D4EFBA40DA_1_201_a.jpeg

I'm hoping they're going to turn out nice once glued in.

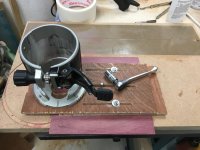
I've turned the rosette blank over and scraped away all 80 grit sanding marks and prepared for routing the rosette with my shop made circle cutting jig.

73D2ED7B-3355-4F43-9271-426524382079.jpeg

I just love that little ratchet socket. Top of my Christmas list last month.

I've stopped there, because I recall seeing a Stewmac video of cutting a rosette and routing it's housing in the soundboard, and my soundboard isn't ready yet. So, I'm looking back at the video to refresh myself of the order of working.

Google 'gramil'. I had to. ;)
 
Andyp":1czgwbka said:
Why use a router for cutting the circle and not the CNC?

The CNC is currently stowed in the rafters while I work on the instrument bodies and necks using the TS as the build up table. The TS is the only thing man enough to support the CNC, so I program all the CNC work first for the year's instruments, then when finished with that, I stow the machine in the rafters to make bench space.
 
It's a blooming good job I went a looked up that professional video. It's saved me tons of time trying to curve straight made purfling. I went to my veneer/purfling stash and found some black/white/black I made last year.

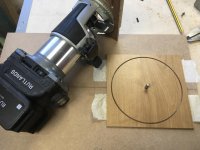
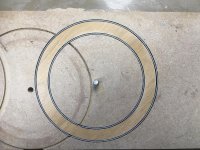
So, I fitted the router with a 2mm cutter and routed out a circle. I fed the straight B/W/B into the groove and it fitted, albeit a tad loose. I got the tiny tail plane out and scraped it flat to the practice surface (pdf board).

0D6B5E26-B120-463A-B6A3-48C9CE1DA384.jpeg

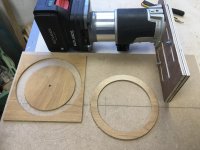
Next, I sought out some wood image 3mm pdf to act as the rosette, fixed it to a another work board and using the router with the same radius on the jig, cut the outer circumference of the rosette. If you're keeping up, this is the same as the inner circumference of the outer purfling. :)

77B6E7C0-083B-4BAF-97FA-E2465B2C5DA3_1_201_a.jpeg

I then go to the purfling practice board and rout the inner purfling channel, and feed another B/W/B strip into the channel and plane/scape it level.

89DFD81A-4460-456F-81B7-7521694263EE_1_201_a.jpeg

Next, back to the rosette workbaord and without changing the radius on the circle jig, cut the inner circumference of the rosette.

95392FE9-82F8-4890-B883-E6EB0B69AFEA_1_201_a.jpeg

The remove it from its board…..

424B38DC-174C-43AE-955E-9AE347D553AA_1_201_a.jpeg

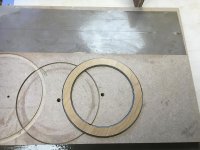
…and offer it over the two purflings.

43ADFA5B-D6C5-4641-A0D5-30D4765F04DA_1_201_a.jpeg

Next, remove the two purfling strips from their work board and rout out the gap between them to the depth, or just under, of the rosette.

2BE71BAE-BB83-420F-80D2-7D9910193863.jpeg

Fit the rosette in that channel…

860409E5-0186-44DA-81A8-4957B6DA7F01_1_201_a.jpeg

..and then feed the two purfling strips into their channels.

E91BB847-5680-4563-839B-5A0C38BBBCD2_1_201_a.jpeg

By George, I think I've done it!

Now I can start work on the soundboards and backs.
 
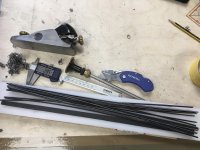
So now I know how to make the rosette and purfling properly, I made myself a stock of 1.55 x 2.75mm Black/White/Black purfling for future use.

D3E0AF32-73D7-48AA-A1D9-DFD9A4A5454B_1_201_a.jpeg


They're made from three sheets of 50mm wide x 0.6mm veneer, B/W/B, glued together with clear Gorilla glue, clamped for 24 hours and left for another 24 hours, before hand sanding the outer black faces to create an overall thickness of 1.55mm.

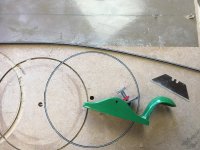
The wheel marking gauge was then used as a gramil to cut the 2.75mm strips along with the craft knife, and planing the next edge after each cut.
 
Now I've finished practising the more tricky stuff, I can get back to the build.

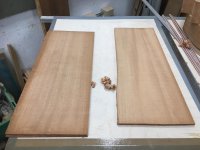
I got the book-matched backs out of storage and checked for colour matching with the sides.

130BE138-E536-46B3-8001-722A771CCD53.jpeg

Looks good. They came as sets.

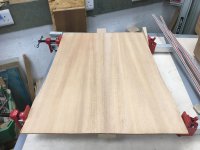
Shooting the joint edges.

91B3B91F-7CAF-4AB0-9EBC-DF0262CBFDB4.jpeg

Held the up to the light till there were no more gaps. The professional outfits use a light table.

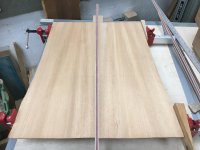
I also check the joint line under a little clamp tension.

0D61A748-4DCB-4509-917E-8696CC4F3889.jpeg

Then I check it with the centre strips I made last week.

BE93A36A-E748-4811-811C-C096DD29E58E.jpeg

Same again with the other instrument back.

84FC0F8A-0BD9-4861-809E-6338D82CBE86.jpeg

And with its centre strip.

1D917DB4-6ED6-4BCA-9469-D64010E7A7DE.jpeg

Both pairs of halves have been through the drum sander at 80 grit to remove the bandsaw marks on both sides. They're both down to about 4.75 mm.

I will select which sides are the outside and sand to a thickness of about 3mm with 80 grit, then change the drum to 180 grit and reduce by about 0.15mm off both sides. The inside faces will be hand sanded before the braces are glued in place, and the outside faces will be hand sanded once the instruments' are complete.
 
Malc don’t despair about the ratio of views to comments.

I, and I am damn sure many others, follow and enjoy reading your builds. A best selling author could sell a million books but he has no idea how many are actually read.

How many instruments have you made now and in how long? From a standing start too.
 
I look at your updates and am in wonder at the number of tricky things you have to do making an acoustic instrument compared to a solid body one. [emoji33]
 
Thanks, Al.

Thanks, Phil.

Thanks, Dave. I liken the making of a solid body electric as requiring similar skills to furniture making.

Thanks, Andy. These two are Nos 8 and 9.

No 1 was the electric Telecaster copy I made in the 90s. No 2 was my first acoustic in 2000 and finished during lockdown. No 3 was the 12 string kit from America during lockdown. No's 4 and 5 were the first two Concert Ukuleles from plans.

I haven't included the course made Tenor Ukulele because a significant proportion was by the pro.

Nos 6 and 7 were the last two Concert Ukuleles of Kent Sycamore.

It seems I'm averaging 2 a year, because I can only spray finish them when outdoor temperatures reach room temperature, as I don't have a spray booth or a shop big enough to manage the parts for more than 2 instruments at a time.
 
I like your work ethic which seems to be to try to do it to the very best of your ability, rather than saying "I've spent enough time on this, so that's good enough".

Personally with my projects I often feel forced into the latter category (list pressure) but aspire to the former.

Nice build.
 
PS, from the photos I somehow get the impression that you have an enormous workshop that is very tidy, so was surprised to see that you have to plan work around CNC storage and room for spraying. Mine is currently a tip.
 
Thanks, Adrian. I even try to stretch my ability.

My workshop outside dimensions are 5.5m x 3.5m.
 
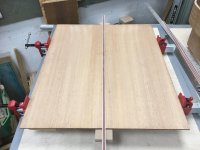
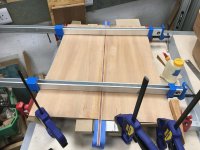
Each side is sanded to 2.65mm, the strip a little more, to be scraped back when dry.

C44BE5A6-9309-4D52-8127-DB763F1B6001.jpeg
 
Watching with interest and a little jealousy as I've not made anything worthwhile in ages now.

I do have one possible project but it needs a lot of design thinking before doing and there's no hurry so motivation is low.

Just have to keep watching what you are doing :)
 
Robert":2zone5rc said:
Watching with interest and a little jealousy as I've not made anything worthwhile in ages now.

I do have one possible project but it needs a lot of design thinking before doing and there's no hurry so motivation is low.

Just have to keep watching what you are doing :)


Gosh, Robert. That's a huge responsibility for me, a vicarious instrument build! :lol:
 
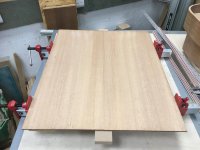
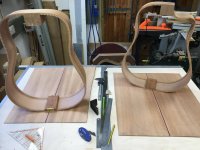
Glued and marked out, using the pencil and washer method.

73896919-CF86-41E4-9838-32B6D7E8A8CC.jpeg

I must make sure I get the cutaway back the correct way round.

C1D93CBA-2525-4A4D-ADDE-57DC34841455.jpeg
 
Taking shape, oversize.

D335DEAA-DEE2-4244-A909-424DEAE1A356.jpeg

(Good job I got the cutaway the right way round, for us righties, that is!)
 
They're looking so good, the back of that standard dreadnought looks like its going to be stunning with a bit of finish on it.
 
Back
Top